WJSX150 User Guide
Page 1
... the firmware of the terminal mode or PS·Data mode are applicable for how to check the version. (1) ADDENDUM FOR SYSTEM CONTROLLER WV-CU950/WV-CU650: MATRIX SWITCHER WJ-SX150 SERIES OPERATING PROCEDURES INSTALLATIONS AND CONNECTIONS ■ Basic System Connections • The connection details are Ver. 2.04 or later. To turn on the power switches of matrix switcher.) 1. SETUP PROCEDURES (HARDWARE) ■ MODE Switch Setting Either of this switch to "1" (default...
... the firmware of the terminal mode or PS·Data mode are applicable for how to check the version. (1) ADDENDUM FOR SYSTEM CONTROLLER WV-CU950/WV-CU650: MATRIX SWITCHER WJ-SX150 SERIES OPERATING PROCEDURES INSTALLATIONS AND CONNECTIONS ■ Basic System Connections • The connection details are Ver. 2.04 or later. To turn on the power switches of matrix switcher.) 1. SETUP PROCEDURES (HARDWARE) ■ MODE Switch Setting Either of this switch to "1" (default...

WJSX150 User Guide
Page 2
... the power consumption, disconnect the DC 9 V plug from the controller, and remove the AC adapter from the AC outlet. ■ Operation End (Auto Logout) If the auto logout is 150. 4. Then, "Mon -" "Cam - -" will blink on the LCD. Note: If you want to the operating instructions of matrix switcher.) Mon- This function is configurable through WJ-SX150A Administrator Console. (Refer to 2 digits...
... the power consumption, disconnect the DC 9 V plug from the controller, and remove the AC adapter from the AC outlet. ■ Operation End (Auto Logout) If the auto logout is 150. 4. Then, "Mon -" "Cam - -" will blink on the LCD. Note: If you want to the operating instructions of matrix switcher.) Mon- This function is configurable through WJ-SX150A Administrator Console. (Refer to 2 digits...

WJSX150 User Guide
Page 3
... Blinking ■ Priority Lock ● Applying Priority Lock 1. In this case, return to Step 2 and select another monitor number. To replace the currently selected camera with higher priority is not valid, or if an operator with the next lower-numbered camera, press the - button. MONITOR SELECTION AND CAMERA SELECTION Note: This section describes the terminal mode. Press the MON LOCK/LOGOUT button to the operating instructions...
... Blinking ■ Priority Lock ● Applying Priority Lock 1. In this case, return to Step 2 and select another monitor number. To replace the currently selected camera with higher priority is not valid, or if an operator with the next lower-numbered camera, press the - button. MONITOR SELECTION AND CAMERA SELECTION Note: This section describes the terminal mode. Press the MON LOCK/LOGOUT button to the operating instructions...

WJSX150 User Guide
Page 8
... button to change the image from the color mode to the BW (black and white) mode on the LCD. F1: "Seq" (Activates SEQUENCE PAN.) F2: "Sort" (Activates SORT PAN.) F3: "Pan" (Activates AUTO PAN.) Note: The AUTO MODE parameter, previously set in the camera's SETUP MENU, will indicate the selected mode as follows: sequence mode, sort mode, and auto pan. (Refer to the operating instructions of the selected camera...
... button to change the image from the color mode to the BW (black and white) mode on the LCD. F1: "Seq" (Activates SEQUENCE PAN.) F2: "Sort" (Activates SORT PAN.) F3: "Pan" (Activates AUTO PAN.) Note: The AUTO MODE parameter, previously set in the camera's SETUP MENU, will indicate the selected mode as follows: sequence mode, sort mode, and auto pan. (Refer to the operating instructions of the selected camera...
WJSX150 User Guide
Page 14
... matrix switcher's operation mode changes to the operating instructions of the ALARM port (25-pin Dsub connector) at the rear panel. All the video output signals are supplied from the display. ALARM01 • Alarm output signals are sent to 4 (#10, 11, 23 and 24) of matrix switcher.) • Alarm input will disappear from Alarm Output 1 to Monitor 1. MENU or WJ-SX150A Administrator Console. (Refer to the operating instructions of the alarm inputs with the same-numbered camera input connectors. Select a monitor which displays "ALARM...
... matrix switcher's operation mode changes to the operating instructions of the ALARM port (25-pin Dsub connector) at the rear panel. All the video output signals are supplied from the display. ALARM01 • Alarm output signals are sent to 4 (#10, 11, 23 and 24) of matrix switcher.) • Alarm input will disappear from Alarm Output 1 to Monitor 1. MENU or WJ-SX150A Administrator Console. (Refer to the operating instructions of the alarm inputs with the same-numbered camera input connectors. Select a monitor which displays "ALARM...
WJSX150 User Guide
Page 16
... switcher.) ■ Monitoring the Camera Picture ● Multiscreen Segment Switching 1. The system will change into the still pictures. Press the RECORDER/UNIT button. Note: The sequence can skip pressing this case, you skip Step 3 and do Step 4, all the channels displayed in multiscreen segments. 4. Press the F1 button. Note: Before the use, it is configurable through SETUP MENU and WJ-SX150A Administrator Console. (Refer to install...
... switcher.) ■ Monitoring the Camera Picture ● Multiscreen Segment Switching 1. The system will change into the still pictures. Press the RECORDER/UNIT button. Note: The sequence can skip pressing this case, you skip Step 3 and do Step 4, all the channels displayed in multiscreen segments. 4. Press the F1 button. Note: Before the use, it is configurable through SETUP MENU and WJ-SX150A Administrator Console. (Refer to install...

WJSX150 User Guide
Page 17
... the alarm recording is displayed, the playback of the recorder/time-lapse VCR continues. 6. The system will enter the playback mode. 3. Press the EL-ZOOM button. Note: To use this function, you need to connect a WJ-HD100 Series recorder or time-lapse VCR to the matrix switcher. 1. Select a camera channel by pressing a numeric button and then pressing the CAM (SET) button. Press the F1 button. Notes: • Still picture is...
... the alarm recording is displayed, the playback of the recorder/time-lapse VCR continues. 6. The system will enter the playback mode. 3. Press the EL-ZOOM button. Note: To use this function, you need to connect a WJ-HD100 Series recorder or time-lapse VCR to the matrix switcher. 1. Select a camera channel by pressing a numeric button and then pressing the CAM (SET) button. Press the F1 button. Notes: • Still picture is...
WJSX150 User Guide
Page 18
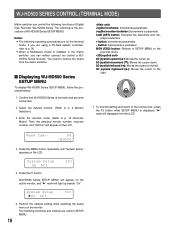
.... The following operating procedures are valid in the matrix switcher, you are using a PS·Data system controller, refer to the right. 7. Select the desired monitor. (Refer to the normal view, press the F2 button while SETUP MENU is the procedure of Digital Disk Recorder WJ-HD500 Series. Enter the recorder mode. (Refer to p. 19 Recorder Mode.) Then, the selected monitor number, recorder number, and "/HDnnn" will light up...
.... The following operating procedures are valid in the matrix switcher, you are using a PS·Data system controller, refer to the right. 7. Select the desired monitor. (Refer to the normal view, press the F2 button while SETUP MENU is the procedure of Digital Disk Recorder WJ-HD500 Series. Enter the recorder mode. (Refer to p. 19 Recorder Mode.) Then, the selected monitor number, recorder number, and "/HDnnn" will light up...
WJSX150 User Guide
Page 20
... can search playback images using the Record List or Thumbnail Display. Press the SEARCH/T&D SEARCH button. Record List will be adjusted by "REC ONLY" setting of 430 CAMERA/440 ALARM PORT/450 SERIAL PORT/460 MUX MOTION DET in SETUP MENU or the Alarm Mode window in WJ-SX150A Administrator Console. (Refer to the operating instructions of multiscreen segments, press the MULTI SCREEN button again during the playback, move to the closest date and time. Enter the recorder mode...
... can search playback images using the Record List or Thumbnail Display. Press the SEARCH/T&D SEARCH button. Record List will be adjusted by "REC ONLY" setting of 430 CAMERA/440 ALARM PORT/450 SERIAL PORT/460 MUX MOTION DET in SETUP MENU or the Alarm Mode window in WJ-SX150A Administrator Console. (Refer to the operating instructions of multiscreen segments, press the MULTI SCREEN button again during the playback, move to the closest date and time. Enter the recorder mode...
WJSX150 User Guide
Page 22
... /HD300 JogDial clockwise: Increments a parameter. CLEAR button: Deletes a character when editing a camera title, user ID, or password, etc. 6. The following operating procedures are using a PS·Data system controller, refer to p. 36. • When a Multiplexer board is the procedure of WJ-HD300 Series SETUP MENU. Notes: • The following is installed in SETUP MENU. 22 ● Recorder Mode The operations are the same as WJ-HD500...
... /HD300 JogDial clockwise: Increments a parameter. CLEAR button: Deletes a character when editing a camera title, user ID, or password, etc. 6. The following operating procedures are using a PS·Data system controller, refer to p. 36. • When a Multiplexer board is the procedure of WJ-HD300 Series SETUP MENU. Notes: • The following is installed in SETUP MENU. 22 ● Recorder Mode The operations are the same as WJ-HD500...

WJSX150 User Guide
Page 25
.... - button: Decrements a parameter. Available controls and functions (REC EVENT FILTERING window) REC EVENT FILTERING EMERGENCY OFF VMD ON TERMINAL ON COMMAND ON VIDEO LOSS ON MANUAL ON SCHEDULE ON SET : [ SET ] CANCEL : [ ESC ] JogDial clockwise: Increments a parameter. The live image will start. 9. Press the PLAY button. Select a desired recording event by the cursor, between On and OFF. + button: Selects the next camera number...
.... - button: Decrements a parameter. Available controls and functions (REC EVENT FILTERING window) REC EVENT FILTERING EMERGENCY OFF VMD ON TERMINAL ON COMMAND ON VIDEO LOSS ON MANUAL ON SCHEDULE ON SET : [ SET ] CANCEL : [ ESC ] JogDial clockwise: Increments a parameter. The live image will start. 9. Press the PLAY button. Select a desired recording event by the cursor, between On and OFF. + button: Selects the next camera number...
WJSX150 User Guide
Page 26
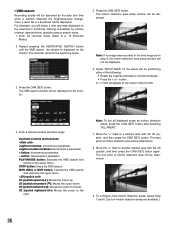
... the 3D joystick, and then press the CAM (SET) button. Press the CAM (SET) button. Note: If no image was recorded in step 4, the motion detection area setup window will be displayed on the monitor. For playback, you will be displayed. 6. Then, a result list or a thumbnail will select a time and date displayed on the status bar by camera channel, date-and-time, detection area or search mode. 1.
... the 3D joystick, and then press the CAM (SET) button. Press the CAM (SET) button. Note: If no image was recorded in step 4, the motion detection area setup window will be displayed on the monitor. For playback, you will be displayed. 6. Then, a result list or a thumbnail will select a time and date displayed on the status bar by camera channel, date-and-time, detection area or search mode. 1.

WJSX150 User Guide
Page 27
.... • Press the + or - button. 15. The recorder will enter the searching mode. MID: The sensitivity is level is high. 13. The playback of the recorded images with a marked point will be displayed in a list or a thumbnail. Repeat pressing the SEARCH/T&D SEARCH button until the marking list window is displayed on the camera channel. Note: Depending on the position of the set detection areas, the sensitivity...
.... • Press the + or - button. 15. The recorder will enter the searching mode. MID: The sensitivity is level is high. 13. The playback of the recorded images with a marked point will be displayed in a list or a thumbnail. Repeat pressing the SEARCH/T&D SEARCH button until the marking list window is displayed on the camera channel. Note: Depending on the position of the set detection areas, the sensitivity...

WJSX150 User Guide
Page 30
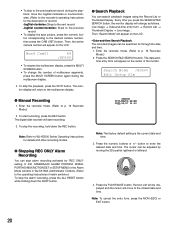
...; Manual Recording The operations are the same as WJ-HD500 Series. (Refer to p. 20.) Note: Refer to WJ-HD200 Series Operating Instructions for details and other recording modes. ● Stopping REC ONLY Alarm Recording The operations are for through the date and time. 1. Press the SEARCH/T&D SEARCH button. The date-andtime entry form will change as WJ-HD500 Series. (Refer to p. 18.) ■ Controlling Digital Disk Recorder WJ...
...; Manual Recording The operations are the same as WJ-HD500 Series. (Refer to p. 20.) Note: Refer to WJ-HD200 Series Operating Instructions for details and other recording modes. ● Stopping REC ONLY Alarm Recording The operations are for through the date and time. 1. Press the SEARCH/T&D SEARCH button. The date-andtime entry form will change as WJ-HD500 Series. (Refer to p. 18.) ■ Controlling Digital Disk Recorder WJ...

WJSX150 User Guide
Page 34
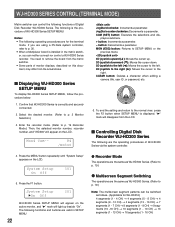
... the PLAY/PAUSE button during rewind will be fast-forwarded. 2. TIME-LAPSE VCR CONTROL MUX [PANASONIC MODELS] (TERMINAL MODE) A time-lapse VCR (Panasonic Models) is necessary to install the Multiplexer board in the matrix switcher, connect the matrix switcher to the time-lapse VCR, and configure the system through WJ-SX150A Administrator Console, OSD SETUP MENU, and time-lapse VCR's SETUP MENU. (Refer to the operating instructions of matrix switcher.) The following...
... the PLAY/PAUSE button during rewind will be fast-forwarded. 2. TIME-LAPSE VCR CONTROL MUX [PANASONIC MODELS] (TERMINAL MODE) A time-lapse VCR (Panasonic Models) is necessary to install the Multiplexer board in the matrix switcher, connect the matrix switcher to the time-lapse VCR, and configure the system through WJ-SX150A Administrator Console, OSD SETUP MENU, and time-lapse VCR's SETUP MENU. (Refer to the operating instructions of matrix switcher.) The following...
WJSX150 User Guide
Page 35
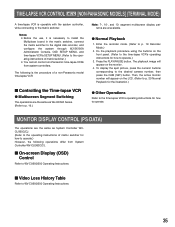
... operate.) 3. Press the PLAY/PAUSE button. The following operations differ from system controllers. To display the spot picture, press the numeric buttons corresponding to p. 19 Recorder Mode.) 2. TIME-LAPSE VCR CONTROL MUX [NON-PANASONIC MODELS] (TERMINAL MODE) A time-lapse VCR is the procedure of matrix switcher.) • You cannot control non-Panasonic time-lapse VCRs from System Controller WV-CU360C/CJ. ■ On-screen Display (OSD) Control Refer to WV-CU950/650 Operating Instructions. ■ Video...
... operate.) 3. Press the PLAY/PAUSE button. The following operations differ from system controllers. To display the spot picture, press the numeric buttons corresponding to p. 19 Recorder Mode.) 2. TIME-LAPSE VCR CONTROL MUX [NON-PANASONIC MODELS] (TERMINAL MODE) A time-lapse VCR is the procedure of matrix switcher.) • You cannot control non-Panasonic time-lapse VCRs from System Controller WV-CU360C/CJ. ■ On-screen Display (OSD) Control Refer to WV-CU950/650 Operating Instructions. ■ Video...

WJSX150 User Guide
Page 37
...-HD220 SERIES) ■ Connection with Digital Disk Recorder WJ-HD300 Series Notes: • Refer to service personnel for all cameras in SETUP MENU of the recorder. 3. Connect the unit's CAM OUT 1 to 16 connectors to the recorder's VIDEO IN 1 to the recorder's DATA port with a modular cable. Connect the unit's DATA HDR connector to 16 connectors with a coaxial cable. 5. System controller (Terminal Mode) Monitor EXT IN MONITOR OUT ALARM DATA HDR DATA 4 TERM OFF ON SERIAL DATA 3 DATA 2 DATA 1 RS485(CAMERA) LINE 2 SELECT...
...-HD220 SERIES) ■ Connection with Digital Disk Recorder WJ-HD300 Series Notes: • Refer to service personnel for all cameras in SETUP MENU of the recorder. 3. Connect the unit's CAM OUT 1 to 16 connectors to the recorder's VIDEO IN 1 to the recorder's DATA port with a modular cable. Connect the unit's DATA HDR connector to 16 connectors with a coaxial cable. 5. System controller (Terminal Mode) Monitor EXT IN MONITOR OUT ALARM DATA HDR DATA 4 TERM OFF ON SERIAL DATA 3 DATA 2 DATA 1 RS485(CAMERA) LINE 2 SELECT...

WJSX150 User Guide
Page 38
... SETUP MENU of the recorder. 3. ● To Control a Recorder and Cameras via the network. 1. Select the recorder's new unit address, which is set in 600 RECORDER of SETUP MENU or the Recorder window of the recorder to 5 or larger. (Refer to the recorder's DATA ports with modular cables. 6. Set the unit address of WJ-SX150A Administrator Console. (Refer to this unit to the MONITOR OUT 1 connector of recorder. 38 Connect the unit's DATA HDR and DATA4 connectors to the recorder's operating instructions.) 2. Set the [Camera control] setting...
... SETUP MENU of the recorder. 3. ● To Control a Recorder and Cameras via the network. 1. Select the recorder's new unit address, which is set in 600 RECORDER of SETUP MENU or the Recorder window of the recorder to 5 or larger. (Refer to the recorder's DATA ports with modular cables. 6. Set the unit address of WJ-SX150A Administrator Console. (Refer to this unit to the MONITOR OUT 1 connector of recorder. 38 Connect the unit's DATA HDR and DATA4 connectors to the recorder's operating instructions.) 2. Set the [Camera control] setting...

WJSX150 User Guide
Page 39
... cameras in SETUP MENU of the recorder to 16 connectors with a modular cable. Connect the unit's DATA4 Port connector to the matrix switcher is set in Step 1, in the PS·Data mode. 39 Connect the unit's CAM OUT 1 to 16 connectors to the recorder's VIDEO IN 1 to 5 or larger. 2. Select the recorder's new unit address, which is not available. Set the [Camera control] setting to "PSD" for the DATA 4 setting. (Refer to this unit's operating instructions.) • If the recorder's unit address, set...
... cameras in SETUP MENU of the recorder to 16 connectors with a modular cable. Connect the unit's DATA4 Port connector to the matrix switcher is set in Step 1, in the PS·Data mode. 39 Connect the unit's CAM OUT 1 to 16 connectors to the recorder's VIDEO IN 1 to 5 or larger. 2. Select the recorder's new unit address, which is not available. Set the [Camera control] setting to "PSD" for the DATA 4 setting. (Refer to this unit's operating instructions.) • If the recorder's unit address, set...

WJSX150 User Guide
Page 43
... enter the searching mode. 43 NEXT or PREV button: Changes a parameter. CAM (SET) button: Executes the filtering. Enter the recorder mode. (Refer to the upper menu. Then, a result list or a thumbnail will be searched by camera channel, date-and-time, detection area or search mode. 1. For playback, you will be displayed. To determine the filter setting, press the CAM (SET) button. The searching filter window will select a time and date displayed on the searching filter...
... enter the searching mode. 43 NEXT or PREV button: Changes a parameter. CAM (SET) button: Executes the filtering. Enter the recorder mode. (Refer to the upper menu. Then, a result list or a thumbnail will be searched by camera channel, date-and-time, detection area or search mode. 1. For playback, you will be displayed. To determine the filter setting, press the CAM (SET) button. The searching filter window will select a time and date displayed on the searching filter...


