
Operating Instructions
Page 1
Before Starting Printer Section Document Management System Section Software Operating Instructions (For Document Management System and Printer) Model No. UF-4000/4100/6000/6100 Before operating this software, please read these instructions completely and keep these operating instructions for future reference. English Troubleshooting Appendix
Before Starting Printer Section Document Management System Section Software Operating Instructions (For Document Management System and Printer) Model No. UF-4000/4100/6000/6100 Before operating this software, please read these instructions completely and keep these operating instructions for future reference. English Troubleshooting Appendix

Operating Instructions
Page 8
... 4.0, Windows Server 2003 : 128 MB or greater • Free Disk Space • CD-ROM Drive • Interface : 100 MB or greater : Used for installing the software and utilities from the CD-ROM. : Parallel Port * 1 Microsoft® Windows® 98 operating system (hereafter Windows 98) * 2 Microsoft® Windows® Millennium Edition operating...
... 4.0, Windows Server 2003 : 128 MB or greater • Free Disk Space • CD-ROM Drive • Interface : 100 MB or greater : Used for installing the software and utilities from the CD-ROM. : Parallel Port * 1 Microsoft® Windows® 98 operating system (hereafter Windows 98) * 2 Microsoft® Windows® Millennium Edition operating...

Operating Instructions
Page 42
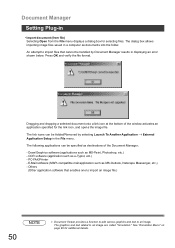
The language screen differ depending on page 45) 2 Select the language. Note: 1. Document Management System Section Installing the Document Management System 1 Insert the Panasonic Document Management System CD-ROM. (See Note 1 on the models. 3 Click the Next button. 4 Click Panasonic-DMS. 5 Click Install Panasonic-DMS Software. 42 If the CD-ROM does not launch automatically, double click the My Computer icon on the Desktop or on the Start menu, then double click the CD-ROM icon. 2.
The language screen differ depending on page 45) 2 Select the language. Note: 1. Document Management System Section Installing the Document Management System 1 Insert the Panasonic Document Management System CD-ROM. (See Note 1 on the models. 3 Click the Next button. 4 Click Panasonic-DMS. 5 Click Install Panasonic-DMS Software. 42 If the CD-ROM does not launch automatically, double click the My Computer icon on the Desktop or on the Start menu, then double click the CD-ROM icon. 2.
Operating Instructions
Page 50
...e-Typist, etc.) - Dragging and dropping a selected document onto a link icon at the bottom of the Document Manager: - OCR software (application such as MS-Paint, Photoshop, etc.) - Document Viewer provides a function to add various graphics and text to an image ... can be Added/Removed by Document Manager results in the File menu. PC-FAX/Printer - E-Mail software (MAPI-compatible mail application such as MS-Outlook, Netscape Messenger, etc.) - Others (Other application software that cannot be specified as destinations of the window activates an application specified for...
...e-Typist, etc.) - Dragging and dropping a selected document onto a link icon at the bottom of the Document Manager: - OCR software (application such as MS-Paint, Photoshop, etc.) - Document Viewer provides a function to add various graphics and text to an image ... can be Added/Removed by Document Manager results in the File menu. PC-FAX/Printer - E-Mail software (MAPI-compatible mail application such as MS-Outlook, Netscape Messenger, etc.) - Others (Other application software that cannot be specified as destinations of the window activates an application specified for...

Operating Instructions
Page 62
Document Manager Options Menu Note: The Options Menu is not available for the UF-4000/4100/6000/6100. • Setup Selects the expansion feature(s) available for DD Server Software, select DD Function and click the button. To enable the expansion feature for the Document Manager. Select the data folder (DD Folder) on the server. • [Options] - [DD Function] - [Print DD Cover] Prints the DD Cover page selected in the document window 62
Document Manager Options Menu Note: The Options Menu is not available for the UF-4000/4100/6000/6100. • Setup Selects the expansion feature(s) available for DD Server Software, select DD Function and click the button. To enable the expansion feature for the Document Manager. Select the data folder (DD Folder) on the server. • [Options] - [DD Function] - [Print DD Cover] Prints the DD Cover page selected in the document window 62
Operating Instructions
Page 70
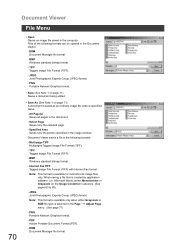
... Saves only the portion specified in the Document Viewer. - Internet Fax TIFF Tagged Image File Format (TIFF) with Internet Fax format. PDF Adobe Portable Document Format (PDF). - Multi-page TIFF Multipages Tagged Image File Format (TIFF). - Note: This format is created by application software (i.e. PNG Portable Network Graphics format. - Files of the following...
... Saves only the portion specified in the Document Viewer. - Internet Fax TIFF Tagged Image File Format (TIFF) with Internet Fax format. PDF Adobe Portable Document Format (PDF). - Multi-page TIFF Multipages Tagged Image File Format (TIFF). - Note: This format is created by application software (i.e. PNG Portable Network Graphics format. - Files of the following...

Operating Instructions
Page 90
...using no uniform pattern in a blurred image. • Halftone image (error diffusion) This method, using a TWAIN-compatible application (image editing software, etc.). You may adjust/select the final scanning area by no halftone correction) A method suitable for natural images such as photographs, produces ...be scanned. The black frame represents the actual scanning area (Output Size). in the Output Size field. 2. Compared to an ordinary fax machine. 4. Paper Size Select the size of image to be scanned. • Monochrome image (no halftone correction. The size and...
...using no uniform pattern in a blurred image. • Halftone image (error diffusion) This method, using a TWAIN-compatible application (image editing software, etc.). You may adjust/select the final scanning area by no halftone correction) A method suitable for natural images such as photographs, produces ...be scanned. The black frame represents the actual scanning area (Output Size). in the Output Size field. 2. Compared to an ordinary fax machine. 4. Paper Size Select the size of image to be scanned. • Monochrome image (no halftone correction. The size and...
Operating Instructions
Page 96
...use the fax machine to complement the Panasonic line of the device. UF-590/790 - Please consult your Network Administrator. 96 UF-490/525 (USA UF-490: ...the Panafax Desktop from sending a PC Fax Job to the Device properly. UF-890/990 (Tx only) - UF-4000/4100 - Document(s) created on the ...PC can be transmitted is within the memory of multi-function products. Compatible Models - The size of the data that can be required to the size that is limited to temporarily disable the Anti-virus software...
...use the fax machine to complement the Panasonic line of the device. UF-590/790 - Please consult your Network Administrator. 96 UF-490/525 (USA UF-490: ...the Panafax Desktop from sending a PC Fax Job to the Device properly. UF-890/990 (Tx only) - UF-4000/4100 - Document(s) created on the ...PC can be transmitted is within the memory of multi-function products. Compatible Models - The size of the data that can be required to the size that is limited to temporarily disable the Anti-virus software...

Operating Instructions
Page 136
Start 2 Select Programs. 3 Select Panasonic. 4 Select Panasonic Document Management System. 5 Select MFP Utilities. 6 Select Phone Book Editor. 7 Phone Book Editor splash screen appears and the Phone Book Editor program is activated. 136 Phonebook Editor Activation Procedure Take the following steps to activate the phonebook editor software. 1 Click Start at the bottom left of the PC screen.
Start 2 Select Programs. 3 Select Panasonic. 4 Select Panasonic Document Management System. 5 Select MFP Utilities. 6 Select Phone Book Editor. 7 Phone Book Editor splash screen appears and the Phone Book Editor program is activated. 136 Phonebook Editor Activation Procedure Take the following steps to activate the phonebook editor software. 1 Click Start at the bottom left of the PC screen.

Operating Instructions
Page 137
... page... 137 Indication Description 1 Abbr. Tab Contains the abbreviated dialing number entries 2 One-Touch Tab Contains the One-Touch Key entries 3 About Version information of software 4 ABBR. NO. Dialing No.
... page... 137 Indication Description 1 Abbr. Tab Contains the abbreviated dialing number entries 2 One-Touch Tab Contains the One-Touch Key entries 3 About Version information of software 4 ABBR. NO. Dialing No.

Operating Instructions
Page 138
Phonebook Editor Main Window No. Indication 13 Help 14 Exit 15 ONE-TOUCH Description Display an on-line help screen Close the phonebook editor software One-Touch Key Reference 138
Phonebook Editor Main Window No. Indication 13 Help 14 Exit 15 ONE-TOUCH Description Display an on-line help screen Close the phonebook editor software One-Touch Key Reference 138

