Digital Spread Spect
Page 1
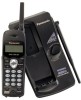
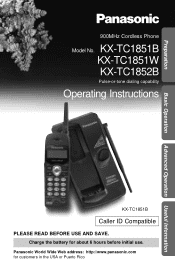
Preparation Basic Operation Advanced Operation Useful Information 900MHz Cordless Phone Model No. KX-TC1851B KX-TC1851W KX-TC1852B Pulse-or-tone dialing capability Operating Instructions KX-TC1851B Caller ID Compatible PLEASE READ BEFORE USE AND SAVE. Panasonic World Wide Web address: http://www.panasonic.com for about 6 hours before initial use. Charge the battery for customers in the USA or Puerto Rico
Preparation Basic Operation Advanced Operation Useful Information 900MHz Cordless Phone Model No. KX-TC1851B KX-TC1851W KX-TC1852B Pulse-or-tone dialing capability Operating Instructions KX-TC1851B Caller ID Compatible PLEASE READ BEFORE USE AND SAVE. Panasonic World Wide Web address: http://www.panasonic.com for about 6 hours before initial use. Charge the battery for customers in the USA or Puerto Rico

Digital Spread Spect
Page 3
... obstructions such as a TV, personal computer or another cordless phone's base unit, noise may be heard. Raise the antenna. ≥If more than one cordless phone is being used and your handset is : Away from the other cordless phone's base unit and closer to your base unit. 3 For maximum distance and noise-free operation, the recommended base unit location is near another cordless phone. Move away from electrical appliances such as walls.
... obstructions such as a TV, personal computer or another cordless phone's base unit, noise may be heard. Raise the antenna. ≥If more than one cordless phone is being used and your handset is : Away from the other cordless phone's base unit and closer to your base unit. 3 For maximum distance and noise-free operation, the recommended base unit location is near another cordless phone. Move away from electrical appliances such as walls.

Digital Spread Spect
Page 4
... 6 Display 8 Settings 10 Connections 10 Installing the Battery in the Handset 11 Battery Charge 11 Using the Belt Clip 13 Using an Optional Headset 13 Selecting the Dialing Mode 14 Selecting the Line Mode 15 Programmable Functions 16 Setting the Auto Talk Feature 17 Selecting the Ringer Volume 18 Basic Operation Making Calls 19 Answering Calls 21 Advanced Operation Caller ID Service 22 Using the Caller List 24 Viewing the Caller List 24 Calling Back from the Caller List 26 Editing the Caller's Phone Number...
... 6 Display 8 Settings 10 Connections 10 Installing the Battery in the Handset 11 Battery Charge 11 Using the Belt Clip 13 Using an Optional Headset 13 Selecting the Dialing Mode 14 Selecting the Line Mode 15 Programmable Functions 16 Setting the Auto Talk Feature 17 Selecting the Ringer Volume 18 Basic Operation Making Calls 19 Answering Calls 21 Advanced Operation Caller ID Service 22 Using the Caller List 24 Viewing the Caller List 24 Calling Back from the Caller List 26 Editing the Caller's Phone Number...

Digital Spread Spect
Page 5
... the Directory 39 Voice Mail Service 40 Storing a Voice Mail Access Number 40 Setting the Voice Mail Tone 41 Listening to Voice Mail Messages 42 Special Features 43 Automatic Security Code Setting 43 Handset Locator 43 For Call Waiting Service Users 44 Temporary Tone Dialing (For Rotary or Pulse Service Users 44 How to Use the PAUSE Button (For Analog PBX Line/Long Distance Service Users 44 FLASH Button 45 Useful Information Wall Mounting 46 Battery Replacement 48 Adding Another Phone 48 Before Requesting Help 49 Important Safety Instructions 52 FCC and...
... the Directory 39 Voice Mail Service 40 Storing a Voice Mail Access Number 40 Setting the Voice Mail Tone 41 Listening to Voice Mail Messages 42 Special Features 43 Automatic Security Code Setting 43 Handset Locator 43 For Call Waiting Service Users 44 Temporary Tone Dialing (For Rotary or Pulse Service Users 44 How to Use the PAUSE Button (For Analog PBX Line/Long Distance Service Users 44 FLASH Button 45 Useful Information Wall Mounting 46 Battery Replacement 48 Adding Another Phone 48 Before Requesting Help 49 Important Safety Instructions 52 FCC and...

Digital Spread Spect
Page 8
... in the directory. Place the handset on the base unit to charge the battery Recharge battery (p. 11). 12 new calls The display shows the number of new calls and the battery strength (p. 11) while the handset is on the display. During a conversation, the display shows the length of new calls when (›) or (‹) is pressed while the handset is set to the standby mode (p. 12). Ringer off TINA ROBINSON 1-000-222...
... in the directory. Place the handset on the base unit to charge the battery Recharge battery (p. 11). 12 new calls The display shows the number of new calls and the battery strength (p. 11) while the handset is on the display. During a conversation, the display shows the length of new calls when (›) or (‹) is pressed while the handset is set to the standby mode (p. 12). Ringer off TINA ROBINSON 1-000-222...

Digital Spread Spect
Page 10
... warm during use.) ≥To connect a standard telephone on the same line, see page 48. ≥If your unit is connected to prevent them from being disconnected. Settings Connections Fasten the cords to a PBX which does not support Caller ID and voice mail services, you cannot access those services. 10 Single-Line Telephone Jack (RJ11C) Telephone Line Cord Power Outlet (AC 120 V, 60 Hz) AC Adaptor ≥USE ONLY WITH Panasonic AC ADAPTOR KX-TCA1...
... warm during use.) ≥To connect a standard telephone on the same line, see page 48. ≥If your unit is connected to prevent them from being disconnected. Settings Connections Fasten the cords to a PBX which does not support Caller ID and voice mail services, you cannot access those services. 10 Single-Line Telephone Jack (RJ11C) Telephone Line Cord Power Outlet (AC 120 V, 60 Hz) AC Adaptor ≥USE ONLY WITH Panasonic AC ADAPTOR KX-TCA1...

Digital Spread Spect
Page 12
... flash. The battery life is conserved in use (Standby) Approx. " Settings Recharge Recharge the battery when: -"Recharge battery" is displayed, Recharge battery -" " flashes on the display, or -the handset beeps intermittently while it is in use. ≥If you DO NOT recharge the handset battery for more often if the unit is fully charged, you finish using the handset (making/answering a call, viewing the Caller List or directory...
... flash. The battery life is conserved in use (Standby) Approx. " Settings Recharge Recharge the battery when: -"Recharge battery" is displayed, Recharge battery -" " flashes on the display, or -the handset beeps intermittently while it is in use. ≥If you DO NOT recharge the handset battery for more often if the unit is fully charged, you finish using the handset (making/answering a call, viewing the Caller List or directory...

Digital Spread Spect
Page 13
... belt clip Preparation Using an Optional Headset Plugging an optional headset into the handset allows a hands-free phone conversation. Please use the headset to talk with the caller. " Using the Belt Clip You can hang the handset on page 2. To order, call the accessories telephone number on your belt or pocket using the belt clip. Headset Jack When an optional headset is a KX-TCA90. The illustration headset is connected to the handset, make sure to use only a Panasonic KX...
... belt clip Preparation Using an Optional Headset Plugging an optional headset into the handset allows a hands-free phone conversation. Please use the headset to talk with the caller. " Using the Belt Clip You can hang the handset on page 2. To order, call the accessories telephone number on your belt or pocket using the belt clip. Headset Jack When an optional headset is a KX-TCA90. The illustration headset is connected to the handset, make sure to use only a Panasonic KX...

Digital Spread Spect
Page 14
... or pulse service is in the standby mode. 1 Press (FUNCTION/EXIT/CH). 2 Press (›) or (‹) repeatedly until the arrow points to "Program". 1Save directory Voicemail dial 43 1=Yes Ringer volume 1Program 43 1=Yes 3 Press FWD/EDIT (fl) (Yes key). 1Save DIRECT# Set flash time 43 1=Yes 4 Press (›) or (‹) repeatedly until the arrow points to "Tone". Your phone comes from the factory set...
... or pulse service is in the standby mode. 1 Press (FUNCTION/EXIT/CH). 2 Press (›) or (‹) repeatedly until the arrow points to "Program". 1Save directory Voicemail dial 43 1=Yes Ringer volume 1Program 43 1=Yes 3 Press FWD/EDIT (fl) (Yes key). 1Save DIRECT# Set flash time 43 1=Yes 4 Press (›) or (‹) repeatedly until the arrow points to "Tone". Your phone comes from the factory set...

Digital Spread Spect
Page 15
... the programming mode any time by pressing (FUNCTION/EXIT/CH). 15 Otherwise the unit may not ring and the Call Waiting Caller ID Feature may not be accessible (p. 44). Ringer volume 1Program 43 1=Yes 1Save DIRECT# Set flash time 43 1=Yes 4 Press (›) or (‹) repeatedly until the arrow points to "Set line mode". 1Set line mode Set dial mode 43 1=Yes 5 Press FWD/EDIT (fl) (Yes key). Make sure the handset is connected to...
... the programming mode any time by pressing (FUNCTION/EXIT/CH). 15 Otherwise the unit may not ring and the Call Waiting Caller ID Feature may not be accessible (p. 44). Ringer volume 1Program 43 1=Yes 1Save DIRECT# Set flash time 43 1=Yes 4 Press (›) or (‹) repeatedly until the arrow points to "Set line mode". 1Set line mode Set dial mode 43 1=Yes 5 Press FWD/EDIT (fl) (Yes key). Make sure the handset is connected to...

Digital Spread Spect
Page 16
Make sure the handset is in the DIRECT button (p. 30). Press FWD/EDIT (fl). * 1Save DIRECT# Set flash time Save mailbox# Voicemail tone Set line mode Set dial mode Talk switching To store a phone number in the standby mode. To select the line mode (p. 15). To select the dial mode (p. 14). To set the voice mail tone (p. 41). To store a voice mail access number (p. 40). Press (FUNCTION/EXIT/CH). * 1Save directory Voicemail dial Ringer volume Program To store an item in the directory (p. 33). To...
Make sure the handset is in the DIRECT button (p. 30). Press FWD/EDIT (fl). * 1Save DIRECT# Set flash time Save mailbox# Voicemail tone Set line mode Set dial mode Talk switching To store a phone number in the standby mode. To select the line mode (p. 15). To select the dial mode (p. 14). To set the voice mail tone (p. 41). To store a voice mail access number (p. 40). Press (FUNCTION/EXIT/CH). * 1Save directory Voicemail dial Ringer volume Program To store an item in the directory (p. 33). To...

Digital Spread Spect
Page 17
... phone comes from the factory set to the standby mode, press (FUNCTION/EXIT/CH). Make sure the handset is OFF, lift the handset off the base unit without pressing (TALK). Auto talk :On ≥You can exit the programming mode any time by pressing (FUNCTION/EXIT/CH). ≥To answer a call by programming. Press FWD/EDIT (fl) (Save key). ≥A beep sounds. ≥To return to OFF. Ringer volume...
... phone comes from the factory set to the standby mode, press (FUNCTION/EXIT/CH). Make sure the handset is OFF, lift the handset off the base unit without pressing (TALK). Auto talk :On ≥You can exit the programming mode any time by pressing (FUNCTION/EXIT/CH). ≥To answer a call by programming. Press FWD/EDIT (fl) (Save key). ≥A beep sounds. ≥To return to OFF. Ringer volume...

Digital Spread Spect
Page 21
... base unit. Backlit LCD display The lighted handset display will go out about 10 seconds after pressing a button, lifting the handset or answering a call. 21 Lighted handset keypad The handset dialing buttons will be displayed after the first ring (p. 22). If you want to have a normal cordless phone conversation, disconnect the headset. In order to view the Caller ID information, please wait until the second ring to answer a call is received. Answering Calls When a call is connected (p. 13), make...
... base unit. Backlit LCD display The lighted handset display will go out about 10 seconds after pressing a button, lifting the handset or answering a call. 21 Lighted handset keypad The handset dialing buttons will be displayed after the first ring (p. 22). If you want to have a normal cordless phone conversation, disconnect the headset. In order to view the Caller ID information, please wait until the second ring to answer a call is received. Answering Calls When a call is connected (p. 13), make...

Digital Spread Spect
Page 30
Storing a Phone Number in the DIRECT Button Make sure the handset is required for dialing, (REDIAL/PAUSE) can be dialed with a onetouch operation. To erase all of the digits, press and hold (CLEAR). ≥The last 32 digits number you press (CLEAR) the digit to the left of the cursor is erased. Ringer volume 1Program 43 1=Yes 4 While the arrow points to "Save DIRECT#", press FWD/EDIT (fl) (Yes key). 1Save DIRECT# Set fl...
Storing a Phone Number in the DIRECT Button Make sure the handset is required for dialing, (REDIAL/PAUSE) can be dialed with a onetouch operation. To erase all of the digits, press and hold (CLEAR). ≥The last 32 digits number you press (CLEAR) the digit to the left of the cursor is erased. Ringer volume 1Program 43 1=Yes 4 While the arrow points to "Save DIRECT#", press FWD/EDIT (fl) (Yes key). 1Save DIRECT# Set fl...

Digital Spread Spect
Page 41
... subscribe to a voice mail service, -your voice mail service does not send a voice mail tone, or -the unit is in your mailbox. Your phone comes from the factory set to "On". Save mailbox# 1Voicemail tone 43 1=Yes Voicemail tone :On 43 1=Save Voicemail tone :Off Advanced Operation ≥You can exit the programming mode any time by a dial tone after a new message has been recorded, set to "On". You will be displayed when a message has been recorded in the standby mode. 1 Press...
... subscribe to a voice mail service, -your voice mail service does not send a voice mail tone, or -the unit is in your mailbox. Your phone comes from the factory set to "On". Save mailbox# 1Voicemail tone 43 1=Yes Voicemail tone :On 43 1=Save Voicemail tone :Off Advanced Operation ≥You can exit the programming mode any time by a dial tone after a new message has been recorded, set to "On". You will be displayed when a message has been recorded in the standby mode. 1 Press...

Digital Spread Spect
Page 43
The handset beeps for 1 minute and "Paging" is displayed on the handset. 2 To stop paging, press (HANDSET\LOCATOR) again or press (TALK) twice on the base unit, the unit automatically selects one of your telephone line by another cordless telephone user. Special Features " Advanced Operation Display FWD/EDIT (fl) (TALK) (FUNCTION/EXIT/CH) (TONE) (FLASH/CALL\WAIT) (REDIAL/PAUSE) IN USE/CHARGE Indicator (HANDSET\LOCATOR) Automatic Security Code Setting Each time you place the handset on the handset. 43 These codes help prevent...
The handset beeps for 1 minute and "Paging" is displayed on the handset. 2 To stop paging, press (HANDSET\LOCATOR) again or press (TALK) twice on the base unit, the unit automatically selects one of your telephone line by another cordless telephone user. Special Features " Advanced Operation Display FWD/EDIT (fl) (TALK) (FUNCTION/EXIT/CH) (TONE) (FLASH/CALL\WAIT) (REDIAL/PAUSE) IN USE/CHARGE Indicator (HANDSET\LOCATOR) Automatic Security Code Setting Each time you place the handset on the handset. 43 These codes help prevent...

Digital Spread Spect
Page 45
... (milliseconds)". Ringer volume 1Program 43 1=Yes Save DIRECT# 1Set flash time 43 1=Yes Flash time :700ms 43 1=Save 7 Press FWD/EDIT (fl) (Save key). ≥A beep sounds. ≥To return to use special features of your host PBX such as transferring an extension call or accessing special telephone services (optional) such as call etc.). Advanced Operation 45 Your phone comes from the factory set to "Set flash time". 5 Press...
... (milliseconds)". Ringer volume 1Program 43 1=Yes Save DIRECT# 1Set flash time 43 1=Yes Flash time :700ms 43 1=Save 7 Press FWD/EDIT (fl) (Save key). ≥A beep sounds. ≥To return to use special features of your host PBX such as transferring an extension call or accessing special telephone services (optional) such as call etc.). Advanced Operation 45 Your phone comes from the factory set to "Set flash time". 5 Press...

Digital Spread Spect
Page 49
...;Locate the handset and the base unit away from the base unit. Before Requesting Help " Problem "No link to reset. Press BACK (fi) or FWD/EDIT (fl) to turn the display on the base unit and unplug the AC adaptor to base. is blank. The handset display is displayed and an alarm tone sounds. Remedy ≥You are too far from other electrical units. Place on the base unit and try again...
...;Locate the handset and the base unit away from the base unit. Before Requesting Help " Problem "No link to reset. Press BACK (fi) or FWD/EDIT (fl) to turn the display on the base unit and unplug the AC adaptor to base. is blank. The handset display is displayed and an alarm tone sounds. Remedy ≥You are too far from other electrical units. Place on the base unit and try again...

Digital Spread Spect
Page 51
.... Problem Remedy (HANDSET\LOCATOR) does not function. ≥The handset is too far from the base unit. ≥The handset is engaged in the USA or Puerto Rico ONLY 51 If you must use the headset to flash. ≥Clean the charge contacts and charge again (p. 12). ≥Install a new battery (p. 48). Wait until the IN USE/CHARGE indicator light goes out. You cannot have a normal cordless phone conversation...
.... Problem Remedy (HANDSET\LOCATOR) does not function. ≥The handset is too far from the base unit. ≥The handset is engaged in the USA or Puerto Rico ONLY 51 If you must use the headset to flash. ≥Clean the charge contacts and charge again (p. 12). ≥Install a new battery (p. 48). Wait until the IN USE/CHARGE indicator light goes out. You cannot have a normal cordless phone conversation...

Digital Spread Spect
Page 55
... installed and used in a room where the temperature is experienced, move the cordless telephone further away from external RF (radio frequency) energy. (The unit operates in the frequency range of 905MHz to which can be placed near or on a circuit different from the telephone line and connect a known working phone does not operate properly, consult your unit repaired by one of any regulations posted in the area instruct...
... installed and used in a room where the temperature is experienced, move the cordless telephone further away from external RF (radio frequency) energy. (The unit operates in the frequency range of 905MHz to which can be placed near or on a circuit different from the telephone line and connect a known working phone does not operate properly, consult your unit repaired by one of any regulations posted in the area instruct...


