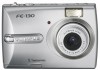
FE-140 Advanced Manual (English)
Page 2
...a while. The batteries are loaded incorrectly • Reload the batteries correctly. The battery is loaded The batteries are exhausted • Replace the batteries with new ones, or charge the batteries. POWER button Turning the camera on and off Shutter...Cover lock 72 CUISINE V 21 CUSTOM PRINT 35 D D IMAGE STABILIZATION h . . . 10 Date and time X 30 DCF 67 DIGITAL ZOOM 18 Search by putting it by Objective XXXShooting tips and information gP. 55 5 Getting to know your camera better Shooting tips and information Tips before you start taking pictures The camera...
FE-140 Advanced Manual (English)
Page 45
... • Operation is only guaranteed on a Macintosh equipped with the installation. • The OLYMPUS Master installation screen is displayed, read the agreement and click "Agree" to the computer. • Turn off the camera. • Open the camera's battery compartment/card cover. If the QuickTime screen is not displayed, QuickTime 6 or later is not displayed, double...
FE-140 Advanced Manual (English)
Page 60
...being downloaded (when connected to format the card. Blinking: The focus is blinking. Getting to indicate the camera status. Using a new card • If you use a non-Olympus card or a card used for another application, such as for approximately 2 seconds, and then the picture ...being saved and render the internal memory or card unusable. 5 • Open the camera's battery compartment/card cover • Remove the battery. • Connect or disconnect the AC adapter. To use this card with this camera, use the [FORMAT] function to a computer). • Do not do any ...
FE-140 Advanced Manual (English)
Page 63
.... L There are on this camera. Close the card cover. Getting to a computer. Monitor indication q CARD ERROR Possible cause There is a problem with the card. Before erasing, download important pictures to view the picture on the card. If that cannot be used for the first time or the battery has been removed for a long...
FE-140 Advanced Manual (English)
Page 72
Index area • Grasp the card and remove. 4 Close the battery compartment/card cover. 2 1 3 Miscellaneous 72 Removing the card 6 3 Push the card all the way in . • Insert the card until it clicks into the Notch card slot as shown in the illustration. • Insert the card straight in and release slowly. • The card protrudes slightly and stops. Inserting and removing the card 1 Turn off the camera. 2 Open the battery compartment/card cover. 2 Battery compartment/ Card cover 3 1 Inserting the card Cover lock 3 Orient the card, and insert it into place.
FE-140 Advanced Manual (English)
Page 73
... for a long period of abroad, you may take some time. Note • The card access lamp blinks while the camera is blinking. Do not open the Battery compartment/ Card cover while the card access lamp is reading the images. Reading of AC 100 V to the other AC adapter with this... camera. Miscellaneous 73 Doing so may damage the data in the internal memory or the card and render the internal memory...
FE-140 Advanced Manual (English)
Page 77
...Shooting) h 9 Auto focus 57 AVALIABLE LIGHT c 21 B BACKUP 29 Battery 70, 74 Battery compartment/ Card cover . . . 72 BEACH Z 21 BEHIND GLASS V 21 BLACK & WHITE 26 BRIGHTNESS 28 C CALENDAR (Edit 27 CALENDAR (Playback 25 Calendar display 11 CAMERA MENU 18 CANDLE b 21 Card 19, 29, 71 Card access lamp 50..., 60, 73 CCD 30, 67 Close-up playback U 11 COLOR 30 Compression 20 Connector cover 31, 33, 48 Cover lock 72 CUISINE V 21 CUSTOM PRINT 35 D D IMAGE STABILIZATION h . . . 10 Date and time X 30 DCF 67 DIGITAL...
FE-140 Basic Manual (English, Français, Español, Português)
Page 3
CAMERA DIAGRAM Connector Cover Self-Timer Lamp Flash Multi-Connector K Button (Shooting Mode) S Button (Erase) < Button (Print) Card access lamp MENU Button Monitor Printer connector Tripod Socket En Lens q Button (Playback Mode) POWER Button Strap Eyelet Zoom Lever Shutter Button Mode Dial F Button Arrow Pad (O/N/X/Y) DISP./E Button Battery Compartment/ Card Cover Cover lock 3
FE-140 Basic Manual (English, Français, Español, Português)
Page 24
... it. • Never remove the batteries with a hand while firing. Pay attention to the following dangerous situations which may be at the sun or strong lights with wet hands. ( Do not leave the camera in places where it is covered (such as a blanket). If you carry the camera. It could cause overheating, resulting in...
FE-140 Basic Manual (English, Français, Español, Português)
Page 25
...; Use only the Olympus brand NiMH batteries and fitting charger. • Never heat or incinerate batteries. • Take precautions when carrying or storing batteries to high temperatures in a hot vehicle, near a heat source, etc. • To prevent causing battery leaks or damaging their body is not covered by soldering, etc. • If battery fluid gets into contact...
FE-140 Basic Manual (English, Français, Español, Português)
Page 26
... skin, remove the clothing and flush the affected area with clean, running cold water immediately. Batteries whose bodies are raised, but not covered by an insulating sheet. SAFETY PRECAUTIONS CAUTION • Do not remove batteries immediately after using the camera. • If a battery leaks fluid onto your skin, seek medical attention immediately. • Never subject...
FE-140 Quick Start Guide (English, Português)
Page 1
...Mode Dial F Button Arrow Pad (O/N/X/Y) DISP./E Button Battery Compartment/ Card Cover Cover-lock TRANSFER IMAGES a. Connect the camera to the computer 1 Connect the camera and computer using the arrow pad (O/N/X/Y). 3 Set ...OLYMPUS Master CD-ROM. 2 Windows: Click the "OLYMPUS Master" button. Your PC will be displayed. Transfer images to the original size. Quick Start Guide FE-130/X-720/X-740 FE...EASY PRINT CUSTOM PRINT EXIT SET OK c. Digital Camera Strap AA Batteries (two) Camera insert* USB Cable (light gray) Video Cable (black) OLYMPUS Master software CD-ROM Items not shown: ...