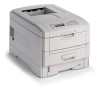
C7100/C7300/C7500 Handy Reference Guide
Page 1
... (MP) Tray 9 Selecting/Using Paper 10 Selecting/Using Transparencies 12 Selecting/Using Labels 13 Selecting/Using Thick Media 14 Selecting/Using Envelopes 15 Selecting/Using OKI® Print Media 16 Ideas for Using Printer Features 17 Secure Print 18 Proof & Print 19 Printing Built-In Reports 20 Setting Power Save Parameters...
C7100/C7300/C7500 Handy Reference Guide
Page 2
...®. • Check office supply catalogs. Order Numbers Important! Black 41963004 Cyan 41963003 Magenta 41963002 Yellow 41963001 Image Drums, Type C4 Color OKI Part No. Toner Cartridges, Type C4 Color OKI Part No. Black 41962804 Cyan 41962803 Magenta 41962802 Yellow 41962801 2 To register for Supply Manager, go to Order • Consult the dealer...
C7100/C7300/C7500 Handy Reference Guide
Page 26
Off The printer is receiving data. Flashing The printer is off line. Off Normal. The printer needs attention, but can continue to operate. The printer needs attention immediately. Attention LED (Red) On: Warning! Blinking: Alarm! The display message indicates the nature of the problem: e.g., TONER LOW, PAPER NEAR END, etc. The display message indicates the nature of the problem: e.g., PAPER JAM, TRAY1 EMPTY, etc. 26 Control Panel Lights Ready LED (Green) On The printer is on line.
C7100/C7300/C7500 Handy Reference Guide
Page 31
Clearing Media Jams (cont.) Jam 381 3 OPEN UPPER COVER 381: PAPER JAM 1 4 2 5 Caution! To avoid damage to the drums: • Be sure to set the toner/drum cradle on a flat surface • Do not touch the shiny green area on the bottom of the drums. 31
C7100/C7300/C7500 Handy Reference Guide
Page 33
... 382 (cont.) 3 If the sheet is inside and caught in the fuser: Warning! To avoid damage to the drums: • Be sure to set the toner/drum cradle on a flat surface • Do not touch the shiny green area on the blue lock levers at either end of the fuser forward...
C7100/C7300/C7500 Handy Reference Guide
Page 37
Use only Type C4 Toner. Discard toner cartridges in accordance with local regulations! 5 6 3 7 37 INSTALL NEW TONER nnn: XXXX* TONER EMPTY * nnn: XXXX = 410: YELLOW 411: MAGENTA 412: CYAN 413: BLACK 1 2 Important! Changing Toner Cartridges Toner Cartridge Order #s: 4 • Black = 41963004 • Cyan = 41963003 • Magenta = 41963002 • Yellow = 41963001 Caution!
C7100/C7300/C7500 Handy Reference Guide
Page 38
If it still doesn't disappear, reinstall the toner cartridge. 11 38 If it doesn't, try printing a page. The TONER LOW message should disappear from the display. Changing Toner Cartridges (cont.) 8 12 9 13 10 14 Important!
C7100/C7300/C7500 Handy Reference Guide
Page 39
... all the pages at one time). • Install additional memory in the printer (see page 37) on -line User's Guide. Note: If you have a replacement toner cartridge (see your on hand. XXXX DRUM NEAR LIFE The Problem Appears on -line User's Guide for more common error messages appear below. What to... OVERFLOW The Problem The amount of data in the SYSTEM CONFIG MENU to STOP, the ATTENTION light will blink and you have changed the LOW TONER item in the file being printed (e.g., print the file as separate groups of pages instead of the file being printed has exceeded the printer' ...
C7100/C7300/C7500 Handy Reference Guide
Page 41
XXX TONER SENSOR ERROR The Problem Appears on the second line of the display to Do Turn the printer off, then on -line User's Guide for more information. 41 Press down in place. You should disappear. Note: You can also use the OKI Storage Device Manager utility to Do Open the top... (toward the printer cover hinge) and lift the fuser out, then lower it back into the printer, pushing it is a problem with the color xxx toner sensor. The message should feel the latches at either end engage. 2. Close the cover. Error Messages (cont.) CHECK FUSER UNIT 320: FUSER UNIT MISSING...
C7100/C7300/C7500 User's Guide: Windows
Page 3
...Unpacking 12 CD-ROM disk contents 13 Printer location 14 Printer components 15 Setting up 18 Packaging and protective sheet removal 18 Toner cartridge installation 22 Loading paper 26 Manual feed 30 Power connection 31 Control panel 32 Menu settings 34 Media recommendations 39 ... 93 Factors that affect color printing 94 Choosing a color matching method 97 Color matching: PCL driver 100 Color matching: PostScript driver 103 OKI "Using ICC Profiles" feature: PostScript driver only 107 Windows ICM color matching 110 Printing Multiple pages on one sheet (n-up printing 111 3
C7100/C7300/C7500 User's Guide: Windows
Page 6
...documents 330 Store to hard disk 333 Printing overlays 336 Printing posters: PCL driver only 345 Maintenance 346 Adding Paper 346 Changing the toner cartridge 349 Changing the image drum 355 Changing the transfer belt 358 Changing the fuser unit 362 Cleaning the LED heads 365 Transporting... Additional memory 392 Internal hard disk 396 Duplex unit 399 Additional paper trays 400 Specifications 402 Consumables 406 Toner 406 Drums 406 Fuser Units 407 Transfer Belt 407 OKI Print Media 408 Factory Default Settings 410 Print menu 410 Media menu 410 Color menu 412 System Config...
C7100/C7300/C7500 User's Guide: Windows
Page 10
Industry standard network connectivity via internal network interface card (optional on models C7100 and C7300) • Environmentally friendly: the advanced power save mode minimizes power consumption and the separate toner and drum design cuts down on waste. • Automatic color balance adjustment: in order to ensure consistent output at all times, the machine...
C7100/C7300/C7500 User's Guide: Windows
Page 13
Documentation (not illustrated): Setup Guide, Software Installation Guide, Warranty booklet. The printer. 2. 4 toner cartridges (cyan, magenta, yellow and black). 3. Retain all the necessary parts are required to lift the printer safely. Getting Started UNPACKING WARNING This printer ... 1. After unpacking the printer and choosing a suitable place to put it, check that all packing materials to faciliate transport. Power cable 4. CD-ROM disks. 5. C7100/C7300/C7500 Getting Started • 12 Light-proof plastic bags (not illustrated). 7. LED lens cleaner (not illustrated). 6.
C7100/C7300/C7500 User's Guide: Windows
Page 17
11.LED heads (4) 12.Discharge roller) 13.Fuser unit 14.Image drum and toner cartridge (cyan) 15.Image drum and toner cartridge (magenta) 16.Image drum and toner cartridge (yellow) 17.Image drum and toner cartridge (black) C7100/C7300/C7500 Getting Started • 16
C7100/C7300/C7500 User's Guide: Windows
Page 19
Remove any adhesive tape and packaging from the printer. 2. C7100/C7300/C7500 Setting up Before connecting this printer to a computer and power supply, the toner cartridges must be installed and paper inserted in the paper tray. Using the release handle, open the top cover. PACKAGING AND PROTECTIVE SHEET REMOVAL 1. Setting up • 18
C7100/C7300/C7500 User's Guide: Windows
Page 23
Shake the toner cartridge back and forth several times then, holding it gets in your Warranty, Regulatory and Safety Information booklet for more information. 1. Take extreme care when handling toner. • Toner can also stain hands and clothing. TONER CARTRIDGE INSTALLATION WARNING! See the Material Safety Data Sheets in the eyes. • Toner can be harmful if inhaled, swallowed or if it horizontally, remove the tape. Remove the black toner cartridge from the package. 2. C7100/C7300/C7500 Setting up • 22
C7100/C7300/C7500 User's Guide: Windows
Page 24
Insert the toner cartridge into the black image drum, left side first, engaging the drum locating peg in the hole in the toner cartridge. Make sure the colors of the toner cartridge and image drum correspond. 3. Remove the locking piece from behind the colored toner release lever. 4. C7100/C7300/C7500 Setting up • 23
C7100/C7300/C7500 User's Guide: Windows
Page 25
Gently push the toner cartridge down on the image drum. 6. C7100/C7300/C7500 Setting up • 24 The lever should go back easily. Gently push the colored lever toward the rear of the machine until it is firmly in place before proceeding. This releases the toner into the groove on the toner cartridge to be sure it stops. If the lever resists moving, stop and press down engaging the locking pin into the image drum. 5. CAUTION!
C7100/C7300/C7500 User's Guide: Windows
Page 26
C7100/C7300/C7500 Setting up • 25 7. Close the top cover. Repeat the process for each color toner cartridge, being careful to match the color toner to the color image drum. 8.
C7100/C7300/C7500 User's Guide: Windows
Page 32
... up • 31 C7100/C7300/C7500 Setting up sequence. Connect the power cable (1) into the power socket on the display. If this message does not disappear after a few pages have been printed, reinstall the appropriate toner cartridge. NOTE After installing the new toner cartridges, the message TONER LOW or CHANGE TONER may appear on the...