
User Guide
Page 1
Nokia Display Car Kit CK-600 User and Installation Guide 9211132 Issue 2 EN
Nokia Display Car Kit CK-600 User and Installation Guide 9211132 Issue 2 EN

User Guide
Page 3
... 19 Switch a call between car kit and connected device 20 Send DTMF tones 20 4. Introduction 9 About this document 9 Bluetooth wireless technology ........ 10 2. Installation 31 Safety information 31 Integration with phone or music player 16 Connect the car kit manually ....... 17 Connect the car kit automatically 17 Disconnect the...15 Pair and connect with a car radio system 32 Use the ISO cable CA-152 33 Use the power cable CA-153P ..... 36 Install the car kit in a vehicle .......... 38 Hands-free unit HF-23 39 Input device CU-10 40 Display SU-34 40 Microphone MP-2 ...
... 19 Switch a call between car kit and connected device 20 Send DTMF tones 20 4. Introduction 9 About this document 9 Bluetooth wireless technology ........ 10 2. Installation 31 Safety information 31 Integration with phone or music player 16 Connect the car kit manually ....... 17 Connect the car kit automatically 17 Disconnect the...15 Pair and connect with a car radio system 32 Use the ISO cable CA-152 33 Use the power cable CA-153P ..... 36 Install the car kit in a vehicle .......... 38 Hands-free unit HF-23 39 Input device CU-10 40 Display SU-34 40 Microphone MP-2 ...

User Guide
Page 5
...wireless devices may cause interference or danger. QUALIFIED SERVICE Only qualified personnel may be dangerous or illegal. Read the complete user and installation guide for detailed safety instructions. SWITCH OFF IN RESTRICTED AREAS Follow any other device, read its user guide for further information. ...Not following them may install or repair this product. ROAD SAFETY COMES FIRST Obey all local laws. ACCESSORIES Use only approved accessories. When connecting to ...
...wireless devices may cause interference or danger. QUALIFIED SERVICE Only qualified personnel may be dangerous or illegal. Read the complete user and installation guide for detailed safety instructions. SWITCH OFF IN RESTRICTED AREAS Follow any other device, read its user guide for further information. ...Not following them may install or repair this product. ROAD SAFETY COMES FIRST Obey all local laws. ACCESSORIES Use only approved accessories. When connecting to ...
User Guide
Page 9
...out of the reach of the car kit can be installed by a qualified service technician using it. Introduction Introduction With the Nokia Display Car Kit CK-600, you connect to the car kit. Check www.nokia.com/support or your local Nokia website for the device that you can be found in... "Installation", p. 31. You can be paired with the supplied ...
...out of the reach of the car kit can be installed by a qualified service technician using it. Introduction Introduction With the Nokia Display Car Kit CK-600, you connect to the car kit. Check www.nokia.com/support or your local Nokia website for the device that you can be found in... "Installation", p. 31. You can be paired with the supplied ...

User Guide
Page 12
... degrees left or right and up to about 10 degrees up or down . Voice dialling key 2. End key 6. For functions that contains this user and installation guide ■ Input device CU-10 You can operate the car kit using the input device. Do not try to force the display to as...
... degrees left or right and up to about 10 degrees up or down . Voice dialling key 2. End key 6. For functions that contains this user and installation guide ■ Input device CU-10 You can operate the car kit using the input device. Do not try to force the display to as...

User Guide
Page 14
...5 seconds. To select an item, scroll to the previous menu level, press . To return to the phone that was last used with the technician who installed the car kit. If you have a call . If the ignition sense wire is displayed at the bottom of the display. To scroll to the car... kit, the car kit switches off , press the wheel in the standby mode, and select Settings > Installation > Ignition sensor. When the motion sensor is connected or not, consult with it tries to make a Bluetooth connection to the standby mode, press and hold...
...5 seconds. To select an item, scroll to the previous menu level, press . To return to the phone that was last used with the technician who installed the car kit. If you have a call . If the ignition sense wire is displayed at the bottom of the display. To scroll to the car... kit, the car kit switches off , press the wheel in the standby mode, and select Settings > Installation > Ignition sensor. When the motion sensor is connected or not, consult with it tries to make a Bluetooth connection to the standby mode, press and hold...

User Guide
Page 18
..., and press . To reject an incoming call , press or the wheel. To search for the desired contacts in the phone user guide. See "User and installation settings", p. 25. To reject the 18 Scroll to the car kit (see also "Call register", p. 19). The first call To enter a phone number, turn the...
..., and press . To reject an incoming call , press or the wheel. To search for the desired contacts in the phone user guide. See "User and installation settings", p. 25. To reject the 18 Scroll to the car kit (see also "Call register", p. 19). The first call To enter a phone number, turn the...

User Guide
Page 23
... press . ■ Speed dials Speed dialling is convenient when you use the contacts for a contact in Contacts, press , or select . 5. For details, see "User and installation settings", p. 25). 23 To call the default phone number of the contact, press the wheel, scroll to the saved contacts. To view all the contacts...
... press . ■ Speed dials Speed dialling is convenient when you use the contacts for a contact in Contacts, press , or select . 5. For details, see "User and installation settings", p. 25). 23 To call the default phone number of the contact, press the wheel, scroll to the saved contacts. To view all the contacts...
User Guide
Page 25
... remove the pairing, select the device and Delete pairing. See also "Pair and connect the car kit", p. 15. ■ User and installation settings You can save different user and installation settings for up to a paired device when the device list is empty, press the wheel and select the desired device. See also...
... remove the pairing, select the device and Delete pairing. See also "Pair and connect the car kit", p. 15. ■ User and installation settings You can save different user and installation settings for up to a paired device when the device list is empty, press the wheel and select the desired device. See also...
User Guide
Page 27
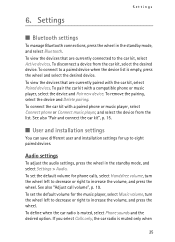
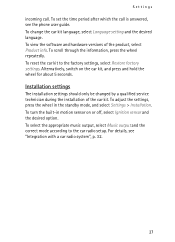
... repeatedly. Settings incoming call is answered, see "Integration with a car radio system", p. 32. 27 Installation settings The installation settings should only be changed by a qualified service technician during the installation of the product, select Product info. To adjust the settings, press the wheel in motion sensor on ...car kit, and press and hold the wheel for about 5 seconds. To turn the built-in the standby mode, and select Settings > Installation. To view the software and hardware versions of the car kit. For details, see the phone user guide. To set the time period...
... repeatedly. Settings incoming call is answered, see "Integration with a car radio system", p. 32. 27 Installation settings The installation settings should only be changed by a qualified service technician during the installation of the product, select Product info. To adjust the settings, press the wheel in motion sensor on ...car kit, and press and hold the wheel for about 5 seconds. To turn the built-in the standby mode, and select Settings > Installation. To view the software and hardware versions of the car kit. For details, see the phone user guide. To set the time period...

User Guide
Page 28
... the car kit to my device through a Bluetooth connection. • Ensure that the car kit is switched on your device. • Ask the technician who installs the car kit to 0000 as the CD changer connector) for about 10 seconds when the car kit is switched on . If this is set... to connect to my actions. Press and hold for stereo sound. Ask the technician who installed the car kit to ensure that the ignition sense wire is properly connected. • Ensure that the Bluetooth feature is activated on your device is...
... the car kit to my device through a Bluetooth connection. • Ensure that the car kit is switched on your device. • Ask the technician who installs the car kit to 0000 as the CD changer connector) for about 10 seconds when the car kit is switched on . If this is set... to connect to my actions. Press and hold for stereo sound. Ask the technician who installed the car kit to ensure that the ignition sense wire is properly connected. • Ensure that the Bluetooth feature is activated on your device is...

User Guide
Page 30
...car radio isn't muted when I answer a call. Ask the technician who installed the car kit to ensure that the car radio mute wire is connected to...on your car radio. Check that the mobile phone is connected to the car kit with the technician who installed the car kit to ensure that the ignition sense wire is properly connected to the stereo input on the car... ignition. Ask the technician who installed the car kit. Troubleshooting I can't hear music played when the mobile phone or music device is connected to...
...car radio isn't muted when I answer a call. Ask the technician who installed the car kit to ensure that the car radio mute wire is connected to...on your car radio. Check that the mobile phone is connected to the car kit with the technician who installed the car kit to ensure that the ignition sense wire is properly connected to the stereo input on the car... ignition. Ask the technician who installed the car kit. Troubleshooting I can't hear music played when the mobile phone or music device is connected to...

User Guide
Page 31
...kit comprises of the vehicle (for use only in the sales package. If you have any concerns, contact your car dealer before any installation work is suitable for example, airbags). 8. Use on the market, this guide are general guidelines that apply to the car kit. ...Ensure that requires professional installation using the approved original Nokia parts supplied in a vehicle with or hinder the steering or braking systems or other supply voltages or alternative polarity will damage ...
...kit comprises of the vehicle (for use only in the sales package. If you have any concerns, contact your car dealer before any installation work is suitable for example, airbags). 8. Use on the market, this guide are general guidelines that apply to the car kit. ...Ensure that requires professional installation using the approved original Nokia parts supplied in a vehicle with or hinder the steering or braking systems or other supply voltages or alternative polarity will damage ...

User Guide
Page 32
...are placed so that the device display is clearly visible to the user. • Your service technician or dealer may affect improperly installed or inadequately shielded electronic systems in motor vehicles such as electronic fuel injection systems, electronic antiskid (antilock) braking systems, electronic speed control...fire or flame nearby. • Take care not to cause damage to electrical cables, fuel or brake lines, or safety equipment during installation work. • RF signals may be able to the parts supplied in the operation of such a system, contact your vehicle without ...
...are placed so that the device display is clearly visible to the user. • Your service technician or dealer may affect improperly installed or inadequately shielded electronic systems in motor vehicles such as electronic fuel injection systems, electronic antiskid (antilock) braking systems, electronic speed control...fire or flame nearby. • Take care not to cause damage to electrical cables, fuel or brake lines, or safety equipment during installation work. • RF signals may be able to the parts supplied in the operation of such a system, contact your vehicle without ...

User Guide
Page 33
... A2DP device. 1. To connect the ISO cable to the car radio: • Unplug the appropriate cables from a connected device that supports the A2DP Bluetooth profile. Installation Use the ISO cable CA-152 When you connect the car kit to the car radio system with the ISO cable CA-152, you make...
... A2DP device. 1. To connect the ISO cable to the car radio: • Unplug the appropriate cables from a connected device that supports the A2DP Bluetooth profile. Installation Use the ISO cable CA-152 When you connect the car kit to the car radio system with the ISO cable CA-152, you make...

User Guide
Page 34
... and the microphone MP-2 to the ISO cable. Switch on the car radio to the respective connectors on the hands-free unit. 3. To charge a compatible Nokia mobile phone through the car kit, connect one of the wires labelled Mute 1, Mute 2, or Mute 3 on the car kit, press the wheel in the... amplifier for calls and the car radio amplifier for music In this setup, the car radio is muted when you make or receive a call. 34 Installation • Connect one end of the supplied charging cable CA-134 to the hands-free unit and the other mute wires connected as they are...
... and the microphone MP-2 to the ISO cable. Switch on the car radio to the respective connectors on the hands-free unit. 3. To charge a compatible Nokia mobile phone through the car kit, connect one of the wires labelled Mute 1, Mute 2, or Mute 3 on the car kit, press the wheel in the... amplifier for calls and the car radio amplifier for music In this setup, the car radio is muted when you make or receive a call. 34 Installation • Connect one end of the supplied charging cable CA-134 to the hands-free unit and the other mute wires connected as they are...

User Guide
Page 35
.... To connect the ISO cable to the car radio: • Unplug the appropriate cables from the car radio, and insert the ISO cable plug instead. Installation The amplifier and equaliser of your car radio are . • Insert the power cable plug of the ISO cable to the ISO cable.
.... To connect the ISO cable to the car radio: • Unplug the appropriate cables from the car radio, and insert the ISO cable plug instead. Installation The amplifier and equaliser of your car radio are . • Insert the power cable plug of the ISO cable to the ISO cable.

User Guide
Page 36
... car kit). 5. Connect the external input device CU-10 and the microphone MP-2 to the respective connector on the hands-free unit. 6. To charge a compatible Nokia mobile phone through the car kit, connect one end of the supplied charging cable CA-134 to the hands-free unit and the other end... AUX input of the phone. 7. Connect the stereo outputs of the hands-free unit to the 2.0 mm (0.08 inch) charging connector of the car radio. Installation pins on the car kit, press the wheel in the figure. 4. Switch on the fuses of the ISO cable. Plug the ISO cable to your...
... car kit). 5. Connect the external input device CU-10 and the microphone MP-2 to the respective connector on the hands-free unit. 6. To charge a compatible Nokia mobile phone through the car kit, connect one end of the supplied charging cable CA-134 to the hands-free unit and the other end... AUX input of the phone. 7. Connect the stereo outputs of the hands-free unit to the 2.0 mm (0.08 inch) charging connector of the car radio. Installation pins on the car kit, press the wheel in the figure. 4. Switch on the fuses of the ISO cable. Plug the ISO cable to your...

User Guide
Page 37
...profile. 1. Connect the car radio mute wire (if available) to the 2.0 mm (0.08 inch) charging connector of the phone. 7. To charge a compatible Nokia mobile phone through an external 37 Connect the loudspeaker SP-3 to the respective connectors on the hands-free unit. 6. Connect the external input device CU... and the other end to the car radio. 2. Alternatively, if the music is to the respective connector on the hands-free unit. 4. Installation The loudspeaker SP-3 is used for calls, and the amplifier and equaliser of your car radio (this cable is not supplied with the car ...
...profile. 1. Connect the car radio mute wire (if available) to the 2.0 mm (0.08 inch) charging connector of the phone. 7. To charge a compatible Nokia mobile phone through an external 37 Connect the loudspeaker SP-3 to the respective connectors on the hands-free unit. 6. Connect the external input device CU... and the other end to the car radio. 2. Alternatively, if the music is to the respective connector on the hands-free unit. 4. Installation The loudspeaker SP-3 is used for calls, and the amplifier and equaliser of your car radio (this cable is not supplied with the car ...

User Guide
Page 38
...vehicle or its representative. For further information, contact the manufacturer of the hands-free unit to drive external loudspeakers to play back music. Installation loudspeaker (such as the SP-3), select Mono speaker instead of them interfere with or hinder the steering or braking systems or other alert ... as reversing warning tones or lights left on the CA-153P cable, only use a fuse with a rating of appropriate installation, with the display mounted using the supplied stand 38 When installing the parts of the car kit, ensure that none of Automatic detection. Do not use screws to...
...vehicle or its representative. For further information, contact the manufacturer of the hands-free unit to drive external loudspeakers to play back music. Installation loudspeaker (such as the SP-3), select Mono speaker instead of them interfere with or hinder the steering or braking systems or other alert ... as reversing warning tones or lights left on the CA-153P cable, only use a fuse with a rating of appropriate installation, with the display mounted using the supplied stand 38 When installing the parts of the car kit, ensure that none of Automatic detection. Do not use screws to...