
Instruction Manual
Page 2
...not disassemble Touching the product's internal parts could result in their entirety before using this could result from the equipment, remove the battery immediately, taking care to a Nikon-authorized service center for inspection. 2 Getting Started For your safety (Caring for the Camera and Battery...) To prevent damage to your Nikon product to prevent possible injury. The consequences that should be ...
...not disassemble Touching the product's internal parts could result in their entirety before using this could result from the equipment, remove the battery immediately, taking care to a Nikon-authorized service center for inspection. 2 Getting Started For your safety (Caring for the Camera and Battery...) To prevent damage to your Nikon product to prevent possible injury. The consequences that should be ...

Instruction Manual
Page 3
... hot. Getting Started 3 Observe caution when operating the flash Using the flash close to prevent infants from the subject. Before removing the battery, turn the camera off and allow the battery to cool. • Discontinue use immediately should you notice any changes in or expose to water. • Do not transport...
... hot. Getting Started 3 Observe caution when operating the flash Using the flash close to prevent infants from the subject. Before removing the battery, turn the camera off and allow the battery to cool. • Discontinue use immediately should you notice any changes in or expose to water. • Do not transport...

Instruction Manual
Page 4
... or exposed to high levels of the internal mechanism can cause condensation inside the device. Do not touch the lens with care Do not apply force to the lens or flash unit, or to the ...battery chamber cover or slide cover. Caring for the Camera and Battery Keep dry This product is not waterproof, and may malfunction if subjected to strong shocks...use a soft, clean cotton cloth or lens tissue moistened with a lightly dampened cloth and then dry your camera at the beach or seaside, wipe off any sand or salt with ethanol (alcohol) or lens cleaner. ...
... or exposed to high levels of the internal mechanism can cause condensation inside the device. Do not touch the lens with care Do not apply force to the lens or flash unit, or to the ...battery chamber cover or slide cover. Caring for the Camera and Battery Keep dry This product is not waterproof, and may malfunction if subjected to strong shocks...use a soft, clean cotton cloth or lens tissue moistened with a lightly dampened cloth and then dry your camera at the beach or seaside, wipe off any sand or salt with ethanol (alcohol) or lens cleaner. ...

Instruction Manual
Page 5
... of temperature, for example near a space heater or in a plastic bag containing a desiccant. Turn the camera on a hot day. • To prevent mold or mildew, take the camera out of batteries tends to absorb moisture and should be replaced at regular intervals. • Do not store... in a cool, dry place. Use a fresh battery at least once a month. En Storage • To prevent mold or mildew, store the camera in a warm place and exchange the two as this may recover some of time, remove the battery to purchase replacement batteries on important occasions. Getting...
... of temperature, for example near a space heater or in a plastic bag containing a desiccant. Turn the camera on a hot day. • To prevent mold or mildew, take the camera out of batteries tends to absorb moisture and should be replaced at regular intervals. • Do not store... in a cool, dry place. Use a fresh battery at least once a month. En Storage • To prevent mold or mildew, store the camera in a warm place and exchange the two as this may recover some of time, remove the battery to purchase replacement batteries on important occasions. Getting...

Instruction Manual
Page 6
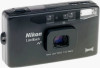
Accessory (The following item is supplied with the date function (Lite Touch Zoom 100W QD). Thank you feel confident using the camera. Some of the illustrations show the model with this camera.) Hand strap Original accessories • Camera case CS-L30 (Remote control unit can be stored in the pocket inside.) • Remote control unit... before use, and keep it handy until you for reference. 6 Getting Started Be sure to follow. : Indicates supplementary descriptions. : Indicates pages for purchasing the Nikon Lite Touch Zoom 100W/Lite Touch Zoom 100W QUARTZ DATE (QD) camera.
Accessory (The following item is supplied with the date function (Lite Touch Zoom 100W QD). Thank you feel confident using the camera. Some of the illustrations show the model with this camera.) Hand strap Original accessories • Camera case CS-L30 (Remote control unit can be stored in the pocket inside.) • Remote control unit... before use, and keep it handy until you for reference. 6 Getting Started Be sure to follow. : Indicates supplementary descriptions. : Indicates pages for purchasing the Nikon Lite Touch Zoom 100W/Lite Touch Zoom 100W QUARTZ DATE (QD) camera.

Instruction Manual
Page 7
... Caring for the Camera and Battery 4 To take a picture right away (Quick operation guide) --- 8 Camera parts 10 Body 10 LCD panel 12 Viewfinder 13 Installing a battery 14 Turning the camera on 15 Checking the battery power 15 Loading the film 16 Imprinting the date/time on pictures (Lite Touch Zoom 100W QD only... 18 Holding the camera properly 19 En Operating the shutter release button 19 Shooting 20 Zooming 22 Rewinding the film 23 Removing the film 23 When ...
... Caring for the Camera and Battery 4 To take a picture right away (Quick operation guide) --- 8 Camera parts 10 Body 10 LCD panel 12 Viewfinder 13 Installing a battery 14 Turning the camera on 15 Checking the battery power 15 Loading the film 16 Imprinting the date/time on pictures (Lite Touch Zoom 100W QD only... 18 Holding the camera properly 19 En Operating the shutter release button 19 Shooting 20 Zooming 22 Rewinding the film 23 Removing the film 23 When ...

Instruction Manual
Page 8
To take care not to the green index mark inside of the camera. 8 Getting Started When loading the film, take a picture right away (Quick operation guide) 1 Insert a battery. ( p. 14) 2 Open the slide cover to turn the camera on. ( p. 15) Make sure that the sufficient Battery Power indicator ( ) appears on the LCD panel. ( p. 15) 3 Load the film. ( p. 16) Pull the film leader across to touch the lens inside the film compartment.
To take care not to the green index mark inside of the camera. 8 Getting Started When loading the film, take a picture right away (Quick operation guide) 1 Insert a battery. ( p. 14) 2 Open the slide cover to turn the camera on. ( p. 15) Make sure that the sufficient Battery Power indicator ( ) appears on the LCD panel. ( p. 15) 3 Load the film. ( p. 16) Pull the film leader across to touch the lens inside the film compartment.

Instruction Manual
Page 9
... the green LED lights up. Getting Started 9 Zo ( p. 23) Take trial shots Take trial shots before shooting at important occasions like weddings or graduations. • Nikon will not be held liable for any damages resulting from the use of the roll. ( p. 23) Remove the film cartridge. Zo En 6 Check the green...
... the green LED lights up. Getting Started 9 Zo ( p. 23) Take trial shots Take trial shots before shooting at important occasions like weddings or graduations. • Nikon will not be held liable for any damages resulting from the use of the roll. ( p. 23) Remove the film cartridge. Zo En 6 Check the green...

Instruction Manual
Page 10
Camera parts Body Red-eye Reduction lamp ( pp. 32, 33) Self-timer lamp ( p. 36) Auto Exposure metering window Viewfinder window Flash ( pp. 26, 27) Lens Remote-.../SEL button* Date/time select mode ( p. 18) Date/time setting mode ( p. 39) ADJ button* ( p. 39) button Flash mode ( pp. 26-31) Infinity Focus mode ( p. 35) * Lite Touch Zoom 100W QD only 10 Getting Started Battery chamber cover ( p. 14) Strap eyelet ( p. 11) Shutter release button ( p. 19) Mid-roll rewind button ( p. 23) button Red...
Camera parts Body Red-eye Reduction lamp ( pp. 32, 33) Self-timer lamp ( p. 36) Auto Exposure metering window Viewfinder window Flash ( pp. 26, 27) Lens Remote-.../SEL button* Date/time select mode ( p. 18) Date/time setting mode ( p. 39) ADJ button* ( p. 39) button Flash mode ( pp. 26-31) Infinity Focus mode ( p. 35) * Lite Touch Zoom 100W QD only 10 Getting Started Battery chamber cover ( p. 14) Strap eyelet ( p. 11) Shutter release button ( p. 19) Mid-roll rewind button ( p. 23) button Red...

Instruction Manual
Page 11
Getting Started 11 Green LED ( pp. 13, 20) Orange LED ( pp. 13, 27) Viewfinder eyepiece ( p. 13) Zoom buttons ( p. 22) Film confirmation window En MADE IN INDONESIA Camera back lock release lever ( p. 16) Attaching the hand strap Tripod socket ( pp. 29, 31, 36, 37) Attach the hand strap as shown in the illustration.
Getting Started 11 Green LED ( pp. 13, 20) Orange LED ( pp. 13, 27) Viewfinder eyepiece ( p. 13) Zoom buttons ( p. 22) Film confirmation window En MADE IN INDONESIA Camera back lock release lever ( p. 16) Attaching the hand strap Tripod socket ( pp. 29, 31, 36, 37) Attach the hand strap as shown in the illustration.

Instruction Manual
Page 12
Camera parts (continued) LCD panel Battery power indicator ( p. 15) Red-eye Reduction indicator ( p. 33) Infinity Focus Mode indicator ( p. 35) Flash Mode indicator ( pp. 26-31) Self-timer indicator ( p. 36) Frame counter ( p. 17) Remote Control indicator ( p. 37) Battery power indicator ( p. 15) Infinity Focus Mode indicator ( p. 35) Self-timer indicator ( p. 36) Red-eye Reduction indicator ( p. 33) Frame counter ( p. 17) Flash Mode indicator ( pp. 26-31) Date/time indicator ( pp. 18, 39) The illustrations are fully labeled for your reference. 12 Getting Started
Camera parts (continued) LCD panel Battery power indicator ( p. 15) Red-eye Reduction indicator ( p. 33) Infinity Focus Mode indicator ( p. 35) Flash Mode indicator ( pp. 26-31) Self-timer indicator ( p. 36) Frame counter ( p. 17) Remote Control indicator ( p. 37) Battery power indicator ( p. 15) Infinity Focus Mode indicator ( p. 35) Self-timer indicator ( p. 36) Red-eye Reduction indicator ( p. 33) Frame counter ( p. 17) Flash Mode indicator ( pp. 26-31) Date/time indicator ( pp. 18, 39) The illustrations are fully labeled for your reference. 12 Getting Started

Instruction Manual
Page 13
Getting Started 13 In close -up shooting distance less than approx. 0.65m. Viewfinder 1 3 4 2 1Parallax compensation marks ( p. 34) En Use for close -up when the flash is ready to fire, and it blinks when the flash charging is not completed. 4Green LED ( p. 20) Lights when focus is closer than 1m. 2Autofocus frame mark ( p. 20) Center the autofocus frame mark on the subject. 3Orange LED ( p. 27) With the shutter release button pressed halfway, the orange LED lights up photography, the LED blinks as a warning if the subject is achieved.
Getting Started 13 In close -up shooting distance less than approx. 0.65m. Viewfinder 1 3 4 2 1Parallax compensation marks ( p. 34) En Use for close -up when the flash is ready to fire, and it blinks when the flash charging is not completed. 4Green LED ( p. 20) Lights when focus is closer than 1m. 2Autofocus frame mark ( p. 20) Center the autofocus frame mark on the subject. 3Orange LED ( p. 27) With the shutter release button pressed halfway, the orange LED lights up photography, the LED blinks as a warning if the subject is achieved.

Instruction Manual
Page 14
... lock as marked inside the battery chamber. 3 Close the battery chamber cover until it clicks. Check the time and date. (Lite Touch Zoom 100W QD only) ( p. 39) 14 Preparations The built-in this camera. Insert the battery with the + and - Installing a battery Battery type Use one CR123A or DL123A type 3V lithium battery...
... lock as marked inside the battery chamber. 3 Close the battery chamber cover until it clicks. Check the time and date. (Lite Touch Zoom 100W QD only) ( p. 39) 14 Preparations The built-in this camera. Insert the battery with the + and - Installing a battery Battery type Use one CR123A or DL123A type 3V lithium battery...

Instruction Manual
Page 15
... battery with you open the slide cover in the direction of the arrow, the camera is set in Auto flash mode. ( p. 28) When closing the cover, first slide it clicks. Lite Touch Zoom 100W Lite Touch Zoom 100W QD showing blinking The battery power is completely retracted, slowly close the... cover. Turning the camera on Open the slide cover until it slightly in to start lens retraction. Once you...
... battery with you open the slide cover in the direction of the arrow, the camera is set in Auto flash mode. ( p. 28) When closing the cover, first slide it clicks. Lite Touch Zoom 100W Lite Touch Zoom 100W QD showing blinking The battery power is completely retracted, slowly close the... cover. Turning the camera on Open the slide cover until it slightly in to start lens retraction. Once you...

Instruction Manual
Page 16
...touch the lens inside the film compartment. MADE IN INDONESIA It is recommended to use DX-coded ISO 400 film, which provides good results when using the flash, and helps avoid blurred images, should camera shake occur. 1 Close the slide cover, then open the camera... back (2). MADE IN INDONESIA BAT T. Slide the camera back lock release lever (1), and open the camera... the camera. 3 Pull the film leader across ...camera. Hold the film cartridge and ensure film is not properly aligned to open the camera...
...touch the lens inside the film compartment. MADE IN INDONESIA It is recommended to use DX-coded ISO 400 film, which provides good results when using the flash, and helps avoid blurred images, should camera shake occur. 1 Close the slide cover, then open the camera... back (2). MADE IN INDONESIA BAT T. Slide the camera back lock release lever (1), and open the camera... the camera. 3 Pull the film leader across ...camera. Hold the film cartridge and ensure film is not properly aligned to open the camera...

Instruction Manual
Page 17
Open the camera back again and reload film. With a non-DX-coded film, the film speed is closed, and the film has been properly set, " " appears on the ... are ISO 50, 100, 200, 400, 800, 1600, and 3200. Once the camera back is automatically set automatically. If " " blinks on the LCD panel. Lite Touch Zoom 100W Lite Touch Zoom 100W QD 4 Close the camera back, and check that " " appears on DX-coded 35mm film Number of frames DX mark DX code ISO (film speed) Film...
Open the camera back again and reload film. With a non-DX-coded film, the film speed is closed, and the film has been properly set, " " appears on the ... are ISO 50, 100, 200, 400, 800, 1600, and 3200. Once the camera back is automatically set automatically. If " " blinks on the LCD panel. Lite Touch Zoom 100W Lite Touch Zoom 100W QD 4 Close the camera back, and check that " " appears on DX-coded 35mm film Number of frames DX mark DX code ISO (film speed) Film...

Instruction Manual
Page 18
... shown in the illustration shows Apr. 1, 2003. Each time you take a picture exceeding the number of date/time Imprint position The imprint positions on pictures (Lite Touch Zoom 100W QD only) Select the date/time indicator by 24hour clock. The year is indicated by the last two digits, and the time is...
... shown in the illustration shows Apr. 1, 2003. Each time you take a picture exceeding the number of date/time Imprint position The imprint positions on pictures (Lite Touch Zoom 100W QD only) Select the date/time indicator by 24hour clock. The year is indicated by the last two digits, and the time is...

Instruction Manual
Page 19
Holding the camera properly When holding the camera horizontally When holding the camera vertically, make sure that the flash is on the flash unit when it is depressed halfway. p. 24) while the shutter release 2 Press the shutter release ... to take a picture. When you press the button halfway, focus and exposure are automatically achieved, and the green LED lights up position. When holding the camera vertically Prop your elbows against your body and hold the...
Holding the camera properly When holding the camera horizontally When holding the camera vertically, make sure that the flash is on the flash unit when it is depressed halfway. p. 24) while the shutter release 2 Press the shutter release ... to take a picture. When you press the button halfway, focus and exposure are automatically achieved, and the green LED lights up position. When holding the camera vertically Prop your elbows against your body and hold the...

Instruction Manual
Page 20
... to be sharp. 20 Basic Operations Shooting 1 Center the autofocus frame mark " " on the main subject. Note that you may not be achieved, keep the camera away from the subject for more than approx. 0.65m. Zo Lighting/blinking of the green LED When correct focus has been achieved, the green LED...: Use focus lock. ( p. 24) 2 Press the shutter release button halfway to -subject distance is too close. However, the focus may take a picture even if the camera-to focus.
... to be sharp. 20 Basic Operations Shooting 1 Center the autofocus frame mark " " on the main subject. Note that you may not be achieved, keep the camera away from the subject for more than approx. 0.65m. Zo Lighting/blinking of the green LED When correct focus has been achieved, the green LED...: Use focus lock. ( p. 24) 2 Press the shutter release button halfway to -subject distance is too close. However, the focus may take a picture even if the camera-to focus.

Instruction Manual
Page 21
Pressing the shutter release button abruptly can result in Auto Flash mode, the flash fires automatically. and to protect the lens, finder, etc. En Basic Operations 21 When not in use, close the slide cover to save battery power. Zo If the subject is dark in picture blur. 3 Confirm that the green LED lights up and slowly press the shutter release button all the way down.
Pressing the shutter release button abruptly can result in Auto Flash mode, the flash fires automatically. and to protect the lens, finder, etc. En Basic Operations 21 When not in use, close the slide cover to save battery power. Zo If the subject is dark in picture blur. 3 Confirm that the green LED lights up and slowly press the shutter release button all the way down.