
User Guide
Page 7
... ...ix Notational Conventions x Related Documents and Software x Service Information ...xi Chapter 1: Getting Started Introduction ...1-1 Unpacking the Mobile Computer 1-4 Accessories ...1-4 Getting Started ...1-5 Installing and Removing the Main Battery 1-6 Installing the Main Battery 1-6 Charging the ...Batteries 1-8 Removing the Main Battery 1-8 Starting the Mobile Computer 1-9 Calibrating the Screen 1-10 Checking Battery Status 1-10 SIM Card ...1-11 Stylus ...1-13 MC9090-G Strap ...1-14 MC909X-K Strap ...1-15 MC909X-S Strap ...1-17 Battery Management ...1-18 Battery Saving Tips 1-...
... ...ix Notational Conventions x Related Documents and Software x Service Information ...xi Chapter 1: Getting Started Introduction ...1-1 Unpacking the Mobile Computer 1-4 Accessories ...1-4 Getting Started ...1-5 Installing and Removing the Main Battery 1-6 Installing the Main Battery 1-6 Charging the ...Batteries 1-8 Removing the Main Battery 1-8 Starting the Mobile Computer 1-9 Calibrating the Screen 1-10 Checking Battery Status 1-10 SIM Card ...1-11 Stylus ...1-13 MC9090-G Strap ...1-14 MC909X-K Strap ...1-15 MC909X-S Strap ...1-17 Battery Management ...1-18 Battery Saving Tips 1-...

User Guide
Page 23
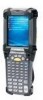
Chapter 1 Chapter 1 Chapter 1 Getting Started Getting Started Introduction This chapter lists the accessories for the mobile computer and explains how to install and charge the batteries, replace the strap and start the mobile computer for the first time. Indicator LED Bar Touch Screen Scan Button Microphone (Windows Mobile 5.0 only) Keypad Headphone Jack (Windows Mobile 5.0 only) Handstrap Power Button Trigger Figure 1-1 MC9090-G
Chapter 1 Chapter 1 Chapter 1 Getting Started Getting Started Introduction This chapter lists the accessories for the mobile computer and explains how to install and charge the batteries, replace the strap and start the mobile computer for the first time. Indicator LED Bar Touch Screen Scan Button Microphone (Windows Mobile 5.0 only) Keypad Headphone Jack (Windows Mobile 5.0 only) Handstrap Power Button Trigger Figure 1-1 MC9090-G

User Guide
Page 24
1 - 2 MC909X User Guide Microphone Scan Button or Walkie-Talkie Button on MC9097-K Touch Screen Indicator LED Bar Power Scan Button Keypad Battery Release Latch Headphone Jack Exit Window Stylus Exit Window Scan Button Scan Button Stylus Strap Scan Button (MC9094-K) Walkie-Talkie Button (MC9097-K) SIM Door MC9090-K Figure 1-2 MC909X-K MC9094-K MC9097-K
1 - 2 MC909X User Guide Microphone Scan Button or Walkie-Talkie Button on MC9097-K Touch Screen Indicator LED Bar Power Scan Button Keypad Battery Release Latch Headphone Jack Exit Window Stylus Exit Window Scan Button Scan Button Stylus Strap Scan Button (MC9094-K) Walkie-Talkie Button (MC9097-K) SIM Door MC9090-K Figure 1-2 MC909X-K MC9094-K MC9097-K

User Guide
Page 25
Getting Started 1 - 3 Microphone Scan Button or Walkie-Talkie Button on MC9097-S Touch Screen Indicator LED Bar Power Button Scan Button Keypad Headphone Jack Exit Window Scan Button MC9090-S Figure 1-3 MC909X-S Stylus Exit Window Scan Button Strap Stylus Battery Release Latch Scan Button (MC9094-S) Walkie-Talkie Button (MC9097-S) SIM Door MC9094-S MC9097-S
Getting Started 1 - 3 Microphone Scan Button or Walkie-Talkie Button on MC9097-S Touch Screen Indicator LED Bar Power Button Scan Button Keypad Headphone Jack Exit Window Scan Button MC9090-S Figure 1-3 MC909X-S Stylus Exit Window Scan Button Strap Stylus Battery Release Latch Scan Button (MC9094-S) Walkie-Talkie Button (MC9097-S) SIM Door MC9094-S MC9097-S

User Guide
Page 26
1 - 4 MC909X User Guide Unpacking the Mobile Computer Carefully remove all equipment listed below: • mobile computer • lithium-ion battery • strap, attached to the mobile computer • stylus, in the stylus silo • Regulatory Guide • Quick Start Guide (poster...). Inspect the equipment for contact information. AC line cord (country-specific) and power supply, charges the mobile...
1 - 4 MC909X User Guide Unpacking the Mobile Computer Carefully remove all equipment listed below: • mobile computer • lithium-ion battery • strap, attached to the mobile computer • stylus, in the stylus silo • Regulatory Guide • Quick Start Guide (poster...). Inspect the equipment for contact information. AC line cord (country-specific) and power supply, charges the mobile...

User Guide
Page 36
To reposition the strap: 1. Two strap connectors are provided on the mobile computer's main body. 1 - 14 MC909X User Guide MC9090-G Strap The strap may be moved to re-attach the strap. Slide the loop out of the mobile computer to suit user preferences. The handstrap may be attached to either the left or right side of the connector post. 4. Reverse the procedure to either connector. Open strap loop and slide the handstrap through the loop. 3. Disconnect the metal clip at the handle. 2. Strap Loop Handstrap Figure 1-13 Reposition the Strap Metal Clip
To reposition the strap: 1. Two strap connectors are provided on the mobile computer's main body. 1 - 14 MC909X User Guide MC9090-G Strap The strap may be moved to re-attach the strap. Slide the loop out of the mobile computer to suit user preferences. The handstrap may be attached to either the left or right side of the connector post. 4. Reverse the procedure to either connector. Open strap loop and slide the handstrap through the loop. 3. Disconnect the metal clip at the handle. 2. Strap Loop Handstrap Figure 1-13 Reposition the Strap Metal Clip

User Guide
Page 37
Lift the loop end of the mobile computer to the device. Insert the loop into the opposite connection post. 5. To replace the handstrap: 1. Remove two screws securing the strap bracket to suit user preferences. Place the loop over the button. Replace the battery. Pull the loop... through the connection post. 3. Remove the battery. 4. To reposition the MC909X-K strap: 1. Getting Started 1 - 15 MC909X-K Strap The strap may be moved to either the left or right side of the strap over the button and pull taught. 6. Loop Button Connection Post Figure 1-14 Repositioning ...
Lift the loop end of the mobile computer to the device. Insert the loop into the opposite connection post. 5. To replace the handstrap: 1. Remove two screws securing the strap bracket to suit user preferences. Place the loop over the button. Replace the battery. Pull the loop... through the connection post. 3. Remove the battery. 4. To reposition the MC909X-K strap: 1. Getting Started 1 - 15 MC909X-K Strap The strap may be moved to either the left or right side of the strap over the button and pull taught. 6. Loop Button Connection Post Figure 1-14 Repositioning ...

User Guide
Page 38
Pull the loop through the connection post. 4. Reverse the procedure to re-attach the strap. Remove the battery. 5. Lift the loop end of the strap over the button. 3. 1 - 16 MC909X User Guide Screws Strap Bracket Figure 1-15 Remove Strap Bracket 2.
Pull the loop through the connection post. 4. Reverse the procedure to re-attach the strap. Remove the battery. 5. Lift the loop end of the strap over the button. 3. 1 - 16 MC909X User Guide Screws Strap Bracket Figure 1-15 Remove Strap Bracket 2.

User Guide
Page 39
...screw securing the bottom of the strap to the device. 2. To reposition the strap: 1. Remove the screw securing the bottom of the strap to the device. 3. To reposition the MC909X-S strap, attach the MC909X-S strap to either the left or right side of the mobile computer to suit user preferences.... Reverse the procedure to re-attach the strap. Getting Started 1 - 17 MC909X-S Strap The strap may be moved to...
...screw securing the bottom of the strap to the device. 2. To reposition the strap: 1. Remove the screw securing the bottom of the strap to the device. 3. To reposition the MC909X-S strap, attach the MC909X-S strap to either the left or right side of the mobile computer to suit user preferences.... Reverse the procedure to re-attach the strap. Getting Started 1 - 17 MC909X-S Strap The strap may be moved to...

User Guide
Page 243
... 1-4 ActiveSync icon 2-5 Adaptive Frequency Hopping 3-1 AFH 3-1 aiming options aiming pattern 2-51 aiming the imager 2-50 aligning screen 1-10 answering a call 4-2, 5-9 attaching MC9090-G strap 1-14 attaching MC909X-K strap 1-15 attaching MC909X-S strap 1-17 auto charge cable 6-1 B backlight 2-47 backlight intensity 2-47 backup battery 2-2 charging 1-6 bar codes one dimensional 2-50 two dimensional 2-50 battery backup...
... 1-4 ActiveSync icon 2-5 Adaptive Frequency Hopping 3-1 AFH 3-1 aiming options aiming pattern 2-51 aiming the imager 2-50 aligning screen 1-10 answering a call 4-2, 5-9 attaching MC9090-G strap 1-14 attaching MC909X-K strap 1-15 attaching MC909X-S strap 1-17 auto charge cable 6-1 B backlight 2-47 backlight intensity 2-47 backup battery 2-2 charging 1-6 bar codes one dimensional 2-50 two dimensional 2-50 battery backup...

User Guide
Page 247
... battery charger 6-10 power connection 6-10 special characters B-1 specifications A-1 speed dial 4-5, 4-10, 5-18 starting the mobile computer 1-5, 1-9 status 2-1, 2-3 status icon 2-1, 2-2, 2-3 phone 2-4 WWAN 2-4 status icons 2-3, 2-5 Windows CE 5.0 2-1 Windows Mobile 5.0 2-3 storage card 1-5 SD card MMC card 1-5 storage temperature A-2 strap 1-4, 1-14 attaching to the MC9090-G 1-14 attaching to the MC909X-K 1-15 attaching to the MC909X-S 1-17...
... battery charger 6-10 power connection 6-10 special characters B-1 specifications A-1 speed dial 4-5, 4-10, 5-18 starting the mobile computer 1-5, 1-9 status 2-1, 2-3 status icon 2-1, 2-2, 2-3 phone 2-4 WWAN 2-4 status icons 2-3, 2-5 Windows CE 5.0 2-1 Windows Mobile 5.0 2-3 storage card 1-5 SD card MMC card 1-5 storage temperature A-2 strap 1-4, 1-14 attaching to the MC9090-G 1-14 attaching to the MC909X-K 1-15 attaching to the MC909X-S 1-17...