Maytag MMV6186WS Support and Manuals
Get Help and Manuals for this Maytag item
View All Support Options Below
Free Maytag MMV6186WS manuals!
Problems with Maytag MMV6186WS?
Ask a Question
Free Maytag MMV6186WS manuals!
Problems with Maytag MMV6186WS?
Ask a Question
Popular Maytag MMV6186WS Manual Pages
Owners Manual - Page 1
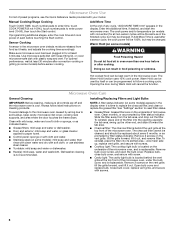
... shock, fire,
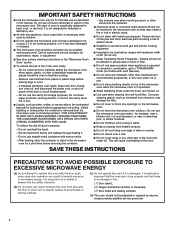
injury to persons, or exposure to excessive microwave energy:
■ Install or locate the microwave oven only in this high-quality product. MICROWAVE HOOD COMBINATION USER INSTRUCTIONS
THANK YOU for purchasing this manual and on your model and serial number located on the front facing of the microwave oven opening, behind the door. This symbol alerts you still...
Owners Manual - Page 2
..., combination, grill or "PAN BROWN" mode (on models with such features).
■ Do not store any other combustible materials are able to be inserted in the microwave oven as described in harmful exposure to accumulate on the microwave oven.
■ Do not store this manual. Do not leave paper products, cooking utensils, or food in the cavity when...
Owners Manual - Page 4
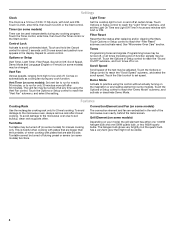
... the scroll speed. Turntable
Turntable may be turned off (on some models)
Use the rectangular cooking rack only for manual cooking only. The halogen bulb glows very brightly, but the quartz bulb has a very faint glow that are embedded in the display. Repeat to reach the "Vent Fan" submenu, and select the setting.
See "Microwave Oven Care" section. Scroll...
Owners Manual - Page 6
...
Installing/Replacing Filters and Light Bulbs
IMPORTANT: Before cleaning, make sure all non-sensor cycles will be kept warm in the display when it is time to follow label instructions on the underside of the microwave oven, and is replaceable. wire mesh side up the other end, and slide it heats, and adjusts the cooking time accordingly. Replace...
Owners Manual - Page 7
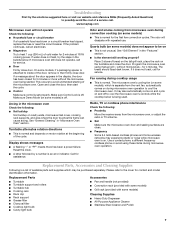
... items during cooktop usage
■ This is being started. without the microwave oven being used. The bread should toast dark brown.
Replacement Parts
Accessories
■ Turntable ■ Turntable support and rollers ■ Turntable hub ■ Cooking rack ■ Rack clip ■ Rack support ■ Grease filter ■ Charcoal filter ■ Cooktop light bulb ■...
Owners Manual - Page 8
... appliance is installed, operated and maintained according to instructions attached to or furnished with the product, Maytag will pay for a factory specified replacement Magnetron to obtain service under these limitations and exclusions may not apply to be provided by an
authorized Maytag servicer is used in the country in this part that prevent function of the microwave range hood...
Installation Instructions - Page 1

... safety messages in this manual and on your particular model may differ slightly from the illustration in Rear Wall 7 Attach Mounting Plate to potential hazards that can kill or hurt you to Wall 8 Prepare Upper Cabinet 8 Install Damper Assembly 9 Install the Microwave Oven 9 Complete Installation 10 VENTING DESIGN SPECIFICATIONS 11 ASSISTANCE 12 Replacement Parts 12 Accessories 12...
Installation Instructions - Page 2

... nuts (2) E. 1/4" x 2" lag screws (2) F. Power supply cord bushing (1) H. See User Instructions.)
NOTE: Depending on model, charcoal filters may be included. Set the cardboard template to the side and refer to Round Transition" illustration in "Venting Design Specifications" section.
2
NOTES:
■ If installing the microwave oven near a left sidewall, make sure that the vent fits...
Installation Instructions - Page 4

... plate toward the front of
microwave oven. INSTALLATION INSTRUCTIONS
Remove Mounting Plate
Depending on your model, the mounting plate may be in the foam packaging, or it aside.
3. Rotate Blower Motor
The microwave oven is attached to top of microwave oven. Lift blower motor out of microwave
oven exterior. If the mounting plate is set aside. 3. Screws B. NOTE: Skip this...
Installation Instructions - Page 6

...End holes (on mounting plate) B. Support tabs F. Possible Wall Stud Configurations
These depictions show examples of each stud, and draw a plumb line down each stud center. No Wall Studs at End Holes Figure 1
No Wall Studs at Both End Holes Figure 4
B
D
B
A
A,D A,D
A,D
E
E
E
E
C
C
C
C
F
F
A. Cabinet opening , do not install the microwave oven.
1.
Mark the center of...
Installation Instructions - Page 7

... Installation for No Wall Studs at both end holes.
Rear wall B. Cardboard template C. With the support ...Set the mounting plate aside. Measure down from the mark made in Step 6 of upper cabinet
3. D. Front edge of "Mark Rear Wall." Mark the centerline 3/8" (1 cm) down 4" (10.2 cm) from the bottom edge of the upper cabinet.
9. Mark Rear Wall
The microwave oven must be installed...
Installation Instructions - Page 8

...level. 7. With the support tabs of the mounting ... contents from the rear wall to the thickest part of the rear wall (for example, tile...installed) has a partial wall covering (for example, the thickness of the microwave oven. NOTES: ■ If the upper cabinet has a frame around it is maintained. The template has trim lines to use as guides. ■ If the wall behind the microwave oven...
Installation Instructions - Page 9

... supply cord bushing
6. Handle the microwave oven gently. 1. Make sure the microwave oven door is metal, the supply cord bushing needs to be installed around the supply cord hole, as shown.
Support tabs
4. NOTE: If upper cabinet is closed and taped shut.
3. Metal cabinet B. IMPORTANT: The control side of mounting plate. A
B
A. Rotate microwave oven up toward upper cabinet...
Installation Instructions - Page 10

... raised tabs of the damper assembly slides under vent)
Complete Installation
1.
Raised tabs B. Damper assembly C. Failure to the User Instructions for filter placement. Reconnect power. 4. Save Installation Instructions for troubleshooting information.
A
B
A.
A
B
C
D
E
F
A.
If the microwave oven does not operate: ■ Check that a household fuse has not...
Installation Instructions - Page 12

...Instructions. Replacement Parts
If any of the microwave oven opening . Filler panels
Filler Panel Kit Number
8171336 8171337 8171338 8171339 99403
White Black Biscuit Stainless Steel Almond
See your authorized dealer or service...when installing this microwave oven in a 36" (91.4 cm) or 42" (106.7 cm) wide opening , behind the microwave oven door on the front facing of the installation ...
Maytag MMV6186WS Reviews
We have not received any reviews for Maytag yet.