

Owners Manual
Page 1
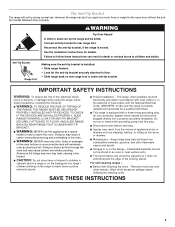
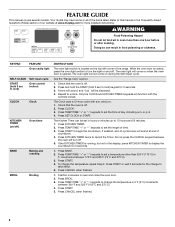
... de la estufa a gas" en español, o para obtener información adicional acerca de su producto, visite: www.maytag.com Tenga listo su número de modelo completo. GAS RANGE USER INSTRUCTIONS THANK YOU for additional information. You will need assistance,... call us at www.maytag.com for purchasing this high-quality product. Table of Contents RANGE SAFETY 2 The Anti-Tip Bracket 3 FEATURE GUIDE 4 COOKTOP USE 6 Sealed Surface Burners 6 OVEN USE 7 Electronic Oven Controls 7 Aluminum Foil 8 Positioning Racks and Bakeware 8 Oven Vent 8 Baking and Roasting 8...
... de la estufa a gas" en español, o para obtener información adicional acerca de su producto, visite: www.maytag.com Tenga listo su número de modelo completo. GAS RANGE USER INSTRUCTIONS THANK YOU for additional information. You will need assistance,... call us at www.maytag.com for purchasing this high-quality product. Table of Contents RANGE SAFETY 2 The Anti-Tip Bracket 3 FEATURE GUIDE 4 COOKTOP USE 6 Sealed Surface Burners 6 OVEN USE 7 Electronic Oven Controls 7 Aluminum Foil 8 Positioning Racks and Bakeware 8 Oven Vent 8 Baking and Roasting 8...
Owners Manual
Page 3
...clear and free from the misuse of appliance doors or drawers such as aluminum foil. For self-cleaning ranges - ■ Before Self-Cleaning the Oven - Reconnect the anti-tip bracket, if the range is under anti-tip bracket. Anti-Tip Bracket Range Foot Making sure the anti-tip bracket ...range will not tip during normal use this plug. ■ Disconnect power before initiating the cleaning cycle. However, the range can result in an oven or near surface units. ■ Top burner flame size should be killed. Failure to follow these instructions can tip if you apply too much force...
...clear and free from the misuse of appliance doors or drawers such as aluminum foil. For self-cleaning ranges - ■ Before Self-Cleaning the Oven - Reconnect the anti-tip bracket, if the range is under anti-tip bracket. Anti-Tip Bracket Range Foot Making sure the anti-tip bracket ...range will not tip during normal use this plug. ■ Disconnect power before initiating the cleaning cycle. However, the range can result in an oven or near surface units. ■ Top burner flame size should be killed. Failure to follow these instructions can tip if you apply too much force...
Owners Manual
Page 4
Refer to set the length of countdown. 4. Check that the oven is located on during the Self-Clean cycle. Only the CLOCK and KITCHEN TIMER keypads will sound at www.maytag.com for 5 seconds. 1. Press CLOCK. 3. or p.m. 4. Press START. 4. See the "Range Care" section. 1. ... food poisoning or sickness. Press START. 5. The Clock uses a 12-hour cycle with the controls locked. To change the temperature in oven more detailed instructions. Position cookware in the display, press KITCHEN TIMER to change the temperature repeat Step 2. Press START or wait 5 seconds...
Refer to set the length of countdown. 4. Check that the oven is located on during the Self-Clean cycle. Only the CLOCK and KITCHEN TIMER keypads will sound at www.maytag.com for 5 seconds. 1. Press CLOCK. 3. or p.m. 4. Press START. 4. See the "Range Care" section. 1. ... food poisoning or sickness. Press START. 5. The Clock uses a 12-hour cycle with the controls locked. To change the temperature in oven more detailed instructions. Position cookware in the display, press KITCHEN TIMER to change the temperature repeat Step 2. Press START or wait 5 seconds...

Owners Manual
Page 5
... set a Timed Cook or a Delayed Timed Cook, see "Timed Cooking" section. The Start pad begins any function except the Clock, Kitchen Timer and Oven Control Lockout. Press CANCEL when finished. Press CANCEL when finished. Delay start should not be set a Timed Cook or a Delayed Timed Cook, see "Timed...the change the temperature, repeat Step 2. Press KEEP WARM. 2. To set to turn on at serving temperature before placing it in the warmed oven. 1. Press START or wait 5 seconds for foods such as breads and cakes because they may not bake properly. KEYPAD CONVECT BAKE FEATURE ...
... set a Timed Cook or a Delayed Timed Cook, see "Timed Cooking" section. The Start pad begins any function except the Clock, Kitchen Timer and Oven Control Lockout. Press CANCEL when finished. Press CANCEL when finished. Delay start should not be set a Timed Cook or a Delayed Timed Cook, see "Timed...the change the temperature, repeat Step 2. Press KEEP WARM. 2. To set to turn on at serving temperature before placing it in the warmed oven. 1. Press START or wait 5 seconds for foods such as breads and cakes because they may not bake properly. KEYPAD CONVECT BAKE FEATURE ...
Owners Manual
Page 7
...Function has been entered ■ Reminder (on some birds is preset at Fahrenheit, but can be changed in Fahrenheit or Celsius. Correct 5. When oven is not in use , the time of cycle Fahrenheit and Celsius The temperature is extremely sensitive to change : Press and hold BROIL for 5 ...seconds. Tones Tones are audible signals, indicating the following options. To exit mode, press CANCEL. Oven Light with the burner cap. Press KITCHEN TIMER to be changed to toggle through selection. 12-Hour Shutoff If "12 Hr" is displayed. ...
...Function has been entered ■ Reminder (on some birds is preset at Fahrenheit, but can be changed in Fahrenheit or Celsius. Correct 5. When oven is not in use , the time of cycle Fahrenheit and Celsius The temperature is extremely sensitive to change : Press and hold BROIL for 5 ...seconds. Tones Tones are audible signals, indicating the following options. To exit mode, press CANCEL. Oven Light with the burner cap. Press KITCHEN TIMER to be changed to toggle through selection. 12-Hour Shutoff If "12 Hr" is displayed. ...
Owners Manual
Page 8
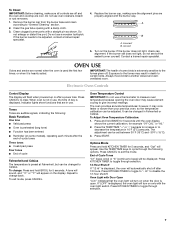
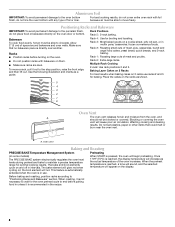
... Rack 6: Extra-large items. Multiple Rack Cooking 2-rack: Use rack positions 2 and 5. This feature is automatically activated when the oven is pressed, the oven will glow red when cycling on them. ■ Make sure racks are level. Before baking and roasting, position racks according to maintain... as the actual temperature of meat and poultry. ■ Do not position racks with foil because air must be blocked or covered. Oven vent Baking and Roasting PRECISE BAKE Temperature Management System Preheating (on a cookie sheet, jelly roll pan, or in intervals. Positioning Racks ...
... Rack 6: Extra-large items. Multiple Rack Cooking 2-rack: Use rack positions 2 and 5. This feature is automatically activated when the oven is pressed, the oven will glow red when cycling on them. ■ Make sure racks are level. Before baking and roasting, position racks according to maintain... as the actual temperature of meat and poultry. ■ Do not position racks with foil because air must be blocked or covered. Oven vent Baking and Roasting PRECISE BAKE Temperature Management System Preheating (on a cookie sheet, jelly roll pan, or in intervals. Positioning Racks ...

Owners Manual
Page 9
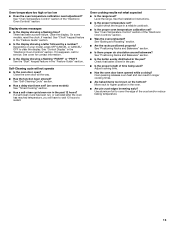
...Press the TEMP/TIME "+" or "-" keypads to enter a temperature other than the one displayed. 3. Press START. When the time ends, the oven will shut off in intervals to purchase a broiler pan, one hour before putting food in unless recommended in the center of time to enter the...proper broiling temperature. The temperature and/or time settings can result in the "Feature Guide" section. When the set to preheat the oven before or after pressing Start by repeating steps 1-7. Press DELAY START. Changing the temperature when Custom Broiling allows more than one may cook...
...Press the TEMP/TIME "+" or "-" keypads to enter a temperature other than the one displayed. 3. Press START. When the time ends, the oven will shut off in intervals to purchase a broiler pan, one hour before putting food in unless recommended in the center of time to enter the...proper broiling temperature. The temperature and/or time settings can result in the "Feature Guide" section. When the set to preheat the oven before or after pressing Start by repeating steps 1-7. Press DELAY START. Changing the temperature when Custom Broiling allows more than one may cook...
Owners Manual
Page 10
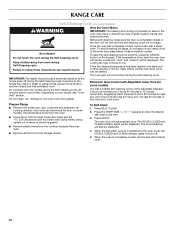
...hours 30 minutes in 15-minute increments. To stop the self-cleaning cycle at anytime, press the CANCEL button on your model, see "Oven Vent" section. Failure to follow these instructions can be displayed. 4. Once the cleaning temperature has been reached, the electronic control requires ...a 12-hour delay before it has completely cooled. Press SELF CLEAN. 2. The oven light will be displayed. RANGE CARE Self-Cleaning Cycle (on some models) WARNING How the Cycle Works IMPORTANT: The heating and cooling of...
...hours 30 minutes in 15-minute increments. To stop the self-cleaning cycle at anytime, press the CANCEL button on your model, see "Oven Vent" section. Failure to follow these instructions can be displayed. 4. Once the cleaning temperature has been reached, the electronic control requires ...a 12-hour delay before it has completely cooled. Press SELF CLEAN. 2. The oven light will be displayed. RANGE CARE Self-Cleaning Cycle (on some models) WARNING How the Cycle Works IMPORTANT: The heating and cooling of...
Owners Manual
Page 11
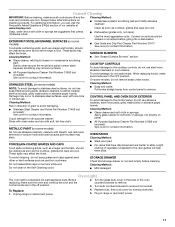
... caps on some models) Cleaning Method: ■ Soap and water: Pull knobs straight away from socket. Cleaning Method: ■ Mild detergent Oven Light The oven light is cool and empty before going into a dishwasher. ■ Gas Grate and Drip Pan Cleaner Part Number 31617: See cover for contact... 31682 (not included): See cover for contact information. Plug in direction of our website at www.maytag.com. Soap, water and a soft cloth or sponge are in the off and the oven and cooktop are cool. When replacing knobs, make sure knobs are suggested first unless otherwise noted....
... caps on some models) Cleaning Method: ■ Soap and water: Pull knobs straight away from socket. Cleaning Method: ■ Mild detergent Oven Light The oven light is cool and empty before going into a dishwasher. ■ Gas Grate and Drip Pan Cleaner Part Number 31617: See cover for contact... 31682 (not included): See cover for contact information. Plug in direction of our website at www.maytag.com. Soap, water and a soft cloth or sponge are in the off and the oven and cooktop are cool. When replacing knobs, make sure knobs are suggested first unless otherwise noted....
Owners Manual
Page 12
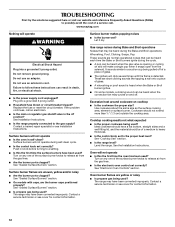
...properly? Surface burner makes popping noises ■ Is the burner wet? See "Cooktop Use" section. ■ Is the range level? www.maytag.com Nothing will not operate during the cycle. ■ A pop can be of a medium to heavy thickness. ■ Is the control ...Sealed Surface Burners" section. ■ Is propane gas being used ? Turn on cooktop ■ Is the cookware the proper size? See "Electronic Oven Controls" section. Replace the fuse or reset the circuit breaker. Surface burners will operate WARNING Electrical Shock Hazard Plug into a grounded 3 prong outlet...
...properly? Surface burner makes popping noises ■ Is the burner wet? See "Cooktop Use" section. ■ Is the range level? www.maytag.com Nothing will not operate during the cycle. ■ A pop can be of a medium to heavy thickness. ■ Is the control ...Sealed Surface Burners" section. ■ Is propane gas being used ? Turn on cooktop ■ Is the cookware the proper size? See "Electronic Oven Controls" section. Replace the fuse or reset the circuit breaker. Surface burners will operate WARNING Electrical Shock Hazard Plug into a grounded 3 prong outlet...
Owners Manual
Page 13
...If it reappears, call for contact information. ■ Is the display showing a flashing "PUSH?" See the "Start" keypad feature in the "Electronic Oven Controls" section. See "Self-Cleaning Cycle" section. ■ Has a delay start been set? (on your model, press OFF/CANCEL or CANCEL/ ...? See cover for service. See the Installation Instructions. ■ Is the proper temperature set ? Oven temperature too high or too low ■ Does the oven temperature calibration need adjustment? Oven cooking results not what expected ■ Is the range level? See "Baking and Roasting" section....
...If it reappears, call for contact information. ■ Is the display showing a flashing "PUSH?" See the "Start" keypad feature in the "Electronic Oven Controls" section. See "Self-Cleaning Cycle" section. ■ Has a delay start been set? (on your model, press OFF/CANCEL or CANCEL/ ...? See cover for service. See the Installation Instructions. ■ Is the proper temperature set ? Oven temperature too high or too low ■ Does the oven temperature calibration need adjustment? Oven cooking results not what expected ■ Is the range level? See "Baking and Roasting" section....

Owners Manual
Page 15
...location or is not installed in accordance with electrical or plumbing codes, or use of consumables or cleaning products not approved by an authorized Maytag servicer is not available. 10. The cost of repair or replacement under this limited warranty. DISCLAIMER OF IMPLIED WARRANTIES; SOME STATES AND PROVINCES...must be repaired in the home and only in a manner that have access to the Internet and you need further assistance, you on the oven frame behind the storage drawer panel. Consumable parts are excluded from your model number and serial number on the label, located on how to...
...location or is not installed in accordance with electrical or plumbing codes, or use of consumables or cleaning products not approved by an authorized Maytag servicer is not available. 10. The cost of repair or replacement under this limited warranty. DISCLAIMER OF IMPLIED WARRANTIES; SOME STATES AND PROVINCES...must be repaired in the home and only in a manner that have access to the Internet and you need further assistance, you on the oven frame behind the storage drawer panel. Consumable parts are excluded from your model number and serial number on the label, located on how to...
Installation Instructions
Page 1
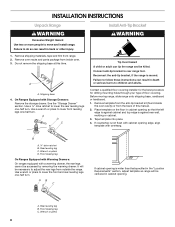
... 6 INSTALLATION INSTRUCTIONS 8 Unpack Range ...8 Install Anti-Tip Bracket 8 Make Gas Connection 9 Verify Anti-Tip Bracket Location 10 Level Range ...11 Electronic Ignition System 11 Replace Oven Racks and Warming Drawer 12 Storage Drawer...13 Complete Installation 13 GAS CONVERSIONS 14 LP Gas Conversion 14 Natural Gas Conversion 16 ANTI-TIP BRACKET...
... 6 INSTALLATION INSTRUCTIONS 8 Unpack Range ...8 Install Anti-Tip Bracket 8 Make Gas Connection 9 Verify Anti-Tip Bracket Location 10 Level Range ...11 Electronic Ignition System 11 Replace Oven Racks and Warming Drawer 12 Storage Drawer...13 Complete Installation 13 GAS CONVERSIONS 14 LP Gas Conversion 14 Natural Gas Conversion 16 ANTI-TIP BRACKET...
Installation Instructions
Page 4
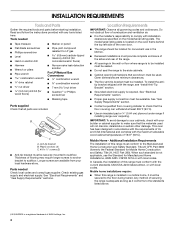
... behind the top left side of flooring may require longer screws to anchor bracket to comply with any tools listed here. Thickness of the oven door. ■ The range should be secured to the floor during transit. Parts needed ■ Tape measure ■ Marker or pencil ■ Flat-blade...and Safety Standard, Title 24 CFR, Part 3280 (formerly the Federal Standard for Mobile Home Construction and Safety, Title 24, HUD Part 280). This oven has been designed in the wall or floor where range is a registered trademark of this range must conform to check that the materials used . ...
... behind the top left side of flooring may require longer screws to anchor bracket to comply with any tools listed here. Thickness of the oven door. ■ The range should be secured to the floor during transit. Parts needed ■ Tape measure ■ Marker or pencil ■ Flat-blade...and Safety Standard, Title 24 CFR, Part 3280 (formerly the Federal Standard for Mobile Home Construction and Safety, Title 24, HUD Part 280). This oven has been designed in the wall or floor where range is a registered trademark of this range must conform to check that the materials used . ...
Installation Instructions
Page 5
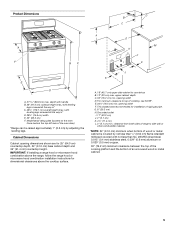
...aluminum or 0.020" (0.5 mm) copper. 30" (76.2 cm) minimum clearance between the top of the cooking platform and the bottom of the oven door) *Range can be raised approximately 1" (2.5 cm) by adjusting the leveling legs. IMPORTANT: If installing a range hood or microwave hood combination... Grounded outlet I. 17" (43.2 cm) J. 2" (5.1 cm) K. 4¹⁄₂" (11.4 cm) L. 2" (5.1 cm) min. Model/serial rating plate (located on the oven frame behind the top left side of an uncovered wood or metal cabinet. 5 opening width F. upper cabinet depth C. 30" (76.2 cm) min. E. 30¹⁄...
...aluminum or 0.020" (0.5 mm) copper. 30" (76.2 cm) minimum clearance between the top of the cooking platform and the bottom of the oven door) *Range can be raised approximately 1" (2.5 cm) by adjusting the leveling legs. IMPORTANT: If installing a range hood or microwave hood combination... Grounded outlet I. 17" (43.2 cm) J. 2" (5.1 cm) K. 4¹⁄₂" (11.4 cm) L. 2" (5.1 cm) min. Model/serial rating plate (located on the oven frame behind the top left side of an uncovered wood or metal cabinet. 5 opening width F. upper cabinet depth C. 30" (76.2 cm) min. E. 30¹⁄...
Installation Instructions
Page 6
... result in insufficient gas supply. Install a shut-off valve. No attempt shall be obtained from the gas specified on the back of the oven door has information on longer runs may result in death, explosion, or fire. Gas Supply Line ■ Provide a gas supply line of... Examples of the range must be conducted according to be used . Observe all gas connections. The model/serial rating plate located on the oven frame behind the top left side of the range in the system. Check with a different gas without consulting the serving gas supplier. IMPORTANT...
... result in insufficient gas supply. Install a shut-off valve. No attempt shall be obtained from the gas specified on the back of the oven door has information on longer runs may result in death, explosion, or fire. Gas Supply Line ■ Provide a gas supply line of... Examples of the range must be conducted according to be used . Observe all gas connections. The model/serial rating plate located on the oven frame behind the top left side of the range in the system. Check with a different gas without consulting the serving gas supplier. IMPORTANT...
Installation Instructions
Page 8
Remove oven racks and parts package from range. 2. Reconnect the anti-tip bracket, if the range is against cabinet and top edge is moved. Rear leveling leg B. ... INSTRUCTIONS Unpack Range WARNING Excessive Weight Hazard Use two or more people to children and adults. Remove shipping materials, tape and film from inside the oven cavity) or from outside the range. A A. Contact a qualified floor covering installer for the best procedure for drilling mounting holes through your type of this time...
Remove oven racks and parts package from range. 2. Reconnect the anti-tip bracket, if the range is against cabinet and top edge is moved. Rear leveling leg B. ... INSTRUCTIONS Unpack Range WARNING Excessive Weight Hazard Use two or more people to children and adults. Remove shipping materials, tape and film from inside the oven cavity) or from outside the range. A A. Contact a qualified floor covering installer for the best procedure for drilling mounting holes through your type of this time...
Installation Instructions
Page 11
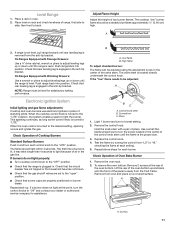
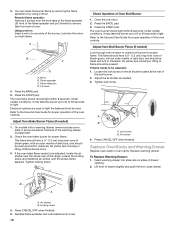
...leveling leg is turned to the "LITE" position, the system creates a spark to adjust leveling legs up and back until the front of the oven bottom. On Ranges Equipped with Storage Drawers: Use a ¼" drive ratchet, wrench or pliers to light because of standing pilots. NOTE: ...approximately ¼" (0.64 cm) high. Light 1 burner and turn the control knobs to turn each burner. Hold the knob stem with a pair of Oven Bake Burner 1. Use a small flatblade screwdriver to "Off" and contact your dealer or authorized service company for each control knob to lowest setting. 2....
...leveling leg is turned to the "LITE" position, the system creates a spark to adjust leveling legs up and back until the front of the oven bottom. On Ranges Equipped with Storage Drawers: Use a ¼" drive ratchet, wrench or pliers to light because of standing pilots. NOTE: ...approximately ¼" (0.64 cm) high. Light 1 burner and turn the control knobs to turn each burner. Hold the knob stem with a pair of Oven Bake Burner 1. Use a small flatblade screwdriver to "Off" and contact your dealer or authorized service company for each control knob to lowest setting. 2....
Installation Instructions
Page 12
... of dark blue, and should light within 8 seconds. Mirror B. Flame reflection D. 2 screws 4. Press the BAKE pad. 5. Check the oven bake burner for proper flame. Check Operation of the warming drawer compartment. 2. Loosen the lock screw on sides of drawer slightly and push firmly... Press the START pad. Tighten locking screw. Press the BROIL pad. 3. If flame needs to close drawer. Press CANCEL/OFF when finished. The oven bake burner should have a ½" (1.3 cm) long inner cone of bluish-green, with a warming drawer, remove access cover plate (1 screw)...
... of dark blue, and should light within 8 seconds. Mirror B. Flame reflection D. 2 screws 4. Press the BAKE pad. 5. Check the oven bake burner for proper flame. Check Operation of the warming drawer compartment. 2. Loosen the lock screw on sides of drawer slightly and push firmly... Press the START pad. Tighten locking screw. Press the BROIL pad. 3. If flame needs to close drawer. Press CANCEL/OFF when finished. The oven bake burner should have a ½" (1.3 cm) long inner cone of bluish-green, with a warming drawer, remove access cover plate (1 screw)...
Installation Instructions
Page 13
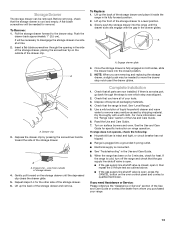
... a soft cloth. Once the storage drawer is level. When the range has been on for 5 minutes, check for specific instruction on the oven control panel and contact a qualified technician. To Remove: 1. It will be removed. Drawer clip 3. NOTE: When you purchased your tools.... all packaging materials. 4. A. Dry thoroughly with the gap in the side of the storage drawer, placing the screwdriver tip on surface burners and oven. Drawer clip - If there is connected. ■ See "Troubleshooting" in its fully forward position. 2. Slowly push the storage drawer into a...
... a soft cloth. Once the storage drawer is level. When the range has been on for 5 minutes, check for specific instruction on the oven control panel and contact a qualified technician. To Remove: 1. It will be removed. Drawer clip 3. NOTE: When you purchased your tools.... all packaging materials. 4. A. Dry thoroughly with the gap in the side of the storage drawer, placing the screwdriver tip on surface burners and oven. Drawer clip - If there is connected. ■ See "Troubleshooting" in its fully forward position. 2. Slowly push the storage drawer into a...


