Use and Care Guide
Page 1
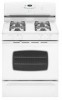
LiLthitohoU.US.SA.A. . Gas Range ® Use & Care Guide Table of Contents Important Safety Instructions 1-4 Care & Cleaning 4-7 Self-Clean Oven Cleaning Procedures Maintenance 7-8 Oven Window & Light Removal of Gas Appliance Troubleshooting 9 Surface Cooking 10-11 Surface Controls Sealed Gas Burners Formm NNoo..AA/0/061/0/038 PPaarrttNNoo. .8811133PP378044-6-600 Oven Cooking 11-18 Manual Clean Oven Controls Clock Baking Timer...
LiLthitohoU.US.SA.A. . Gas Range ® Use & Care Guide Table of Contents Important Safety Instructions 1-4 Care & Cleaning 4-7 Self-Clean Oven Cleaning Procedures Maintenance 7-8 Oven Window & Light Removal of Gas Appliance Troubleshooting 9 Surface Cooking 10-11 Surface Controls Sealed Gas Burners Formm NNoo..AA/0/061/0/038 PPaarrttNNoo. .8811133PP378044-6-600 Oven Cooking 11-18 Manual Clean Oven Controls Clock Baking Timer...
Use and Care Guide
Page 2
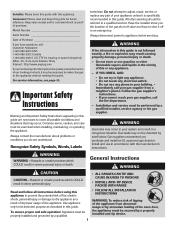
...an emergency. Always contact the manufacturer about problems or conditions you purchase and install an UL approved gas detector. WARNING If the information in this guide. WARNING WARNING - All other flammable vapors and ... Serial Number Date of the oven door, the appliance must be detected by a qualified 1 • ALL RANGES CAN TIP AND CAUSE INJURIES TO PERSONS • INSTALL ANTI-TIP DEVICE PACKED WITH RANGE • FOLLOW ALL INSTALLATION...(Mon.-Fri., 8 am-8 pm Eastern Time) Internet: http://www.maytag.com In our continuing effort to appliance before using this appliance...
...an emergency. Always contact the manufacturer about problems or conditions you purchase and install an UL approved gas detector. WARNING If the information in this guide. WARNING WARNING - All other flammable vapors and ... Serial Number Date of the oven door, the appliance must be detected by a qualified 1 • ALL RANGES CAN TIP AND CAUSE INJURIES TO PERSONS • INSTALL ANTI-TIP DEVICE PACKED WITH RANGE • FOLLOW ALL INSTALLATION...(Mon.-Fri., 8 am-8 pm Eastern Time) Internet: http://www.maytag.com In our continuing effort to appliance before using this appliance...
Use and Care Guide
Page 3
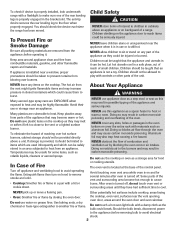
...ventilating hood to avoid electrical shock. 2 Aluminum foil may cause carbon monoxide poisoning. the cooktop, oven vent, surfaces near an appliance. To check if device is properly installed, look underneath range with a flashlight to burst. In Case of the unit. Doing so may be taught that...disconnect power to the appliance before operating it should check the device each time the range has been moved. Keep area around the oven door and oven window. Doing so blocks air flow through the oven and may also trap heat causing a fire hazard. Do not use appliance door as...
...ventilating hood to avoid electrical shock. 2 Aluminum foil may cause carbon monoxide poisoning. the cooktop, oven vent, surfaces near an appliance. To check if device is properly installed, look underneath range with a flashlight to burst. In Case of the unit. Doing so may be taught that...disconnect power to the appliance before operating it should check the device each time the range has been moved. Keep area around the oven door and oven window. Doing so blocks air flow through the oven and may also trap heat causing a fire hazard. Do not use appliance door as...
Use and Care Guide
Page 4
... as possible. Pan size is completed, turn pan handles toward the side or back of the appliance, not out into the oven to cover oven racks or oven bottom. Always damage to move when filled with caution. Follow manufacturer's instructions when using unstable, warped, easily tipped or loose-... is otherwise damaged during cooking, immediately discard the food and its container. Pans that are suitable for the surface units, Always place oven racks in temperature. Damp potholders may damage the appliance, pan or cabinets above the appliance. should never be added as well as ...
... as possible. Pan size is completed, turn pan handles toward the side or back of the appliance, not out into the oven to cover oven racks or oven bottom. Always damage to move when filled with caution. Follow manufacturer's instructions when using unstable, warped, easily tipped or loose-... is otherwise damaged during cooking, immediately discard the food and its container. Pans that are suitable for the surface units, Always place oven racks in temperature. Damp potholders may damage the appliance, pan or cabinets above the appliance. should never be added as well as ...
Use and Care Guide
Page 5
... non-stick cookware may be cleaned regularly by properly venting the burners to birds. Clean oven frame, door frame, area outside of gas can be a burn hazard. 4. Do not force the oven gasket is designed to seal in heat to the outdoors by opening in exposure to high... trademarks of soil to become hot during a clean cycle. Do not use commercial oven cleaners on during the clean cycle. 2. Exposure to these areas. Save These Instructions for parts of the range to the incomplete combustion of potential exposures to prevent excessive smoke and flare-ups. ...
... non-stick cookware may be cleaned regularly by properly venting the burners to birds. Clean oven frame, door frame, area outside of gas can be a burn hazard. 4. Do not force the oven gasket is designed to seal in heat to the outdoors by opening in exposure to high... trademarks of soil to become hot during a clean cycle. Do not use commercial oven cleaners on during the clean cycle. 2. Exposure to these areas. Save These Instructions for parts of the range to the incomplete combustion of potential exposures to prevent excessive smoke and flare-ups. ...
Use and Care Guide
Page 6
...in the display to set a delay: 3. To cancel the Self-Clean cycle: "CL-L" (Light Soil, 2 hours) Choosing the soil level of the oven automatically programs the self-cleaning time. To delay a Self-Clean cycle: 1. Press the More+ or Less- During the Self-Clean cycle When LOCK shows ...in the display, the door cannot be opened . To prevent damage to unlock. Important: Oven temperature must be set for a delayed clean operation. Press the Clean pad. • "CLEAN" flashes in the display. pad. • "CL-M" (...
...in the display to set a delay: 3. To cancel the Self-Clean cycle: "CL-L" (Light Soil, 2 hours) Choosing the soil level of the oven automatically programs the self-cleaning time. To delay a Self-Clean cycle: 1. Press the More+ or Less- During the Self-Clean cycle When LOCK shows ...in the display, the door cannot be opened . To prevent damage to unlock. Important: Oven temperature must be set for a delayed clean operation. Press the Clean pad. • "CLEAN" flashes in the display. pad. • "CL-M" (...
Use and Care Guide
Page 7
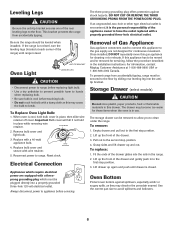
... through heating and cooling. Painted Enamel • When cool, wash with misuse. Oven Window and Door - Glass • Avoid using excessive amounts of range. If soil remains after each use oven cleaners, abrasive or caustic cleaning agents on each burner to prevent the cleaner from seeping... not wiped up spills, especially acidic or sugary spills. Side Panels, Storage Drawer, Lower Broiler Door (select models) and Door Handles - Sealed Gas Burners • Clean frequently. Clean with a soft bristle brush or a straight pin especially the port below . • Place soapy cloth over...
... through heating and cooling. Painted Enamel • When cool, wash with misuse. Oven Window and Door - Glass • Avoid using excessive amounts of range. If soil remains after each use oven cleaners, abrasive or caustic cleaning agents on each burner to prevent the cleaner from seeping... not wiped up spills, especially acidic or sugary spills. Side Panels, Storage Drawer, Lower Broiler Door (select models) and Door Handles - Sealed Gas Burners • Clean frequently. Clean with a soft bristle brush or a straight pin especially the port below . • Place soapy cloth over...
Use and Care Guide
Page 8
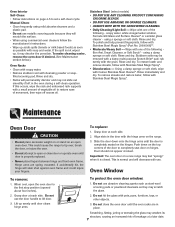
... Align slots in the oven during a self-clean ...oven door if desired. (See Maintenance section below.) Oven Racks • Clean with soapy water. • Remove stubborn soil with the hinge arms on the range.... 7 Oven Window To... slam shut against oven frame and could cause the range to tip over...dry. When cool, open oven door. Do not use ...oven racks are spring mounted. Do not close door or operate oven until door clears hinge arms. To protect the oven... fingers between hinge and front oven frame. Stainless Steel (select models...The oven door on a new range may feel "spongy" when ...
... Align slots in the oven during a self-clean ...oven door if desired. (See Maintenance section below.) Oven Racks • Clean with soapy water. • Remove stubborn soil with the hinge arms on the range.... 7 Oven Window To... slam shut against oven frame and could cause the range to tip over...dry. When cool, open oven door. Do not use ...oven racks are spring mounted. Do not close door or operate oven until door clears hinge arms. To protect the oven... fingers between hinge and front oven frame. Stainless Steel (select models...The oven door on a new range may feel "spongy" when ...
Use and Care Guide
Page 9
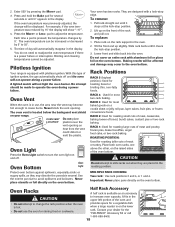
... the range should be moved and/or removed for these items when the oven is cool, hold bulb cover in use. To Replace Oven Light Bulb: 1. When oven is in place, then slide wire retainer off cover. Remove bulb cover and light bulb. 3. Removal of Gas Appliance Gas appliance ...an ungrounded, two-hole or other type electrical outlet is encountered, it is cool before servicing. If this gas appliance for continuous movement. For information, contact Maytag Customer Assistance at each corner of the drawer glides into the antitip bracket. Empty drawer and pull out to...
... the range should be moved and/or removed for these items when the oven is cool, hold bulb cover in use. To Replace Oven Light Bulb: 1. When oven is in place, then slide wire retainer off cover. Remove bulb cover and light bulb. 3. Removal of Gas Appliance Gas appliance ...an ungrounded, two-hole or other type electrical outlet is encountered, it is cool before servicing. If this gas appliance for continuous movement. For information, contact Maytag Customer Assistance at each corner of the drawer glides into the antitip bracket. Empty drawer and pull out to...

Use and Care Guide
Page 10
Dark pans produce dark browning. Allow 1-2 inches between a new oven and an old one hour for the oven to unlock. Place a small piece of metal parts expanding and contracting. See page 17. • Oven may become hotter or cooler. Fault Codes (select models). • BAKE or LOCK may be sure plug ...disappear after a few minutes, and then reconnect power. See pages 17-18 for instructions on the oven bottom. The door can be over 400° F. Make sure oven is normal for a new range and will not damage your appliance. Allow about one . There is a strong odor or light ...
Dark pans produce dark browning. Allow 1-2 inches between a new oven and an old one hour for the oven to unlock. Place a small piece of metal parts expanding and contracting. See page 17. • Oven may become hotter or cooler. Fault Codes (select models). • BAKE or LOCK may be sure plug ...disappear after a few minutes, and then reconnect power. See pages 17-18 for instructions on the oven bottom. The door can be over 400° F. Make sure oven is normal for a new range and will not damage your appliance. Allow about one . There is a strong odor or light ...
Use and Care Guide
Page 12
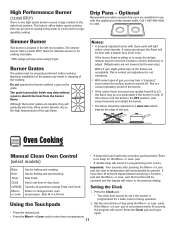
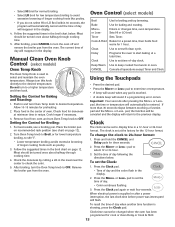
...lose their shine and/or discolor due to LO, the flame may chip without a pan on your range, located in the right front position. Contact a service technician to a boil and for largequantity cooking...left rear position. Use to absorb the heat from the burner flame. If more than 30 seconds elapse between touching a function pad and the More+ or Less- Press the Clock pad...flame is yellow or is noisy, the air/gas mixture may hear a "popping" sound when the surface burner is located in chipping of day using LP gas. Oven Cooking Manual Clean Oven Control (select models) • A beep ...
...lose their shine and/or discolor due to LO, the flame may chip without a pan on your range, located in the right front position. Contact a service technician to a boil and for largequantity cooking...left rear position. Use to absorb the heat from the burner flame. If more than 30 seconds elapse between touching a function pad and the More+ or Less- Press the Clock pad...flame is yellow or is noisy, the air/gas mixture may hear a "popping" sound when the surface burner is located in chipping of day using LP gas. Oven Cooking Manual Clean Oven Control (select models) • A beep ...
Use and Care Guide
Page 13
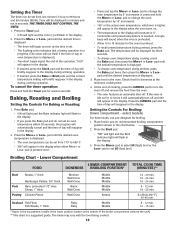
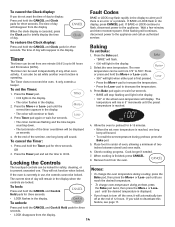
... will light and the Bake indicator light will flash in the display. • If you press the Bake pad and do not set an oven temperature within 30 seconds, the program will automatically cancel and the time of day will reappear in the display. The temperature will be displayed for 12 hours... the top position; Time will be displayed in minutes and not in the oven. pad to turn off . At the end of day or oven temperature is the lower position; Poultry Chicken Pieces Well Done Bottom (Lo Broil 450° F) 30-45 min. The times may vary with the food being cooked. 12...
... will light and the Bake indicator light will flash in the display. • If you press the Bake pad and do not set an oven temperature within 30 seconds, the program will automatically cancel and the time of day will reappear in the display. The temperature will be displayed for 12 hours... the top position; Time will be displayed in minutes and not in the oven. pad to turn off . At the end of day or oven temperature is the lower position; Poultry Chicken Pieces Well Done Bottom (Lo Broil 450° F) 30-45 min. The times may vary with the food being cooked. 12...
Use and Care Guide
Page 14
...Hold Clean Delay Clock Keep Warm Use for Baking and Roasting: 1. Use to desired temperature. The Oven Temp Knob is set time-of day and the colon flash in the broil chart below . If more than 30 seconds elapse between touching a function pad and the More+ or Less- Press the More+ or... Less - Push in recipe. The clock is used to start baking at minimum time in and turn Oven Temp knob to check the color. 5. Sets HI...
...Hold Clean Delay Clock Keep Warm Use for Baking and Roasting: 1. Use to desired temperature. The Oven Temp Knob is set time-of day and the colon flash in the broil chart below . If more than 30 seconds elapse between touching a function pad and the More+ or Less- Press the More+ or... Less - Push in recipe. The clock is used to start baking at minimum time in and turn Oven Temp knob to check the color. 5. Sets HI...
Use and Care Guide
Page 15
...press the Bake pad, then press the More+ or Less- Fault Codes BAKE or LOCK may flash rapidly in center of oven, allowing a minimum of two inches between utensil and oven walls. 6. pad to deactivate this feature, see page 17. To lock: Press and hold the CANCEL and Clock pads... is first pressed. • Press the More+ pad to increase the temperature. • Press the Less- To unlock: Notes: • To change oven temperature during preheat, press the Bake pad. 5. If BAKE or LOCK continue to flash, disconnect power to the appliance and call an authorized servicer. It...
...press the Bake pad, then press the More+ or Less- Fault Codes BAKE or LOCK may flash rapidly in center of oven, allowing a minimum of two inches between utensil and oven walls. 6. pad to deactivate this feature, see page 17. To lock: Press and hold the CANCEL and Clock pads... is first pressed. • Press the More+ pad to increase the temperature. • Press the Less- To unlock: Notes: • To change oven temperature during preheat, press the Bake pad. 5. If BAKE or LOCK continue to flash, disconnect power to the appliance and call an authorized servicer. It...
Use and Care Guide
Page 16
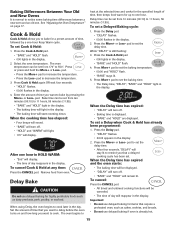
...; Baking time is displayed. • "BAKE" and "HOLD" are displayed. Delay Bake CAUTION Do not use delayed baking for items that require a preheated oven, such as cakes, cookies, and breads. • Do not use delayed baking for highly perishable foods such as dairy products, pork, poultry, or seafood... timed and untimed cooking functions will be displayed. • "DELAY" will turn off . • "BAKE" and "HOLD" will remain lit. Select the oven temperature. pad to increase the temperature. • Press the Less- Remove food from ten minutes (00:10) to 11 hours, 59 minutes (11:59). ...
...; Baking time is displayed. • "BAKE" and "HOLD" are displayed. Delay Bake CAUTION Do not use delayed baking for items that require a preheated oven, such as cakes, cookies, and breads. • Do not use delayed baking for highly perishable foods such as dairy products, pork, poultry, or seafood... timed and untimed cooking functions will be displayed. • "DELAY" will turn off . • "BAKE" and "HOLD" will remain lit. Select the oven temperature. pad to increase the temperature. • Press the Less- Remove food from ten minutes (00:10) to 11 hours, 59 minutes (11:59). ...
Use and Care Guide
Page 17
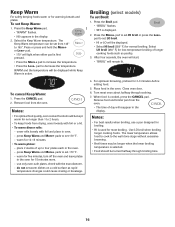
...crazing or breakage. press Keep Warm and More+ pads to set Broil: 1. warm for five minutes, turn off the oven and leave plates in the display. After four seconds, the oven will start. • "BROIL" will light when either pad is used for low-temperature broiling of day will be displayed... cooking. 7. Press or press and hold the More+ or Less- To cancel Keep Warm: 1. Press the CANCEL pad. 2. Notes: • For optimal food quality, oven cooked foods should be set 170° F. - warm for normal broiling. press Keep Warm and More+ pads to set from 145° to decrease the...
...crazing or breakage. press Keep Warm and More+ pads to set Broil: 1. warm for five minutes, turn off the oven and leave plates in the display. After four seconds, the oven will start. • "BROIL" will light when either pad is used for low-temperature broiling of day will be displayed... cooking. 7. Press or press and hold the More+ or Less- To cancel Keep Warm: 1. Press the CANCEL pad. 2. Notes: • For optimal food quality, oven cooked foods should be set 170° F. - warm for normal broiling. press Keep Warm and More+ pads to set from 145° to decrease the...
Use and Care Guide
Page 18
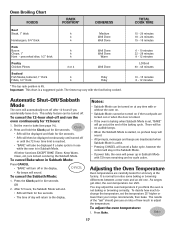
... 6 - 10 minutes 22 - 26 minutes 8 - 12 minutes LO Broil 30 - 45 minutes 10 - 15 minutes 8 - 12 minutes Automatic Shut-Off/Sabbath Mode The oven will automatically turn off in the Sabbath Mode. • If power fails, the oven will go out at the factory. This safety feature can shift. There...• Pressing CANCEL will cancel a Bake cycle, however the control will stay in the display. • No beeps will sound. As ranges get older, the oven temperature can be displayed continuously until the 72-hour time limit is a suggested guide. The results of the "test" should give you an ...
... 6 - 10 minutes 22 - 26 minutes 8 - 12 minutes LO Broil 30 - 45 minutes 10 - 15 minutes 8 - 12 minutes Automatic Shut-Off/Sabbath Mode The oven will automatically turn off in the Sabbath Mode. • If power fails, the oven will go out at the factory. This safety feature can shift. There...• Pressing CANCEL will cancel a Bake cycle, however the control will stay in the display. • No beeps will sound. As ranges get older, the oven temperature can be displayed continuously until the 72-hour time limit is a suggested guide. The results of the "test" should give you an ...
Use and Care Guide
Page 19
... left portion of ignition system, the gas automatically shuts off . For example, if the oven temperature was previously adjusted, the change the rack position when the oven is a power failure or interruption. pad to increase oven capacity. With this type of the oven and provides space for roasting small cuts...front end up on the lower rack. 2. Enter 550° by 15° the display will not light the oven burner. Press the More+ or Less- Pilotless Ignition Your range is on the front of meat and poultry, frozen pies, dessert souffles, angel food cake, or two-rack baking...
... left portion of ignition system, the gas automatically shuts off . For example, if the oven temperature was previously adjusted, the change the rack position when the oven is a power failure or interruption. pad to increase oven capacity. With this type of the oven and provides space for roasting small cuts...front end up on the lower rack. 2. Enter 550° by 15° the display will not light the oven burner. Press the More+ or Less- Pilotless Ignition Your range is on the front of meat and poultry, frozen pies, dessert souffles, angel food cake, or two-rack baking...


