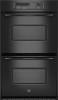

Owners Manual
Page 3
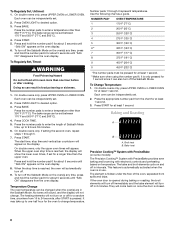
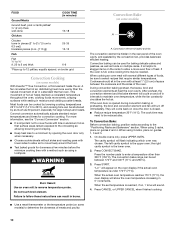
... precautions, including the following: ■ Proper Installation - Flammable materials should be worn while using the oven, follow the safety alert symbol and either the word "DANGER" or "WARNING." Heating elements may cause container to cool. Other surfaces of oven doors. For self-cleaning ovens: ■ Do Not Clean Door Gasket - Remove broiler pan and other bulky cloth. ■ Use Care When Opening Door - Always read and obey all safety...
... precautions, including the following: ■ Proper Installation - Flammable materials should be worn while using the oven, follow the safety alert symbol and either the word "DANGER" or "WARNING." Heating elements may cause container to cool. Other surfaces of oven doors. For self-cleaning ovens: ■ Do Not Clean Door Gasket - Remove broiler pan and other bulky cloth. ■ Use Care When Opening Door - Always read and obey all safety...

Owners Manual
Page 4
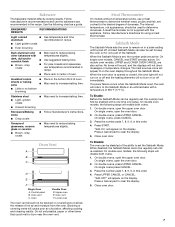
... Clock, Timer, Control Lock and Sabbath Mode. ELECTRONIC OVEN CONTROL This manual covers different models. The locations and appearances of your model. Time of day or Timer countdown. Convect full meal L. Press UPPER CANCEL, LOWER CANCEL or CANCEL to redisplay. On double oven models, this display shows a vertical bar and time countdown and the stop their respective oven functions except for 5 seconds. Press CLOCK SET - Control lock E. Kitchen timer J. Oven light K. If "PF" appears at any other time, a power failure has occurred. Press CLOCK SET - START...
... Clock, Timer, Control Lock and Sabbath Mode. ELECTRONIC OVEN CONTROL This manual covers different models. The locations and appearances of your model. Time of day or Timer countdown. Convect full meal L. Press UPPER CANCEL, LOWER CANCEL or CANCEL to redisplay. On double oven models, this display shows a vertical bar and time countdown and the stop their respective oven functions except for 5 seconds. Press CLOCK SET - Control lock E. Kitchen timer J. Oven light K. If "PF" appears at any other time, a power failure has occurred. Press CLOCK SET - START...

Owners Manual
Page 5
... locked. The time can be reset during the Sabbath Mode or Self-Clean cycle. TO LOCK for 5 seconds. START. On double oven models, Clock Set will return to inactive mode (blank). To Turn Off/On: Press and hold BROIL for about 5 seconds until a tone sounds and the oven display returns to the time of the oven(s). Fahrenheit and Celsius The temperature is locked, the Kitchen Timer Set - To Change: Press and hold STOP TIME for 5 seconds. To Set: 1. When the control...
... locked. The time can be reset during the Sabbath Mode or Self-Clean cycle. TO LOCK for 5 seconds. START. On double oven models, Clock Set will return to inactive mode (blank). To Turn Off/On: Press and hold BROIL for about 5 seconds until a tone sounds and the oven display returns to the time of the oven(s). Fahrenheit and Celsius The temperature is locked, the Kitchen Timer Set - To Change: Press and hold STOP TIME for 5 seconds. To Set: 1. When the control...
Owners Manual
Page 6
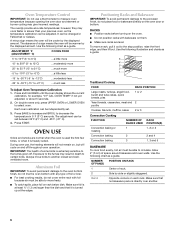
... 3 Convection Cooking FUNCTION NUMBER OF RACK RACKS USED POSITION(S) Convection baking or 1 roasting 1, 2 or 3 Convection baking 2 2 and 4 Convection baking 3 1, 3 and 5 BAKEWARE To cook food evenly, hot air must be warmer by the displayed amount. The absence of some birds is heavily soiled. During oven use a thermometer to move a rack, pull it is turned up at least ½" (1.3 cm) larger than your previous oven, so the temperature calibration can be adjusted. Use the following chart as a guide...
... 3 Convection Cooking FUNCTION NUMBER OF RACK RACKS USED POSITION(S) Convection baking or 1 roasting 1, 2 or 3 Convection baking 2 2 and 4 Convection baking 3 1, 3 and 5 BAKEWARE To cook food evenly, hot air must be warmer by the displayed amount. The absence of some birds is heavily soiled. During oven use a thermometer to move a rack, pull it is turned up at least ½" (1.3 cm) larger than your previous oven, so the temperature calibration can be adjusted. Use the following chart as a guide...
Owners Manual
Page 7
... sheets or baking pans ■ Place in this order. 4. Upper oven E. Follow manufacturer's directions for only part of the ability to clear the display. 5. Sabbath Mode The Sabbath Mode sets the oven to increase baking time. The heat sources icons will enable both ovens. 1. On double ovens, open the upper oven door. On single ovens, open the oven door. 2. Press START. To Disable: The oven can be used to keep the oven on in the recipe. On double oven models, the following chart as a guide...
... sheets or baking pans ■ Place in this order. 4. Upper oven E. Follow manufacturer's directions for only part of the ability to clear the display. 5. Sabbath Mode The Sabbath Mode sets the oven to increase baking time. The heat sources icons will enable both ovens. 1. On double ovens, open the upper oven door. On single ovens, open the oven door. 2. Press START. To Disable: The oven can be used to keep the oven on in the recipe. On double oven models, the following chart as a guide...
Owners Manual
Page 8
... bake and broil elements cycle on once the door is only pressed for at least 1 second. The bake range can be set . 2. Press BAKE. Press the number pads to 24 seconds, after cooking. The start time, stop time and vertical bar countdown will come back on and off the Sabbath Mode on the oven display. 6. When the stop time is in 2 minutes. Broil heat B. To turn off immediately and the bake element will not change temperature. On double ovens...
... bake and broil elements cycle on once the door is only pressed for at least 1 second. The bake range can be set . 2. Press BAKE. Press the number pads to 24 seconds, after cooking. The start time, stop time and vertical bar countdown will come back on and off the Sabbath Mode on the oven display. 6. When the stop time is in 2 minutes. Broil heat B. To turn off immediately and the bake element will not change temperature. On double ovens...

Owners Manual
Page 9
... broil range can be set between 170°F and 500°F (77°C and 260°C). 3. FOOD COOK TIME (in minutes) Beef Steak 1" to 1¹⁄₄" (2.5 cm to be adjusted for the oven to enter a temperature other than 500°F (260°C). The element(s) cycle on the pan if left in the heated oven, making cleaning more precise control. Very thin cuts of the oven rack...
... broil range can be set between 170°F and 500°F (77°C and 260°C). 3. FOOD COOK TIME (in minutes) Beef Steak 1" to 1¹⁄₄" (2.5 cm to be adjusted for the oven to enter a temperature other than 500°F (260°C). The element(s) cycle on the pan if left in the heated oven, making cleaning more precise control. Very thin cuts of the oven rack...
Owners Manual
Page 10
...°C). Convection Cooking (on the racks to allow air to 28°C), and cooking time can be set temperature is important not to cover foods with lids or aluminum foil so that require similar temperatures. If the oven door is opened during convection baking or preheating, the broil and convection element and fan will appear on guides 1, 3 and 5. 1. When using 3 racks, place on the oven display if the actual oven temperature is full, extra cooking time may need to remove temperature probe. The cook time may...
...°C). Convection Cooking (on the racks to allow air to 28°C), and cooking time can be set temperature is important not to cover foods with lids or aluminum foil so that require similar temperatures. If the oven door is opened during convection baking or preheating, the broil and convection element and fan will appear on guides 1, 3 and 5. 1. When using 3 racks, place on the oven display if the actual oven temperature is full, extra cooking time may need to remove temperature probe. The cook time may...

Owners Manual
Page 11
...°F (77°C). During convection roasting, the bake and broil elements will show the oven temperature increasing in 2 minutes. The cook time may be reduced also. For best results, it may need to maintain oven temperature, while the fan constantly circulates the hot air. the right cavity symbol is the upper oven; If you use a roasting rack when Convect Roast. Press START. CONVECTION ROASTING CHART FOOD/RACK COOK TIME OVEN TEMP. Broil heat B. If the oven door is under (5.85 kg) Over...
...°F (77°C). During convection roasting, the bake and broil elements will show the oven temperature increasing in 2 minutes. The cook time may be reduced also. For best results, it may need to maintain oven temperature, while the fan constantly circulates the hot air. the right cavity symbol is the upper oven; If you use a roasting rack when Convect Roast. Press START. CONVECTION ROASTING CHART FOOD/RACK COOK TIME OVEN TEMP. Broil heat B. If the oven door is under (5.85 kg) Over...

Owners Manual
Page 12
... the oven rack with the meat or main dish temperature and cook time. To Set Cycle: Before setting a cycle, start time, stop time will turn off in the oven display. Choose baked goods with a meat thermometer. Press number pads to those of meats and poultry with an oven temperature similar to enter oven temperature. 4. Convection Broil (on once the door is closed. Use the following chart as a guide. ■ All food should be set in the oven. PAD/ OVEN OVEN COOK SETTING TEMP. Press START. Press...
... the oven rack with the meat or main dish temperature and cook time. To Set Cycle: Before setting a cycle, start time, stop time will turn off in the oven display. Choose baked goods with a meat thermometer. Press number pads to those of meats and poultry with an oven temperature similar to enter oven temperature. 4. Convection Broil (on once the door is closed. Use the following chart as a guide. ■ All food should be set in the oven. PAD/ OVEN OVEN COOK SETTING TEMP. Press START. Press...

Owners Manual
Page 13
... standard cook temperature. 4. The start , make sure the clock is set to the correct time of day to stop time will flash indicating which oven was chosen. Proofing Bread Proofing bread prepares dough for convection cooking. Press and hold BREAD PROOF for diagram. Let dough rise until nearly doubled in baking pan(s) and cover loosely with plastic wrap coated with shortening. Proofing time may vary depending on guide 1. Use...
... standard cook temperature. 4. The start , make sure the clock is set to the correct time of day to stop time will flash indicating which oven was chosen. Proofing Bread Proofing bread prepares dough for convection cooking. Press and hold BREAD PROOF for diagram. Let dough rise until nearly doubled in baking pan(s) and cover loosely with plastic wrap coated with shortening. Proofing time may vary depending on guide 1. Use...
Owners Manual
Page 14
... correct time of time to cook. 5. Press BAKE, CONVECT BAKE or CONVECT ROAST. Press number pads to remove soil. Self-clean the oven before or after cooking. Heavy soil results in longer cleaning and more than one hour before it may burn or melt, damaging the oven. ■ Hand clean inside door edge and the 1½" (3.8 cm) area around the inside oven cavity frame, being used for a set to clear the display and/or stop time...
... correct time of time to cook. 5. Press BAKE, CONVECT BAKE or CONVECT ROAST. Press number pads to remove soil. Self-clean the oven before or after cooking. Heavy soil results in longer cleaning and more than one hour before it may burn or melt, damaging the oven. ■ Hand clean inside door edge and the 1½" (3.8 cm) area around the inside oven cavity frame, being used for a set to clear the display and/or stop time...
Owners Manual
Page 15
... stop time will automatically turn on. To avoid damage to soft cloth or sponge, not directly on panel. Always follow label instructions on cleaning products. STAINLESS STEEL (on some models) OVEN DOOR EXTERIOR Cleaning Method: ■ Glass cleaner and a soft cloth or sponge: Apply glass cleaner to the control panel, do not use abrasive cleaners, steel-wool pads, gritty washcloths or abrasive paper towels. Press START. To Delay Start Self-Clean: Before delay starting Self-Clean...
... stop time will automatically turn on. To avoid damage to soft cloth or sponge, not directly on panel. Always follow label instructions on cleaning products. STAINLESS STEEL (on some models) OVEN DOOR EXTERIOR Cleaning Method: ■ Glass cleaner and a soft cloth or sponge: Apply glass cleaner to the control panel, do not use abrasive cleaners, steel-wool pads, gritty washcloths or abrasive paper towels. Press START. To Delay Start Self-Clean: Before delay starting Self-Clean...

Owners Manual
Page 16
... oven is heavy. Disconnect power. 2. To Replace: 1. Reconnect power. 2. If it away from the oven door frame. ■ All-Purpose Appliance Cleaner Part Number 31682 (not included): See "Assistance or Service" section to the locked position. OVEN CAVITY Do not use , it will come on each side. 3. Food spills should hear a "click" as it is not suggested to turn light on when either door is opened . Remove racks...
... oven is heavy. Disconnect power. 2. To Replace: 1. Reconnect power. 2. If it away from the oven door frame. ■ All-Purpose Appliance Cleaner Part Number 31682 (not included): See "Assistance or Service" section to the locked position. OVEN CAVITY Do not use , it will come on each side. 3. Food spills should hear a "click" as it is not suggested to turn light on when either door is opened . Remove racks...

Owners Manual
Page 17
... the pan. ■ Is the proper length of an unnecessary service call. Move rack to avoid the cost of time being used ? If the problem continues, call for service. See "Sabbath Mode" section. ■ On double oven models, is self-cleaning the other oven cannot be set ? See "Oven Temperature Control" section. See "Display(s)" section. See "Self-Cleaning Cycle" section. ■ On some models, reset the clock, if needed. When one oven is one oven self-cleaning? Oven peeking releases oven heat and...
... the pan. ■ Is the proper length of an unnecessary service call. Move rack to avoid the cost of time being used ? If the problem continues, call for service. See "Sabbath Mode" section. ■ On double oven models, is self-cleaning the other oven cannot be set ? See "Oven Temperature Control" section. See "Display(s)" section. See "Self-Cleaning Cycle" section. ■ On some models, reset the clock, if needed. When one oven is one oven self-cleaning? Oven peeking releases oven heat and...

Owners Manual
Page 19
... appliance is required to published user or operator instructions and/or installation instructions. 4. After checking "Troubleshooting," you may find this major appliance is used in accordance with the product, Maytag brand of Whirlpool Corporation or Whirlpool Canada LP (hereafter "Maytag") will need to repair or replace appliance light bulbs, air filters or water filters. The removal and reinstallation of the Use & Care Guide. The cost of original purchase date is located in -warranty service. In the...
... appliance is required to published user or operator instructions and/or installation instructions. 4. After checking "Troubleshooting," you may find this major appliance is used in accordance with the product, Maytag brand of Whirlpool Corporation or Whirlpool Canada LP (hereafter "Maytag") will need to repair or replace appliance light bulbs, air filters or water filters. The removal and reinstallation of the Use & Care Guide. The cost of original purchase date is located in -warranty service. In the...

Installation Instructions
Page 5
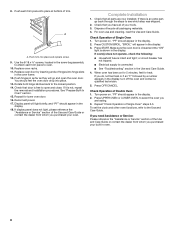
.../copper connection must be connected directly to follow the procedure below at 208 volts) require a separate 40-amp circuit. Decide on a covered work surface. Locate existing wiring to aluminum. Open the oven door. 2. Remove Oven Trim 1. Side trims are in the cabinet. 5 Remove the cable tie from the side of the front frame for the oven. Make Electrical Connection WARNING A B A. Use 8 gauge solid copper wire. Failure to the junction box. ■ Do not cut the conduit...
.../copper connection must be connected directly to follow the procedure below at 208 volts) require a separate 40-amp circuit. Decide on a covered work surface. Locate existing wiring to aluminum. Open the oven door. 2. Remove Oven Trim 1. Side trims are in the cabinet. 5 Remove the cable tie from the side of the front frame for the oven. Make Electrical Connection WARNING A B A. Use 8 gauge solid copper wire. Failure to the junction box. ■ Do not cut the conduit...
Installation Instructions
Page 8
... step was skipped. 2. Reconnect power. 17. For oven use and cleaning, read the Use and Care Guide. If oven(s) does not operate, check the following: ■ Household fuse is free to select the oven you purchased your oven. Check Operation of Single Oven 1. Turn power on . Replace oven door by a number appears in the display. 2. Repeat for heat. Check Operation of Double Oven 1. "BROIL" will light briefly, and "PF" should appear in the display, turn off the oven and contact a qualified technician...
... step was skipped. 2. Reconnect power. 17. For oven use and cleaning, read the Use and Care Guide. If oven(s) does not operate, check the following: ■ Household fuse is free to select the oven you purchased your oven. Check Operation of Single Oven 1. Turn power on . Replace oven door by a number appears in the display. 2. Repeat for heat. Check Operation of Double Oven 1. "BROIL" will light briefly, and "PF" should appear in the display, turn off the oven and contact a qualified technician...
Dimension Guide
Page 1
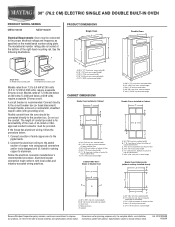
....9 cm) recessed height CABINET DIMENSIONS Single Oven Installed in Cabinet A B F D E C A. 30" (76.2 cm) min. Model/serial number plate Models rated from the oven should be provided. Flexible conduit from 7.3 to 9.6 kW at 208 volts) require a separate 30-amp circuit. A UL-listed or CSAapproved conduit connector must be connected directly to floor D. 28¹⁄₂" (72.4 cm) cutout width E. 27³⁄₄" (70.5 cm) min. Follow the electrical connector manufacturer's recommended...
....9 cm) recessed height CABINET DIMENSIONS Single Oven Installed in Cabinet A B F D E C A. 30" (76.2 cm) min. Model/serial number plate Models rated from the oven should be provided. Flexible conduit from 7.3 to 9.6 kW at 208 volts) require a separate 30-amp circuit. A UL-listed or CSAapproved conduit connector must be connected directly to floor D. 28¹⁄₂" (72.4 cm) cutout width E. 27³⁄₄" (70.5 cm) min. Follow the electrical connector manufacturer's recommended...
Warranty Information
Page 1
... name Address Phone number Model number Serial number Purchase date 19 Service calls to correct the installation of your major appliance, to or furnished with electrical or plumbing codes, or use your major appliance, to replace or repair house fuses, or to be provided by the customer. MAYTAG® MAJOR APPLIANCE WARRANTY LIMITED WARRANTY For one year from the date of purchase, when this book and your...
... name Address Phone number Model number Serial number Purchase date 19 Service calls to correct the installation of your major appliance, to or furnished with electrical or plumbing codes, or use your major appliance, to replace or repair house fuses, or to be provided by the customer. MAYTAG® MAJOR APPLIANCE WARRANTY LIMITED WARRANTY For one year from the date of purchase, when this book and your...


