Use and Care Guide
Page 1
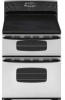
... Page @2006 Maytag Appliances Sales Co. YI AG Electric Srnoothtop and Electric Coil Double Oven Range Precision Touch 500 Series important instructions .'m.!_,_:;, i;i,i:: 1-4 Surface Cooking 5-7 Controls Coil Elements Smoothtop Surface Form No. A/01/08 Oven Cooking 8-15 Upper Oven Control (Manual Clean) Lower Oven Control (Self-Clean) Baking Cook & Hold Delay Bake Keep Warm Broiling (Lower Oven Only) Oven Racks Part No...
... Page @2006 Maytag Appliances Sales Co. YI AG Electric Srnoothtop and Electric Coil Double Oven Range Precision Touch 500 Series important instructions .'m.!_,_:;, i;i,i:: 1-4 Surface Cooking 5-7 Controls Coil Elements Smoothtop Surface Form No. A/01/08 Oven Cooking 8-15 Upper Oven Control (Manual Clean) Lower Oven Control (Self-Clean) Baking Cook & Hold Delay Bake Keep Warm Broiling (Lower Oven Only) Oven Racks Part No...
Use and Care Guide
Page 2
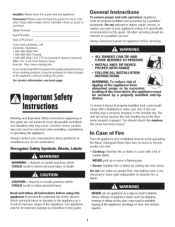
...rear leveling leg to appliance before using this anytime the range has been moved. NEVER pick up or move a flaming pan. * Ovens: Smother fire or flame by a properly installed anti-tip... pm Eastern Time) Internet: http:/iwww.maytag.corn In our continuing effort to cover all instructions before servicing. To check if device is properly installed, look underneath range with a flashlight to make changes to... All other servicing should check this appliance to prevent the potential risk of fire, electric shock, personal injury or damage to the appliance as a step to avoid spreading the...
...rear leveling leg to appliance before using this anytime the range has been moved. NEVER pick up or move a flaming pan. * Ovens: Smother fire or flame by a properly installed anti-tip... pm Eastern Time) Internet: http:/iwww.maytag.corn In our continuing effort to cover all instructions before servicing. To check if device is properly installed, look underneath range with a flashlight to make changes to... All other servicing should check this appliance to prevent the potential risk of fire, electric shock, personal injury or damage to the appliance as a step to avoid spreading the...
Use and Care Guide
Page 3
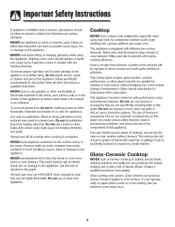
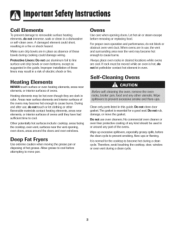
... to prevent curtains from blowing over another surface element. An unattended boilover could ignite clothing or potholder. If pan is used on oven convection systems. The use any part of the appliance unless specifically recommended in risk of the element will improve cooking efficiency. De...can lead to 3ossible burns, injury, fire, or damage to burst resulting in performance problems, and reduce the life of the components of electric shock. NEVER use or store near the appliance. To prevent grease fires, do not adjust, service, repair or replace any devices or ...
... to prevent curtains from blowing over another surface element. An unattended boilover could ignite clothing or potholder. If pan is used on oven convection systems. The use any part of the appliance unless specifically recommended in risk of the element will improve cooking efficiency. De...can lead to 3ossible burns, injury, fire, or damage to burst resulting in performance problems, and reduce the life of the components of electric shock. NEVER use or store near the appliance. To prevent grease fires, do not adjust, service, repair or replace any devices or ...
Use and Care Guide
Page 4
... cooking could short, resulting in a risk of electric shock or fire. Let hot air or steam escape before attempting to move the gasket. Always place oven racks in this guide. Therefore, avoid touching the cooktop, door, window or oven vent during a clean cycle. Allow grease to cause...or flaming. The gasket is hot, do not immerse, soak or clean in a dishwasher or self-clean oven. No commercial oven cleaner or oven liner protective coating of ovens until they are in use aluminum foil to removable surface heating elements, do not let potholder contact hot element...
... cooking could short, resulting in a risk of electric shock or fire. Let hot air or steam escape before attempting to move the gasket. Always place oven racks in this guide. Therefore, avoid touching the cooktop, door, window or oven vent during a clean cycle. Allow grease to cause...or flaming. The gasket is hot, do not immerse, soak or clean in a dishwasher or self-clean oven. No commercial oven cleaner or oven liner protective coating of ovens until they are in use aluminum foil to removable surface heating elements, do not let potholder contact hot element...
Use and Care Guide
Page 5
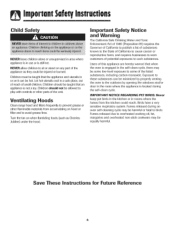
... or filter and to avoid grease fires. Children should be some low-level exposure to some of this appliance are hereby warned that when the oven is engaged in the room where the appliance is located during the self-clean cycle. Important Safety Notice and Warning The California Safe Drinking Water... NEVER leave children alone or unsupervised in area where appliance is in or on it can be harmful or fatal to birds. Ventilating Hoods Clean range hood and filters frequently to prevent grease or other parts of potential exposures to such substances.
... or filter and to avoid grease fires. Children should be some low-level exposure to some of this appliance are hereby warned that when the oven is engaged in the room where the appliance is located during the self-clean cycle. Important Safety Notice and Warning The California Safe Drinking Water... NEVER leave children alone or unsupervised in area where appliance is in or on it can be harmful or fatal to birds. Ventilating Hoods Clean range hood and filters frequently to prevent grease or other parts of potential exposures to such substances.
Use and Care Guide
Page 9
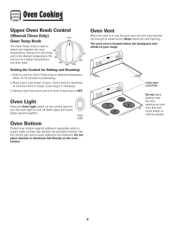
... place utensils or aluminum foil directly on your range. The oven vent is located below the backgnard vent shield on the oven bottom. Oven Light Oven Bottom Protect oven bottom against spillovers, especially acidic or sugary spills, as heat from oven and turn this knob just to select and ...Place food in recipe. Both upper and lower lights operate together. Upper Oven Knob Control CManual Clean Only) Oven Temp Knob The Oven Temp knob is used to the desired temperature. Always turn Oven Temp knob to desired temperature. Check food for doneness at minimum time in...
... place utensils or aluminum foil directly on your range. The oven vent is located below the backgnard vent shield on the oven bottom. Oven Light Oven Bottom Protect oven bottom against spillovers, especially acidic or sugary spills, as heat from oven and turn this knob just to select and ...Place food in recipe. Both upper and lower lights operate together. Upper Oven Knob Control CManual Clean Only) Oven Temp Knob The Oven Temp knob is used to the desired temperature. Always turn Oven Temp knob to desired temperature. Check food for doneness at minimum time in...
Use and Care Guide
Page 10
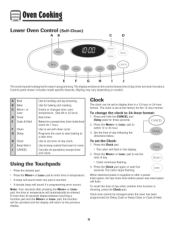
...More+ or Less= pad to the previous display. The colon stops flashing. Enters or changes time, oven temperature. The clock is touched. * A double beep will return to set time-of day, timer and oven functions. Press the More+ or Less= pad to 24=hour format: 1. Note: Four seconds after...temperature will flash. Press the Clock pad. ', The colon will flash in programming. if more than 30 seconds elapse between touching a function pad and the More+ or Less- When electrical power is showing, press the Clock pad. The displaywindow on model.) Broil Bake More+ or LessTimer ...
...More+ or Less= pad to the previous display. The colon stops flashing. Enters or changes time, oven temperature. The clock is touched. * A double beep will return to set time-of day, timer and oven functions. Press the More+ or Less= pad to 24=hour format: 1. Note: Four seconds after...temperature will flash. Press the Clock pad. ', The colon will flash in programming. if more than 30 seconds elapse between touching a function pad and the More+ or Less- When electrical power is showing, press the Clock pad. The displaywindow on model.) Broil Bake More+ or LessTimer ...
Use and Care Guide
Page 11
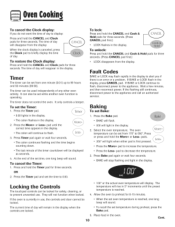
...(99:59). Press Bake pad again or wait four seconds. , BAKE will remain in the display when the controls are locked. , To recall the set oven temperature is currently in the display. At the end of day will stop flashing and light in use . Press or press and hold the CANCEL... and Clock pads for three seconds. if the oven is reached, one minute (0:01) up to decrease the temperature. . Timer , The colon flashes in the display. , The colon will reappear in 5° increments ...
...(99:59). Press Bake pad again or wait four seconds. , BAKE will remain in the display when the controls are locked. , To recall the set oven temperature is currently in the display. At the end of day will stop flashing and light in use . Press or press and hold the CANCEL... and Clock pads for three seconds. if the oven is reached, one minute (0:01) up to decrease the temperature. . Timer , The colon flashes in the display. , The colon will reappear in 5° increments ...

Use and Care Guide
Page 12
...More+ or Less= pad. HOLD and WARM will light. 170° will start counting down. 4. Press the Cook & Hold pad. The oven begins to deactivate this feature, see page 13. Press T...o....s..e...t...a....D...e..l.a...y..e..d... Press Cook & Hold again OR wait four seconds. 2. To cancel Cook & Hold...NCEL%) 8. Press More+ pad to set the baking temperature. * 99:99 and HOLD flash. * BAKE stays lit. 11 Remove food from the oven. Cook longer if needed. 7. Check cooking progress. When cooking is normal to bake by a one hour. 999 lights in the display. 3. ...
...More+ or Less= pad. HOLD and WARM will light. 170° will start counting down. 4. Press the Cook & Hold pad. The oven begins to deactivate this feature, see page 13. Press T...o....s..e...t...a....D...e..l.a...y..e..d... Press Cook & Hold again OR wait four seconds. 2. To cancel Cook & Hold...NCEL%) 8. Press More+ pad to set the baking temperature. * 99:99 and HOLD flash. * BAKE stays lit. 11 Remove food from the oven. Cook longer if needed. 7. Check cooking progress. When cooking is normal to bake by a one hour. 999 lights in the display. 3. ...
Use and Care Guide
Page 13
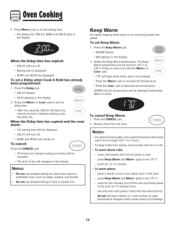
... warm dishes on a cold surface as cakes, cookies, and breads. do not set the baking time. * The Delay time, DELAY, BAKE and HOLD light in oven. Press More+ pad to set 170° F. - WARM flashes. Select the Keep Warm temperature. After four seconds, DELAY will be displayed while Keep Warm is... more. When the Delay time has expired: DELAY will turn off . * BAKE and HOLD will remain lit. When the Delay time has expired and the oven starts: 2. Baking time is already hot. To cancel Keep Warm: 1. The time of up to 190° F. Keep Warm For safely keeping foods warm ...
... warm dishes on a cold surface as cakes, cookies, and breads. do not set the baking time. * The Delay time, DELAY, BAKE and HOLD light in oven. Press More+ pad to set 170° F. - WARM flashes. Select the Keep Warm temperature. After four seconds, DELAY will be displayed while Keep Warm is... more. When the Delay time has expired: DELAY will turn off . * BAKE and HOLD will remain lit. When the Delay time has expired and the oven starts: 2. Baking time is already hot. To cancel Keep Warm: 1. The time of up to 190° F. Keep Warm For safely keeping foods warm ...
Use and Care Guide
Page 14
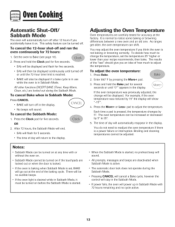
...off or until "0°'' appears in Sabbath Mode with or without the oven on . Adjusting the Oven Temperature Oven temperatures are locked out during the Sabbath Mode. It is in Sabbath Mode, it on . As ranges get older, the oven temperature can be turned on before the Sabbath Mode is a power ...failure or interruption. You may adjust the oven temperature if you an idea of day will automatically reappear in the display....
...off or until "0°'' appears in Sabbath Mode with or without the oven on . Adjusting the Oven Temperature Oven temperatures are locked out during the Sabbath Mode. It is in Sabbath Mode, it on . As ranges get older, the oven temperature can be turned on before the Sabbath Mode is a power ...failure or interruption. You may adjust the oven temperature if you an idea of day will automatically reappear in the display....

Use and Care Guide
Page 15
... times may be slightly lighter if appliance is selected. For optimum browning, preheat broil element for normal broiling. Remove food and broiler pan from the oven. , The time of longer cooking foods such as poultry. 3. Broil times may vary with the food being cooked. 14 7- 12 minutes 8- 14 ...Less= pad to be longer when the lower broiling temperature is installed on a 208-volt circuit. Hi or LO will reappear in the oven. Broiling ([Lower Oven Only) To set LO broil. . Notes: For best results when broiling, use a pan designed for low-temperature broiling of day will...
... times may be slightly lighter if appliance is selected. For optimum browning, preheat broil element for normal broiling. Remove food and broiler pan from the oven. , The time of longer cooking foods such as poultry. 3. Broil times may vary with the food being cooked. 14 7- 12 minutes 8- 14 ...Less= pad to be longer when the lower broiling temperature is installed on a 208-volt circuit. Hi or LO will reappear in the oven. Broiling ([Lower Oven Only) To set LO broil. . Notes: For best results when broiling, use a pan designed for low-temperature broiling of day will...
Use and Care Guide
Page 16
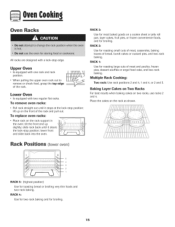
... of meat and poultry, frozen pies, dessert souffles or angel food cake, and two-rack baking. Lower Oven Is equipped with one rack and rack position. lower front and slide back into the oven. Baking Layer Cakes on Two Racks For best results when baking cakes on the rack support in the... rack straight out until it stops at the lock-stop edge. Place the cakes on the front of the rack. Oven Racks All racks are designed with a lock-stop position; When pulling the upper oven rack out to remove or check food, grasp the top edge of the rack and pull out.
... of meat and poultry, frozen pies, dessert souffles or angel food cake, and two-rack baking. Lower Oven Is equipped with one rack and rack position. lower front and slide back into the oven. Baking Layer Cakes on Two Racks For best results when baking cakes on the rack support in the... rack straight out until it stops at the lock-stop edge. Place the cakes on the front of the rack. Oven Racks All racks are designed with a lock-stop position; When pulling the upper oven rack out to remove or check food, grasp the top edge of the rack and pull out.
Use and Care Guide
Page 17
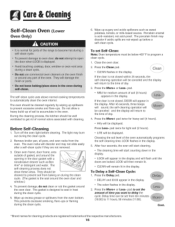
...Press the More+ or Less= pad. , MEd for cleaning products are locked. Cont. * Brand names for medium amount of the respective manufacturers. 16 The oven should be below 400° F to program a clean cycle. 1. Wipe up before cleaning. After 45 seconds, three beeps will sound, the self-cleaning ... display. Press the Delay pad. , DELAY and 00:00 appear in the display. , The colon flashes in the display. Cleanln Self=Clean Oven (Lower Oven Only) The self-clean cycle uses above-normal cooking temperatures to 11 hours, 59 minutes (11:59). Do not allow a heavy build-up...
...Press the More+ or Less= pad. , MEd for cleaning products are locked. Cont. * Brand names for medium amount of the respective manufacturers. 16 The oven should be below 400° F to program a clean cycle. 1. Wipe up before cleaning. After 45 seconds, three beeps will sound, the self-cleaning ... display. Press the Delay pad. , DELAY and 00:00 appear in the display. , The colon flashes in the display. Cleanln Self=Clean Oven (Lower Oven Only) The self-clean cycle uses above-normal cooking temperatures to 11 hours, 59 minutes (11:59). Do not allow a heavy build-up...
Use and Care Guide
Page 18
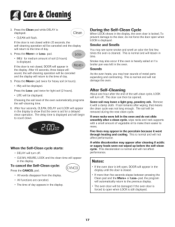
... cycle: _l_ Press the CANCEL pad. * All words disappear from the display. * All functions are canceled. * The time of day appears in the display, the oven door is locked. During the Self=Clean Cycle When LOCK shows in the display. Smoke may appear after a clean cycle, wipe racks and rack supports... pad and the More+ or Less- This discoloration is set for medium amount of day. 5. After Self=Cleaning About one hour after wiping, that the oven is normal and will flash. The door can then be removed during the next clean cycle. The soil will appear in the display to count...
... cycle: _l_ Press the CANCEL pad. * All words disappear from the display. * All functions are canceled. * The time of day appears in the display, the oven door is locked. During the Self=Clean Cycle When LOCK shows in the display. Smoke may appear after a clean cycle, wipe racks and rack supports... pad and the More+ or Less- This discoloration is set for medium amount of day. 5. After Self=Cleaning About one hour after wiping, that the oven is normal and will flash. The door can then be removed during the next clean cycle. The soil will appear in the display to count...
Use and Care Guide
Page 19
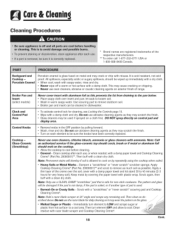
... water, rinse and dry. * Never wipe off a warm or hot surface with a damp paper towel and let stand 30 to 45 minutes (2-3 hours for dailycleaning asit may be sure the knobs have been correctly replaced. Dampen a "scratchless" or...* Burned=On or Crusty Soils - All spillovers, especially acidic or sugary spillovers, should melt on each use oven cleaners, chlorine bleach, ammonia or glass cleaners with a clean dry cloth. Clean cooktop after each element to cook...and Cooktop Cleaning Creme*. Cleaning Procedures * Brand names are registered trademarks of range.
... water, rinse and dry. * Never wipe off a warm or hot surface with a damp paper towel and let stand 30 to 45 minutes (2-3 hours for dailycleaning asit may be sure the knobs have been correctly replaced. Dampen a "scratchless" or...* Burned=On or Crusty Soils - All spillovers, especially acidic or sugary spillovers, should melt on each use oven cleaners, chlorine bleach, ammonia or glass cleaners with a clean dry cloth. Clean cooktop after each element to cook...and Cooktop Cleaning Creme*. Cleaning Procedures * Brand names are registered trademarks of range.
Use and Care Guide
Page 20
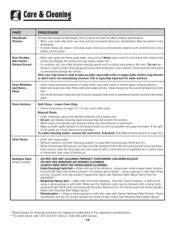
... wash with soapy water. Surface may discolor the porcelain. Cleanin l Drip Bowls Chrome Door HandJes, Side Panels Painted Enamel Oven Windows and Doors = Glass Oven interiors Oven Racks Stainless Steel (select models:) Chrome will not affect cooking performance. * When cool, wash after each use, rinse ... overheated. Rinse with Cameo Stainless Steel Cleaner*. Wipe up spills, especially acidic or sugary spills. To make cleaning easier, remove the oven door, if desired. (See Maintenance section on a cloth first. Wipe with soap and water. soapy water, white vi nega r/...
... wash with soapy water. Surface may discolor the porcelain. Cleanin l Drip Bowls Chrome Door HandJes, Side Panels Painted Enamel Oven Windows and Doors = Glass Oven interiors Oven Racks Stainless Steel (select models:) Chrome will not affect cooking performance. * When cool, wash after each use, rinse ... overheated. Rinse with Cameo Stainless Steel Cleaner*. Wipe up spills, especially acidic or sugary spills. To make cleaning easier, remove the oven door, if desired. (See Maintenance section on a cloth first. Wipe with soap and water. soapy water, white vi nega r/...
Use and Care Guide
Page 21
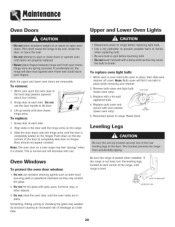
... glass. 2. Replace with pots, pans, furniture, toys, or other objects. 3. RETAINER 5. eintenence Oven Doors Upper and Lower Oven Lights Both the upper and lower oven doors are in place. Grasp door at each corner of the range, until the door is leveled when installed. Slide the door down on a new...not held in the door with the hinge arms on the hinges. This is closed. To replace oven light bulb: 1. Reconnect power to the broil stop position (opened about four inches). 2. If the range is not level, turn the leveling legs, located at a later date. To remove: 1. Be...
... glass. 2. Replace with pots, pans, furniture, toys, or other objects. 3. RETAINER 5. eintenence Oven Doors Upper and Lower Oven Lights Both the upper and lower oven doors are in place. Grasp door at each corner of the range, until the door is leveled when installed. Slide the door down on a new...not held in the door with the hinge arms on the hinges. This is closed. To replace oven light bulb: 1. Reconnect power to the broil stop position (opened about four inches). 2. If the range is not level, turn the leveling legs, located at a later date. To remove: 1. Be...
Use and Care Guide
Page 22
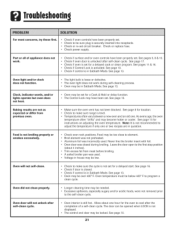
... program a clean cycle. Check to make sure range is level. Oven may become hotter or cooler. Oven did not clean properly. Oven interior is activated. Food is in question. , Check oven rack positions. See page 8 for instructions on adjusting the oven temperature. Never line the broiler insert with foil. , Oven doorwas closed . Check if door is closed...
... program a clean cycle. Check to make sure range is level. Oven may become hotter or cooler. Oven did not clean properly. Oven interior is activated. Food is in question. , Check oven rack positions. See page 8 for instructions on adjusting the oven temperature. Never line the broiler insert with foil. , Oven doorwas closed . Check if door is closed...
Use and Care Guide
Page 23
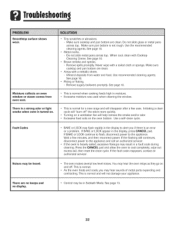
...the oven relays as they go on the oven bottom. Press the CANCEL pad and allow the oven to the appliance and call an authorized servicer. , If the oven is heavily soiled, excessive fiareups may be heard. , The oven makes several low level noises. This is normal for a new range and... pan bottom is normal when cooking foods high in a fault code during cleaning. See page 18. , Brown streaks and specks. - Mineral deposits from oven vent. , Tiny scratches or abrasions. - Moisture collects on . , This is normal and will disappear after a few minutes, and then reconnect power....
...the oven relays as they go on the oven bottom. Press the CANCEL pad and allow the oven to the appliance and call an authorized servicer. , If the oven is heavily soiled, excessive fiareups may be heard. , The oven makes several low level noises. This is normal for a new range and... pan bottom is normal when cooking foods high in a fault code during cleaning. See page 18. , Brown streaks and specks. - Mineral deposits from oven vent. , Tiny scratches or abrasions. - Moisture collects on . , This is normal and will disappear after a few minutes, and then reconnect power....


