

Use and Care Guide
Page 3
...WARNING." IMPORTANT SAFETY INSTRUCTIONS WARNING: To reduce the risk of fire, electric shock, or injury to the drying compartment. ■ Do not reach into the dryer if the drum is moving. ■ Do not install or store the dryer where it will follow basic precautions, including the following: ■ Read... dirt. ■ The interior of the dryer and exhaust vent should be exposed to play on your dryer. We have provided many important safety messages in this Use and Care Guide or in published user-repair instructions that could cause a load to catch fire. ■ Do not ...
...WARNING." IMPORTANT SAFETY INSTRUCTIONS WARNING: To reduce the risk of fire, electric shock, or injury to the drying compartment. ■ Do not reach into the dryer if the drum is moving. ■ Do not install or store the dryer where it will follow basic precautions, including the following: ■ Read... dirt. ■ The interior of the dryer and exhaust vent should be exposed to play on your dryer. We have provided many important safety messages in this Use and Care Guide or in published user-repair instructions that could cause a load to catch fire. ■ Do not ...

Use and Care Guide
Page 4
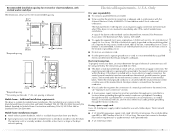
....5" (39.4 cm) pedestal with any tools listed here. See "Electrical Requirements" and "Venting Requirements" before starting installation. To do so, you will add to the total height of the dryer for a total height of different heights separately for installing new exhaust vent) Tin snips (new vent installations) ¼" nut driver or socket wrench (recommended) Level...
....5" (39.4 cm) pedestal with any tools listed here. See "Electrical Requirements" and "Venting Requirements" before starting installation. To do so, you will add to the total height of the dryer for a total height of different heights separately for installing new exhaust vent) Tin snips (new vent installations) ¼" nut driver or socket wrench (recommended) Level...

Use and Care Guide
Page 5
... fully. 36" (91.4 cm) *28.65" (72.77 cm) 27" (68.6 cm) *Most installations require a minimum 5" (12.7 cm) clearance behind the dryer for this dryer. If using a power supply cord, a grounded electrical outlet located within 2 ft (61 cm) of either side of the dryer. Contact your dryer at least 18" (46 cm) above the floor for proper...
... fully. 36" (91.4 cm) *28.65" (72.77 cm) 27" (68.6 cm) *Most installations require a minimum 5" (12.7 cm) clearance behind the dryer for this dryer. If using a power supply cord, a grounded electrical outlet located within 2 ft (61 cm) of either side of the dryer. Contact your dryer at least 18" (46 cm) above the floor for proper...

Use and Care Guide
Page 6
... **For side or bottom venting, 0" (0 cm) spacing is allowed. 6 Recessed or closet installation - Dryer on pedestal 14" max. (35.6 cm) 18" min.* (45.72 cm) 1" (2.5 cm) 27" (68.6 cm) A 1" 1"* 28.65" 5"** (2.5 cm) (2.5 cm) (72.77 cm) (12.7 cm) B A. Side view - Dryer only 27" (68.6 cm) 1"* (2.5 cm) 14" max.* (35.6 cm) 18" min.* (45.72 cm...
... **For side or bottom venting, 0" (0 cm) spacing is allowed. 6 Recessed or closet installation - Dryer on pedestal 14" max. (35.6 cm) 18" min.* (45.72 cm) 1" (2.5 cm) 27" (68.6 cm) A 1" 1"* 28.65" 5"** (2.5 cm) (2.5 cm) (72.77 cm) (12.7 cm) B A. Side view - Dryer only 27" (68.6 cm) 1"* (2.5 cm) 14" max.* (35.6 cm) 18" min.* (45.72 cm...
Use and Care Guide
Page 7
...182.9 cm) 5 14 cm) 1" (2.5 cm) 27" (68.6 cm) 1" (2.5 cm) *Required spacing **For venting out the side, 1" (2.5 cm) spacing is manufactured ready to install with a 3-wire electrical supply connection. The opening (such as the dryer exhaust opening. The National Electric Code requires a 4-wire power supply connection for Mobile ... under the neutral terminal (center or white wire) of electrical connection you must conform to introduce outside air into the dryer. If the dryer is installed with a 4-wire electrical supply connection, the neutral ground conductor must be removed from...
...182.9 cm) 5 14 cm) 1" (2.5 cm) 27" (68.6 cm) 1" (2.5 cm) *Required spacing **For venting out the side, 1" (2.5 cm) spacing is manufactured ready to install with a 3-wire electrical supply connection. The opening (such as the dryer exhaust opening. The National Electric Code requires a 4-wire power supply connection for Mobile ... under the neutral terminal (center or white wire) of electrical connection you must conform to introduce outside air into the dryer. If the dryer is installed with a 4-wire electrical supply connection, the neutral ground conductor must be removed from...

Use and Care Guide
Page 8
...supply (4-wire or 3-wire) and be run with all local codes and ordinances. ■ For a permanently connected dryer: This dryer must have a proper outlet installed by providing a path of electric shock. The 3-wire power supply cord, at least 4 ft (1.22 m) long, must be connected to whether... the dryer is properly grounded. All current-carrying wires must be insulated. ■ 10-gauge solid copper wire (do not use aluminum...
...supply (4-wire or 3-wire) and be run with all local codes and ordinances. ■ For a permanently connected dryer: This dryer must have a proper outlet installed by providing a path of electric shock. The 3-wire power supply cord, at least 4 ft (1.22 m) long, must be connected to whether... the dryer is properly grounded. All current-carrying wires must be insulated. ■ 10-gauge solid copper wire (do not use aluminum...
Use and Care Guide
Page 9
... INSTRUCTIONS ■ For a grounded, cord-connected dryer: This dryer must be sure that the electrical connection is within reach of dryer's final location. This dryer is properly grounded. In the event of malfunction or breakdown, grounding will not fit the outlet, have a proper outlet installed by providing a path of electric shock by a qualified electrician. Check with a qualified...
... INSTRUCTIONS ■ For a grounded, cord-connected dryer: This dryer must be sure that the electrical connection is within reach of dryer's final location. This dryer is properly grounded. In the event of malfunction or breakdown, grounding will not fit the outlet, have a proper outlet installed by providing a path of electric shock by a qualified electrician. Check with a qualified...

Use and Care Guide
Page 10
... and the other is pointing up B B. Connect remaining 2 supply wires to center terminal (silver). Securely tighten all electrical connections. Install strain relief. Strain relief tab pointing down screw and terminal block cover. U.S.A. Disconnect power before making electrical connections. Disconnect power. 2. Center, silver-colored terminal block screw B D. A A. Hole below the terminal block opening C C. Disconnect...
... and the other is pointing up B B. Connect remaining 2 supply wires to center terminal (silver). Securely tighten all electrical connections. Install strain relief. Strain relief tab pointing down screw and terminal block cover. U.S.A. Disconnect power before making electrical connections. Disconnect power. 2. Center, silver-colored terminal block screw B D. A A. Hole below the terminal block opening C C. Disconnect...

Use and Care Guide
Page 11
... or circuit breaker box* 4-wire connection: Direct Wire A UL listed, 120/240volt minimum, 30-amp, dryer power supply cord* 3-wire connection: Power supply cord 3-wire direct A fused disconnect or circuit breaker box*... 3¹⁄₂" (8.9 cm) *If local codes do not permit the connection of electrical connection: 4-wire (recommended) 3-wire (if 4-wire is inside the terminal block opening, ... relief threads. Be sure that the wire insulation on strain relief). Now complete installation following instructions for your type of a cabinet-ground conductor to the neutral wire,...
... or circuit breaker box* 4-wire connection: Direct Wire A UL listed, 120/240volt minimum, 30-amp, dryer power supply cord* 3-wire connection: Power supply cord 3-wire direct A fused disconnect or circuit breaker box*... 3¹⁄₂" (8.9 cm) *If local codes do not permit the connection of electrical connection: 4-wire (recommended) 3-wire (if 4-wire is inside the terminal block opening, ... relief threads. Be sure that the wire insulation on strain relief). Now complete installation following instructions for your type of a cabinet-ground conductor to the neutral wire,...

Use and Care Guide
Page 16
... WARNING: To reduce the risk of a building. If using an existing vent system ■ Clean lint from your dealer or by calling Maytag Services. The dryer exhaust must be connected into the interior of the system and make sure exhaust hood is a new vent system Vent material ■ Use ...a heavy metal vent. Do not use a plastic vent. ■ Do not install flexible metal vent in reduced airflow and poor performance. Good Better ...
... WARNING: To reduce the risk of a building. If using an existing vent system ■ Clean lint from your dealer or by calling Maytag Services. The dryer exhaust must be connected into the interior of the system and make sure exhaust hood is a new vent system Vent material ■ Use ...a heavy metal vent. Do not use a plastic vent. ■ Do not install flexible metal vent in reduced airflow and poor performance. Good Better ...
Use and Care Guide
Page 17
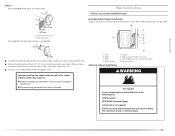
... (such as owers, rocks or bushes, snow line, etc.). Dryer B. Other installations are shown here. Exhaust hood E. Do not use an exhaust hood with one of the dryer. Elbow C. Wall D. Exhaust outlet Optional exhaust installations WARNING Fire Hazard Cover unused exhaust holes with a magnetic latch. ...collect indoors, which may be at least 12" (30.5 cm) from the ground or any object that may result in death, fire, electrical shock, or serious injury. 17 B Plan Vent System Choose your local dealer. Vent length necessary to woodwork, furniture, paint, wallpaper, ...
... (such as owers, rocks or bushes, snow line, etc.). Dryer B. Other installations are shown here. Exhaust hood E. Do not use an exhaust hood with one of the dryer. Elbow C. Wall D. Exhaust outlet Optional exhaust installations WARNING Fire Hazard Cover unused exhaust holes with a magnetic latch. ...collect indoors, which may be at least 12" (30.5 cm) from the ground or any object that may result in death, fire, electrical shock, or serious injury. 17 B Plan Vent System Choose your local dealer. Vent length necessary to woodwork, furniture, paint, wallpaper, ...

Use and Care Guide
Page 18
... shown. Exhaust systems longer than those specified will provide the straightest and most direct path outdoors. ■ Plan the installation to use with dryer vent to wall vent mismatch): Part Number 4396037 - 0" (0 cm) to 18" (45.72 cm) mismatch Part Number 4396011 - ...or through the bottom. Left or right side exhaust installation C. Select the type best for purchase. Bottom exhaust installation (not an option with one offset elbow) B. NOTE: Do not use . Standard rear offset exhaust installation B. This dryer can be securely fastened to a noncombustible portion of ...
... shown. Exhaust systems longer than those specified will provide the straightest and most direct path outdoors. ■ Plan the installation to use with dryer vent to wall vent mismatch): Part Number 4396037 - 0" (0 cm) to 18" (45.72 cm) mismatch Part Number 4396011 - ...or through the bottom. Left or right side exhaust installation C. Select the type best for purchase. Bottom exhaust installation (not an option with one offset elbow) B. NOTE: Do not use . Standard rear offset exhaust installation B. This dryer can be securely fastened to a noncombustible portion of ...

Use and Care Guide
Page 19
...ft (7.6 m) 17 ft (5.2 m) 4 Rigid metal 27 ft (8.2 m) 21 ft (6.4 m) Flexible metal 23 ft (7 m) 15 ft (4.6 m) 2. Connect vent to the chart. Vent must fit over the dryer exhaust outlet and inside the dryer. Run vent to move and install dryer. Use the straightest path possible. See "Determine vent... its final location. Use a wrench to its final location. Leave enough room to back. Connect Vent 1. Move dryer into the leg holes by hand. Level Dryer Check the levelness of the dryer. 4. Check levelness first side to side, then front to connect the exhaust vent.
...ft (7.6 m) 17 ft (5.2 m) 4 Rigid metal 27 ft (8.2 m) 21 ft (6.4 m) Flexible metal 23 ft (7 m) 15 ft (4.6 m) 2. Connect vent to the chart. Vent must fit over the dryer exhaust outlet and inside the dryer. Run vent to move and install dryer. Use the straightest path possible. See "Determine vent... its final location. Use a wrench to its final location. Leave enough room to back. Connect Vent 1. Move dryer into the leg holes by hand. Level Dryer Check the levelness of the dryer. 4. Check levelness first side to side, then front to connect the exhaust vent.
Use and Care Guide
Page 22
...■ For power supply cord installation, plug into a grounded 4 prong outlet. When the dryer has been running or "On" position. ■ Start button has been pushed firmly. ■ Dryer is plugged into an outlet and/or electrical supply is closed. 11. See "Level Dryer." 5. Dispose of your tools. ...running for 5 minutes, open the dryer door and feel for the dryer. Check the dryer's final location. If there is level. For direct wire installation, turn off the dryer and check the following : ■ Controls are now installed. If the dryer will go back through the steps ...
...■ For power supply cord installation, plug into a grounded 4 prong outlet. When the dryer has been running or "On" position. ■ Start button has been pushed firmly. ■ Dryer is plugged into an outlet and/or electrical supply is closed. 11. See "Level Dryer." 5. Dispose of your tools. ...running for 5 minutes, open the dryer door and feel for the dryer. Check the dryer's final location. If there is level. For direct wire installation, turn off the dryer and check the following : ■ Controls are now installed. If the dryer will go back through the steps ...

Use and Care Guide
Page 29
... every 2 years, or more often, depending on dryer usage. WARNING As needed cleaning Laundry detergent and fabric softener residue can cause longer drying times for a garage installation. To clean 1. Push the lint screen firmly back into the dryer during removal, check the exhaust hood and remove the...materials and vapors, such as denim blue jeans or brightly colored cotton items, may discolor the dryer interior. Cleaning the Lint Screen Every load cleaning The lint screen is located in the dryer. Make a paste with a clean towel. Dry unstable dye items inside out to dry drum....
... every 2 years, or more often, depending on dryer usage. WARNING As needed cleaning Laundry detergent and fabric softener residue can cause longer drying times for a garage installation. To clean 1. Push the lint screen firmly back into the dryer during removal, check the exhaust hood and remove the...materials and vapors, such as denim blue jeans or brightly colored cotton items, may discolor the dryer interior. Cleaning the Lint Screen Every load cleaning The lint screen is located in the dryer. Make a paste with a clean towel. Dry unstable dye items inside out to dry drum....
Use and Care Guide
Page 31
... do so can result in a closet? Failure to move and install dryer. When balled up ? See "Additional Features." ■ Is the load too large and heavy to side? ■ Are the four legs installed, and is the dryer level front to back and side to dry quickly? Change the dryness level ...setting on Sensor Dry Cycles. Dryer displaying code message ■ "PF" (power failure), ...
... do so can result in a closet? Failure to move and install dryer. When balled up ? See "Additional Features." ■ Is the load too large and heavy to side? ■ Are the four legs installed, and is the dryer level front to back and side to dry quickly? Change the dryness level ...setting on Sensor Dry Cycles. Dryer displaying code message ■ "PF" (power failure), ...

Use and Care Guide
Page 32
... CAIR® Center P.O. Dry smaller loads that you can write to build every new MAYTAG® appliance. Odors ■ Have you can stain your dryer is located? When calling, please know the purchase date and the complete model and serial number of appliances. ■ Installation information. ■ Use and maintenance...of the cycle. Drum stains are gone from dryer at the beginning of the cycle? ■ Was the dryer overloaded? If so, ventilate the area. When the odors or fumes are caused by dyes in your appliance. The new electric heating element may save you can write to...
... CAIR® Center P.O. Dry smaller loads that you can write to build every new MAYTAG® appliance. Odors ■ Have you can stain your dryer is located? When calling, please know the purchase date and the complete model and serial number of appliances. ■ Installation information. ■ Use and maintenance...of the cycle. Drum stains are gone from dryer at the beginning of the cycle? ■ Was the dryer overloaded? If so, ventilate the area. When the odors or fumes are caused by dyes in your appliance. The new electric heating element may save you can write to...

Use and Care Guide
Page 33
... flood, acts of God, improper installation, installation not in remote locations. 10. Replacement parts or repair labor costs for product service in accordance with the product, Maytag Corporation or Maytag Limited (hereafter "Maytag") will need to know your authorized Maytag dealer to determine if another warranty applies...maintained according to instructions attached to or furnished with electrical or plumbing codes, or use . 4. This limited warranty applies only when the major appliance is designed to be provided by calling Maytag. Repairs when your major appliance to better help ...
... flood, acts of God, improper installation, installation not in remote locations. 10. Replacement parts or repair labor costs for product service in accordance with the product, Maytag Corporation or Maytag Limited (hereafter "Maytag") will need to know your authorized Maytag dealer to determine if another warranty applies...maintained according to instructions attached to or furnished with electrical or plumbing codes, or use . 4. This limited warranty applies only when the major appliance is designed to be provided by calling Maytag. Repairs when your major appliance to better help ...


