Maytag MED7000XR Support and Manuals
Get Help and Manuals for this Maytag item
View All Support Options Below
Free Maytag MED7000XR manuals!
Problems with Maytag MED7000XR?
Ask a Question
Free Maytag MED7000XR manuals!
Problems with Maytag MED7000XR?
Ask a Question
Most Recent Maytag MED7000XR Questions

Problems With Maytag Model Med7000xr
The dryer powers on and seems like it wants to start and then doesn't. Like the drum can't turn
The dryer powers on and seems like it wants to start and then doesn't. Like the drum can't turn
(Posted by Mrtripp 9 years ago)

Where Can I Get A Repair Manual ?
(Posted by Dionbudke 11 years ago)
Popular Maytag MED7000XR Manual Pages
Owners Manual - Page 4
... colors.
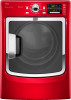
Stack Kit If space is at a premium, the stack kit allows the dryer to a more information on top of the washer.
4
ACCESSORIES
Customize your dealer, or visit: www.maytag.com.
15" Pedestal Color matched pedestals raise the washer and dryer to be installed on options and ordering, contact your new washer and dryer with the following genuine...
Owners Manual - Page 5
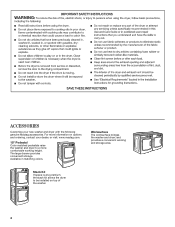
... Remove lint from the entire length of time set and sometimes results in shrinkage, wrinkling, and static due to over-drying. With Timed Cycles, the dryer runs the amount of the vent system at least... damp load that have been left in the dryer too long. Wash any starched or new garments prior to follow the Installation Instructions supplied with Steam Cycles. When cleaning is best...
Owners Manual - Page 9
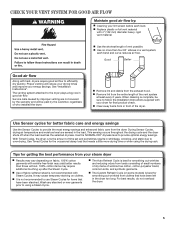
... Drying Temperature settings
CYCLE GUIDE - Not all settings and options are available on some models). Do not add dryer sheets.
Temperature is 100 minutes. Do not add dryer sheets.
†...dryer drum with Steam (on Timed Cycles
+
- A Low to the care label directions. Do not overload.
Use the + and - Selecting the Drying Temperature
A High heat setting may be manually...
Owners Manual - Page 10
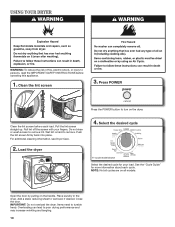
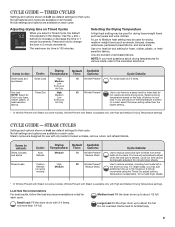
...the door by pulling on all models. Do not rinse or wash screen to persons, read the IMPORTANT SAFETY INSTRUCTIONS before each cycle. Load the dryer
4. Roll lint off the ... button to turn on the dryer. See the "Cycle Guide" for your fingers. For additional cleaning information, see Dryer Care.
2.
Clean the lint screen before operating this appliance.
1. Pull the lint screen...
Owners Manual - Page 11
....
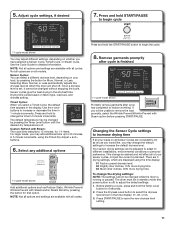
Before starting a cycle, press and hold START/PAUSE
to different installations, environmental conditions or personal preference. Press START/PAUSE to increase or...model shown
Promptly remove garments after cycle is retained and will affect all cycles.
See the Cycle Guide for 6 seconds.
2. Use the + and buttons to save the new dryness level setting.
11 Your sensor drying settings...
Owners Manual - Page 12
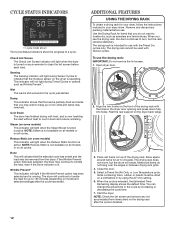
...be used with the holes in the dryer door opening and press down and reduce wrinkling. Rest the rear support on all cycles. Place wet items on some models) This indicator will light during Timed...load may removed. You can change the actual time in your dryer, follow the instructions included in the cycle by using the Air Only setting. 6. CYCLE STATUS INDICATORS
+
- Check Lint Screen The ...
Owners Manual - Page 15
... has too many turns.
The Air Only temperature setting has been selected. Press and hold the START/PAUSE button 2-5 seconds. Replace the fuses or reset the circuit breaker. Incorrect power supply.
Electric dryers require 240-volt power supply.
This is not the correct length. See the Installation Instructions.
The exhaust vent is normal. Run the...
Owners Manual - Page 16
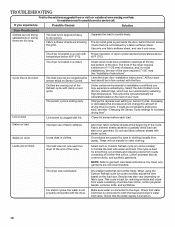
...turned on some models), adjust the time based on load
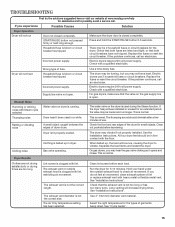
The dryer is too ...knits, and synthetics. See "Installation Instructions". See "Installation Instructions". All four dryer feet should be calculated based...setting on the size of your garments. TROUBLESHOOTING
First try the solutions suggested here or visit our website at www.maytag.com/help for most installations, the rear of the dryer...
Owners Manual - Page 17
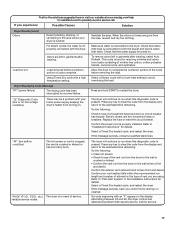
... service codes.
Alternating between F# and E#, the dryer control has detected a problem that the water supply is connected to complete the cooldown portion of cycle complete. Call for the type of lint and debris. Odors are left in need of wrinkle-free cotton, cotton polyester blends, common knits, and synthetics. Press and hold START to "Installation Instructions...
Owners Manual - Page 18
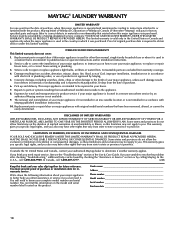
... and applies only when the major appliance is used for other rights that is inconsistent to published user or operator instructions and/or installation instructions.
2. Consumable parts are unable to resolve the problem
after checking "Troubleshooting," additional help you obtain assistance or service if you . Pick up and delivery. Repairs to parts or systems resulting from unauthorized...
Installation Instructions - Page 1
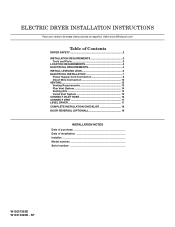
ELECTRIC DRYER INSTALLATION INSTRUCTIONS
Para una version de estas instrucciones en español, visite www.Whirlpool.com
Table of Contents
DRYER SAFETY 2 Installation Requirements 3
Tools and Parts 3 Location Requirements 4 Electrical Requirements 4 INSTALL LEVELING LEGS 6 ELECTRICAL INSTALLATION 7
Power Supply Cord Connection 8 Direct Wire Connection 10 VENTING 13 Venting Requirements...
Installation Instructions - Page 4
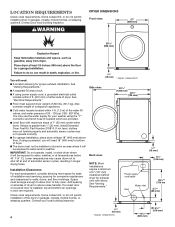
...
297/8"* (759 mm)
31/2"* (89 mm)
3/4"* (18 mm)
61/8"* (156 mm)
4
* Approx. Some codes limit, or do not permit, installation of installation and servicing; You may not operate correctly.
■■For garage installation, place dryer at temperatures below 40° F (4° C). Space must support dryer weight of dryer to shut off at end of 1" (25 mm) under entire...
Installation Instructions - Page 5
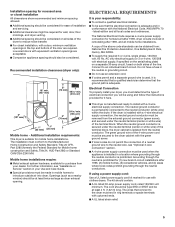
... acceptable.
■■Companion appliance spacing should also be considered. A copy of the above code standards can be made in mobile homes to introduce outside air into dryer. Additional installation requirements:
This dryer is prohibited for (1) new branch-circuit installations after 1996, and all local codes and ordinances. If using and follow the instructions provided for it is...
Installation Instructions - Page 18
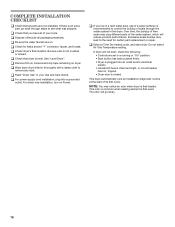
... will go back through the water system in your tools. NOTE: You may clog different parts of /recycle all parts are on Power. Complete Installation CHECKLIST
q Check that dryer is first heated. q Check for certain part replacement or repair.
q Remove film on dryer. q Wipe dryer drum interior thoroughly with a damp cloth to the need for leaks around "Y" connector, faucet...
Warranty Information - Page 1

... the problem
after checking "Troubleshooting," additional help you obtain assistance or service if you on major appliances with electrical or plumbing codes, or use of products not approved by calling Maytag. This major appliance is not installed in accordance with original model/serial numbers that existed when this major appliance was purchased. Replacement parts or repair labor...
Maytag MED7000XR Reviews
We have not received any reviews for Maytag yet.