
User Guide
Page 1
... L'UTILISATEUR Page 8 Page 16 ○ ○ ○ ○ ○ ○ ○ Form No. ELECTRIC COOKTOPS ® Installer: Please leave this manual with this guide. Keep sales receipt and/or cancelled check as proof of our cooking products, it may be necessary to make changes to improve the quality and performance of purchase. A/01/08 Part No. 8111P523-60 h t t p : / / w w w .
... L'UTILISATEUR Page 8 Page 16 ○ ○ ○ ○ ○ ○ ○ Form No. ELECTRIC COOKTOPS ® Installer: Please leave this manual with this guide. Keep sales receipt and/or cancelled check as proof of our cooking products, it may be necessary to make changes to improve the quality and performance of purchase. A/01/08 Part No. 8111P523-60 h t t p : / / w w w .
User Guide
Page 2
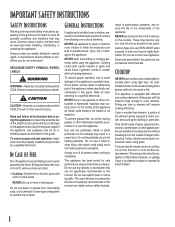
... could easily touch hot heating elements and ignite. NEVER wear loose-fitting or hanging garments while using this guide. Do not use aluminum foil or foil containers on grease fires. Clean only parts listed in this guide and use water on the cooktop. Select pans with different size surface elements. Fitting pan size to element will be taken to prevent curtains from blowing over another surface element. IMPORTANT SAFETY INSTRUCTIONS Safety Instructions Warning and Important...
... could easily touch hot heating elements and ignite. NEVER wear loose-fitting or hanging garments while using this guide. Do not use aluminum foil or foil containers on grease fires. Clean only parts listed in this guide and use water on the cooktop. Select pans with different size surface elements. Fitting pan size to element will be taken to prevent curtains from blowing over another surface element. IMPORTANT SAFETY INSTRUCTIONS Safety Instructions Warning and Important...
User Guide
Page 3
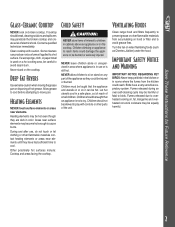
...kitchen could damage the appliance or be careful to birds. Clean cooktop with controls or other parts of electric shock. Never stand on broken cooktop. Clean range hood and filters frequently to cool. Fumes released due to overheated cooking oil, fat, margarine and overheated non-stick cookware may become hot enough to move pan. Deep Fat Fryers Use.... Turn the fan on hood or filter and to play with caution. Other potentially hot surfaces include: Cooktop and areas facing the cooktop. Fumes released during an oven self-cleaning cycle may penetrate the broken cooktop and...
...kitchen could damage the appliance or be careful to birds. Clean cooktop with controls or other parts of electric shock. Never stand on broken cooktop. Clean range hood and filters frequently to cool. Fumes released due to overheated cooking oil, fat, margarine and overheated non-stick cookware may become hot enough to move pan. Deep Fat Fryers Use.... Turn the fan on hood or filter and to play with caution. Other potentially hot surfaces include: Cooktop and areas facing the cooktop. Fumes released during an oven self-cleaning cycle may penetrate the broken cooktop and...
User Guide
Page 4
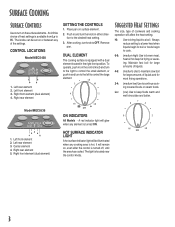
.... Surface Cooking Surface Controls Use to turn knob to OFF. Left front element 2. LO 2 HI 4 2 HI LO OFF ON INDICATORS All Models - The light is equipped with a dual element located in either direction to the desired heat setting. 3. The knobs can be illuminated when any of heat settings is hot. CONTROL LOCATIONS Model MEC5430 1. Left front element 3. Lo: (low) Use to a boil. An infinite choice of the settings. It will be set on the surface elements. Right rear element Model MEC5536 1. Remove pan...
.... Surface Cooking Surface Controls Use to turn knob to OFF. Left front element 2. LO 2 HI 4 2 HI LO OFF ON INDICATORS All Models - The light is equipped with a dual element located in either direction to the desired heat setting. 3. The knobs can be illuminated when any of heat settings is hot. CONTROL LOCATIONS Model MEC5430 1. Left front element 3. Lo: (low) Use to a boil. An infinite choice of the settings. It will be set on the surface elements. Right rear element Model MEC5536 1. Remove pan...
User Guide
Page 5
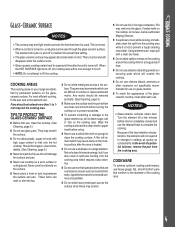
... element. COOKING AREAS The cooking areas on glass-ceramic. ❚ To retain the appearance of a potential boilover, remove the pan from the cooking area while it is hot to the element size. Using extreme care, wipe spill with a clean cloth or paper towel before turning the cooktop on to prevent scratches. ❚ To prevent scratching or damage to changes in spillovers burning onto the cooking area which requires extra cleaning...
... element. COOKING AREAS The cooking areas on glass-ceramic. ❚ To retain the appearance of a potential boilover, remove the pan from the cooking area while it is hot to the element size. Using extreme care, wipe spill with a clean cloth or paper towel before turning the cooktop on to prevent scratches. ❚ To prevent scratching or damage to changes in spillovers burning onto the cooking area which requires extra cleaning...
User Guide
Page 6
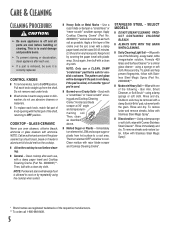
... layer of the following - NOTE: Only use oven cleaners, chlorine bleach, ammonia or glass cleaners with a clean dry cloth. STAINLESS STEEL - To restore luster and remove streaks, follow with one of the creme over the soil, cover with Stainless Steel Magic Spray*. ❚ Discoloration -- Scrub again, then buff with ammonia. Then, clean as possible. COOKTOP - GLASS-CERAMIC Never use a CLEAN, DAMP "scratchless" pad that is to...
... layer of the following - NOTE: Only use oven cleaners, chlorine bleach, ammonia or glass cleaners with a clean dry cloth. STAINLESS STEEL - To restore luster and remove streaks, follow with one of the creme over the soil, cover with Stainless Steel Magic Spray*. ❚ Discoloration -- Scrub again, then buff with ammonia. Then, clean as possible. COOKTOP - GLASS-CERAMIC Never use a CLEAN, DAMP "scratchless" pad that is to...
User Guide
Page 7
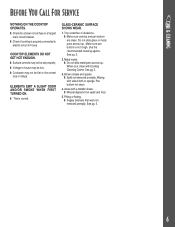
.... ❚ Do not slide metal pans across top. Pan bottom not clean. 4. Before You Call For Service NOTHING ON THE COOKTOP OPERATES. ❚ Check for a blown circuit fuse or a tripped main circuit breaker. ❚ Check if cooktop is properly connected to house may be low. ❚ Cookware may not be set properly. ❚ Voltage to electric circuit in house. When cool, clean with Cooktop Cleaning Creme. See pg...
.... ❚ Do not slide metal pans across top. Pan bottom not clean. 4. Before You Call For Service NOTHING ON THE COOKTOP OPERATES. ❚ Check for a blown circuit fuse or a tripped main circuit breaker. ❚ Check if cooktop is properly connected to house may be low. ❚ Cookware may not be set properly. ❚ Voltage to electric circuit in house. When cool, clean with Cooktop Cleaning Creme. See pg...
User Guide
Page 8
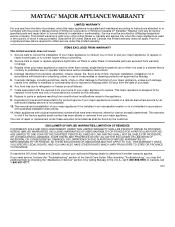
... user or operator instructions and/or installation instructions. 4. The removal and reinstallation of your major appliance for product service if your major appliance if it was purchased. The cost of your major appliance. Service calls to be easily determined. Major appliances with electrical or plumbing codes, or use or when it is designed to repair or replace appliance light bulbs, air filters or water filters. IMPLIED WARRANTIES...
... user or operator instructions and/or installation instructions. 4. The removal and reinstallation of your major appliance for product service if your major appliance if it was purchased. The cost of your major appliance. Service calls to be easily determined. Major appliances with electrical or plumbing codes, or use or when it is designed to repair or replace appliance light bulbs, air filters or water filters. IMPLIED WARRANTIES...
Installation Instructions
Page 1
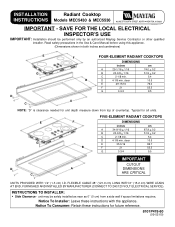
... depth measure down from a side wall if space limitations requires. EE G A F F G B B FIVE-ELEMENT RADIANT COOKTOPS DIMENSIONS inches cm A 34-9/16 + 1/16 87.9 + 0.2 B 20-3/8 + 1/16 51.9 + 0.2 C 2-1/8 min. 5.4 D 4-1/8 min. SAVE FOR THE LOCAL ELECTRICAL INSPECTOR'S USE IMPORTANT: Installation should be safely installed as near as 0² (0 cm) from top of countertop. INSTRUCTIONS TO INSTALLER: S Side Clearance - unit may be performed only by an authorized Maytag Service Contractor or other qualified installer. INSTALLATION INSTRUCTIONS Radiant Cooktop Models...
... depth measure down from a side wall if space limitations requires. EE G A F F G B B FIVE-ELEMENT RADIANT COOKTOPS DIMENSIONS inches cm A 34-9/16 + 1/16 87.9 + 0.2 B 20-3/8 + 1/16 51.9 + 0.2 C 2-1/8 min. 5.4 D 4-1/8 min. SAVE FOR THE LOCAL ELECTRICAL INSPECTOR'S USE IMPORTANT: Installation should be safely installed as near as 0² (0 cm) from top of countertop. INSTRUCTIONS TO INSTALLER: S Side Clearance - unit may be performed only by an authorized Maytag Service Contractor or other qualified installer. INSTALLATION INSTRUCTIONS Radiant Cooktop Models...
Installation Instructions
Page 2
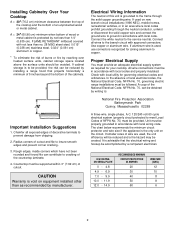
... the minimum circuit protector and wire size if the appliance is protected by reaching over heated surface units, cabinet storage space located above the surface units should be followed. Installing Cabinetry Over Your Cooktop A = 30² (76.2 cm) minimum clearance between the top of the cooktop and the bottom of decorative laminate to the service neutral. Important Installation Suggestions 1. CAUTION Warranty is advisable that projects horizontally a minimum of 5 inches beyond...
... the minimum circuit protector and wire size if the appliance is protected by reaching over heated surface units, cabinet storage space located above the surface units should be followed. Installing Cabinetry Over Your Cooktop A = 30² (76.2 cm) minimum clearance between the top of the cooktop and the bottom of decorative laminate to the service neutral. Important Installation Suggestions 1. CAUTION Warranty is advisable that projects horizontally a minimum of 5 inches beyond...
Installation Instructions
Page 3
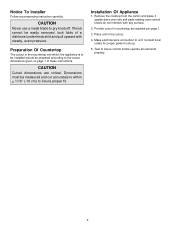
... insure control knobs operate all elements properly. 3 Remove the cooktop from the carton and place it upside down over two soft pads making sure control knobs do not interfere with steady, even pressure. If knob cannot be measured and cut accurately to within + 1/16² (.16 cm) to unit. Test to pry knob off. Make electrical wire connection to insure proper fit. Provide cutout in the cutout. 4. Installation...
... insure control knobs operate all elements properly. 3 Remove the cooktop from the carton and place it upside down over two soft pads making sure control knobs do not interfere with steady, even pressure. If knob cannot be measured and cut accurately to within + 1/16² (.16 cm) to unit. Test to pry knob off. Make electrical wire connection to insure proper fit. Provide cutout in the cutout. 4. Installation...
Parts List
Page 1
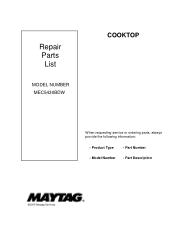
Part Description ©2005 Maytag Services Repair Parts List MODEL NUMBER MEC5430BDW COOKTOP When requesting service or ordering parts, always provide the following information: - Model Number - Product Type - Part Number -
Part Description ©2005 Maytag Services Repair Parts List MODEL NUMBER MEC5430BDW COOKTOP When requesting service or ordering parts, always provide the following information: - Model Number - Product Type - Part Number -
Parts List
Page 2
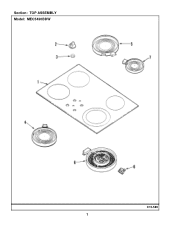
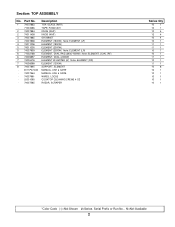
Section: TOP ASSEMBLY Model: MEC5430BDW C15-589 1
Section: TOP ASSEMBLY Model: MEC5430BDW C15-589 1
Parts List
Page 3
...74007838 TOP, GLASS (WHT) TAPE, FOAM (30") KNOB (WHT) KNOB (WHT) GROMMET ELEMENT (1800W) Note: ELEMENT (LF) 4 74011006 5 74011005 ELEMENT (1800W) ELEMENT (2000W) 5 74007839 6 71002168 6 74008897 7 74005476 7 74008568 8 74007845 ELEMENT (2000W) Note: ELEMENT (LR) ELEMENT, DUAL RAD.(2400/1000W) Note: ELEMENT, DUAL (RF) ELEMENT, DUAL (2400W) ELEMENT W/LIMITER (6") Note: ELEMENT (RR) ELEMENT (1200W) SUPPORT, ELEMENT - 8111P474-60 MANUAL, USE & CARE - 74007564 MANUAL, USE & CARE - 74007881 - 20001080 - 74007585 WIRES, LOOSE COOKTOP CLEANING CREME 4 OZ RAZOR, SCRAPER Series Qty 10...
...74007838 TOP, GLASS (WHT) TAPE, FOAM (30") KNOB (WHT) KNOB (WHT) GROMMET ELEMENT (1800W) Note: ELEMENT (LF) 4 74011006 5 74011005 ELEMENT (1800W) ELEMENT (2000W) 5 74007839 6 71002168 6 74008897 7 74005476 7 74008568 8 74007845 ELEMENT (2000W) Note: ELEMENT (LR) ELEMENT, DUAL RAD.(2400/1000W) Note: ELEMENT, DUAL (RF) ELEMENT, DUAL (2400W) ELEMENT W/LIMITER (6") Note: ELEMENT (RR) ELEMENT (1200W) SUPPORT, ELEMENT - 8111P474-60 MANUAL, USE & CARE - 74007564 MANUAL, USE & CARE - 74007881 - 20001080 - 74007585 WIRES, LOOSE COOKTOP CLEANING CREME 4 OZ RAZOR, SCRAPER Series Qty 10...
Parts List
Page 4
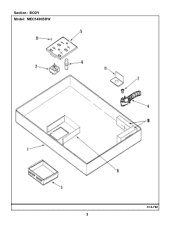
Section: BODY Model: MEC5430BDW C14-792 3
Section: BODY Model: MEC5430BDW C14-792 3
Parts List
Page 5
... Note: GROMMET, WIRE (BLK) 8 74007843 COVER, SWITCH PLATE 9 7101P309-60 SCREW Note: SCREW, SWITCH MOUNTING 10 74007899 INSULATION, BURNER BOX 11 74007893 BRACKET, CONDUIT/HARNESS ASY. Series Qty 10 1 10 1 10 2 10 1 10 1 11 1 10 1 10 1 11 1 10 2 11 1 10 1 10 1 10 2 11 1 10 2 10 2 10 1 10 8 10 4 10 1 *Color Code (-)=Not Shown #=Series, Serial Prefix or Run No., N=Not Available 4 Part No.
... Note: GROMMET, WIRE (BLK) 8 74007843 COVER, SWITCH PLATE 9 7101P309-60 SCREW Note: SCREW, SWITCH MOUNTING 10 74007899 INSULATION, BURNER BOX 11 74007893 BRACKET, CONDUIT/HARNESS ASY. Series Qty 10 1 10 1 10 2 10 1 10 1 11 1 10 1 10 1 11 1 10 2 11 1 10 1 10 1 10 2 11 1 10 2 10 2 10 1 10 8 10 4 10 1 *Color Code (-)=Not Shown #=Series, Serial Prefix or Run No., N=Not Available 4 Part No.

Parts List
Page 6
Section: WIRING INFORMATION Model: MEC5430BDW 15003183 5
Section: WIRING INFORMATION Model: MEC5430BDW 15003183 5


