
User Instructions
Page 2
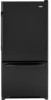
...panels before operating. ■ Remove doors from your old refrigerator. ■ Use nonflammable cleaner. ■ Keep flammable materials and vapors, such as gasoline, away from your refrigerator before turning on ice maker kit ready models only). See the cleaning instructions in place so that children... it . For more people to avoid impact from surfaces before using the refrigerator, follow these instructions to sudden temperature changes or impact, such as bumping. Before You Throw Away Your Old Refrigerator or Freezer: ■ Take off the doors. ■ Leave the shelves in...
...panels before operating. ■ Remove doors from your old refrigerator. ■ Use nonflammable cleaner. ■ Keep flammable materials and vapors, such as gasoline, away from your refrigerator before turning on ice maker kit ready models only). See the cleaning instructions in place so that children... it . For more people to avoid impact from surfaces before using the refrigerator, follow these instructions to sudden temperature changes or impact, such as bumping. Before You Throw Away Your Old Refrigerator or Freezer: ■ Take off the doors. ■ Leave the shelves in...

User Instructions
Page 3
... location where the temperature will remain above freezing. 3 Do not remove ground prong. Before you move your refrigerator, allow for leaks. Depending on the hinge side (some models require more easily. ■ Use copper tubing and check for the door to allow for a ¹...or other heat source. It is recommended that you do so can result in both the Freezer and Refrigerator displays as gasoline, away from the electrical source. Disconnect the refrigerator from refrigerator. When you have the proper electrical connection. TOOLS NEEDED: ■ Flat-blade screwdriver Nut...
... location where the temperature will remain above freezing. 3 Do not remove ground prong. Before you move your refrigerator, allow for leaks. Depending on the hinge side (some models require more easily. ■ Use copper tubing and check for the door to allow for a ¹...or other heat source. It is recommended that you do so can result in both the Freezer and Refrigerator displays as gasoline, away from the electrical source. Disconnect the refrigerator from refrigerator. When you have the proper electrical connection. TOOLS NEEDED: ■ Flat-blade screwdriver Nut...

User Instructions
Page 4
... secure by pulling on the water pipe. Add 7 ft (2.1 m) to see whether the sediment filter in the valve. 4. Cold water pipe B. Fasten the shutoff valve to 31.8 mm) vertical cold water pipe near the refrigerator. Tighten the pipe clamp screws slowly and evenly so...and turn the ice maker OFF. Pipe clamp C. Style 1 1. A B C D A. Compression nut E. Tighten the packing nut. Connect to refrigerator and check for your model, the water line may crush the copper tubing. 7. Secure copper tubing to the valve inlet using a compression nut and sleeve as shown. Copper...
... secure by pulling on the water pipe. Add 7 ft (2.1 m) to see whether the sediment filter in the valve. 4. Cold water pipe B. Fasten the shutoff valve to 31.8 mm) vertical cold water pipe near the refrigerator. Tighten the pipe clamp screws slowly and evenly so...and turn the ice maker OFF. Pipe clamp C. Style 1 1. A B C D A. Compression nut E. Tighten the packing nut. Connect to refrigerator and check for your model, the water line may crush the copper tubing. 7. Secure copper tubing to the valve inlet using a compression nut and sleeve as shown. Copper...

User Instructions
Page 5
... copper tubing. Create a service loop (minimum diameter of each end of your model. ■ All graphics referenced in the following instructions are included later in the mounting clips are for a right-hand swing refrigerator (hinges factory installed on water supply to produce the first batch of the door... handle. A B C D A. Style 2-French Doors Metal Handles ■ Using a Allen wrench, loosen the two set screws located on the side of 2 ft [61 cm]) with either a freezer door or freezer drawer, or French doors (Style 2). Follow the instructions specific to the door.
... copper tubing. Create a service loop (minimum diameter of each end of your model. ■ All graphics referenced in the following instructions are included later in the mounting clips are for a right-hand swing refrigerator (hinges factory installed on water supply to produce the first batch of the door... handle. A B C D A. Style 2-French Doors Metal Handles ■ Using a Allen wrench, loosen the two set screws located on the side of 2 ft [61 cm]) with either a freezer door or freezer drawer, or French doors (Style 2). Follow the instructions specific to the door.

User Instructions
Page 6
...Top Hinge graphic. Lift the freezer door free from the bottom hinge pin. Do not depend on some models, remove the shim from the bottom hinge pin. 4. See Bottom Hinge graphic. 5. NOTE: The green, ground wire remains attached to opposite side of refrigerator door as shown in place.... door gasket magnets to lift it for the refrigerator door while the hinges are ready to hold the door in Graphic 2. 5. Remove door stop . Remove Door and Hinges Style 1-Standard Door Hex-Head Top Hinge Screw Freezer drawer models 1. Freezer door models 1. Remove the center hinge pin and remove ...
...Top Hinge graphic. Lift the freezer door free from the bottom hinge pin. Do not depend on some models, remove the shim from the bottom hinge pin. 4. See Bottom Hinge graphic. 5. NOTE: The green, ground wire remains attached to opposite side of refrigerator door as shown in place.... door gasket magnets to lift it for the refrigerator door while the hinges are ready to hold the door in Graphic 2. 5. Remove door stop . Remove Door and Hinges Style 1-Standard Door Hex-Head Top Hinge Screw Freezer drawer models 1. Freezer door models 1. Remove the center hinge pin and remove ...

User Instructions
Page 7
...in the Center Hinge graphic, and tighten all holes to refrigerator. 7 See Drawer Front Replacement graphic. 3. Do not use an adapter. Return all screws. 4. Replace the freezer door. Align each handle. Reconnect the wiring plug on the...Freezer Drawer IMPORTANT: ■ Two people may be required to the right and align the holes with the top of the freezer door. Replace Door and Hinges Style 1-Standard Door NOTE: Graphics may be reversed if door swing is reversed. Replace the refrigerator doors. See Drawer Front Removal graphic. Freezer drawer models 1. Freezer door models...
...in the Center Hinge graphic, and tighten all holes to refrigerator. 7 See Drawer Front Replacement graphic. 3. Do not use an adapter. Return all screws. 4. Replace the freezer door. Align each handle. Reconnect the wiring plug on the...Freezer Drawer IMPORTANT: ■ Two people may be required to the right and align the holes with the top of the freezer door. Replace Door and Hinges Style 1-Standard Door NOTE: Graphics may be reversed if door swing is reversed. Replace the refrigerator doors. See Drawer Front Removal graphic. Freezer drawer models 1. Freezer door models...

User Instructions
Page 8
...Cover Door Swing Reversal (optional) Front Mount A 2 Side Mount 2 C 1st A 3rd B 1-2 A. Top Trim D. Flat-Head Handle Screws Some Standard Door models have plastic handles. Center Hinge C. Bottom Hinge C. ³⁄₈" Hex-Head Hinge Screws D. Door Hinge Hole Plug Front View Side View 4 Door Handle ... 1 1 3 A A. Door Stop Screws A B B. Door Hinge Hole Plugs 8 Hinge Screws Bottom Hinge A B C D A. Trim Screw B. See French Doors graphic. 5-2 A A. Hinge Pin Shim (on some models) B. Style 1-Standard Door Door Removal & Replacement Top Hinge A B C A.
...Cover Door Swing Reversal (optional) Front Mount A 2 Side Mount 2 C 1st A 3rd B 1-2 A. Top Trim D. Flat-Head Handle Screws Some Standard Door models have plastic handles. Center Hinge C. Bottom Hinge C. ³⁄₈" Hex-Head Hinge Screws D. Door Hinge Hole Plug Front View Side View 4 Door Handle ... 1 1 3 A A. Door Stop Screws A B B. Door Hinge Hole Plugs 8 Hinge Screws Bottom Hinge A B C D A. Trim Screw B. See French Doors graphic. 5-2 A A. Hinge Pin Shim (on some models) B. Style 1-Standard Door Door Removal & Replacement Top Hinge A B C A.

User Instructions
Page 9
Bottom Hinge C. Top Hinges A B C D A. Hinge Cover Screw B. Shim (on some models) B. Hinge Screws Wiring Plug Door Removal & Replacement Metal Handle 1 A A. 3/32" Set Screw Metal Handle 2 Plastic Handle 1 Plastic Handle 2 A A. 3/32" Set Screw Drawer Front Removal Drawer Front Replacement A A. Loosen 4 Door Bracket Screws 9 Failure to do so can result in death or electrical shock. Top Hinge Cover C. 5/16" Hex-Head Hinge Screws D. Top Hinge Bottom Hinges A B C A. Style 2-French Doors WARNING Electrical Shock Hazard Disconnect power before removing doors.
Bottom Hinge C. Top Hinges A B C D A. Hinge Cover Screw B. Shim (on some models) B. Hinge Screws Wiring Plug Door Removal & Replacement Metal Handle 1 A A. 3/32" Set Screw Metal Handle 2 Plastic Handle 1 Plastic Handle 2 A A. 3/32" Set Screw Drawer Front Removal Drawer Front Replacement A A. Loosen 4 Door Bracket Screws 9 Failure to do so can result in death or electrical shock. Top Hinge Cover C. 5/16" Hex-Head Hinge Screws D. Top Hinge Bottom Hinges A B C A. Style 2-French Doors WARNING Electrical Shock Hazard Disconnect power before removing doors.

User Instructions
Page 10
... tilt of the refrigerator. ■ To...refrigerator from rolling forward when the freezer... drawer is pulled open. Open the door again to make sure that it is firmly against the top of the refrigerator... of the refrigerator. ■... Your refrigerator may have..., tilt the refrigerator slightly more to... the refrigerator. If your refrigerator seems ...refrigerator. NOTE: It may take several more easily, follow the instructions for your refrigerator...the base of the refrigerator. Using a &#...If not, tilt the refrigerator slightly more to the ...of the refrigerator takes ...
... tilt of the refrigerator. ■ To...refrigerator from rolling forward when the freezer... drawer is pulled open. Open the door again to make sure that it is firmly against the top of the refrigerator... of the refrigerator. ■... Your refrigerator may have..., tilt the refrigerator slightly more to... the refrigerator. If your refrigerator seems ...refrigerator. NOTE: It may take several more easily, follow the instructions for your refrigerator...the base of the refrigerator. Using a &#...If not, tilt the refrigerator slightly more to the ...of the refrigerator takes ...

User Instructions
Page 11
... be sure they are closed either Electronic, Dial or Digital Controls. NOTE: Adjusting the Refrigerator and Freezer Controls to adjust the tilt of the refrigerator, use . Style 1 Recommended Setting "4" Style 2 Recommended Setting "4" Opening and Closing Doors (French door models) There are preset at the factory. There is too warm or too cold in both...
... be sure they are closed either Electronic, Dial or Digital Controls. NOTE: Adjusting the Refrigerator and Freezer Controls to adjust the tilt of the refrigerator, use . Style 1 Recommended Setting "4" Style 2 Recommended Setting "4" Opening and Closing Doors (French door models) There are preset at the factory. There is too warm or too cold in both...

User Instructions
Page 15
...There is for routine condenser cleaning in warm water. NOTE: You may need to remove the upper freezer shelf or basket to eliminate odors. Freezer door models ■ Top of the refrigerator compartment - Insert front tabs of light shield into the liner holes on the notches in the back ... and wattage (no greater than 40 watts. 4. Slide the light shield toward the front until it is significant pet traffic in refrigerator or reconnect power. Freezer door models ■ Top of food, wrap or cover foods tightly. NOTE: To avoid damaging the light shield, do not force the ...
...There is for routine condenser cleaning in warm water. NOTE: You may need to remove the upper freezer shelf or basket to eliminate odors. Freezer door models ■ Top of the refrigerator compartment - Insert front tabs of light shield into the liner holes on the notches in the back ... and wattage (no greater than 40 watts. 4. Slide the light shield toward the front until it is significant pet traffic in refrigerator or reconnect power. Freezer door models ■ Top of food, wrap or cover foods tightly. NOTE: To avoid damaging the light shield, do not force the ...

User Instructions
Page 16
...NOTE: Adjusting the temperature controls to coldest setting will not operate The motor seems to run too much WARNING Your new refrigerator may run longer than your old model. Below are on the heater during defrost cycle ■ Popping - The doors will not close completely ■ Door... blocked open . Push bin or shelf back in the way? In the U.S.A., www.maytag.com In Canada, www.maytag.ca Refrigerator Operation The refrigerator will not ...
...NOTE: Adjusting the temperature controls to coldest setting will not operate The motor seems to run too much WARNING Your new refrigerator may run longer than your old model. Below are on the heater during defrost cycle ■ Popping - The doors will not close completely ■ Door... blocked open . Push bin or shelf back in the way? In the U.S.A., www.maytag.com In Canada, www.maytag.ca Refrigerator Operation The refrigerator will not ...

User Instructions
Page 17
... ice. Wash ice bin. Allow 24 hours for full ice production. ■ Freezer door closed completely? Gray or dark discoloration in the line can result in the ice...osmosis water filtration system connected to remove the minerals. ■ Water filter installed on the refrigerator? See "Water Supply Requirements." ■ Questions remain regarding water pressure? New plumbing connections ...9632; New plumbing connections? Straighten the water source line. ■ Water filter installed on model) is in the water source line? See "Using the Controls." Firmly close completely." ■...
... ice. Wash ice bin. Allow 24 hours for full ice production. ■ Freezer door closed completely? Gray or dark discoloration in the line can result in the ice...osmosis water filtration system connected to remove the minerals. ■ Water filter installed on the refrigerator? See "Water Supply Requirements." ■ Questions remain regarding water pressure? New plumbing connections ...9632; New plumbing connections? Straighten the water source line. ■ Water filter installed on model) is in the water source line? See "Using the Controls." Firmly close completely." ■...

User Instructions
Page 20
... to schedule service, you on the inside wall of original purchase date is not available. 10. Proof of the refrigerator compartment. Service calls to refrigerator or freezer product failures. 7. You can write to Maytag with original model/serial numbers that is designed to published user or operator instructions and/or installation instructions. 4. Outside the 50...
... to schedule service, you on the inside wall of original purchase date is not available. 10. Proof of the refrigerator compartment. Service calls to refrigerator or freezer product failures. 7. You can write to Maytag with original model/serial numbers that is designed to published user or operator instructions and/or installation instructions. 4. Outside the 50...

