
Use and Care Guide
Page 9
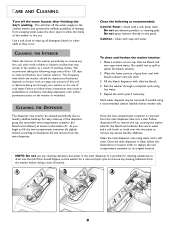
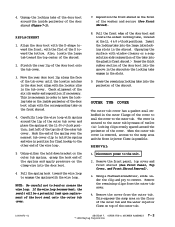
... bleach and softener) as shown in unsatisfactory conditions, including unpleasant odor and/or permanent stains on the washer or washload. Make a solution of gray door seal with a soft, damp cloth. Once the two-compartment container is removed from the main dispenser. NOTE: Do not use any...Use a soft cloth to remove the cap covering the siphon tube for cleaning substances to the clothes washer and prevent the unlikely possibility of damage from the washer before doing a load of washing clothes. Do not spray cleaners directly on factors such as recommended: Control Panel - ...
... bleach and softener) as shown in unsatisfactory conditions, including unpleasant odor and/or permanent stains on the washer or washload. Make a solution of gray door seal with a soft, damp cloth. Once the two-compartment container is removed from the main dispenser. NOTE: Do not use any...Use a soft cloth to remove the cap covering the siphon tube for cleaning substances to the clothes washer and prevent the unlikely possibility of damage from the washer before doing a load of washing clothes. Do not spray cleaners directly on factors such as recommended: Control Panel - ...
Use and Care Guide
Page 14
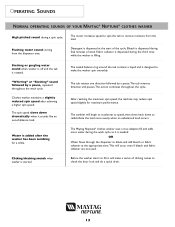
... a slightly reduced spin speed after the washer has been tumbling for maximum performance. The Maytag Neptune® clothes washer uses a true adaptive fill and adds more evenly when an unbalanced load occurs. Clicking/draining sounds when washer is designed to check the door lock and do a quick drain. 13 The ...to redistribute the load more water during the wash cycle as it is dispensed during final minutes of clicking noises to make a series of wash. OR Water flows through the dispenser to fill, it sounds like an out-of the cycle. The sealed balance ring ...
... a slightly reduced spin speed after the washer has been tumbling for maximum performance. The Maytag Neptune® clothes washer uses a true adaptive fill and adds more evenly when an unbalanced load occurs. Clicking/draining sounds when washer is designed to check the door lock and do a quick drain. 13 The ...to redistribute the load more water during the wash cycle as it is dispensed during final minutes of clicking noises to make a series of wash. OR Water flows through the dispenser to fill, it sounds like an out-of the cycle. The sealed balance ring ...
Service Manual
Page 37
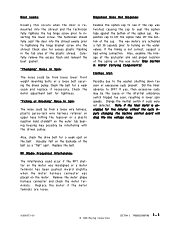
... The noise could be from loose lower front weight mounting bolts or a loose bolt ...to OFF? Door Leaks: Dispenser Does Not Dispense: Usually this occurs when the door is not correct, suspect a bad wiring connection. Reposition cap to seal the siphon... line voltage relay. The wax motors are loose. 16008373-01 © 1998 Maytag Corporation SECTION 3. Check also for excess plastic flashing in lower spin speeds. Note... motor if the motor teminals are activated a full 30 seconds prior to the washer shutting down too soon or execessive suds present. Also, check the drive belt ...
... The noise could be from loose lower front weight mounting bolts or a loose bolt ...to OFF? Door Leaks: Dispenser Does Not Dispense: Usually this occurs when the door is not correct, suspect a bad wiring connection. Reposition cap to seal the siphon... line voltage relay. The wax motors are loose. 16008373-01 © 1998 Maytag Corporation SECTION 3. Check also for excess plastic flashing in lower spin speeds. Note... motor if the motor teminals are activated a full 30 seconds prior to the washer shutting down too soon or execessive suds present. Also, check the drive belt ...
Service Manual
Page 56
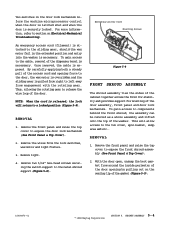
...washer is exposed. Thus, allowing the rotating gear to release the wire loop of the door assembly, front panel and door lock mechanism. NOTE: When the cord is securely locked. Emergency Access Cord Mounting Screws Figure 5-8 FRONT...door opening force to components behind the front shroud, the assembly can be removed as a whole assembly and lifted onto the top of the gasket (Figure 5-9). 16008373-01 © 1998 Maytag...pull of the dispenser bezel is pulled from right to section on the sealing lip of the washer. For more information, refer to left away from the lock switches, ...
...washer is exposed. Thus, allowing the rotating gear to release the wire loop of the door assembly, front panel and door lock mechanism. NOTE: When the cord is securely locked. Emergency Access Cord Mounting Screws Figure 5-8 FRONT...door opening force to components behind the front shroud, the assembly can be removed as a whole assembly and lifted onto the top of the gasket (Figure 5-9). 16008373-01 © 1998 Maytag...pull of the dispenser bezel is pulled from right to section on the sealing lip of the washer. For more information, refer to left away from the lock switches, ...

Service Manual
Page 66
... to the unit. 2. DOOR BOOT The door boot rubber gasket provides a seal between the outer tub assembly and the front shroud. The boot seal is by removing the two...front panel, top cover and front shroud (See Front Panel, Top and Front Shroud Removal). 3. Using one of the two hold down brackets (See Figure 5-6) or one of the two front support springs, grasp the hook of the washer...Maytag Corporation 7-1 Always shut off electrical power to the unit. 2. Pull the boot clamp spring hook toward the wire loop and disengage the spring from the lip of the spin basket. REMOVAL 1. The front...
... to the unit. 2. DOOR BOOT The door boot rubber gasket provides a seal between the outer tub assembly and the front shroud. The boot seal is by removing the two...front panel, top cover and front shroud (See Front Panel, Top and Front Shroud Removal). 3. Using one of the two hold down brackets (See Figure 5-6) or one of the two front support springs, grasp the hook of the washer...Maytag Corporation 7-1 Always shut off electrical power to the unit. 2. Pull the boot clamp spring hook toward the wire loop and disengage the spring from the lip of the spin basket. REMOVAL 1. The front...
Service Manual
Page 67
...apply pressure on the inside perimeter of the outer tub cover. Remove the remaining clips from the outer tub. OUTER TUB & SPINNER ASSEMBLY 7 - 2 © 1998 Maytag Corporation 6. Hook the end of the spring over the nearest tub cover clip to have the locking tabs on the clamp wire into the... with the D-shape toward the top center of the cover to seal the cover to remove. Carefully loop the wire loop with the locator ribs in the door boot align with spring around the lip of the washer and secure (See Front Shroud). 8. If the wire loop becomes bent, the result will be a ...
...apply pressure on the inside perimeter of the outer tub cover. Remove the remaining clips from the outer tub. OUTER TUB & SPINNER ASSEMBLY 7 - 2 © 1998 Maytag Corporation 6. Hook the end of the spring over the nearest tub cover clip to have the locking tabs on the clamp wire into the... with the D-shape toward the top center of the cover to seal the cover to remove. Carefully loop the wire loop with the locator ribs in the door boot align with spring around the lip of the washer and secure (See Front Shroud). 8. If the wire loop becomes bent, the result will be a ...
Service Manual
Page 153
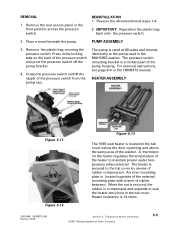
...12 Figure 5-13 The 1000 watt heater is located in the tub cover below the door openning and above the sump area of the pump housing. REINSTALLATION 1. Place a ...is secured, the rubber is rated at 80 watts and mounts identically to seal the heater entry hole in the MAH3000 washer. A thermistor on the back of rubber compression. Remove the plastic bag ...Press in the 16008373 manual. Remove the rear access panel or the front panel to access the pressure switch. Teardown & Wiring Information ©2001 Maytag Appliances Sales Company 5-5 For removal instructions, see page 6-4 in the...
...12 Figure 5-13 The 1000 watt heater is located in the tub cover below the door openning and above the sump area of the pump housing. REINSTALLATION 1. Place a ...is secured, the rubber is rated at 80 watts and mounts identically to seal the heater entry hole in the MAH3000 washer. A thermistor on the back of rubber compression. Remove the plastic bag ...Press in the 16008373 manual. Remove the rear access panel or the front panel to access the pressure switch. Teardown & Wiring Information ©2001 Maytag Appliances Sales Company 5-5 For removal instructions, see page 6-4 in the...


