Owners Manual
Page 7
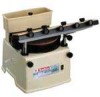
Loosen the pole fastening screws and lift off the sharpening platform guide. The bevel becomes acute as the angle adjustment screw is turned clockwise. Sharpening platform guide (Rail) The platform poles are fixed in reverse. Adjusting sharpening platform guide In using the sharpening platform guide to sharpen blade/knife, adjust the angle adjustment screw to the desired blade/knife sharpening angle. To install the sharpening platform guide, follow the removal procedure in place by tightening the pole fastening screws on Pole either side. 7
Loosen the pole fastening screws and lift off the sharpening platform guide. The bevel becomes acute as the angle adjustment screw is turned clockwise. Sharpening platform guide (Rail) The platform poles are fixed in reverse. Adjusting sharpening platform guide In using the sharpening platform guide to sharpen blade/knife, adjust the angle adjustment screw to the desired blade/knife sharpening angle. To install the sharpening platform guide, follow the removal procedure in place by tightening the pole fastening screws on Pole either side. 7
Owners Manual
Page 8
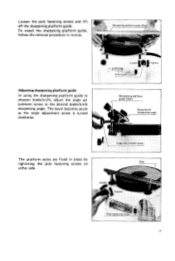
... turned clockwise, and it lowers the pole, conversely, 0.5 mm (1/32") when turned counterclockwise. Blade I \ Forward adiurt screw I I I The sharpening holder horizontal (forward) adjust screws should be unscrewedto allow the heel of the grinding wheel. Then lightly tighten the blade fastening screws and set the holder on either side raises the pole 0.5 mm (1/32...
... turned clockwise, and it lowers the pole, conversely, 0.5 mm (1/32") when turned counterclockwise. Blade I \ Forward adiurt screw I I I The sharpening holder horizontal (forward) adjust screws should be unscrewedto allow the heel of the grinding wheel. Then lightly tighten the blade fastening screws and set the holder on either side raises the pole 0.5 mm (1/32...
Owners Manual
Page 9
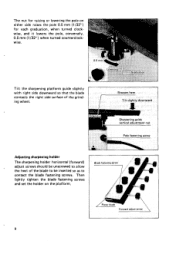
Now use all four fastening screws to the right across the sharpening platform guide. Screw in the left-hand forward adjust screw until the right upper edge of the blade contacts the grinding wheel. Slide the holder to secure the blade on the horizontal. Then fully tighten the fastening screw on the sharpener frame. 9 Installingcoolant reservoir (Tank) Insert the reservoir legs into contact with the grinding wheel. Screw in clockwise the forward adjust screw on the right until the left upper edge of the blade comes into the grooves provided for them on the far right.
Now use all four fastening screws to the right across the sharpening platform guide. Screw in the left-hand forward adjust screw until the right upper edge of the blade contacts the grinding wheel. Slide the holder to secure the blade on the horizontal. Then fully tighten the fastening screw on the sharpener frame. 9 Installingcoolant reservoir (Tank) Insert the reservoir legs into contact with the grinding wheel. Screw in clockwise the forward adjust screw on the right until the left upper edge of the blade comes into the grooves provided for them on the far right.
Owners Manual
Page 11
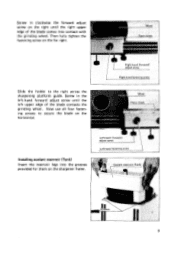
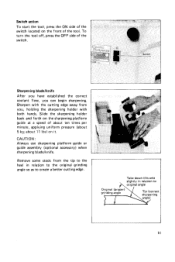
... a better cutting edge. 1 Take down this area slightly in relation t o A o r i g i l a l angle Original (proper) grinding angle Tip (correct sharpening 11 Slide the sharpening holder back and forth on it. CAUTION : Always use sharpening platform guide or guide assembly (optional accessory) when sharpening bladdknife. Sharpening blade/knife 1 After you have established the correct coolant flow, you , holding the...
... a better cutting edge. 1 Take down this area slightly in relation t o A o r i g i l a l angle Original (proper) grinding angle Tip (correct sharpening 11 Slide the sharpening holder back and forth on it. CAUTION : Always use sharpening platform guide or guide assembly (optional accessory) when sharpening bladdknife. Sharpening blade/knife 1 After you have established the correct coolant flow, you , holding the...
Owners Manual
Page 12
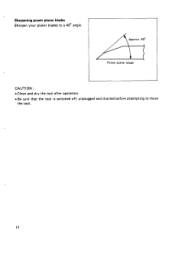
Power planer blade CAUTION : *Clean and dry the tool after operation. 0 Be sure that the tool is switched off, unplugged and drained before attempting to a 40" angle. Sharpening power planer blades Sharpen your planer blades to move the tool. 12
Power planer blade CAUTION : *Clean and dry the tool after operation. 0 Be sure that the tool is switched off, unplugged and drained before attempting to a 40" angle. Sharpening power planer blades Sharpen your planer blades to move the tool. 12
Parts Breakdown
Page 1
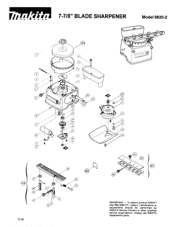
Always use MAKITA replacement parts. To assure product SAFETY and RELIABILITY. repairs, maintenance or adjustments should be performed by MAKITA Service Centers or other qualified service organizations. r r 7-7/8" BLADE SHARPENER Model 9820-2 01-96 IMPORTANT -
Always use MAKITA replacement parts. To assure product SAFETY and RELIABILITY. repairs, maintenance or adjustments should be performed by MAKITA Service Centers or other qualified service organizations. r r 7-7/8" BLADE SHARPENER Model 9820-2 01-96 IMPORTANT -


