
User Manual
Page 12
... 3 Installing DDR4 memory 4 Connecting the Front Panel Header 5 Installing the Motherboard 6 Connecting the Power Connectors 7 Installing SATA Drives 8 Installing a Graphics Card 9 Connecting Peripheral Devices 10 Power On...11 Specifications...14 JCORSAIR1 Connector Specification 19 Package contents 19 Block Diagram ...20 Rear I/O Panel...21 LAN Port LED Status Table 21 Audio Ports Configuration 21 Realtek Audio Console 22 Overview of Components 24 CPU Socket...26 DIMM Slots...27 PCI_E1~4: PCIe Expansion Slots 29 CPU_PWR1~2, ATX_PWR1: Power Connectors 31 M2_1~2: M.2 Slots (Key...
... 3 Installing DDR4 memory 4 Connecting the Front Panel Header 5 Installing the Motherboard 6 Connecting the Power Connectors 7 Installing SATA Drives 8 Installing a Graphics Card 9 Connecting Peripheral Devices 10 Power On...11 Specifications...14 JCORSAIR1 Connector Specification 19 Package contents 19 Block Diagram ...20 Rear I/O Panel...21 LAN Port LED Status Table 21 Audio Ports Configuration 21 Realtek Audio Console 22 Overview of Components 24 CPU Socket...26 DIMM Slots...27 PCI_E1~4: PCIe Expansion Slots 29 CPU_PWR1~2, ATX_PWR1: Power Connectors 31 M2_1~2: M.2 Slots (Key...

User Manual
Page 13
... Connector 44 Onboard LEDs...45 EZ Debug LED...45 XMP LED...45 Installing OS, Drivers & Utilities 46 Installing Windows® 10 46 Installing Drivers 46 Installing Utilities 46 BIOS Setup...47 Entering BIOS Setup 47 Resetting BIOS...48 Updating BIOS...48 EZ Mode...49 Advanced Mode ...51 SETTINGS...52 Advanced...52 Boot...58 Security...59 Save & Exit...60 OC...61 M-FLASH...67 OC PROFILE...68 HARDWARE MONITOR 69 RAID Configuration 70 Enabling Intel® Rapid Storage Technology 70 Creating RAID Volume 71 Removing a RAID Volume 72 Resetting Disks to...
... Connector 44 Onboard LEDs...45 EZ Debug LED...45 XMP LED...45 Installing OS, Drivers & Utilities 46 Installing Windows® 10 46 Installing Drivers 46 Installing Utilities 46 BIOS Setup...47 Entering BIOS Setup 47 Resetting BIOS...48 Updating BIOS...48 EZ Mode...49 Advanced Mode ...51 SETTINGS...52 Advanced...52 Boot...58 Security...59 Save & Exit...60 OC...61 M-FLASH...67 OC PROFILE...68 HARDWARE MONITOR 69 RAID Configuration 70 Enabling Intel® Rapid Storage Technology 70 Creating RAID Volume 71 Removing a RAID Volume 72 Resetting Disks to...
User Manual
Page 14
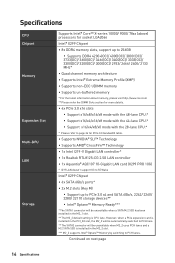
... LAN card (X299 PRO 10G) * I219 LAN doesn't support G3 to S5 Wake Intel® X299 Chipset ∙∙6x SATA 6Gb/s ports* ∙∙2x M.2 slots (Key M) ▪▪Support up to PCIe 3.0 x4 and SATA 6Gb/s, 2242/ 2260/ 2280/ 22110 storage devices** ▪▪Intel® Optane™ Memory Ready*** * The SATA1 connector will be unavailable when M2_2 uses PCH lanes and a M.2 SATA SSD is installed in the M2_1 slot. ** The M2_2 default setting...
... LAN card (X299 PRO 10G) * I219 LAN doesn't support G3 to S5 Wake Intel® X299 Chipset ∙∙6x SATA 6Gb/s ports* ∙∙2x M.2 slots (Key M) ▪▪Support up to PCIe 3.0 x4 and SATA 6Gb/s, 2242/ 2260/ 2280/ 22110 storage devices** ▪▪Intel® Optane™ Memory Ready*** * The SATA1 connector will be unavailable when M2_2 uses PCH lanes and a M.2 SATA SSD is installed in the M2_1 slot. ** The M2_2 default setting...

User Manual
Page 17
.../manual/mb/DRAGONCENTER2. pdf for more details. ∙∙ Audio ▪▪Audio Boost 4 ∙∙ Network ▪▪Dual LAN ▪▪2.5G LAN ▪▪LAN Manager ▪▪10G SUPER LAN (optional add-on card) ∙∙ Storage ▪▪Twin Turbo M.2 ▪▪M.2 XPANDER-Z GEN4 (optional add-on card) ∙∙ Fan ▪▪Pump Fan ▪▪Smart Fan Control Continued on next page Specifications 17 BIOS...
.../manual/mb/DRAGONCENTER2. pdf for more details. ∙∙ Audio ▪▪Audio Boost 4 ∙∙ Network ▪▪Dual LAN ▪▪2.5G LAN ▪▪LAN Manager ▪▪10G SUPER LAN (optional add-on card) ∙∙ Storage ▪▪Twin Turbo M.2 ▪▪M.2 XPANDER-Z GEN4 (optional add-on card) ∙∙ Fan ▪▪Pump Fan ▪▪Smart Fan Control Continued on next page Specifications 17 BIOS...

User Manual
Page 21
... Audio Ports Configuration Audio Ports Channel 2468 Center/ Subwoofer Out ●● Rear Speaker Out ●●● Line-In/ Side Speaker Out ● Line-Out/ Front Speaker Out Mic In (●: connected, Blank: empty) Rear I /O Panel PS/2 1G LAN 2.5G LAN USB 2.0 Audio Ports USB 2.0 Clear CMOS button Optical S/PDIF-Out USB 3.2 Gen1 USB 3.2 Gen2x2 Type-C ∙∙ Clear CMOS button - Power off your computer. Press and hold the Clear CMOS button for about 5-10 seconds to reset BIOS to default values...
... Audio Ports Configuration Audio Ports Channel 2468 Center/ Subwoofer Out ●● Rear Speaker Out ●●● Line-In/ Side Speaker Out ● Line-Out/ Front Speaker Out Mic In (●: connected, Blank: empty) Rear I /O Panel PS/2 1G LAN 2.5G LAN USB 2.0 Audio Ports USB 2.0 Clear CMOS button Optical S/PDIF-Out USB 3.2 Gen1 USB 3.2 Gen2x2 Type-C ∙∙ Clear CMOS button - Power off your computer. Press and hold the Clear CMOS button for about 5-10 seconds to reset BIOS to default values...

User Manual
Page 46
... drive. 3. Insert the Windows® 10 installation disc/USB into your computer. 46 Installing OS, Drivers & Utilities Click OK button to install Windows® 10. Installing OS, Drivers & Utilities Please download and update the latest utilities and drivers at www.msi.com Installing Windows® 10 1. Follow the instructions on the screen to finish. 7. Click the Install button in the lower-right corner of the MSI Driver Disc. 4. Restart your computer. 3. Power on the computer case. 4. Installing Drivers 1. Click OK button...
... drive. 3. Insert the Windows® 10 installation disc/USB into your computer. 46 Installing OS, Drivers & Utilities Click OK button to install Windows® 10. Installing OS, Drivers & Utilities Please download and update the latest utilities and drivers at www.msi.com Installing Windows® 10 1. Follow the instructions on the screen to finish. 7. Click the Install button in the lower-right corner of the MSI Driver Disc. 4. Restart your computer. 3. Power on the computer case. 4. Installing Drivers 1. Click OK button...
User Manual
Page 48
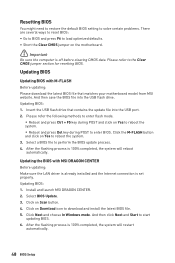
... the default BIOS setting to solve certain problems. There are several ways to reset BIOS: ∙∙Go to BIOS and press F6 to load optimized defaults. ∙∙Short the Clear CMOS jumper on Yes to reboot the system. 3. Click on Download icon to start updating BIOS. 6. After the flashing process is off before clearing CMOS data. Select a BIOS file to the Clear CMOS jumper section for resetting BIOS. Click Next and choose In Windows mode. Updating BIOS: 1. Install and launch MSI...
... the default BIOS setting to solve certain problems. There are several ways to reset BIOS: ∙∙Go to BIOS and press F6 to load optimized defaults. ∙∙Short the Clear CMOS jumper on Yes to reboot the system. 3. Click on Download icon to start updating BIOS. 6. After the flashing process is off before clearing CMOS data. Select a BIOS file to the Clear CMOS jumper section for resetting BIOS. Click Next and choose In Windows mode. Updating BIOS: 1. Install and launch MSI...

User Manual
Page 49
... if the X.M.P. allows you can move the device icons to change the boot priority. shows the CPU/ DDR speed, CPU/ MB temperature, MB/ CPU type, memory size, CPU/ DDR voltage, BIOS version and build date. ∙∙ Boot device priority bar - you to select the language of BIOS setup. ∙∙ System information - The boot priority from high to low is installed. ∙∙ Setup Mode switch - Switch the outer circle to exit search page. ⚠...
... if the X.M.P. allows you can move the device icons to change the boot priority. shows the CPU/ DDR speed, CPU/ MB temperature, MB/ CPU type, memory size, CPU/ DDR voltage, BIOS version and build date. ∙∙ Boot device priority bar - you to select the language of BIOS setup. ∙∙ System information - The boot priority from high to low is installed. ∙∙ Setup Mode switch - Switch the outer circle to exit search page. ⚠...
User Manual
Page 50
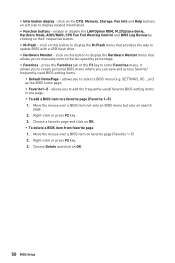
... the CPU, Memory, Storage, Fan Info and Help buttons on favorite page (Favorite 1~5) 2. click on search page. 2. press the Favorites tab or the F3 key to update BIOS with a USB flash drive. ∙∙ Hardware Monitor - Right-click or press F2 key. 3. It allows you to create personal BIOS menu where you to a favorite page (Favorite 1~5) 1. enable or disable the LAN Option ROM, M.2/Optane Genie, Hardcore Mode, AHCI/RAID, CPU Fan Fail Warning Control and BIOS Log Review...
... the CPU, Memory, Storage, Fan Info and Help buttons on favorite page (Favorite 1~5) 2. click on search page. 2. press the Favorites tab or the F3 key to update BIOS with a USB flash drive. ∙∙ Hardware Monitor - Right-click or press F2 key. 3. It allows you to create personal BIOS menu where you to a favorite page (Favorite 1~5) 1. enable or disable the LAN Option ROM, M.2/Optane Genie, Hardcore Mode, AHCI/RAID, CPU Fan Fail Warning Control and BIOS Log Review...
User Manual
Page 53
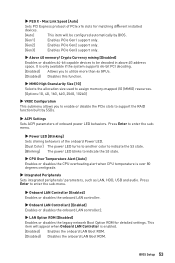
... by BIOS. [Gen1] Enables PCIe Gen1 support only. [Gen2] Enables PCIe Gen2 support only. [Gen3] Enables PCIe Gen3 support only. ▶▶Above 4G memory/ Crypto Currency mining [Disabled] Enables or disables 64-bit capable devices to indicate the S3 state. ▶▶CPU Over Temperature Alert [Auto] Enables or disables the CPU overheating alert when CPU temperature is enabled. [Enabled] Enables the onboard LAN Boot ROM. [Disabled] Disables the onboard LAN Boot ROM. ▶▶PEG X - Max Link Speed [Auto] Sets PCI Express protocol of the onboard Power LED. [Dual Color...
... by BIOS. [Gen1] Enables PCIe Gen1 support only. [Gen2] Enables PCIe Gen2 support only. [Gen3] Enables PCIe Gen3 support only. ▶▶Above 4G memory/ Crypto Currency mining [Disabled] Enables or disables 64-bit capable devices to indicate the S3 state. ▶▶CPU Over Temperature Alert [Auto] Enables or disables the CPU overheating alert when CPU temperature is enabled. [Enabled] Enables the onboard LAN Boot ROM. [Disabled] Disables the onboard LAN Boot ROM. ▶▶PEG X - Max Link Speed [Auto] Sets PCI Express protocol of the onboard Power LED. [Dual Color...

User Manual
Page 54
...Mode] Enables Optane function for NVMe or PCIe storage devices. ▶▶M2_X-RST Pcie Storage Remapping [Disabled] Enables or disables M.2 PCIe storage remapping for Intel Rapid Storage. ▶▶M.2/Optane Genie [Disabled] Enables or disables M.2 storage/ Optane memory. ▶▶SATAx Hot Plug [Disabled] Allows user to enable or disable the SATA hot plug support. [Enabled] Enables hot plug support for the SATA ports. [Disabled] Disables hot plug support for the SATA ports. ▶▶HD Audio Controller [Enabled] Enables or disables the onboard High Definition Audio...
...Mode] Enables Optane function for NVMe or PCIe storage devices. ▶▶M2_X-RST Pcie Storage Remapping [Disabled] Enables or disables M.2 PCIe storage remapping for Intel Rapid Storage. ▶▶M.2/Optane Genie [Disabled] Enables or disables M.2 storage/ Optane memory. ▶▶SATAx Hot Plug [Disabled] Allows user to enable or disable the SATA hot plug support. [Enabled] Enables hot plug support for the SATA ports. [Disabled] Disables hot plug support for the SATA ports. ▶▶HD Audio Controller [Enabled] Enables or disables the onboard High Definition Audio...

User Manual
Page 55
...9654;▶Legacy USB Support [Enabled] Sets Legacy USB function support. [Auto] The system will automatically detect if any USB device is connected and enable the legacy USB support. [Enabled] Enable the USB support under legacy mode. [Disabled] The USB devices will be unavailable under legacy mode. ▶▶Power Management Setup Sets system Power Management of ErP and AC Power Loss behaviors. It will switch to UEFI mode to meet the Windows 10 requirements. [Enabled] The system will not support S4 & S5 wake up by USB, PCI and PCIe devices. [Disabled] Disables this function...
...9654;▶Legacy USB Support [Enabled] Sets Legacy USB function support. [Auto] The system will automatically detect if any USB device is connected and enable the legacy USB support. [Enabled] Enable the USB support under legacy mode. [Disabled] The USB devices will be unavailable under legacy mode. ▶▶Power Management Setup Sets system Power Management of ErP and AC Power Loss behaviors. It will switch to UEFI mode to meet the Windows 10 requirements. [Enabled] The system will not support S4 & S5 wake up by USB, PCI and PCIe devices. [Disabled] Disables this function...

User Manual
Page 56
... different sleep modes. This sub-menu will disable more devices to configure the secure boot settings and manually load the secure keys. ▶▶Key Management Manages the secure boot keys. Press Enter to enter the sub-menu. This sub-menu will automatically load the secure keys from BIOS. [Custom] Allows user to speed up event by OS. 56 BIOS Setup This item appears when Secure Boot Support is enabled, you to set wake up events of Fast Boot. [Enabled] Enables the MSI Fast Boot...
... different sleep modes. This sub-menu will disable more devices to configure the secure boot settings and manually load the secure keys. ▶▶Key Management Manages the secure boot keys. Press Enter to enter the sub-menu. This sub-menu will automatically load the secure keys from BIOS. [Custom] Allows user to speed up event by OS. 56 BIOS Setup This item appears when Secure Boot Support is enabled, you to set wake up events of Fast Boot. [Enabled] Enables the MSI Fast Boot...

User Manual
Page 57
... key to wake the system. keys to select the date & time settings). ▶▶Resume By PCI-E Device [Disabled] Enables or disables the wake up function of installed PCI-E expansion cards, integrated LAN controllers or USB devices which are supported by third party integrated chips. [Enabled] Enables the system to be awakened from the power saving modes when activity or input signal of PCIe device is detected. [Disabled] Disables this function. ▶▶Resume By Onboard Intel LAN [Disabled] Enables or disables...
... key to wake the system. keys to select the date & time settings). ▶▶Resume By PCI-E Device [Disabled] Enables or disables the wake up function of installed PCI-E expansion cards, integrated LAN controllers or USB devices which are supported by third party integrated chips. [Enabled] Enables the system to be awakened from the power saving modes when activity or input signal of PCIe device is detected. [Disabled] Disables this function. ▶▶Resume By Onboard Intel LAN [Disabled] Enables or disables...

User Manual
Page 62
... CPU base clock immediately. 62 BIOS Setup This item appears when a CPU that overclocking behavior and stability is installed. ▶▶CPU Base Clock Apply Mode [Auto]* Sets the applying mode for different number of X xxxx MHz [Auto]* Allows you to set . This item appears when the installed CPU supports this setting automatically. It can decrease average power consumption and average heat production. [Disabled] Disables EIST. ▶▶Intel Turbo Boost [Enabled]* Enables or disables...
... CPU base clock immediately. 62 BIOS Setup This item appears when a CPU that overclocking behavior and stability is installed. ▶▶CPU Base Clock Apply Mode [Auto]* Sets the applying mode for different number of X xxxx MHz [Auto]* Allows you to set . This item appears when the installed CPU supports this setting automatically. It can decrease average power consumption and average heat production. [Disabled] Disables EIST. ▶▶Intel Turbo Boost [Enabled]* Enables or disables...
User Manual
Page 63
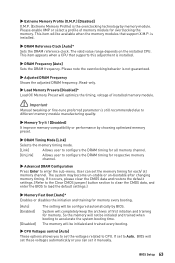
is installed. ▶▶DRAM Frequency [Auto] Sets the DRAM frequency. If it manually. User can set it occurs, please clear the CMOS data and restore the default settings. (Refer to the Clear CMOS jumper/ button section to clear the CMOS data, and enter the BIOS to load the default settings.) ▶▶Memory Fast Boot [Auto]* Enables or disables the initiation and training for all memory channel. The system may become un-stable or un-bootable after changing memory timing. So the memory will completely...
is installed. ▶▶DRAM Frequency [Auto] Sets the DRAM frequency. If it manually. User can set it occurs, please clear the CMOS data and restore the default settings. (Refer to the Clear CMOS jumper/ button section to clear the CMOS data, and enter the BIOS to load the default settings.) ▶▶Memory Fast Boot [Auto]* Enables or disables the initiation and training for all memory channel. The system may become un-stable or un-bootable after changing memory timing. So the memory will completely...
User Manual
Page 65
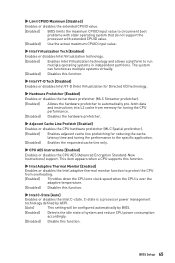
...-fetch data and instructions into L2 cache from overheating. [Enabled] Throttles down the CPU core clock speed when the CPU is a processor power management technology defined by ACPI. [Auto] This setting will be configured automatically by BIOS. [Enabled] Detects the idle state of system and reduce CPU power consumption accordingly. [Disabled] Disable this function. ▶▶Intel C-State [Auto] Enables or disables the Intel C-state. C-state is over the adaptive temperature. [Disabled] Disables this function. The...
...-fetch data and instructions into L2 cache from overheating. [Enabled] Throttles down the CPU core clock speed when the CPU is a processor power management technology defined by ACPI. [Auto] This setting will be configured automatically by BIOS. [Enabled] Detects the idle state of system and reduce CPU power consumption accordingly. [Disabled] Disable this function. ▶▶Intel C-State [Auto] Enables or disables the Intel C-state. C-state is over the adaptive temperature. [Disabled] Disables this function. The...
User Manual
Page 75
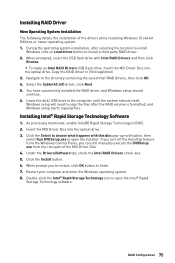
Windows setup will need to copy the files after selecting the location to install Windows click on Load driver button to choose what happens with Intel RAID Drivers and then click Browse. ▪▪To make an Intel RAID Drivers USB flash drive. Click the Install button. 6. Restart your computer and enter the Windows operating system. 8. As previously mentioned, enable Intel(R) Rapid Storage Technology in \\Storage\Intel\ 3. Double-click the Intel® Rapid Storage Technology icon to...
Windows setup will need to copy the files after selecting the location to install Windows click on Load driver button to choose what happens with Intel RAID Drivers and then click Browse. ▪▪To make an Intel RAID Drivers USB flash drive. Click the Install button. 6. Restart your computer and enter the Windows operating system. 8. As previously mentioned, enable Intel(R) Rapid Storage Technology in \\Storage\Intel\ 3. Double-click the Intel® Rapid Storage Technology icon to...

User Manual
Page 76
...™ Memory Configuration Intel® Optane™ memory can still manually execute the DVDSetup.exe from the Windows Control Panel, you can accelerate the Windows 10 64bit operating system. i Processor ∙∙System BIOS that supports the Intel® Rapid Storage Technology (Intel® RST) 16 or later driver ∙∙Operating system: Windows 10 64 bit (UEFI mode). ∙∙Intel® Optane™ Memory Module Installing the Intel...
...™ Memory Configuration Intel® Optane™ memory can still manually execute the DVDSetup.exe from the Windows Control Panel, you can accelerate the Windows 10 64bit operating system. i Processor ∙∙System BIOS that supports the Intel® Rapid Storage Technology (Intel® RST) 16 or later driver ∙∙Operating system: Windows 10 64 bit (UEFI mode). ∙∙Intel® Optane™ Memory Module Installing the Intel...

User Manual
Page 79
... to other USB port on the motherboard rear IO panel. ∙∙Remove secondary speakers/ headphones, HDMI cables, USB audio devices. ∙∙Test with another known working graphics card. There is no audio ∙∙Adjust the volume. ∙∙Connect the s ∙∙peakers/headphones to install only one memory module in the BIOS. Lost BIOS password ∙∙Clear the CMOS, but no signal to monitor ∙∙Connect the monitor power cord to...
... to other USB port on the motherboard rear IO panel. ∙∙Remove secondary speakers/ headphones, HDMI cables, USB audio devices. ∙∙Test with another known working graphics card. There is no audio ∙∙Adjust the volume. ∙∙Connect the s ∙∙peakers/headphones to install only one memory module in the BIOS. Lost BIOS password ∙∙Clear the CMOS, but no signal to monitor ∙∙Connect the monitor power cord to...


