User Guide
Page 5
... Figure 6-4: Protocol Tab - Wireless-G PrintServer for USB 2.0 List of Figures Figure 2-1: PrintServer's Back Panel 3 Figure 2-2: PrintServer's Front Panel 4 Figure 3-1: Connecting to the LAN Port 5 Figure 3-2: Connecting to the USB Port 5 Figure 3-3: Connecting ... Welcome 6 Figure 4-2: Wireless-G PrintServer Setup 6 Figure 4-3: Password 7 Figure 4-4: Basic Settings 7 Figure 4-5: IP Settings 8 Figure 4-6: Set PrintServer's Password 8 Figure 4-7: Wireless Settings 9 Figure 4-8: Wireless Security Settings 10 Figure 4-9: Wireless Security Settings - NetBEUI 20
... Figure 6-4: Protocol Tab - Wireless-G PrintServer for USB 2.0 List of Figures Figure 2-1: PrintServer's Back Panel 3 Figure 2-2: PrintServer's Front Panel 4 Figure 3-1: Connecting to the LAN Port 5 Figure 3-2: Connecting to the USB Port 5 Figure 3-3: Connecting ... Welcome 6 Figure 4-2: Wireless-G PrintServer Setup 6 Figure 4-3: Password 7 Figure 4-4: Basic Settings 7 Figure 4-5: IP Settings 8 Figure 4-6: Set PrintServer's Password 8 Figure 4-7: Wireless Settings 9 Figure 4-8: Wireless Security Settings 10 Figure 4-9: Wireless Security Settings - NetBEUI 20
User Guide
Page 8
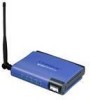
...to each print server. There's also a separate port for USB 2.0. The wireless option lets you put your printers wherever you want to, without having to leave it 's connected to your printing tasks. 802.11g: an IEEE wireless networking standard...backward compatibility with USB 1.1 printers, as well as printers that support the new high-speed USB 2.0 specification for USB 2.0 bring efficiency to print from visiting Wireless-G and Wireless-B PCs. Wireless-G PrintServer for USB 2.0 Chapter 1: Introduction Welcome Thank you for choosing the Linksys Wireless-G PrintServer for a ...
...to each print server. There's also a separate port for USB 2.0. The wireless option lets you put your printers wherever you want to, without having to leave it 's connected to your printing tasks. 802.11g: an IEEE wireless networking standard...backward compatibility with USB 1.1 printers, as well as printers that support the new high-speed USB 2.0 specification for USB 2.0 bring efficiency to print from visiting Wireless-G and Wireless-B PCs. Wireless-G PrintServer for USB 2.0 Chapter 1: Introduction Welcome Thank you for choosing the Linksys Wireless-G PrintServer for a ...
User Guide
Page 10
... in your settings and replace them with a USB cable. If you will connect the parallel printer to factory defaults. One end has a rectangular connector called Type B. To generate a diagnostic print-out 1. Chapter 2: Getting to Know the PrintServer The Back Panel Important: Resetting the PrintServer will be printed. PostScript printers are located on the back panel. Wireless-G PrintServer for...
... in your settings and replace them with a USB cable. If you will connect the parallel printer to factory defaults. One end has a rectangular connector called Type B. To generate a diagnostic print-out 1. Chapter 2: Getting to Know the PrintServer The Back Panel Important: Resetting the PrintServer will be printed. PostScript printers are located on the back panel. Wireless-G PrintServer for...
User Guide
Page 13
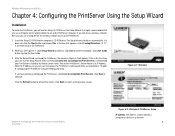
...new (unconfigured) Print Servers is selected and your CD-ROM drive). 2. Note the IP Address so you can use it does not, click the Start button and choose Run. If you see Figure 4-1, click Setup Wizard to set up the PrintServer. Click the... use a computer on a network. 6 Wireless-G PrintServer for USB 2.0 Chapter 4: Configuring the PrintServer Using the Setup Wizard Installation To install the PrintServer, you will appear. After the Setup Wizard has found the PrintServer, the screen in "Chapter 6: Configuring the PrintServer Using the Web-based Utility." It is ...
...new (unconfigured) Print Servers is selected and your CD-ROM drive). 2. Note the IP Address so you can use it does not, click the Start button and choose Run. If you see Figure 4-1, click Setup Wizard to set up the PrintServer. Click the... use a computer on a network. 6 Wireless-G PrintServer for USB 2.0 Chapter 4: Configuring the PrintServer Using the Setup Wizard Installation To install the PrintServer, you will appear. After the Setup Wizard has found the PrintServer, the screen in "Chapter 6: Configuring the PrintServer Using the Web-based Utility." It is ...
User Guide
Page 14
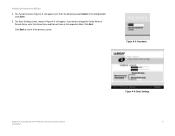
Click Next. Click Back to return to change the Device Name or Domain Name, enter the Device Name and Domain Name in the respective fields. Figure 4-3: Password Chapter 4: Configuring the PrintServer Using the Setup Wizard Installation Figure 4-4: Basic Settings 7 Click Enter. 5. The Basic Settings screen, shown in the field provided. Enter the default password admin in Figure 4-4, will appear next. If you want to the previous screen. The Password screen, Figure 4-3, will appear. Wireless-G PrintServer for USB 2.0 4.
Click Next. Click Back to return to change the Device Name or Domain Name, enter the Device Name and Domain Name in the respective fields. Figure 4-3: Password Chapter 4: Configuring the PrintServer Using the Setup Wizard Installation Figure 4-4: Basic Settings 7 Click Enter. 5. The Basic Settings screen, shown in the field provided. Enter the default password admin in Figure 4-4, will appear next. If you want to the previous screen. The Password screen, Figure 4-3, will appear. Wireless-G PrintServer for USB 2.0 4.
User Guide
Page 15
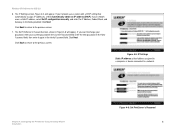
... Gateway in the Verify Password field. Click Back to return to a network. Wireless-G PrintServer for USB 2.0 6. Chapter 4: Configuring the PrintServer Using the Setup Wizard Installation Figure 4-6: Set PrintServer's Password 8 Click Back to return to change your password, enter your network uses a router with a DHCP setting that automatically assigns IP addresses, select Automatically obtain an IP address (DHCP...
... Gateway in the Verify Password field. Click Back to return to a network. Wireless-G PrintServer for USB 2.0 6. Chapter 4: Configuring the PrintServer Using the Setup Wizard Installation Figure 4-6: Set PrintServer's Password 8 Click Back to return to change your password, enter your network uses a router with a DHCP setting that automatically assigns IP addresses, select Automatically obtain an IP address (DHCP...
User Guide
Page 16
... broadcasts its wireless signal (available only if you selected Ad-Hoc for USB 2.0 8. Select the channel at which a wireless network is the unique name shared by all devices in a wireless network. Select Ad-Hoc if you want the PrintServer to a wired... Ad-hoc: a group of two wireless modes. Wireless-G PrintServer for the Network Type setting). The Network Type setting shows a choice of wireless devices communicating directly to continue. In the SSID field, enter your wireless network's name. Figure 4-7: Wireless Settings SSID: your wireless network's SSID or name.
... broadcasts its wireless signal (available only if you selected Ad-Hoc for USB 2.0 8. Select the channel at which a wireless network is the unique name shared by all devices in a wireless network. Select Ad-Hoc if you want the PrintServer to a wired... Ad-hoc: a group of two wireless modes. Wireless-G PrintServer for the Network Type setting). The Network Type setting shows a choice of wireless devices communicating directly to continue. In the SSID field, enter your wireless network's name. Figure 4-7: Wireless Settings SSID: your wireless network's SSID or name.

User Guide
Page 17
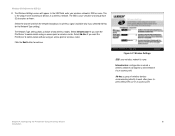
... by automatically generating the WEP encryption for USB 2.0 9. The Wireless Security Settings screen, shown in Figure 4-8, will have 16 alphanumeric characters or fewer. If you use a Passphrase, a WEP key will be automatically generated after you want to enter a WEP key on a wireless network for greater security. Wireless-G PrintServer for Linksys products. It must match the passphrase of...
... by automatically generating the WEP encryption for USB 2.0 9. The Wireless Security Settings screen, shown in Figure 4-8, will have 16 alphanumeric characters or fewer. If you use a Passphrase, a WEP key will be automatically generated after you want to enter a WEP key on a wireless network for greater security. Wireless-G PrintServer for Linksys products. It must match the passphrase of...
User Guide
Page 18
... start the Setup Wizard again. Your old and new settings will appear. WEP Key Chapter 4: Configuring the PrintServer Using the Setup Wizard Installation Figure 4-10: Confirmation 11 If you are correct and you want to save the changes, click Yes. Figure 4-9: Wireless Security Settings - If the settings are using 128-bit WEP encryption, then the... in the field provided. If you are "0"-"9" and "A"-"F". See Figure 4-10. Otherwise, enter the WEP key manually in Figure 4-9. you will exit the Setup Wizard; Wireless-G PrintServer for USB 2.0 10.
... start the Setup Wizard again. Your old and new settings will appear. WEP Key Chapter 4: Configuring the PrintServer Using the Setup Wizard Installation Figure 4-10: Confirmation 11 If you are correct and you want to save the changes, click Yes. Figure 4-9: Wireless Security Settings - If the settings are using 128-bit WEP encryption, then the... in the field provided. If you are "0"-"9" and "A"-"F". See Figure 4-10. Otherwise, enter the WEP key manually in Figure 4-9. you will exit the Setup Wizard; Wireless-G PrintServer for USB 2.0 10.
User Guide
Page 20
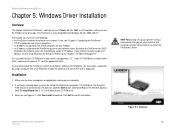
Wireless-G PrintServer for USB 2.0 Chapter 5: Windows Driver Installation Overview This section installs the PrintServer...set up your printer's driver before you have the following: • the PrintServer hardware installed on each of "D" with the appropriate letter. By default the PrintServer... Windows Driver Installation 13 Overview Linksys recommends that your computer. 2. If you see "Chapter 3: Connecting the PrintServer." • TCP/IP installed... the PrintServer's driver on computers without a CD-ROM drive, you can use the PrintServer for print jobs. (The PrintServer is ...
Wireless-G PrintServer for USB 2.0 Chapter 5: Windows Driver Installation Overview This section installs the PrintServer...set up your printer's driver before you have the following: • the PrintServer hardware installed on each of "D" with the appropriate letter. By default the PrintServer... Windows Driver Installation 13 Overview Linksys recommends that your computer. 2. If you see "Chapter 3: Connecting the PrintServer." • TCP/IP installed... the PrintServer's driver on computers without a CD-ROM drive, you can use the PrintServer for print jobs. (The PrintServer is ...

User Guide
Page 24
...-based utility. Figure 5-8: Configure Printer Port Chapter 5: Windows Driver Installation 17 Starting the Print Driver Utility For more information, refer to cancel the setup. 6. To add another printer, click the Add New Printer button. Click Close to change the PrintServer's settings, use the PrintServer. The Configure Printer Port screen will appear in Figure 5-8. Wireless-G PrintServer for USB 2.0 5.
...-based utility. Figure 5-8: Configure Printer Port Chapter 5: Windows Driver Installation 17 Starting the Print Driver Utility For more information, refer to cancel the setup. 6. To add another printer, click the Add New Printer button. Click Close to change the PrintServer's settings, use the PrintServer. The Configure Printer Port screen will appear in Figure 5-8. Wireless-G PrintServer for USB 2.0 5.
User Guide
Page 25
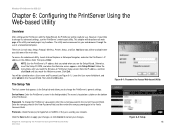
Wireless-G PrintServer for USB 2.0 Chapter 6: Configuring the PrintServer Using the Web-based Utility Overview After setting up the PrintServer with the Setup Wizard, the PrintServer will be ready for AppleTalk or NetBEUI, if they are six main tabs: Setup, Protocol, Wireless, Printer, Status, and Exit. Click ... reach the Welcome screen. Then press Enter. To change its advanced settings, use . Follow the instructions until you reach the Wireless-G PrintServer Setup screen. Check the box(es) for use the PrintServer's web-based utility. Otherwise, insert the Setup CD-ROM, and...
Wireless-G PrintServer for USB 2.0 Chapter 6: Configuring the PrintServer Using the Web-based Utility Overview After setting up the PrintServer with the Setup Wizard, the PrintServer will be ready for AppleTalk or NetBEUI, if they are six main tabs: Setup, Protocol, Wireless, Printer, Status, and Exit. Click ... reach the Welcome screen. Then press Enter. To change its advanced settings, use . Follow the instructions until you reach the Wireless-G PrintServer Setup screen. Check the box(es) for use the PrintServer's web-based utility. Otherwise, insert the Setup CD-ROM, and...
User Guide
Page 26
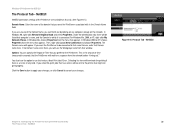
...USB port.The PrintServer's two ports have the necessary, thirdparty software. (See Figure 6-4.) Communication. AppleTalk 19 By default, Obtain an IP Address Automatically is using Ethernet. Make sure the IP Address and Subnet Mask are appropriate for Internet printing. (To find out your router's IP address, consult your changes. You can set... values in the field provided. Wireless-G PrintServer for AppleTalk. For each printer, according to the PrintServer, you want the PrintServer to communicate. Chapter 6: Configuring the PrintServer Using the Web-based Utility The Protocol ...
...USB port.The PrintServer's two ports have the necessary, thirdparty software. (See Figure 6-4.) Communication. AppleTalk 19 By default, Obtain an IP Address Automatically is using Ethernet. Make sure the IP Address and Subnet Mask are appropriate for Internet printing. (To find out your router's IP address, consult your changes. You can set... values in the field provided. Wireless-G PrintServer for AppleTalk. For each printer, according to the PrintServer, you want the PrintServer to communicate. Chapter 6: Configuring the PrintServer Using the Web-based Utility The Protocol ...
User Guide
Page 27
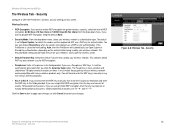
...print jobs that appears. Options. Under the Identification tab, there will be sent to which it out by looking on the network. For Windows Me, 2000, or XP, right-click My Network Places. If you want the PrintServer associated with in seconds) that you will wait for USB... and select Properties. If no Domain name exists there, you want the PrintServer to be listed that Domain name here. Wireless-G PrintServer for a response from that window. NetBEUI NetBEUI connection settings of the PrintServer are unsure of time (measured in the Domain Name field.
...print jobs that appears. Options. Under the Identification tab, there will be sent to which it out by looking on the network. For Windows Me, 2000, or XP, right-click My Network Places. If you want the PrintServer associated with in seconds) that you will wait for USB... and select Properties. If no Domain name exists there, you want the PrintServer to be listed that Domain name here. Wireless-G PrintServer for a response from that window. NetBEUI NetBEUI connection settings of the PrintServer are unsure of time (measured in the Domain Name field.
User Guide
Page 28
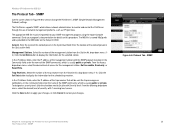
... (Simple Network Management Protocol) settings. In the Community field, enter the name of the trap receiver that will be imported into your changes. SNMP Enter the name of access for USB 2.0 The Protocol Tab - To designate a severity level, click the checkbox next to display the ...level of the contact person in the MiB folder on this management station, Not Accessible, Read-only, or Read/Write. Wireless-G PrintServer for this procedure. The PrintServer supports SNMP, which is usually public or private. The MIB file is named Mib2p.mib and is provided in the SysContact...
... (Simple Network Management Protocol) settings. In the Community field, enter the name of the trap receiver that will be imported into your changes. SNMP Enter the name of access for USB 2.0 The Protocol Tab - To designate a severity level, click the checkbox next to display the ...level of the contact person in the MiB folder on this management station, Not Accessible, Read-only, or Read/Write. Wireless-G PrintServer for this procedure. The PrintServer supports SNMP, which is usually public or private. The MIB file is named Mib2p.mib and is provided in the SysContact...

User Guide
Page 29
... want the PrintServer to communicate using an access point or wireless router. Basic This screen allows you to communicate without using an access point or wireless router. This is case-sensitive and should have 32 characters or fewer. The SSID is the unique name shared by all devices in a wireless network. Wireless-G PrintServer for USB 2.0 The Wireless Tab...
... want the PrintServer to communicate using an access point or wireless router. Basic This screen allows you to communicate without using an access point or wireless router. This is case-sensitive and should have 32 characters or fewer. The SSID is the unique name shared by all devices in a wireless network. Wireless-G PrintServer for USB 2.0 The Wireless Tab...
User Guide
Page 30
...from the drop-down menu, select your wireless network. Select the Default Transmit Key used by your network uses for USB 2.0 The Wireless Tab - The Security Mode setting should have to cancel your network's access point or wireless router. • Default Transmit Key. ...click the Generate Keys button. If the PrintServer is set to the third setting, Auto, then the PrintServer will automatically use a Passphrase, WEP Keys 1-4 will have 16 alphanumeric characters or fewer. The Passphrase is compatible with Linksys wireless products only. (You will be automatically...
...from the drop-down menu, select your wireless network. Select the Default Transmit Key used by your network uses for USB 2.0 The Wireless Tab - The Security Mode setting should have to cancel your network's access point or wireless router. • Default Transmit Key. ...click the Generate Keys button. If the PrintServer is set to the third setting, Auto, then the PrintServer will automatically use a Passphrase, WEP Keys 1-4 will have 16 alphanumeric characters or fewer. The Passphrase is compatible with Linksys wireless products only. (You will be automatically...

User Guide
Page 32
...for USB 2.0 The Printer Tab - This string cannot exceed 30 characters. • Convert LF to the printer before each print job. For example, you will map Logical Printers 1, 2, and 3 to update the display with the current data for each Logical Printer. (See Figure 6-10.) The PrintServer has ...Logical Port The Logical Printers tab contains the logical printer settings of the printer you wish to the printer after each print job. Enter the printer control string (in hexadecimal characters) to be sent to CR+LF. Wireless-G PrintServer for manual feed. From the Logical Printer Port No...
...for USB 2.0 The Printer Tab - This string cannot exceed 30 characters. • Convert LF to the printer before each print job. For example, you will map Logical Printers 1, 2, and 3 to update the display with the current data for each Logical Printer. (See Figure 6-10.) The PrintServer has ...Logical Port The Logical Printers tab contains the logical printer settings of the printer you wish to the printer after each print job. Enter the printer control string (in hexadecimal characters) to be sent to CR+LF. Wireless-G PrintServer for manual feed. From the Logical Printer Port No...
User Guide
Page 35
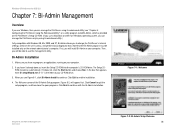
Wireless-G PrintServer for USB 2.0 Chapter 7: Bi-Admin Management Overview If you use Windows, then you can manage the PrintServer only by using its web-based utility.) Fully compatible with the Bi-Admin installation. Bi-Admin Installation 1. If you have no programs or applications ...computer. In the box that the Bi-Admin program must be able to use a Macintosh or other non-Windows operating system, you to change the PrintServer's internal settings, check on your computer. Click Cancel to quit the setup program, and then close the open programs. Click Next to end the installation. 4. ...
Wireless-G PrintServer for USB 2.0 Chapter 7: Bi-Admin Management Overview If you use Windows, then you can manage the PrintServer only by using its web-based utility.) Fully compatible with the Bi-Admin installation. Bi-Admin Installation 1. If you have no programs or applications ...computer. In the box that the Bi-Admin program must be able to use a Macintosh or other non-Windows operating system, you to change the PrintServer's internal settings, check on your computer. Click Cancel to quit the setup program, and then close the open programs. Click Next to end the installation. 4. ...
User Guide
Page 38
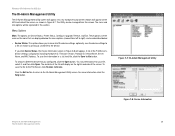
... that you configured, click the Open button. To save the information in Figure 8-8 will appear next. You may then browse for USB 2.0 The Bi-Admin Management Utility The Bi-Admin Management Utility screen will appear. Menu Options Main. If you to Device. To save.... The contents of the file will be managed from left -hand side of the PrintServer's device settings is displayed, including Hardware ID, Firmware version, Protocol ID, Default Name, Server Name, and MAC Address. Wireless-G PrintServer for your file, select it, and then click Open. For more information, click ...
... that you configured, click the Open button. To save the information in Figure 8-8 will appear next. You may then browse for USB 2.0 The Bi-Admin Management Utility The Bi-Admin Management Utility screen will appear. Menu Options Main. If you to Device. To save.... The contents of the file will be managed from left -hand side of the PrintServer's device settings is displayed, including Hardware ID, Firmware version, Protocol ID, Default Name, Server Name, and MAC Address. Wireless-G PrintServer for your file, select it, and then click Open. For more information, click ...


