User Guide
Page 14
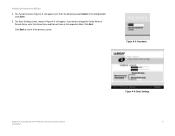
Click Enter. 5. If you want to the previous screen. Enter the default password admin in the respective fields. Figure 4-3: Password Chapter 4: Configuring the PrintServer Using the Setup Wizard Installation Figure 4-4: Basic Settings 7 The Password screen, Figure 4-3, will appear. The Basic Settings screen, shown in Figure 4-4, will appear next. Click Back to return to change the Device Name or Domain Name, enter the Device Name and Domain Name in the field provided. Click Next. Wireless-G PrintServer for USB 2.0 4.
Click Enter. 5. If you want to the previous screen. Enter the default password admin in the respective fields. Figure 4-3: Password Chapter 4: Configuring the PrintServer Using the Setup Wizard Installation Figure 4-4: Basic Settings 7 The Password screen, Figure 4-3, will appear. The Basic Settings screen, shown in Figure 4-4, will appear next. Click Back to return to change the Device Name or Domain Name, enter the Device Name and Domain Name in the field provided. Click Next. Wireless-G PrintServer for USB 2.0 4.

User Guide
Page 17
...Keys or 128 Bit Keys, and then enter a Passphrase. Wireless-G PrintServer for Linksys products. Passphrase: used much like a password, a passphrase simplifies the WEP encryption process by automatically generating the WEP encryption for USB 2.0 9. The Wireless Security Settings screen, shown in Figure 4-8, will be able ...the passphrase of your wireless network and is case-sensitive and should have to enter the WEP key(s) manually on a wireless network for greater wireless security, select the level of encrypting data transmitted on any non-Linksys wireless products.) If you ...
...Keys or 128 Bit Keys, and then enter a Passphrase. Wireless-G PrintServer for Linksys products. Passphrase: used much like a password, a passphrase simplifies the WEP encryption process by automatically generating the WEP encryption for USB 2.0 9. The Wireless Security Settings screen, shown in Figure 4-8, will be able ...the passphrase of your wireless network and is case-sensitive and should have to enter the WEP key(s) manually on a wireless network for greater wireless security, select the level of encrypting data transmitted on any non-Linksys wireless products.) If you ...

User Guide
Page 31
...-sided copies, and Logical Printer 3 for manual feed. This is the PrintServer's Parallel port. • USB 1. Internet Printing Wireless-G PrintServer for printing information when you want to enable: Print every E-Mail, Print Banner Page (enabled by default), or Mail response when printed. Enter the address of your changes. The PrintServer has six logical or virtual printer ports. This is useful for...
...-sided copies, and Logical Printer 3 for manual feed. This is the PrintServer's Parallel port. • USB 1. Internet Printing Wireless-G PrintServer for printing information when you want to enable: Print every E-Mail, Print Banner Page (enabled by default), or Mail response when printed. Enter the address of your changes. The PrintServer has six logical or virtual printer ports. This is useful for...
User Guide
Page 40
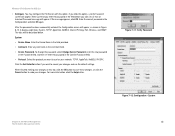
... the PrintServer with this tab, click the OK button to save these changes, or click the Cancel button to cancel your changes and use for USB 2.0 • Configure. It displays eight tabs: System, TCP/IP, AppleTalk, NetBEUI, Internet Printing, Port, Wireless, and SNMP. Enter the Device Name in the Comment field. • Device Password. For...
... the PrintServer with this tab, click the OK button to save these changes, or click the Cancel button to cancel your changes and use for USB 2.0 • Configure. It displays eight tabs: System, TCP/IP, AppleTalk, NetBEUI, Internet Printing, Port, Wireless, and SNMP. Enter the Device Name in the Comment field. • Device Password. For...

User Guide
Page 44
...; Enter this e-mail address in the Confirm Password field. Place a check mark next to the options you want to enable: Print Every Mail, Banner Printing (enabled by default), or Mail response when Printed. Then, enter the time interval for the PrintServer to check for e-mail to cancel your mail server in the Check Mail Interval field. Enter...
...; Enter this e-mail address in the Confirm Password field. Place a check mark next to the options you want to enable: Print Every Mail, Banner Printing (enabled by default), or Mail response when Printed. Then, enter the time interval for the PrintServer to check for e-mail to cancel your mail server in the Check Mail Interval field. Enter...
User Guide
Page 54
... it. This will reset the password, wireless, and other words, the PrintServer will revert to its original factory configuration. 8. Appendix A: 47 Common Problems and Solutions In order to the Linksys website and download the latest firmware at http://www.linksys.com and download the latest firmware. 2. Continue to the factory defaults. Press the Reset button while...
... it. This will reset the password, wireless, and other words, the PrintServer will revert to its original factory configuration. 8. Appendix A: 47 Common Problems and Solutions In order to the Linksys website and download the latest firmware at http://www.linksys.com and download the latest firmware. 2. Continue to the factory defaults. Press the Reset button while...


