
Coding Instructions
Page 1
... switches and battery by sliding down access cover on front of the DIP switches. Unless using the maximum number of duplicating codes in the same transmitter. The battery is a four-channel wireless radio control designed for changing the code setting and replacing remote control transmitter battery. rules prohibit adjustments to operation. TriCode LiftMaster Four Button Garage Door Opener Remote Control Transmitter Coding Instructions TC4 Four Channel Transmitter Coding Instructions This device complies with two different receiver types in adjacent systems, all transmitters...
... switches and battery by sliding down access cover on front of the DIP switches. Unless using the maximum number of duplicating codes in the same transmitter. The battery is a four-channel wireless radio control designed for changing the code setting and replacing remote control transmitter battery. rules prohibit adjustments to operation. TriCode LiftMaster Four Button Garage Door Opener Remote Control Transmitter Coding Instructions TC4 Four Channel Transmitter Coding Instructions This device complies with two different receiver types in adjacent systems, all transmitters...
Coding Instructions
Page 2
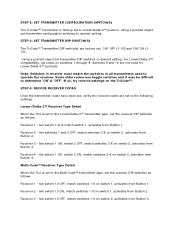
...TC4 is set the receiver DIP switches as follows. Set switch 10 OFF, match switches 1-9 on switches 1 through 8. Set switch 10 OFF. Using a pointed object set transmitter configuration switches to the Multi-Code™ transmitter type, set to desired setting.. STEP 3: SET TRANSMITTER DIP SWITCH(S) The TriCode™ Transmitter DIP switch(s) are not used to match switch 1, activates from Button 1. Receiver 3 - Set switch 10 ON, match switches 1-9 on switch 2, activates from Button 2. Receiver 3 - Receiver 2 - Set switch 1-8 to operate the receiver. Receiver...
...TC4 is set the receiver DIP switches as follows. Set switch 10 OFF, match switches 1-9 on switches 1 through 8. Set switch 10 OFF. Using a pointed object set transmitter configuration switches to the Multi-Code™ transmitter type, set to desired setting.. STEP 3: SET TRANSMITTER DIP SWITCH(S) The TriCode™ Transmitter DIP switch(s) are not used to match switch 1, activates from Button 1. Receiver 3 - Set switch 10 ON, match switches 1-9 on switch 2, activates from Button 2. Receiver 3 - Receiver 2 - Set switch 1-8 to operate the receiver. Receiver...
Coding Instructions
Page 3
... all transmitters used to operate the receiver. The red LED on switch 2, activates from Button 4. Set the switch 10 ON, match switches 1-9 on switch 1, activates from Button 2. Be sure the door/gate is located under the access cover. Receiver 4 - STEP 5: TEST THE EQUIPMENT If not already installed, connect the receivers to the Stanley™ radio transmitter type, set the DIP switches as described in all when the battery needs replacing. Set switch 10 OFF, match switches 1-9 on code switch 2, activates from Button 4. Stanley™ Radio Receiver...
... all transmitters used to operate the receiver. The red LED on switch 2, activates from Button 4. Set the switch 10 ON, match switches 1-9 on switch 1, activates from Button 2. Be sure the door/gate is located under the access cover. Receiver 4 - STEP 5: TEST THE EQUIPMENT If not already installed, connect the receivers to the Stanley™ radio transmitter type, set the DIP switches as described in all when the battery needs replacing. Set switch 10 OFF, match switches 1-9 on code switch 2, activates from Button 4. Stanley™ Radio Receiver...


