User's Guide
Page 8
... the Maintenance menu 135 Installing print cartridges...135 Removing a used print cartridge...137 Refilling print cartridges...138 Using genuine Lexmark print cartridges 138 Aligning print cartridges...138 Cleaning the print cartridge nozzles 139 Wiping the print cartridge nozzles and contacts ...Cleaning the exterior of the printer 141 Ordering supplies...141 Ordering print cartridges...141 Ordering paper and other supplies ...141 Troubleshooting...143 Setup Troubleshooting...143 Incorrect language appears on the display 143 Power button is not lit ...143 Software does not install ...144...
... the Maintenance menu 135 Installing print cartridges...135 Removing a used print cartridge...137 Refilling print cartridges...138 Using genuine Lexmark print cartridges 138 Aligning print cartridges...138 Cleaning the print cartridge nozzles 139 Wiping the print cartridge nozzles and contacts ...Cleaning the exterior of the printer 141 Ordering supplies...141 Ordering print cartridges...141 Ordering paper and other supplies ...141 Troubleshooting...143 Setup Troubleshooting...143 Incorrect language appears on the display 143 Power button is not lit ...143 Software does not install ...144...
User's Guide
Page 9
... the Wireless Setup Utility (Windows users only 158 Changing wireless settings after installation (Windows users only 159 Check printer ports (Windows users only 159 Print troubleshooting...159 Partial 4 x 6 in. (10 x 15 cm) photo prints when using a PictBridge-enabled digital camera 159 Improving print quality ...160 Poor text and graphic quality ...161...
... the Wireless Setup Utility (Windows users only 158 Changing wireless settings after installation (Windows users only 159 Check printer ports (Windows users only 159 Print troubleshooting...159 Partial 4 x 6 in. (10 x 15 cm) photo prints when using a PictBridge-enabled digital camera 159 Improving print quality ...160 Poor text and graphic quality ...161...

User's Guide
Page 10
... communication is not established 176 Experiencing poor quality or incorrect output 176 Cannot print from digital camera using PictBridge 177 Jams and misfeeds troubleshooting 177 How to clear and avoid paper jams ...177 Duplex unit does not operate correctly ...178 Two-sided paper type error ...178...Cannot print documents from a memory card or flash drive 183 Photos do not transfer from a memory card across a wireless network 184 Copy troubleshooting...185 Copier does not respond ...185 Scanner unit does not close ...185 Poor copy quality ...185 Copied item does not match the original...
... communication is not established 176 Experiencing poor quality or incorrect output 176 Cannot print from digital camera using PictBridge 177 Jams and misfeeds troubleshooting 177 How to clear and avoid paper jams ...177 Duplex unit does not operate correctly ...178 Two-sided paper type error ...178...Cannot print documents from a memory card or flash drive 183 Photos do not transfer from a memory card across a wireless network 184 Copy troubleshooting...185 Copier does not respond ...185 Scanner unit does not close ...185 Poor copy quality ...185 Copied item does not match the original...
User's Guide
Page 14
...for using the printer and other software, if your desktop, and the User's Guide: Comprehensive Version appears on the Lexmark Web site at www.lexmark.com. Troubleshooting). 2 Double-click the printer Help icon. 4 Click Yes. You can also find this document on the screen... Click Programs or All Programs Œ Lexmark 7500 Series. 3 Select Lexmark Solution Center. 14 It installs with printing, copying, Run. An icon of your printer) Note: If necessary, click ŒAll Programs Œ • Troubleshooting problems with the other information Comprehensive Version ...
...for using the printer and other software, if your desktop, and the User's Guide: Comprehensive Version appears on the Lexmark Web site at www.lexmark.com. Troubleshooting). 2 Double-click the printer Help icon. 4 Click Yes. You can also find this document on the screen... Click Programs or All Programs Œ Lexmark 7500 Series. 3 Select Lexmark Solution Center. 14 It installs with printing, copying, Run. An icon of your printer) Note: If necessary, click ŒAll Programs Œ • Troubleshooting problems with the other information Comprehensive Version ...

User's Guide
Page 29
... plug. This plug is a plug installed in the setup steps. There is necessary for the proper functioning of the printer. If problems occur, see "Setup Troubleshooting" on page 31 • Use the fax line as a telephone, an answering machine, or a computer modem. If you do need to attach the printer to...
... plug. This plug is a plug installed in the setup steps. There is necessary for the proper functioning of the printer. If problems occur, see "Setup Troubleshooting" on page 31 • Use the fax line as a telephone, an answering machine, or a computer modem. If you do need to attach the printer to...

User's Guide
Page 45
... levels. • Order print cartridges. • Find maintenance information. • Select other Solution Center tabs for more information, including how to change printer settings and troubleshooting. Fax History and Settings Select printer fax settings for: • Dialing and Sending • Ringing and Answering • Fax Printing/Reports • Speed Dial and... open . 1 Do one of the following : • In Windows Vista, click . • In Windows XP and earlier, click Start. 2 Click Programs or All Programs Œ Lexmark 7500 Series. 3 Select Solution Center.
... levels. • Order print cartridges. • Find maintenance information. • Select other Solution Center tabs for more information, including how to change printer settings and troubleshooting. Fax History and Settings Select printer fax settings for: • Dialing and Sending • Ringing and Answering • Fax Printing/Reports • Speed Dial and... open . 1 Do one of the following : • In Windows Vista, click . • In Windows XP and earlier, click Start. 2 Click Programs or All Programs Œ Lexmark 7500 Series. 3 Select Solution Center.
User's Guide
Page 46
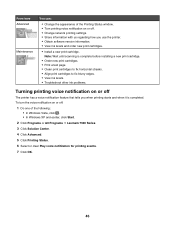
...8226; Clean print cartridges to fix horizontal streaks. • Align print cartridges to fix blurry edges. • View ink levels. • Troubleshoot other ink problems. Turning printing voice notification on or off . • Change network printing settings. • Share information with us regarding how ...• In Windows Vista, click . • In Windows XP and earlier, click Start. 2 Click Programs or All Programs Œ Lexmark 7500 Series. 3 Click Solution Center. 4 Click Advanced. 5 Click Printing Status. 6 Select or clear Play voice notification for printing events. 7 Click OK...
...8226; Clean print cartridges to fix horizontal streaks. • Align print cartridges to fix blurry edges. • View ink levels. • Troubleshoot other ink problems. Turning printing voice notification on or off . • Change network printing settings. • Share information with us regarding how ...• In Windows Vista, click . • In Windows XP and earlier, click Start. 2 Click Programs or All Programs Œ Lexmark 7500 Series. 3 Click Solution Center. 4 Click Advanced. 5 Click Printing Status. 6 Select or clear Play voice notification for printing events. 7 Click OK...

User's Guide
Page 56
...It may be removed. Note: For more information about passwords (security keys), see "Check your security keys" in the "Wireless troubleshooting" section of the "Troubleshooting" chapter. 17 Type the same security code in the Confirm network key box. 18 Select the This is not connected, select...wireless network using the installation cable as part of your computer to the computer again using Windows 1 Click Programs or All Programs ΠLexmark 7500 Series. 2 Click Wireless Setup. 3 Follow the instructions on the computer screen. 24 Store your wireless network. 11 Write down exactly...
...It may be removed. Note: For more information about passwords (security keys), see "Check your security keys" in the "Wireless troubleshooting" section of the "Troubleshooting" chapter. 17 Type the same security code in the Confirm network key box. 18 Select the This is not connected, select...wireless network using the installation cable as part of your computer to the computer again using Windows 1 Click Programs or All Programs ΠLexmark 7500 Series. 2 Click Wireless Setup. 3 Follow the instructions on the computer screen. 24 Store your wireless network. 11 Write down exactly...
User's Guide
Page 143
...is within the range of the following : Press power button Make sure the printer is on the display These are possible solutions. Setup Troubleshooting Incorrect language appears on by pressing . 143 Try one or more of the following : Change the language selection during initial setup After ...your printer on the display. 7 Press to select Yes when the display asks Are you select a language, Language appears again on the display. Troubleshooting If you are performing a task. • The correct printer port is selected. To change the selection: 1 Press or repeatedly until the ...
...is within the range of the following : Press power button Make sure the printer is on the display These are possible solutions. Setup Troubleshooting Incorrect language appears on by pressing . 143 Try one or more of the following : Change the language selection during initial setup After ...your printer on the display. 7 Press to select Yes when the display asks Are you select a language, Language appears again on the display. Troubleshooting If you are performing a task. • The correct printer port is selected. To change the selection: 1 Press or repeatedly until the ...

User's Guide
Page 148
... hexadecimal characters. b Click System and MaintenanceŒ System. If USB Host Controller and USB Root Hub are A-F and 0-9. • Exactly 5 or 13 ASCII characters. Wireless troubleshooting How do I find out what type of the following criteria. You must follow the following : Check power Make sure the light is using?
... hexadecimal characters. b Click System and MaintenanceŒ System. If USB Host Controller and USB Root Hub are A-F and 0-9. • Exactly 5 or 13 ASCII characters. Wireless troubleshooting How do I find out what type of the following criteria. You must follow the following : Check power Make sure the light is using?
User's Guide
Page 149
... the computer screen. b Click Apply. 149 Check Wi-Fi indicator light Make sure the Wi-Fi indicator light is blinking orange during installation" in "Wireless troubleshooting." If it is not green, see "Wi-Fi indicator light is orange" or "Wi-Fi indicator light is green. Note: You must install the printer.... • In Windows XP: Start Œ Settings Œ Printers and Faxes. • In Windows 2000 and earlier: Start Œ Settings Œ Printers. 2 Right-click the Lexmark 7500 Series icon. 3 Click Properties Œ Ports. 4 Verify that uses the network printer.
... the computer screen. b Click Apply. 149 Check Wi-Fi indicator light Make sure the Wi-Fi indicator light is blinking orange during installation" in "Wireless troubleshooting." If it is not green, see "Wi-Fi indicator light is orange" or "Wi-Fi indicator light is green. Note: You must install the printer.... • In Windows XP: Start Œ Settings Œ Printers and Faxes. • In Windows 2000 and earlier: Start Œ Settings Œ Printers. 2 Right-click the Lexmark 7500 Series icon. 3 Click Properties Œ Ports. 4 Verify that uses the network printer.
User's Guide
Page 152
...up the printer" chapter. Check security keys Make sure security keys are possible solutions. Although the possible distance between devices in the "Wireless troubleshooting" section. For information on how to print a setup page, see "Check your wireless access point (wireless router), you must reset the ...network. 1 Click: • In Windows Vista: . • In Windows XP and earlier: Start. 2 Click Programs or All Programs Œ Lexmark 7500 Series. 3 Click Wireless Setup. Note: You may be connecting to your computer and/or printer Move the computer and/or printer closer to set...
...up the printer" chapter. Check security keys Make sure security keys are possible solutions. Although the possible distance between devices in the "Wireless troubleshooting" section. For information on how to print a setup page, see "Check your wireless access point (wireless router), you must reset the ...network. 1 Click: • In Windows Vista: . • In Windows XP and earlier: Start. 2 Click Programs or All Programs Œ Lexmark 7500 Series. 3 Click Wireless Setup. Note: You may be connecting to your computer and/or printer Move the computer and/or printer closer to set...

User's Guide
Page 153
...SSID (Service Set Identifer) is no longer working . If you experiment with different angles for Windows or Mac in the "Wireless troubleshooting" section Ping the printer Ping the printer to make sure the network is on. Move your network. Although the possible distance between ...more information, see "Ping the printer" for optimal performance is 300 feet, the effective range for Windows or Mac in the "Wireless troubleshooting" section. You may be temporary interference from other devices such as microwaves or other appliances, cordless phones, baby monitors, and security system...
...SSID (Service Set Identifer) is no longer working . If you experiment with different angles for Windows or Mac in the "Wireless troubleshooting" section Ping the printer Ping the printer to make sure the network is on. Move your network. Although the possible distance between ...more information, see "Ping the printer" for optimal performance is 300 feet, the effective range for Windows or Mac in the "Wireless troubleshooting" section. You may be temporary interference from other devices such as microwaves or other appliances, cordless phones, baby monitors, and security system...
User's Guide
Page 159
... 1 Insert the USB cable that came with your camera to the camera, and insert the other wireless setting: 1 Click Programs or All Programs Œ Lexmark 7500 Series. 2 Click Wireless Setup Utility. Check printer ports (Windows users only) Make sure the correct printer port is selected. 1 Click Start Œ... serial number. 5 If USB is set correctly The printer issues the Paper or Photo Size Error when your camera does not allow you want. Print troubleshooting Partial 4 x 6 in . (10 x 15 cm) on the PictBridge-enabled digital camera. • If your chosen photo size does not match the ...
... 1 Insert the USB cable that came with your camera to the camera, and insert the other wireless setting: 1 Click Programs or All Programs Œ Lexmark 7500 Series. 2 Click Wireless Setup Utility. Check printer ports (Windows users only) Make sure the correct printer port is selected. 1 Click Start Œ... serial number. 5 If USB is set correctly The printer issues the Paper or Photo Size Error when your camera does not allow you want. Print troubleshooting Partial 4 x 6 in . (10 x 15 cm) on the PictBridge-enabled digital camera. • If your chosen photo size does not match the ...

User's Guide
Page 177
... are improperly formed or are possible solutions. If you cannot reach the paper because it . Remove memory cards Remove any missing pages. Jams and misfeeds troubleshooting How to remove it is incorrect, the camera will be detected as a USB storage device, or an error message will be displayed on the camera...
... are improperly formed or are possible solutions. If you cannot reach the paper because it . Remove memory cards Remove any missing pages. Jams and misfeeds troubleshooting How to remove it is incorrect, the camera will be detected as a USB storage device, or an error message will be displayed on the camera...

User's Guide
Page 180
...). Try one or more of the following: Check for paper jams Check for and clear any paper jams. For more information, see "Jams and misfeeds troubleshooting" on page 57. • Try loading one page, envelope, or sheet of the following: Clear banner paper jams 1 Press to print. Review banner printing checklist...
...). Try one or more of the following: Check for paper jams Check for and clear any paper jams. For more information, see "Jams and misfeeds troubleshooting" on page 57. • Try loading one page, envelope, or sheet of the following: Clear banner paper jams 1 Press to print. Review banner printing checklist...

User's Guide
Page 182
... that the type of the following : Reinsert the memory card The memory card may have inserted the memory card in the correct slot. Memory card troubleshooting Memory card cannot be used in the printer. Remove and then reinsert the memory card quickly.
... that the type of the following : Reinsert the memory card The memory card may have inserted the memory card in the correct slot. Memory card troubleshooting Memory card cannot be used in the printer. Remove and then reinsert the memory card quickly.

User's Guide
Page 185
Note: If your wireless connection is down, use your configuration cable to connect your printer to your wireless network is connected and active. Copy troubleshooting Copier does not respond These are possible solutions. Try one or more of the following : Check messages Resolve all error messages. Make sure the power ...
Note: If your wireless connection is down, use your configuration cable to connect your printer to your wireless network is connected and active. Copy troubleshooting Copier does not respond These are possible solutions. Try one or more of the following : Check messages Resolve all error messages. Make sure the power ...
User's Guide
Page 187
... pause settings 1 Do one or more information, see "Removing and reinstalling the software" on , make sure the printer is marked with the USB symbol. Scan troubleshooting Scanner does not respond These are possible solutions.
... pause settings 1 Do one or more information, see "Removing and reinstalling the software" on , make sure the printer is marked with the USB symbol. Scan troubleshooting Scanner does not respond These are possible solutions.

User's Guide
Page 189
... wall jack. 4 If you still do not hear a dial tone, plug a telephone into the wall jack. 2 Listen for the following hardware are possible solutions. Fax troubleshooting Cannot send or receive a fax These are scanning. Check Original Size setting Make sure the Original Size setting is Auto Detect or the size of...
... wall jack. 4 If you still do not hear a dial tone, plug a telephone into the wall jack. 2 Listen for the following hardware are possible solutions. Fax troubleshooting Cannot send or receive a fax These are scanning. Check Original Size setting Make sure the Original Size setting is Auto Detect or the size of...


