
Quick Reference
Page 6
... control panel cycles through all the lights. Factory defaults have been reset. Verify that the options you installed are configured for the sizes and types of memory installed is not listed under Installed Features, turn the printer back on . Printing the menu settings and network setup pages 6 The Load Paper, Toner Low / Replace PC...
... control panel cycles through all the lights. Factory defaults have been reset. Verify that the options you installed are configured for the sizes and types of memory installed is not listed under Installed Features, turn the printer back on . Printing the menu settings and network setup pages 6 The Load Paper, Toner Low / Replace PC...

Quick Reference
Page 7
...back to sound an alarm when it needs attention). You can change printer settings not available from your drivers CD and click View Documentation for instructions on installing and using the Local Printer Settings Utility: Finishing Settings • Copies • Blank Pages •...USB Buffer Using the Local Printer Settings Utility 7 If you want the printer to your printer driver (for example, activating Alarm Control if you selected the Custom install path from the computer software application, select Start Æ All Programs Æ Lexmark Æ Local Printer Settings Utility.
...back to sound an alarm when it needs attention). You can change printer settings not available from your drivers CD and click View Documentation for instructions on installing and using the Local Printer Settings Utility: Finishing Settings • Copies • Blank Pages •...USB Buffer Using the Local Printer Settings Utility 7 If you want the printer to your printer driver (for example, activating Alarm Control if you selected the Custom install path from the computer software application, select Start Æ All Programs Æ Lexmark Æ Local Printer Settings Utility.
Quick Reference
Page 17
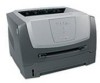
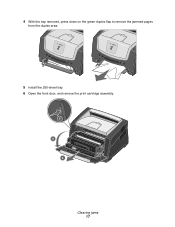
4 With the tray removed, press down on the green duplex flap to remove the jammed pages from the duplex area. 5 Install the 250-sheet tray. 6 Open the front door, and remove the print cartridge assembly. 1 2 3 Clearing jams 17
4 With the tray removed, press down on the green duplex flap to remove the jammed pages from the duplex area. 5 Install the 250-sheet tray. 6 Open the front door, and remove the print cartridge assembly. 1 2 3 Clearing jams 17
User's Guide
Page 4
... 68 Chapter 6: Installing options 69 Accessing the system board ...69 Adding a memory card ...72 Installing an optional 250-sheet drawer or 550-sheet drawer 73 Recognizing installed options ...73 Chapter...printer operating mode ...86 Turning on Reduced Curl mode ...86 Print quality problems ...87 Cleaning the printhead lens ...91 Notices ...93 Conventions ...93 Electronic emission notices ...93 Noise emission levels ...95 Product energy consumption ...95 Waste from Electrical and Electronic Equipment (WEEE) directive 96 Laser notice ...96 Statement of Limited Warranty for Lexmark E250d...
... 68 Chapter 6: Installing options 69 Accessing the system board ...69 Adding a memory card ...72 Installing an optional 250-sheet drawer or 550-sheet drawer 73 Recognizing installed options ...73 Chapter...printer operating mode ...86 Turning on Reduced Curl mode ...86 Print quality problems ...87 Cleaning the printhead lens ...91 Notices ...93 Conventions ...93 Electronic emission notices ...93 Noise emission levels ...95 Product energy consumption ...95 Waste from Electrical and Electronic Equipment (WEEE) directive 96 Laser notice ...96 Statement of Limited Warranty for Lexmark E250d...
User's Guide
Page 17
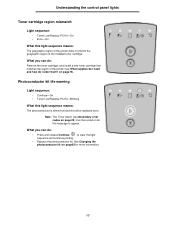
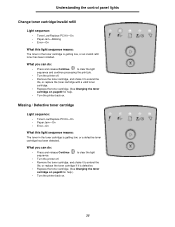
See Changing the photoconductor kit on page76). What you can do: Remove the toner cartridge, and install a new toner cartridge that matches the region of the installed toner cartridge. Understanding the control panel lights Toner cartridge region mismatch Light sequence: • Toner Low/Replace PC Kit-On...-On • Toner Low/Replace PC Kit-Blinking What this light sequence means: The geographic region of the printer does not match the geographic region of the printer (see Secondary error codes on page25) must be replaced soon. on page82 for this message to clear the light...
See Changing the photoconductor kit on page76). What you can do: Remove the toner cartridge, and install a new toner cartridge that matches the region of the installed toner cartridge. Understanding the control panel lights Toner cartridge region mismatch Light sequence: • Toner Low/Replace PC Kit-On...-On • Toner Low/Replace PC Kit-Blinking What this light sequence means: The geographic region of the printer does not match the geographic region of the printer (see Secondary error codes on page25) must be replaced soon. on page82 for this message to clear the light...

User's Guide
Page 29
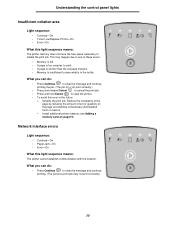
...Understanding the control panel lights Complex page Light sequence: • Continue-On • Ready-On • Error-On What this error in the Local Printer Setup Utility. - Reduce the complexity of the page by reducing the amount of the print data may be lost). • To avoid this light ...on the page is too complex (that is, too large for the printer memory). Set Page Protect to clear the error code and continue processing the print job (some of text or graphics on page72). 29 Install additional printer memory (see Adding a memory card on the page and deleting unnecessary...
...Understanding the control panel lights Complex page Light sequence: • Continue-On • Ready-On • Error-On What this error in the Local Printer Setup Utility. - Reduce the complexity of the page by reducing the amount of the print data may be lost). • To avoid this light ...on the page is too complex (that is, too large for the printer memory). Set Page Protect to clear the error code and continue processing the print job (some of text or graphics on page72). 29 Install additional printer memory (see Adding a memory card on the page and deleting unnecessary...
User's Guide
Page 30
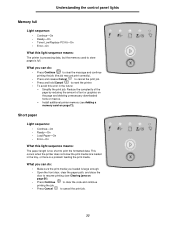
...area Light sequence: • Continue-On • Toner Low/Replace PC Kit-On • Error-On What this light sequence means: The printer cannot establish communication with the network. Network interface errors Light sequence: • Continue-On • Paper Jam-On • Error-On What...; A page is too complex to print. • A page is shorter than the set page margins. • Memory is in the future: - Install additional printer memory (see Adding a memory card on the page and deleting unnecessary downloaded fonts or macros. - What you can do : • Press Continue to...
...area Light sequence: • Continue-On • Toner Low/Replace PC Kit-On • Error-On What this light sequence means: The printer cannot establish communication with the network. Network interface errors Light sequence: • Continue-On • Paper Jam-On • Error-On What...; A page is too complex to print. • A page is shorter than the set page margins. • Memory is in the future: - Install additional printer memory (see Adding a memory card on the page and deleting unnecessary downloaded fonts or macros. - What you can do : • Press Continue to...
User's Guide
Page 31
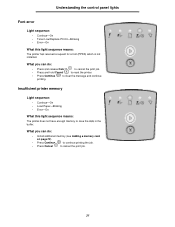
... Error-On What this light sequence means: The printer has received a request for a font (PPDS) which is not installed. What you can do : • Press and release Cancel to cancel the print job. • Press and hold Cancel to reset the printer. • Press Continue to clear the message... Toner Low/Replace PC Kit-Blinking • Error-On What this light sequence means: The printer does not have enough memory to save the data in the buffer. What you can do : • Install additional memory (see Adding a memory card on page72). • Press Continue to continue printing ...
... Error-On What this light sequence means: The printer has received a request for a font (PPDS) which is not installed. What you can do : • Press and release Cancel to cancel the print job. • Press and hold Cancel to reset the printer. • Press Continue to clear the message... Toner Low/Replace PC Kit-Blinking • Error-On What this light sequence means: The printer does not have enough memory to save the data in the buffer. What you can do : • Install additional memory (see Adding a memory card on page72). • Press Continue to continue printing ...
User's Guide
Page 33
...page by reducing the amount of text or graphics on page72). This occurs when the printer does not know the print media size loaded in the future: - Simplify the print job. Install additional printer memory (see Clearing jams on page56). • Press Continue to clear the code... and continue printing the job. • Press Cancel to reset the printer. • To avoid this error in the tray, or ...
...page by reducing the amount of text or graphics on page72). This occurs when the printer does not know the print media size loaded in the future: - Simplify the print job. Install additional printer memory (see Clearing jams on page56). • Press Continue to clear the code... and continue printing the job. • Press Cancel to reset the printer. • To avoid this error in the tray, or ...
User's Guide
Page 34
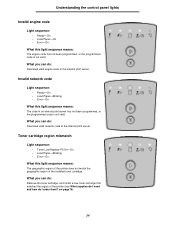
...Replace PC Kit-On • Load Paper-Blinking • Error-On What this light sequence means: The geographic region of the printer does not match the geographic region of the printer (see What supplies do I order them? Invalid network code Light sequence: • Ready-On • Load Paper-Blinking •... not been programmed, or the programmed code is not valid. What you can do: Remove the toner cartridge, and install a new toner cartridge that matches the region of the installed toner cartridge. on page76). 34 What you can do I need and how do : Download valid engine code to ...
...Replace PC Kit-On • Load Paper-Blinking • Error-On What this light sequence means: The geographic region of the printer does not match the geographic region of the printer (see What supplies do I order them? Invalid network code Light sequence: • Ready-On • Load Paper-Blinking •... not been programmed, or the programmed code is not valid. What you can do: Remove the toner cartridge, and install a new toner cartridge that matches the region of the installed toner cartridge. on page76). 34 What you can do I need and how do : Download valid engine code to ...
User's Guide
Page 35
... or replace the toner cartridge if it to clear the light • Turn the printer off . • Remove the toner cartridge, and shake it is getting low, or an invalid refill toner has been installed. What you can do : • Press and release Continue sequence. to extend... the life, or replace the toner cartridge with a valid toner cartridge. • Replace the toner cartridge. (See Changing the toner cartridge on page80 for help . • Turn the printer back on ....
... or replace the toner cartridge if it to clear the light • Turn the printer off . • Remove the toner cartridge, and shake it is getting low, or an invalid refill toner has been installed. What you can do : • Press and release Continue sequence. to extend... the life, or replace the toner cartridge with a valid toner cartridge. • Replace the toner cartridge. (See Changing the toner cartridge on page80 for help . • Turn the printer back on ....

User's Guide
Page 57
Clearing jams 4 With the tray removed, press down on the green duplex flap to remove the jammed pages from the duplex area. 5 Install the 250-sheet paper tray. 57
Clearing jams 4 With the tray removed, press down on the green duplex flap to remove the jammed pages from the duplex area. 5 Install the 250-sheet paper tray. 57
User's Guide
Page 66
...window to send the job to print, then load the letterhead when the printer displays the Load Manual Feeder light sequence (see the printer driver Help. Note: If you must have flash memory installed. Watermarks are simple text. For information about how to create, save,... or download an overlay or watermark, see Manually feeding a print jobon page60 ). 1 From the computer software application, select File à Print. 2 Click Properties (or Options, Printer, or Setup, depending...
...window to send the job to print, then load the letterhead when the printer displays the Load Manual Feeder light sequence (see the printer driver Help. Note: If you must have flash memory installed. Watermarks are simple text. For information about how to create, save,... or download an overlay or watermark, see Manually feeding a print jobon page60 ). 1 From the computer software application, select File à Print. 2 Click Properties (or Options, Printer, or Setup, depending...

User's Guide
Page 69
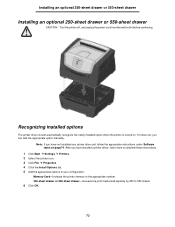
CAUTION: Turn the printer off, and unplug the power cord from the wall outlet before continuing. 1 Remove the 250-sheet tray. 69 6 Installing options Accessing the system board To install memory, you must access the printer system board.
CAUTION: Turn the printer off, and unplug the power cord from the wall outlet before continuing. 1 Remove the 250-sheet tray. 69 6 Installing options Accessing the system board To install memory, you must access the printer system board.

User's Guide
Page 72
..., before continuing. CAUTION: If you touch a memory card. The printer can support up the printer, turn the printer off, and unplug the power cord from the wall outlet before you are installing a memory card after setting up to fully seat the card. 6 Make sure each latch fits...the front door. 10 See Recognizing installed options on page73 . 72 Warning: Memory is easily damaged by static electricity. Adding a memory card Adding a memory card The system board has one connector for a total of 96MB). Memory options designed for other Lexmark printers may be required to 64MB of ...
..., before continuing. CAUTION: If you touch a memory card. The printer can support up the printer, turn the printer off, and unplug the power cord from the wall outlet before you are installing a memory card after setting up to fully seat the card. 6 Make sure each latch fits...the front door. 10 See Recognizing installed options on page73 . 72 Warning: Memory is easily damaged by static electricity. Adding a memory card Adding a memory card The system board has one connector for a total of 96MB). Memory options designed for other Lexmark printers may be required to 64MB of ...
User's Guide
Page 73
... cord from the wall outlet before continuing. Note: If you can add the appropriate option manually. Recognizing installed options The printer driver should automatically recognize the newly installed option when the printer is turned on page74. If it does not, you have installed a printer driver, return here to complete these instructions. 1 Click Start à Settings à...
... cord from the wall outlet before continuing. Note: If you can add the appropriate option manually. Recognizing installed options The printer driver should automatically recognize the newly installed option when the printer is turned on page74. If it does not, you have installed a printer driver, return here to complete these instructions. 1 Click Start à Settings à...

User's Guide
Page 74
...à Properties. 4 Click Print Test Page. 74 Verify the amount of paper you installed are configured for the sizes and types of memory installed is not listed under Installed Features, turn off the printer, unplug the power cord from the wall outlet, and reinstall the option. - On the... menu settings page: - Verify that the paper trays are correctly listed under "Printer Information." - Verify that ...
...à Properties. 4 Click Print Test Page. 74 Verify the amount of paper you installed are configured for the sizes and types of memory installed is not listed under Installed Features, turn off the printer, unplug the power cord from the wall outlet, and reinstall the option. - On the... menu settings page: - Verify that the paper trays are correctly listed under "Printer Information." - Verify that ...

User's Guide
Page 75
... lets you change the following settings using the Local Printer Settings Utility. You can change printer settings not available from your drivers CD and click View Documentation for instructions on installing and using the Local Printer Settings Utility: Finishing Settings • Copies •...you selected the Custom install path from the computer software application, select Start à All Programs à Lexmark à Local Printer Settings Utility. To access the Local Printer Settings Utility from your drivers CD, you want the printer to your printer driver (for example,...
... lets you change the following settings using the Local Printer Settings Utility. You can change printer settings not available from your drivers CD and click View Documentation for instructions on installing and using the Local Printer Settings Utility: Finishing Settings • Copies •...you selected the Custom install path from the computer software application, select Start à All Programs à Lexmark à Local Printer Settings Utility. To access the Local Printer Settings Utility from your drivers CD, you want the printer to your printer driver (for example,...
User's Guide
Page 78
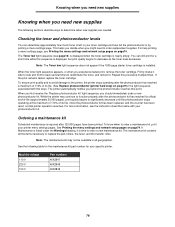
...000 pages have been printed. Note: The maintenance kit may continue to order a maintenance kit, print your specific printer. Knowing when you need new supplies Knowing when you experience faded print, remove the toner cartridge. For help ... official end-of-life (approximately 30,000 pages), print quality begins to order replacement supplies. While the printer may not be available in your photoconductor kit. If the print remains faded, replace the toner cartridge. ... numbers 40X2847 40X2848 40X2849 78 You can determine approximately how much toner is installed.
...000 pages have been printed. Note: The maintenance kit may continue to order a maintenance kit, print your specific printer. Knowing when you need new supplies Knowing when you experience faded print, remove the toner cartridge. For help ... official end-of-life (approximately 30,000 pages), print quality begins to order replacement supplies. While the printer may not be available in your photoconductor kit. If the print remains faded, replace the toner cartridge. ... numbers 40X2847 40X2848 40X2849 78 You can determine approximately how much toner is installed.
User's Guide
Page 81
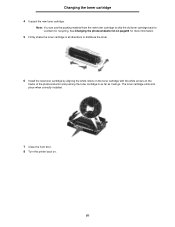
The toner cartridge clicks into place when correctly installed. 7 Close the front door. 8 Turn the printer back on the tracks of the photoconductor and pushing the toner cartridge in as far as it will go. See Changing the photoconductor kit on ... can use the packing material from the new toner cartridge to ship the old toner cartridge back to Lexmark for more information. 5 Firmly shake the toner cartridge in all directions to distribute the toner. 6 Install the new toner cartridge by aligning the white rollers on the toner cartridge with the white arrows...
The toner cartridge clicks into place when correctly installed. 7 Close the front door. 8 Turn the printer back on the tracks of the photoconductor and pushing the toner cartridge in as far as it will go. See Changing the photoconductor kit on ... can use the packing material from the new toner cartridge to ship the old toner cartridge back to Lexmark for more information. 5 Firmly shake the toner cartridge in all directions to distribute the toner. 6 Install the new toner cartridge by aligning the white rollers on the toner cartridge with the white arrows...


