
User's Guide
Page 7
... notice ...2 Safety information ...3 Laser notice ...3 The United Kingdom Telecommunications Act 1984 3 Conventions ...3 Electronic emission notices 3 Printer energy consumption 4 Statement of Limited Warranty 5 Chapter 1: Printer overview 11 Chapter 2: Installing software for local printing 13 Before installing printer software 13 Windows ...13 Installing printer software using the drivers CD 13 Installing printer software through the Add Printer Wizard 13 Installing...
... notice ...2 Safety information ...3 Laser notice ...3 The United Kingdom Telecommunications Act 1984 3 Conventions ...3 Electronic emission notices 3 Printer energy consumption 4 Statement of Limited Warranty 5 Chapter 1: Printer overview 11 Chapter 2: Installing software for local printing 13 Before installing printer software 13 Windows ...13 Installing printer software using the drivers CD 13 Installing printer software through the Add Printer Wizard 13 Installing...
User's Guide
Page 8
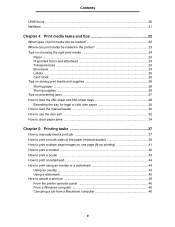
... ...21 Chapter 4: Print media tasks and tips 22 What types of print media can be loaded 22 Where can print media be loaded in the printer 23 Tips on choosing the right print media 24 Paper ...24 Preprinted forms and letterhead 24 Transparencies ...24 Envelopes ...24 Labels ...25 Card stock ...26... 44 How to print using an overlay or a watermark 44 Using an overlay ...44 Using a watermark 45 How to cancel a print job 46 From the printer operator panel 46 From a Windows computer 46 Canceling a job from a Macintosh computer 46 8
... ...21 Chapter 4: Print media tasks and tips 22 What types of print media can be loaded 22 Where can print media be loaded in the printer 23 Tips on choosing the right print media 24 Paper ...24 Preprinted forms and letterhead 24 Transparencies ...24 Envelopes ...24 Labels ...25 Card stock ...26... 44 How to print using an overlay or a watermark 44 Using an overlay ...44 Using a watermark 45 How to cancel a print job 46 From the printer operator panel 46 From a Windows computer 46 Canceling a job from a Macintosh computer 46 8

User's Guide
Page 9
... settings and network setup pages 85 How to print a test page 85 Windows ...85 How to configure for TCP/IP 86 Assigning a printer IP address 86 Verifying the IP settings 86 Using the printer resident Web page 87 Using the Local Printer Setup Utility 87 Chapter 10: Supplies information 88 What supplies do I need...
... settings and network setup pages 85 How to print a test page 85 Windows ...85 How to configure for TCP/IP 86 Assigning a printer IP address 86 Verifying the IP settings 86 Using the printer resident Web page 87 Using the Local Printer Setup Utility 87 Chapter 10: Supplies information 88 What supplies do I need...
User's Guide
Page 13
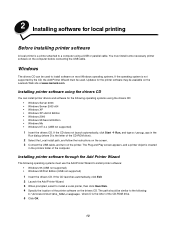
... use the Add Printer Wizard to install software on most Windows operating systems. If the operating system is the letter of the CD-ROM drive). 2 Select the Local install path, and follow the instructions on the screen. 3 Connect the USB cable, and turn on the Lexmark Web site at www.lexmark.com. The path...
... use the Add Printer Wizard to install software on most Windows operating systems. If the operating system is the letter of the CD-ROM drive). 2 Select the Local install path, and follow the instructions on the screen. 3 Connect the USB cable, and turn on the Lexmark Web site at www.lexmark.com. The path...

User's Guide
Page 15
... list, make sure the USB cable is properly connected and the printer is turned on the computer. Make sure the printer PPD now matches the printer in the original Printer (USB) window. 7 In the PostScript Printer Description (PPD) File section, click Auto Setup. The UNIX/Linux ... click Utilities. 3 Double-click Desktop Printer Utility. 4 Select Printer (USB), and click OK. 5 In the USB Printer Selection section, click Change. Visit the Lexmark Web site at www.lexmark.com. After the printer appears in the Printer List, quit Print Center or Printer Setup Utility. A PPD file provides ...
... list, make sure the USB cable is properly connected and the printer is turned on the computer. Make sure the printer PPD now matches the printer in the original Printer (USB) window. 7 In the PostScript Printer Description (PPD) File section, click Auto Setup. The UNIX/Linux ... click Utilities. 3 Double-click Desktop Printer Utility. 4 Select Printer (USB), and click OK. 5 In the USB Printer Selection section, click Change. Visit the Lexmark Web site at www.lexmark.com. After the printer appears in the Printer List, quit Print Center or Printer Setup Utility. A PPD file provides ...
User's Guide
Page 16
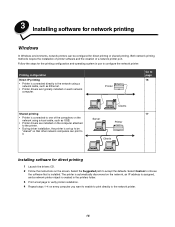
... Installing software for the printing configuration and operating system in the printers folder. 3 Print a test page to verify printer installation. 4 Repeat steps 1-4 on each network computer. 3 Installing software for network printing Windows In Windows environments, network printers can print to it. The printer is automatically discovered on the network, an IP address is assigned, and a network...
... Installing software for the printing configuration and operating system in the printers folder. 3 Print a test page to verify printer installation. 4 Repeat steps 1-4 on each network computer. 3 Installing software for network printing Windows In Windows environments, network printers can print to it. The printer is automatically discovered on the network, an IP address is assigned, and a network...
User's Guide
Page 17
... be installed on every network computer that identifies it to make sure the printer was successfully shared. • The printer object in the Printers folder now has a shared indicator. For example, in Windows NT 4.0, a hand appears under the printer object. • Browse Network Neighborhood. The shared printer name is complete, print a test page to share the...
... be installed on every network computer that identifies it to make sure the printer was successfully shared. • The printer object in the Printers folder now has a shared indicator. For example, in Windows NT 4.0, a hand appears under the printer object. • Browse Network Neighborhood. The shared printer name is complete, print a test page to share the...
User's Guide
Page 18
...or Universally Administered Address (UAA). See Printing a network setup page. 2 Go to the Lexmark Web site at www.lexmark.com for a new printer object to be copied from the computer attached to the printer to the computer you are located on the drivers CD that shipped with your network is ...after you connect the network cable to set them up. Detailed instructions about 64 bit support for more information. Installing optional printer software If you want to the shared printer. Windows 7 Repeat steps 1-6 on every network computer you want to enable to print to use any of the UAA. 18...
...or Universally Administered Address (UAA). See Printing a network setup page. 2 Go to the Lexmark Web site at www.lexmark.com for a new printer object to be copied from the computer attached to the printer to the computer you are located on the drivers CD that shipped with your network is ...after you connect the network cable to set them up. Detailed instructions about 64 bit support for more information. Installing optional printer software If you want to the shared printer. Windows 7 Repeat steps 1-6 on every network computer you want to enable to print to use any of the UAA. 18...
User's Guide
Page 19
... address (for example, ping 192.168.0.11). For example, at a command prompt on a Windows computer, click Start Æ Programs Æ Command prompt (or Accessories Æ Command prompt if using Windows 2000). a Insert the drivers CD. If your printer is set up on a network, you also need to your network support person for more...
... address (for example, ping 192.168.0.11). For example, at a command prompt on a Windows computer, click Start Æ Programs Æ Command prompt (or Accessories Æ Command prompt if using Windows 2000). a Insert the drivers CD. If your printer is set up on a network, you also need to your network support person for more...
User's Guide
Page 20
....and on the computer. c Choose Summary from the Lexmark Web site. UNIX/Linux The printer supports many UNIX and Linux platforms, such as Sun Solaris and Red Hat. h Click Close when installation is not correct for the printer, delete the printer from the printer list in the Summary window is complete. d Do one of the following...
....and on the computer. c Choose Summary from the Lexmark Web site. UNIX/Linux The printer supports many UNIX and Linux platforms, such as Sun Solaris and Red Hat. h Click Close when installation is not correct for the printer, delete the printer from the printer list in the Summary window is complete. d Do one of the following...
User's Guide
Page 24
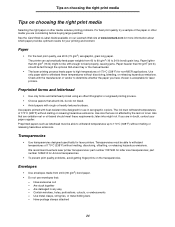
...getting fingerprints on our Lexmark Web site at www.lexmark.com for more information about which paper provides optimum results for non-MICR applications. Envelopes • Use envelopes made from 60 to 90 g/m2 (16 to withstand these requirements; Contain windows, holes, perforations, cutouts... only forms and letterhead printed using an offset lithographic or engraved printing process. • Choose papers that : - We recommend Lexmark laser printer transparencies: part number 70X7240 for use envelopes that absorb ink, but do not bleed. • Avoid papers with heat-resistant ...
...getting fingerprints on our Lexmark Web site at www.lexmark.com for more information about which paper provides optimum results for non-MICR applications. Envelopes • Use envelopes made from 60 to 90 g/m2 (16 to withstand these requirements; Contain windows, holes, perforations, cutouts... only forms and letterhead printed using an offset lithographic or engraved printing process. • Choose papers that : - We recommend Lexmark laser printer transparencies: part number 70X7240 for use envelopes that absorb ink, but do not bleed. • Avoid papers with heat-resistant ...
User's Guide
Page 27
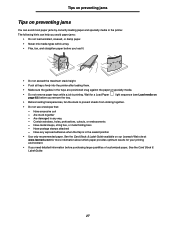
... large quantities of customized paper, See the Card Stock & Label Guide. 27 light sequence (see Load media on our Lexmark Web site at www.lexmark.com for more information about which paper provides optimum results for a Load Paper page 62) before you remove the tray....sheets from sticking together. • Do not use envelopes that: - Contain windows, holes, perforations, cutouts, or embossments - The following hints can avoid most paper jams by correctly loading paper and specialty media in the printer. Have any way - Are stuck together - Are damaged in any exposed...
... large quantities of customized paper, See the Card Stock & Label Guide. 27 light sequence (see Load media on our Lexmark Web site at www.lexmark.com for more information about which paper provides optimum results for a Load Paper page 62) before you remove the tray....sheets from sticking together. • Do not use envelopes that: - Contain windows, holes, perforations, cutouts, or embossments - The following hints can avoid most paper jams by correctly loading paper and specialty media in the printer. Have any way - Are stuck together - Are damaged in any exposed...

User's Guide
Page 37
... is ready, it will display the Load Manual Feeder light sequence, at which point you should load the media. on the Print window to send the job to view the printer driver settings. 3 Click the Paper tab. 4 Select Manual paper from the Paper tray drop-down list. 5 Select the appropriate Paper size... to use in the manual feeder, see What types of print media at the front of the printer and can only feed one sheet of print media can contact the paper guides. 37 When the printer is located at a time. To manually feed a print job: 1 From the computer software application, select ...
... is ready, it will display the Load Manual Feeder light sequence, at which point you should load the media. on the Print window to send the job to view the printer driver settings. 3 Click the Paper tab. 4 Select Manual paper from the Paper tray drop-down list. 5 Select the appropriate Paper size... to use in the manual feeder, see What types of print media at the front of the printer and can only feed one sheet of print media can contact the paper guides. 37 When the printer is located at a time. To manually feed a print job: 1 From the computer software application, select ...

User's Guide
Page 40
The printer prints every other page of the tray. Note: Manual duplex is not available on the Print window. Once the first side of your job prints, the Load Paper light comes on, and the Continue light blinks. 10 Load the paper back into the printer with the already-printed side up and the top of the page toward the front of the document first. How to print on both sides of the paper (manual duplex) 8 Click OK. 9 Click OK on a Macintosh computer. 40
The printer prints every other page of the tray. Note: Manual duplex is not available on the Print window. Once the first side of your job prints, the Load Paper light comes on, and the Continue light blinks. 10 Load the paper back into the printer with the already-printed side up and the top of the page toward the front of the document first. How to print on both sides of the paper (manual duplex) 8 Click OK. 9 Click OK on a Macintosh computer. 40

User's Guide
Page 41
... you select 4-Up multipage printing and portrait orientation, the results differ depending on the Multipage Order value you would like the paper to have. The printer uses the Multipage Order, Multipage View, and Multipage Border settings to determine the order and orientation of the page images, and whether a border is used... the orientation you select: Across Down 1 2 1 3 3 4 2 4 4 To print a visible border around each page image, select Print page borders. 5 Click OK. 6 Click OK on the Print window to send the job to print. 41
... you select 4-Up multipage printing and portrait orientation, the results differ depending on the Multipage Order value you would like the paper to have. The printer uses the Multipage Order, Multipage View, and Multipage Border settings to determine the order and orientation of the page images, and whether a border is used... the orientation you select: Across Down 1 2 1 3 3 4 2 4 4 To print a visible border around each page image, select Print page borders. 5 Click OK. 6 Click OK on the Print window to send the job to print. 41
User's Guide
Page 42
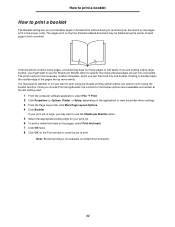
...the pages print in bundles helps the outside edge of each page to form a booklet. 4 5 2 7 If the document contains many pages to fold easily. The printer will print the necessary number of bundles, which you might want to use the Sheets per Bundle option to specify how many physical pages are... for your print job. 6 To print a visible fold mark on the pages, select Print fold mark. 7 Click OK twice. 8 Click OK on the Print window to send the job to print using any Duplex printing options before you want to use the Sheets per Bundle option. 5 Select the appropriate binding...
...the pages print in bundles helps the outside edge of each page to form a booklet. 4 5 2 7 If the document contains many pages to fold easily. The printer will print the necessary number of bundles, which you might want to use the Sheets per Bundle option to specify how many physical pages are... for your print job. 6 To print a visible fold mark on the pages, select Print fold mark. 7 Click OK twice. 8 Click OK on the Print window to send the job to print using any Duplex printing options before you want to use the Sheets per Bundle option. 5 Select the appropriate binding...
User's Guide
Page 43
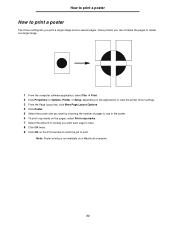
... the pages to create one large image. 1 From the computer software application, select File Æ Print. 2 Click Properties (or Options, Printer, or Setup, depending on the application) to view the printer driver settings. 3 From the Page Layout tab, click More Page Layout Options. 4 Click Poster. 5 Select the poster size you want by... lets you want each page to have. 8 Click OK twice. 9 Click OK on a Macintosh computer. 43 Note: Poster prining is not available on the Print window to send the job to print.
... the pages to create one large image. 1 From the computer software application, select File Æ Print. 2 Click Properties (or Options, Printer, or Setup, depending on the application) to view the printer driver settings. 3 From the Page Layout tab, click More Page Layout Options. 4 Click Poster. 5 Select the poster size you want by... lets you want each page to have. 8 Click OK twice. 9 Click OK on a Macintosh computer. 43 Note: Poster prining is not available on the Print window to send the job to print.
User's Guide
Page 44
... tray. 7 Click OK. 8 Click OK on the Print window to send the job to print. Typical examples of overlays include company logos or letterheads, decorative borders, and simulated "preprinted" forms. Overlays can create overlays and watermarks and then download them directly to the printer, or you must have flash memory installed. You...
... tray. 7 Click OK. 8 Click OK on the Print window to send the job to print. Typical examples of overlays include company logos or letterheads, decorative borders, and simulated "preprinted" forms. Overlays can create overlays and watermarks and then download them directly to the printer, or you must have flash memory installed. You...
User's Guide
Page 46
... printing, and then click Cancel. Canceling a job from a Macintosh computer Canceling a print job from your computer. From a Windows computer 1 Click Start Æ Settings Æ Printers. 2 Double-click the printer you are printing to. 3 In the printer window, select the print job you are using to print the job. How to cancel a print job How to...
... printing, and then click Cancel. Canceling a job from a Macintosh computer Canceling a print job from your computer. From a Windows computer 1 Click Start Æ Settings Æ Printers. 2 Double-click the printer you are printing to. 3 In the printer window, select the print job you are using to print the job. How to cancel a print job How to...
User's Guide
Page 82
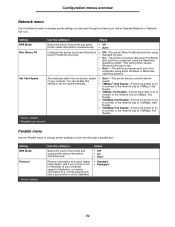
... per second Parallel menu Use the Parallel menu to change printer settings on jobs sent through a network port (either Windows or Macintosh operating systems. Set Card Speed Automatically detect the connection speed of your printer is set to Fastbytes (if your computer supports Fastbytes), or... receive information at a normal transmission rate if your network. This setting often causes Windows print jobs to fail. • Auto*-The printer processes print jobs from computers using either Standard Network or Network Opt ). Setting NPA Mode Protocol * ...
... per second Parallel menu Use the Parallel menu to change printer settings on jobs sent through a network port (either Windows or Macintosh operating systems. Set Card Speed Automatically detect the connection speed of your printer is set to Fastbytes (if your computer supports Fastbytes), or... receive information at a normal transmission rate if your network. This setting often causes Windows print jobs to fail. • Auto*-The printer processes print jobs from computers using either Standard Network or Network Opt ). Setting NPA Mode Protocol * ...


