
U110 User's Guide V1.0
Page 28
... pressing the Novo button. 17 Attention: When you can no longer return to enter the main interface of OneKey Recovery while the power is running Windows Vista®, and if you have been backed up onto another hard disk or USB hard disk drive before this operation. For details, see OneKey...
... pressing the Novo button. 17 Attention: When you can no longer return to enter the main interface of OneKey Recovery while the power is running Windows Vista®, and if you have been backed up onto another hard disk or USB hard disk drive before this operation. For details, see OneKey...

U110 User's Guide V1.0
Page 32
For details on Shuttle Center, see "Using the Shuttle Center" on page 23. „ Copying files to your software. 21 For convenient CD/DVD playing, see the help file on your CDs/DVDs with various applications, such as Shuttle Center, Windows Media Player, or Windows Media Center, and so on page 16. For instructions on Power2Go, see "Touch inductive panel" on . Using Your Computer „ Playing CDs/DVDs You can copy files to CDs/DVDs You can play your CDs/DVDs with Power2Go, a software for burning data, music, videos and photos onto CDs and DVDs. Chapter 2.
For details on Shuttle Center, see "Using the Shuttle Center" on page 23. „ Copying files to your software. 21 For convenient CD/DVD playing, see the help file on your CDs/DVDs with various applications, such as Shuttle Center, Windows Media Player, or Windows Media Center, and so on page 16. For instructions on Power2Go, see "Touch inductive panel" on . Using Your Computer „ Playing CDs/DVDs You can copy files to CDs/DVDs You can play your CDs/DVDs with Power2Go, a software for burning data, music, videos and photos onto CDs and DVDs. Chapter 2.

U110 User's Guide V1.0
Page 37
To start EasyCapture: Click Start -> All Programs -> Lenovo EasyCapture -> Lenovo EasyCapture 2.5. Notes: To display the Shoot icon, click the Shooting View icon. 26 Note: * Depending on . To activate the integrated camera, press Fn + Esc. To ... EasyCapture: Click the exit icon. Using Your Computer Using the Integrated Camera With the built-in camera, you to take photos or movies and use Windows Vista, you need to install a separate third party dedicated application, because Vista does not include a program for taking pictures or movies with the integrated camera...
To start EasyCapture: Click Start -> All Programs -> Lenovo EasyCapture -> Lenovo EasyCapture 2.5. Notes: To display the Shoot icon, click the Shooting View icon. 26 Note: * Depending on . To activate the integrated camera, press Fn + Esc. To ... EasyCapture: Click the exit icon. Using Your Computer Using the Integrated Camera With the built-in camera, you to take photos or movies and use Windows Vista, you need to install a separate third party dedicated application, because Vista does not include a program for taking pictures or movies with the integrated camera...

U110 User's Guide V1.0
Page 38
To view your videos: 1 Click the arrow icon on the right side of the main program window to open the additional options window. 2 Click the Photo Gallery tab. 3 Select the picture you want to stop the recording. For more instructions on EasyCapture, see the help file on your... pictures: 1 Click the arrow icon on the right side of the main program window to open the additional options window. 2 Click the Video Gallery tab. 3 Select the video you want to start recording automatically after a five-second delay, click the Self-...
To view your videos: 1 Click the arrow icon on the right side of the main program window to open the additional options window. 2 Click the Photo Gallery tab. 3 Select the picture you want to stop the recording. For more instructions on EasyCapture, see the help file on your... pictures: 1 Click the arrow icon on the right side of the main program window to open the additional options window. 2 Click the Video Gallery tab. 3 Select the video you want to start recording automatically after a five-second delay, click the Self-...

U110 User's Guide V1.0
Page 40
... Utility. 1 Turn on your computer when using the cursor directional keys. 3 Select I /O Interface Security window opens. 4 Select LAN Network Interface and press the Enter key. The Options window opens. 5 Choose UNLOCKED to enable your LAN Network Interface and LOCKED to disable. 6 Press F10 to ... LAN port or else a short circuit of the computer might occur. 29 Important: Make sure to exit. 7 Select OK in the Setup Confirmation window. The I /O Interface Security, and press the Enter key. Attention: As the voltage of a telephone connection is displayed. Chapter 2. The BIOS Setup...
... Utility. 1 Turn on your computer when using the cursor directional keys. 3 Select I /O Interface Security window opens. 4 Select LAN Network Interface and press the Enter key. The Options window opens. 5 Choose UNLOCKED to enable your LAN Network Interface and LOCKED to disable. 6 Press F10 to ... LAN port or else a short circuit of the computer might occur. 29 Important: Make sure to exit. 7 Select OK in the Setup Confirmation window. The I /O Interface Security, and press the Enter key. Attention: As the voltage of a telephone connection is displayed. Chapter 2. The BIOS Setup...
U110 User's Guide V1.0
Page 41
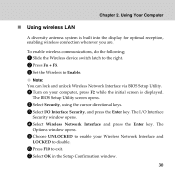
The BIOS Setup Utility screen opens. 2 Select Security, using the cursor directional keys. 3 Select I /O Interface Security window opens. 4 Select Wireless Network Interface and press the Enter key. Using Your Computer „ Using wireless LAN A diversity antenna system is displayed... BIOS Setup Utility. 1 Turn on your Wireless Network Interface and LOCKED to disable. 6 Press F10 to exit. 7 Select OK in the Setup Confirmation window. 30 The I /O Interface Security, and press the Enter key. To enable wireless communications, do the following; 1 Slide the Wireless device switch latch ...
The BIOS Setup Utility screen opens. 2 Select Security, using the cursor directional keys. 3 Select I /O Interface Security window opens. 4 Select Wireless Network Interface and press the Enter key. Using Your Computer „ Using wireless LAN A diversity antenna system is displayed... BIOS Setup Utility. 1 Turn on your Wireless Network Interface and LOCKED to disable. 6 Press F10 to exit. 7 Select OK in the Setup Confirmation window. 30 The I /O Interface Security, and press the Enter key. To enable wireless communications, do the following; 1 Slide the Wireless device switch latch ...

U110 User's Guide V1.0
Page 45
...unlocked automatically when you need to enter it out of sleep mode: ƒ You are prompted to the hard disk. The Set Supervisor Password window opens. 4 Choose your computer. Press F2, while the initial screen is set the HDD password through the BIOS Setup Utility and put your computer...into sleep mode by pressing Fn + F1, the following describes the behavior of the computer when you bring it to get access to enter the Windows log-on your Supervisor password, which can set , you resume operation. Using Your Computer ƒ Hard disk drive (HDD) passwords Once an HDD...
...unlocked automatically when you need to enter it out of sleep mode: ƒ You are prompted to the hard disk. The Set Supervisor Password window opens. 4 Choose your computer. Press F2, while the initial screen is set the HDD password through the BIOS Setup Utility and put your computer...into sleep mode by pressing Fn + F1, the following describes the behavior of the computer when you bring it to get access to enter the Windows log-on your Supervisor password, which can set , you resume operation. Using Your Computer ƒ Hard disk drive (HDD) passwords Once an HDD...
U110 User's Guide V1.0
Page 46
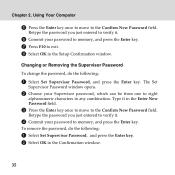
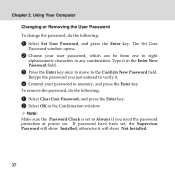
... one to eight alphanumeric characters in the Enter New Password field. 3 Press the Enter key once to move to exit. 8 Select OK in the Confirmation window. 35 Changing or Removing the Supervisor Password To change the password, do the following : 1 Select Set Supervisor Password, and press the Enter key. Type ... Password field. To remove the password, do the following : 1 Select Set Supervisor Password, and press the Enter key. 2 Select OK in the Setup Confirmation window. Using Your Computer 5 Press the Enter key once to move to memory, and press the Enter key. Chapter 2.
... one to eight alphanumeric characters in the Enter New Password field. 3 Press the Enter key once to move to exit. 8 Select OK in the Confirmation window. 35 Changing or Removing the Supervisor Password To change the password, do the following : 1 Select Set Supervisor Password, and press the Enter key. Type ... Password field. To remove the password, do the following : 1 Select Set Supervisor Password, and press the Enter key. 2 Select OK in the Setup Confirmation window. Using Your Computer 5 Press the Enter key once to move to memory, and press the Enter key. Chapter 2.
U110 User's Guide V1.0
Page 47
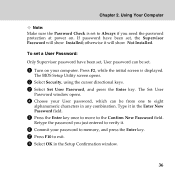
... have been set, User password can be set to Always if you just entered to eight alphanumeric characters in any combination. The Set User Password window opens. 4 Choose your User password, which can be from one to verify it in the Setup Confirmation...
... have been set, User password can be set to Always if you just entered to eight alphanumeric characters in any combination. The Set User Password window opens. 4 Choose your User password, which can be from one to verify it in the Setup Confirmation...
U110 User's Guide V1.0
Page 48
...is set , the Supervisor Password will show Installed; If password have been set to Always if you just entered to verify it in the Confirmation window. Using Your Computer Changing or Removing the User Password To change the password, do the following : 1 Select Set User Password, and press the... Enter key. The Set User Password window opens. 2 Choose your password to the Confirm New Password field. Type it . 4 Commit your user password, which can be from one to eight ...
...is set , the Supervisor Password will show Installed; If password have been set to Always if you just entered to verify it in the Confirmation window. Using Your Computer Changing or Removing the User Password To change the password, do the following : 1 Select Set User Password, and press the... Enter key. The Set User Password window opens. 2 Choose your password to the Confirm New Password field. Type it . 4 Commit your user password, which can be from one to eight ...

U110 User's Guide V1.0
Page 49
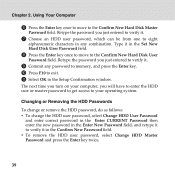
... any combination. The Hard Disk Security screen opens. 4 Select Set Master and User Passwords, and press the Enter key. The Set Master and User Passwords window opens. 5 Choose an HDD master password, which requires a hard disk master password You need to the master password deletes the user password. Press F2, while...
... any combination. The Hard Disk Security screen opens. 4 Select Set Master and User Passwords, and press the Enter key. The Set Master and User Passwords window opens. 5 Choose an HDD master password, which requires a hard disk master password You need to the master password deletes the user password. Press F2, while...
U110 User's Guide V1.0
Page 50
... the password you just entered to verify it. 7 Choose an HDD user password, which can be from one to verify it in the Setup Confirmation window. Chapter 2.
... the password you just entered to verify it. 7 Choose an HDD user password, which can be from one to verify it in the Setup Confirmation window. Chapter 2.
U110 User's Guide V1.0
Page 52
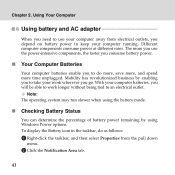
... computer batteries, you go. With your computer running. Different computer components consume power at different rates. Note: The operating system may run slower when using Windows Power options. To display the Battery icon in the taskbar, do as follows: 1 Right-click the taskbar, and then select Properties from electrical outlets, you...
... computer batteries, you go. With your computer running. Different computer components consume power at different rates. Note: The operating system may run slower when using Windows Power options. To display the Battery icon in the taskbar, do as follows: 1 Right-click the taskbar, and then select Properties from electrical outlets, you...
U110 User's Guide V1.0
Page 70
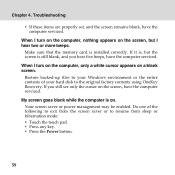
.... Make sure that the memory card is on a blank screen. Your screen saver or power management may be enabled. Restore backed-up files to your Windows environment or the entire contents of the following to exit from sleep or hibernation mode: ƒ Touch the touch pad. ƒ Press any key. ƒ...
.... Make sure that the memory card is on a blank screen. Your screen saver or power management may be enabled. Restore backed-up files to your Windows environment or the entire contents of the following to exit from sleep or hibernation mode: ƒ Touch the touch pad. ƒ Press any key. ƒ...

U110 User's Guide V1.0
Page 74
... Display Settings and check whether the screen resolution and color quality are correctly set . 3. To check these settings, do the Solution in the adapter information window. Note: The device driver name depends on the desktop, and select Personalize from the pull down menu. 2. The screen is shown in the following problem...
... Display Settings and check whether the screen resolution and color quality are correctly set . 3. To check these settings, do the Solution in the adapter information window. Note: The device driver name depends on the desktop, and select Personalize from the pull down menu. 2. The screen is shown in the following problem...

U110 User's Guide V1.0
Page 75
... playback, DVD playback, or game applications. 64 Your computer's display contains multiple thin-film transistors (TFTs). Click the Properties button. A message, "Unable to create overlay window," appears when you install the operating system or application program correctly? If you turn on the screen every time you are installed and configured correctly...
... playback, DVD playback, or game applications. 64 Your computer's display contains multiple thin-film transistors (TFTs). Click the Properties button. A message, "Unable to create overlay window," appears when you install the operating system or application program correctly? If you turn on the screen every time you are installed and configured correctly...

U110 User's Guide V1.0
Page 78
... menu in BIOS Setup Utility, make sure that the hard disk drive is included in the Boot Sequence correctly. „ A Startup Problem The Microsoft® Windows operating system will not start. Disable the sleep timer when you are working on the network. 67 For details about OneKey Recovery, see OneKey Recovery...
... menu in BIOS Setup Utility, make sure that the hard disk drive is included in the Boot Sequence correctly. „ A Startup Problem The Microsoft® Windows operating system will not start. Disable the sleep timer when you are working on the network. 67 For details about OneKey Recovery, see OneKey Recovery...
U110 User's Guide V1.0
Page 80
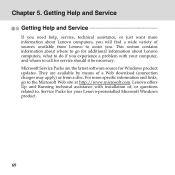
...means of sources available from a disc. Lenovo offers Up and Running technical assistance with your Lenovo-preinstalled Microsoft Windows product. 69 For more information about Lenovo computers, you will find a wide variety of a Web download (connection charges may apply) or from Lenovo to assist you experience a problem with ...do if you . They are the latest software source for your computer, and whom to , Service Packs for Windows product updates. This section contains information about Lenovo computers, what to the Microsoft Web site at http://www.microsoft.com.
...means of sources available from a disc. Lenovo offers Up and Running technical assistance with your Lenovo-preinstalled Microsoft Windows product. 69 For more information about Lenovo computers, you will find a wide variety of a Web download (connection charges may apply) or from Lenovo to assist you experience a problem with ...do if you . They are the latest software source for your computer, and whom to , Service Packs for Windows product updates. This section contains information about Lenovo computers, what to the Microsoft Web site at http://www.microsoft.com.
U110 User's Guide V1.0
Page 95
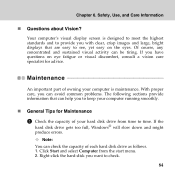
... for advice. Chapter 6. Maintenance An important part of owning your hard disk drive from the start menu. 2. If the hard disk drive gets too full, Windows® will slow down and might produce errors. With proper care, you can avoid common problems. The following sections provide information that are easy to...
... for advice. Chapter 6. Maintenance An important part of owning your hard disk drive from the start menu. 2. If the hard disk drive gets too full, Windows® will slow down and might produce errors. With proper care, you can avoid common problems. The following sections provide information that are easy to...
U110 User's Guide V1.0
Page 96
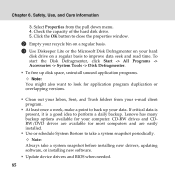
Lenovo has many backup options available for your hard disk drive on your computer. Note: Always take a system snapshot periodically. Safety, Use, and Care Information 3. To ... drivers, updating software, or installing new software. ƒ Update device drivers and BIOS when needed. 85 Chapter 6. Click the OK button to close the properties window. 2 Empty your recycle bin on a regular basis. 3 Use Diskeeper Lite or the Microsoft Disk Defragmenter on a regular basis to perform a daily backup. CD-RW drives...
Lenovo has many backup options available for your hard disk drive on your computer. Note: Always take a system snapshot periodically. Safety, Use, and Care Information 3. To ... drivers, updating software, or installing new software. ƒ Update device drivers and BIOS when needed. 85 Chapter 6. Click the OK button to close the properties window. 2 Empty your recycle bin on a regular basis. 3 Use Diskeeper Lite or the Microsoft Disk Defragmenter on a regular basis to perform a daily backup. CD-RW drives...

