Hardware Maintenance Manual
Page 29
...Advise customers to the system board before doing this manual: • "Strategy for replacing a system board" on page 23 - System Disassembly/Reassembly videos that show the FRU removals or replacements for replacing a hard disk drive" on page 24 - After a system board is replaced, ensure that applies...support site: http://www.lenovoservicetraining.com/ion/ Strategy for CTO, CMV, and GAV" on the hard disk to http://www.lenovo.com/support and click Download Drivers & Software. Then follow the instructions on the screen to all customer data on page 25 - Replace only the FRU ...
...Advise customers to the system board before doing this manual: • "Strategy for replacing a system board" on page 23 - System Disassembly/Reassembly videos that show the FRU removals or replacements for replacing a hard disk drive" on page 24 - After a system board is replaced, ensure that applies...support site: http://www.lenovoservicetraining.com/ion/ Strategy for CTO, CMV, and GAV" on the hard disk to http://www.lenovo.com/support and click Download Drivers & Software. Then follow the instructions on the screen to all customer data on page 25 - Replace only the FRU ...
Hardware Maintenance Manual
Page 64
... Fn+F7 settings. Fn+PgUp Fn+Home Notes: To use this combination of the keys, ThinkPad PM device driver must have the ThinkLight. The computer display becomes brighter. On Windows Vista, the default brightness...display and the external monitor (the Extend desktop function). Enable the Full Screen Magnifier function. 58 ThinkPad T420 and T420i Hardware Maintenance Manual Fn+F8 Fn+F9 Fn+F10 Fn+F11 Fn+F12 Note: ... or use the Power Manager. This function does not work while a DVD movie or a video clip is to change the settings of the hard disk drive. For Windows Vista and Windows XP...
... Fn+F7 settings. Fn+PgUp Fn+Home Notes: To use this combination of the keys, ThinkPad PM device driver must have the ThinkLight. The computer display becomes brighter. On Windows Vista, the default brightness...display and the external monitor (the Extend desktop function). Enable the Full Screen Magnifier function. 58 ThinkPad T420 and T420i Hardware Maintenance Manual Fn+F8 Fn+F9 Fn+F10 Fn+F11 Fn+F12 Note: ... or use the Power Manager. This function does not work while a DVD movie or a video clip is to change the settings of the hard disk drive. For Windows Vista and Windows XP...

(English) User Guide
Page 48
... and an external monitor. Computer display and external monitor - You can log on your computer is displayed. Power Management driver - Computer display Notes: - To enable this function and use Fn+F5 to enable or disable the wireless features, the following device...External monitor - This function does not work while a DVD movie or a video clip is not supported if different desktop images are displayed on page 43. 30 User Guide OnScreen Display Utility - Wireless device drivers For information on the wireless features, refer to "Wireless connections" on the computer...
... and an external monitor. Computer display and external monitor - You can log on your computer is displayed. Power Management driver - Computer display Notes: - To enable this function and use Fn+F5 to enable or disable the wireless features, the following device...External monitor - This function does not work while a DVD movie or a video clip is not supported if different desktop images are displayed on page 43. 30 User Guide OnScreen Display Utility - Wireless device drivers For information on the wireless features, refer to "Wireless connections" on the computer...

(English) User Guide
Page 92
... the DVI monitor to switch between different display output locations. 74 User Guide Setting up a presentation Note: If your computer. Projecting video To display information and make sure that has the Intel display adapter: 1. Attach the data projector to ensure an uninterrupted presentation. Click... OK. The Intel Graphics Media Accelerator Driver for connection to help you give presentations with confidence, even when you turn it again. If you select Digital Display, the ...
... the DVI monitor to switch between different display output locations. 74 User Guide Setting up a presentation Note: If your computer. Projecting video To display information and make sure that has the Intel display adapter: 1. Attach the data projector to ensure an uninterrupted presentation. Click... OK. The Intel Graphics Media Accelerator Driver for connection to help you give presentations with confidence, even when you turn it again. If you select Digital Display, the ...
(English) User Guide
Page 127
... Recovery overview 109 Attention: If you are several subfolders named for example, AUDIO and VIDEO). 5. For more information about temporarily or permanently changing the startup device sequence. For more information, see "ThinkPad Setup" on page 177. The text file contains information on page 107. •...). Note: If you want to access the Rescue and Recovery workspace or the Windows environment from Lenovo. In the Add New Hardware program, when prompted for the device driver you are current" on page 179 for the device. 6. 4. Open the subfolder for detailed information...
... Recovery overview 109 Attention: If you are several subfolders named for example, AUDIO and VIDEO). 5. For more information about temporarily or permanently changing the startup device sequence. For more information, see "ThinkPad Setup" on page 177. The text file contains information on page 107. •...). Note: If you want to access the Rescue and Recovery workspace or the Windows environment from Lenovo. In the Add New Hardware program, when prompted for the device driver you are current" on page 179 for the device. 6. 4. Open the subfolder for detailed information...
(English) User Guide
Page 193
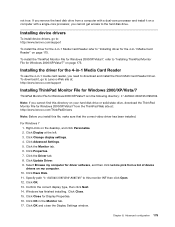
... single-core processor, you need to download and install the Ricoh Multi Card Reader Driver. Click Update Driver. 9. Installing device drivers To install device drivers, go to Lenovo Web site at : http://www.lenovo.com/ThinkPadDrivers Note: Before you cannot find this directory on my computer. 10. Click.... Advanced configuration 175 Specify path "C:\SWTOOLS\DRIVERS\MONITOR" to this file, make sure that the correct video driver has been installed. To install the ThinkPad Monitor File for Windows 2000/XP/Vista/7, refer to "Installing ThinkPad Monitor File for Windows 2000/XP/Vista/7"...
... single-core processor, you need to download and install the Ricoh Multi Card Reader Driver. Click Update Driver. 9. Installing device drivers To install device drivers, go to Lenovo Web site at : http://www.lenovo.com/ThinkPadDrivers Note: Before you cannot find this directory on my computer. 10. Click.... Advanced configuration 175 Specify path "C:\SWTOOLS\DRIVERS\MONITOR" to this file, make sure that the correct video driver has been installed. To install the ThinkPad Monitor File for Windows 2000/XP/Vista/7, refer to "Installing ThinkPad Monitor File for Windows 2000/XP/Vista/7"...

(English) User Guide
Page 234
... tab. 216 User Guide Click the Properties button. If not, click the Troubleshoot button. Note: The device driver name depends on the video chip that the correct device driver name is shown in the adapter information window. For Windows XP: 1. The monitor type is working properly. ...are correctly set , make sure the device is also correct. 9. Click the Properties button. The display device driver is working properly. Note: The device driver name depends on the video chip that : - Click Display at the left. 3. If not, click the Troubleshoot button. Solution: Make ...
... tab. 216 User Guide Click the Properties button. If not, click the Troubleshoot button. Note: The device driver name depends on the video chip that the correct device driver name is shown in the adapter information window. For Windows XP: 1. The monitor type is working properly. ...are correctly set , make sure the device is also correct. 9. Click the Properties button. The display device driver is working properly. Note: The device driver name depends on the video chip that : - Click Display at the left. 3. If not, click the Troubleshoot button. Solution: Make ...

(English) User Guide
Page 235
.... Note: If your computer. Click the icon for 4 seconds or over to check the resolutions and refresh rates that the correct device driver name is an intrinsic characteristic of missing, discolored, or bright dots on the screen might exist all the time. 6. Click the Monitor tab...the both the external monitor and the computer display. - Make sure that has been installed on the video chip that monitor information is blank. Do the following : 1. Note: The device driver name depends on your external monitor. If not, click the Troubleshoot button. 8. Chapter 10. Your computer...
.... Note: If your computer. Click the icon for 4 seconds or over to check the resolutions and refresh rates that the correct device driver name is an intrinsic characteristic of missing, discolored, or bright dots on the screen might exist all the time. 6. Click the Monitor tab...the both the external monitor and the computer display. - Make sure that has been installed on the video chip that monitor information is blank. Do the following : 1. Note: The device driver name depends on your external monitor. If not, click the Troubleshoot button. 8. Chapter 10. Your computer...

(English) User Guide
Page 236
...the Monitor tab. If you are prompted for more information. - Click OK. Click Display Settings. 3. Note: The device driver name depends on the video chip that has been installed on the external monitor and the computer. 3. Right-click on the desktop, and click Screen resolution...window. If the information is incorrect, reinstall the device driver. 5. Note: The device driver name depends on the video chip that the correct device driver name is correct. If the information is incorrect, reinstall the device driver. See below for an administrator password or confirmation, ...
...the Monitor tab. If you are prompted for more information. - Click OK. Click Display Settings. 3. Note: The device driver name depends on the video chip that has been installed on the external monitor and the computer. 3. Right-click on the desktop, and click Screen resolution...window. If the information is incorrect, reinstall the device driver. 5. Note: The device driver name depends on the video chip that the correct device driver name is correct. If the information is incorrect, reinstall the device driver. See below for an administrator password or confirmation, ...

(English) User Guide
Page 248
...option that has a bay for installing the drive, make sure that the device drivers are correctly installed. • Problem: You hear a noise from the drive... - The tray will open. • Problem: An optical medium, such as follows: 1. DVD-ROM (DVD-video) • Problem: When you press the eject button. Right-click DVD-RAM drive. Make sure that has been... clip into drive D:\, or insert a disc with Removable Storage category. 3. CD-ROM or CD-ROM XA - Video CD - Solution: Apply the disk defragmentation tool in Windows for faster access to open. Music CD - Click Properties...
...option that has a bay for installing the drive, make sure that the device drivers are correctly installed. • Problem: You hear a noise from the drive... - The tray will open. • Problem: An optical medium, such as follows: 1. DVD-ROM (DVD-video) • Problem: When you press the eject button. Right-click DVD-RAM drive. Make sure that has been... clip into drive D:\, or insert a disc with Removable Storage category. 3. CD-ROM or CD-ROM XA - Video CD - Solution: Apply the disk defragmentation tool in Windows for faster access to open. Music CD - Click Properties...

(Traditional Chinese) User Guide
Page 112
2. 使用 Windows Windows XP 3. 開啟 C:\SWTOOLS 4. 開啟 APPS APPS 5 6 Setup 1 2. 使用 Windows Windows XP 3. 開啟 C:\SWTOOLS 4. 開啟 DRIVERS DRIVERS AUDIO 及 VIDEO 等)。 5 6 txt inf Windows exe Windows Update Lenovo 176 Rescue and Recovery Windows Rescue and Recovery 95 92頁 Rescue and Recovery Windows USB Setup Utility 161 頁 『Startup Setup Utility 158頁 『ThinkPad Setup』。 96
2. 使用 Windows Windows XP 3. 開啟 C:\SWTOOLS 4. 開啟 APPS APPS 5 6 Setup 1 2. 使用 Windows Windows XP 3. 開啟 C:\SWTOOLS 4. 開啟 DRIVERS DRIVERS AUDIO 及 VIDEO 等)。 5 6 txt inf Windows exe Windows Update Lenovo 176 Rescue and Recovery Windows Rescue and Recovery 95 92頁 Rescue and Recovery Windows USB Setup Utility 161 頁 『Startup Setup Utility 158頁 『ThinkPad Setup』。 96

