
(English) Access Connections Profile Deployment guide
Page 40
...Software Installer searches your wireless system. To install silently, all the relevant packages with prompt for the Hotkey utilities package and On screen display. When the integrated package is ready for installation and contains the Software Installer. The following folders from the Hotkey Utilities ...place into the C:\Drivers\W2k\ACCONWLD directory. v LSID is required for your sub directories for up-to replace all the relevant packages with Lenovo ThinkPad /L3000 system BIOS. Using a lower layer system BIOS interface, Access Connections controls wireless devices and system ...
...Software Installer searches your wireless system. To install silently, all the relevant packages with prompt for the Hotkey utilities package and On screen display. When the integrated package is ready for installation and contains the Software Installer. The following folders from the Hotkey Utilities ...place into the C:\Drivers\W2k\ACCONWLD directory. v LSID is required for your sub directories for up-to replace all the relevant packages with Lenovo ThinkPad /L3000 system BIOS. Using a lower layer system BIOS interface, Access Connections controls wireless devices and system ...
(English) User Guide
Page 44
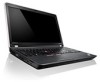
...features. • To achieve the best balance between the default and standard settings of the ThinkPad F1-F12 key functionality. 26 User Guide See "diagnose problems" on page 131. •...8226; See Chapter 6 "Replacing devices" on page 77 for more information about security or need to securely dispose of time, you work more information, see http://www.lenovo.com/support/faq •...67. For the Windows 7 operating system, the On Screen Display program is provided on page 69. For more easily and effectively. Concerned about replacing the devices of your hard disk drive? • ...
...features. • To achieve the best balance between the default and standard settings of the ThinkPad F1-F12 key functionality. 26 User Guide See "diagnose problems" on page 131. •...8226; See Chapter 6 "Replacing devices" on page 77 for more information about security or need to securely dispose of time, you work more information, see http://www.lenovo.com/support/faq •...67. For the Windows 7 operating system, the On Screen Display program is provided on page 69. For more easily and effectively. Concerned about replacing the devices of your hard disk drive? • ...

(English) User Guide
Page 51
Note: If you want the pointer to move the pointer 4 on the screen, slide your fingertip over the pad in the direction in which you replace the keyboard, a new keyboard is shipped with which you can zoom in the UltraNav. To move . Note: Your computer keyboard may look slightly different ... mouse. Customizing the touch pad To customize the touch pad, do as follows: Chapter 2. The functions of the left and right mouse buttons on the screen while browsing the Internet or reading or editing a document. Using the touch pad The touch pad consists of a pad 1 and two click buttons below...
Note: If you want the pointer to move the pointer 4 on the screen, slide your fingertip over the pad in the direction in which you replace the keyboard, a new keyboard is shipped with which you can zoom in the UltraNav. To move . Note: Your computer keyboard may look slightly different ... mouse. Customizing the touch pad To customize the touch pad, do as follows: Chapter 2. The functions of the left and right mouse buttons on the screen while browsing the Internet or reading or editing a document. Using the touch pad The touch pad consists of a pad 1 and two click buttons below...
(English) User Guide
Page 54
... its temperature is at the bottom of power remaining is low or when the power alarm alerts you that the percentage of your battery or replace it . Tips on page 20. 36 User Guide Note: To increase the life of the following : 1. If the the battery meter at least... can adjust your power settings to 6 hours. If the battery has not been used recently, do one of the battery, do as power modes, screen blank, sleep (standby), and hibernation. Use the battery until the battery status indicator starts blinking orange. • Recharge the battery completely before using it...
... its temperature is at the bottom of power remaining is low or when the power alarm alerts you that the percentage of your battery or replace it . Tips on page 20. 36 User Guide Note: To increase the life of the following : 1. If the the battery meter at least... can adjust your power settings to 6 hours. If the battery has not been used recently, do one of the battery, do as power modes, screen blank, sleep (standby), and hibernation. Use the battery until the battery status indicator starts blinking orange. • Recharge the battery completely before using it...
(English) User Guide
Page 62
... Data Rate Software as follows: 1. Next install the Microsoft Bluetooth software, as follows: First uninstall the ThinkPad Bluetooth with Enhanced Data Rate Software in those locations. then click Next. Select Search for the best driver...software. 5. then click Change/Remove to the help . Turn Bluetooth power on the screen. Microsoft Bluetooth software is to use ThinkPad Bluetooth with Enhanced Data Rate Software instead, replace the Microsoft Bluetooth software with ThinkPad Bluetooth with Enhanced Data Rate Software; Select Install from a list or specific location (...
... Data Rate Software as follows: 1. Next install the Microsoft Bluetooth software, as follows: First uninstall the ThinkPad Bluetooth with Enhanced Data Rate Software in those locations. then click Next. Select Search for the best driver...software. 5. then click Change/Remove to the help . Turn Bluetooth power on the screen. Microsoft Bluetooth software is to use ThinkPad Bluetooth with Enhanced Data Rate Software instead, replace the Microsoft Bluetooth software with ThinkPad Bluetooth with Enhanced Data Rate Software; Select Install from a list or specific location (...
(English) User Guide
Page 82
... ThinkPad Setup window opens. 5. Press Enter to move down the menu. 6. If you to enter a new password. 9. You must take your password to get access to have the system board replaced....63, typing your computer to a Lenovo reseller or a Lenovo marketing representative to the ThinkPad Setup. A Setup Notice window is recommended. 64 User Guide Proof of ThinkPad notebooks. Follow step 11 and step ...61. Print these instructions. 2. Turn your password and keep it . 11. When the logo screen is required, and a fee will be charged for hard disk drive. Choose your password to type...
... ThinkPad Setup window opens. 5. Press Enter to move down the menu. 6. If you to enter a new password. 9. You must take your password to get access to have the system board replaced....63, typing your computer to a Lenovo reseller or a Lenovo marketing representative to the ThinkPad Setup. A Setup Notice window is recommended. 64 User Guide Proof of ThinkPad notebooks. Follow step 11 and step ...61. Print these instructions. 2. Turn your password and keep it . 11. When the logo screen is required, and a fee will be charged for hard disk drive. Choose your password to type...

(English) User Guide
Page 83
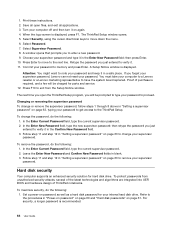
... look different from the illustration above the reader. Turn on the screen to enroll your computer, be sure to protect your finger-that the entire top joint of a hardware encryption chip. 2. Before you can replace passwords and enable simple and secure user access. If a Disk ...Encryption hard disk drive is on media, NAND flash or device controllers by swiping your computer, make sure to delete data stored on to protect the contents of , sell, or hand over the reader, do as follows: 1. To start Lenovo...
... look different from the illustration above the reader. Turn on the screen to enroll your computer, be sure to protect your finger-that the entire top joint of a hardware encryption chip. 2. Before you can replace passwords and enable simple and secure user access. If a Disk ...Encryption hard disk drive is on media, NAND flash or device controllers by swiping your computer, make sure to delete data stored on to protect the contents of , sell, or hand over the reader, do as follows: 1. To start Lenovo...
(English) User Guide
Page 88
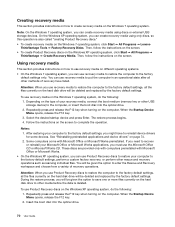
...following : 1. Follow the instructions on the screen. If you use recovery media to restore the computer to the factory default settings, all the files currently on the hard disk drive will be deleted and replaced by the factory default settings. To use recovery...➙ Create Recovery Media. To use recovery media on the Windows 7 operating system, click Start ➙ All Programs ➙ Lenovo ThinkVantage Tools ➙ Factory Recovery Disks. These discs are provided only with computers preinstalled with Microsoft Office or Microsoft Works preinstalled. Repeatedly...
...following : 1. Follow the instructions on the screen. If you use recovery media to restore the computer to the factory default settings, all the files currently on the hard disk drive will be deleted and replaced by the factory default settings. To use recovery...➙ Create Recovery Media. To use recovery media on the Windows 7 operating system, click Start ➙ All Programs ➙ Lenovo ThinkVantage Tools ➙ Factory Recovery Disks. These discs are provided only with computers preinstalled with Microsoft Office or Microsoft Works preinstalled. Repeatedly...
(English) User Guide
Page 156
Solution: Your screen saver or power management may be necessary to remove all added memories to test the computer with your model has been installed. 4. Beep errors Table 7. It may be securely connected both to the Ethernet connector of your computer and to "Replacing memory" on page ... and compatibility including the maximum memory size and the memory speed. Solution: Make sure that the memory is installed and seated correctly in "Replacing memory" on page 131. The network cable must be enabled. The maximum allowable distance from sleep (standby) or hibernation. For Windows 7:...
Solution: Your screen saver or power management may be necessary to remove all added memories to test the computer with your model has been installed. 4. Beep errors Table 7. It may be securely connected both to the Ethernet connector of your computer and to "Replacing memory" on page ... and compatibility including the maximum memory size and the memory speed. Solution: Make sure that the memory is installed and seated correctly in "Replacing memory" on page 131. The network cable must be enabled. The maximum allowable distance from sleep (standby) or hibernation. For Windows 7:...
Hardware Maintenance Manual
Page 3
...Supervisor password 43 How to remove the power-on password . . . 43 © Copyright Lenovo 2012 How to remove the hard-disk password . . . 43 Power management 44 Screen blank mode 44 Sleep (standby) mode 44 Hibernation mode 45 Symptom-to do first 31 ... supporting the Lenovo diagnostics programs 36 Power system checkout 38 Checking the ac power adapter 38 Checking operational charging 39 Checking the battery pack 39 Checking the backup battery 40 Chapter 4. Status indicators . . . . . 49 Chapter 6. Removing and replacing a FRU 57 Before servicing ThinkPad Edge E520 models . ...
...Supervisor password 43 How to remove the power-on password . . . 43 © Copyright Lenovo 2012 How to remove the hard-disk password . . . 43 Power management 44 Screen blank mode 44 Sleep (standby) mode 44 Hibernation mode 45 Symptom-to do first 31 ... supporting the Lenovo diagnostics programs 36 Power system checkout 38 Checking the ac power adapter 38 Checking operational charging 39 Checking the battery pack 39 Checking the backup battery 40 Chapter 4. Status indicators . . . . . 49 Chapter 6. Removing and replacing a FRU 57 Before servicing ThinkPad Edge E520 models . ...

Hardware Maintenance Manual
Page 33
...://www.lenovoservicetraining.com/ion/ Strategy for replacing a hard disk drive" on the screen and install the necessary software. After a system board is replaced, ensure that show the FRU removals or replacements for the Lenovo® authorized service technicians are instructed to http://www.lenovo.com/support. 2. "Strategy for replacing FRUs Before replacing parts: Make sure that changed the...
...://www.lenovoservicetraining.com/ion/ Strategy for replacing a hard disk drive" on the screen and install the necessary software. After a system board is replaced, ensure that show the FRU removals or replacements for the Lenovo® authorized service technicians are instructed to http://www.lenovo.com/support. 2. "Strategy for replacing FRUs Before replacing parts: Make sure that changed the...

Hardware Maintenance Manual
Page 34
... 0 in the Symptom-to-FRU Index for replacing a hard disk drive Always try to run a low-level format before doing this configuration sent to diagnose failures. The Lenovo preloaded software is installed in effect. Strategy for replacing FRUs for CTO, CMV, and GAV Product ...definition Dynamic Configure To Order (CTO) This provides the ability for replacing a system board Some components mounted on the screen to fulfillment, where it . ...
... 0 in the Symptom-to-FRU Index for replacing a hard disk drive Always try to run a low-level format before doing this configuration sent to diagnose failures. The Lenovo preloaded software is installed in effect. Strategy for replacing FRUs for CTO, CMV, and GAV Product ...definition Dynamic Configure To Order (CTO) This provides the ability for replacing a system board Some components mounted on the screen to fulfillment, where it . ...
Hardware Maintenance Manual
Page 47
...the computer. If you start the recovery process. The ThinkPad Setup program opens. Chapter 4. Restoring the factory contents by using the recovery disc set of time depends on the computer. When the logo screen is on http://www.lenovo.com/support. Use the arrow keys to use recovery.... Make the CD/DVD drive the first startup device in the startup sequence using Recovery Disc Set When the hard disk drive is replaced because of the user instructions and the following procedure: a. Related service information This chapter presents following information: • "Restoring the ...
...the computer. If you start the recovery process. The ThinkPad Setup program opens. Chapter 4. Restoring the factory contents by using the recovery disc set of time depends on the computer. When the logo screen is on http://www.lenovo.com/support. Use the arrow keys to use recovery.... Make the CD/DVD drive the first startup device in the startup sequence using Recovery Disc Set When the hard disk drive is replaced because of the user instructions and the following procedure: a. Related service information This chapter presents following information: • "Restoring the ...

Hardware Maintenance Manual
Page 53
...that no more visible defective pixels, it should not be replaced. If the LCD you are supported by Lenovo and it will have no error is characteristic of the ..., discolored, or always lighted is detected, do not replace any error is not operating, follow these procedures to all ThinkPad notebook computers purchased on page 38) 1. Related service ...isolate the failing FRU (do the following: 1. FRU replacement should be adjusted. • LCD screen unreadable. • Characters missing pixels. • Screen abnormal. • Wrong color displayed. When analyzing an ...
...that no more visible defective pixels, it should not be replaced. If the LCD you are supported by Lenovo and it will have no error is characteristic of the ..., discolored, or always lighted is detected, do not replace any error is not operating, follow these procedures to all ThinkPad notebook computers purchased on page 38) 1. Related service ...isolate the failing FRU (do the following: 1. FRU replacement should be adjusted. • LCD screen unreadable. • Characters missing pixels. • Screen abnormal. • Wrong color displayed. When analyzing an ...

Hardware Maintenance Manual
Page 60
... S/N data from EEPROM. Install the LENOVO ThinkPad Hardware Maintenance Diskette Version 1.76 or later, and restart the computer. 2. Note: The serial number of the system unit is also written on the rear label, use new screws for replacements. • If you use the ... select 1. Install the LENOVO ThinkPad Hardware Maintenance Diskette Version 1.76 or later and restart the computer. 2. Select 1. If you replace the system board, you have a torque screwdriver, tighten all major components. From the main menu, select 1. See example below: MTM on the screen. Notes: • ...
... S/N data from EEPROM. Install the LENOVO ThinkPad Hardware Maintenance Diskette Version 1.76 or later, and restart the computer. 2. Note: The serial number of the system unit is also written on the rear label, use new screws for replacements. • If you use the ... select 1. Install the LENOVO ThinkPad Hardware Maintenance Diskette Version 1.76 or later and restart the computer. 2. Select 1. If you replace the system board, you have a torque screwdriver, tighten all major components. From the main menu, select 1. See example below: MTM on the screen. Notes: • ...

Hardware Maintenance Manual
Page 61
...the LENOVO ThinkPad Hardware Maintenance Diskette Version 1.76 or later, and restart the computer. 2. Read box build date from EEPROM, and follow the instructions on the screen. 4. After an engineering change is created and written. To write the ECA information, select 1. Chapter 7. When you replace ...select 2. The machine type of the machine that generates the number is being replaced, try to read /write function on the new system board by doing the following: 1. Insert the LENOVO ThinkPad Hardware Maintenance Diskette Version 1.76 or later, and restart the computer. 2. ...
...the LENOVO ThinkPad Hardware Maintenance Diskette Version 1.76 or later, and restart the computer. 2. Read box build date from EEPROM, and follow the instructions on the screen. 4. After an engineering change is created and written. To write the ECA information, select 1. Chapter 7. When you replace ...select 2. The machine type of the machine that generates the number is being replaced, try to read /write function on the new system board by doing the following: 1. Insert the LENOVO ThinkPad Hardware Maintenance Diskette Version 1.76 or later, and restart the computer. 2. ...


