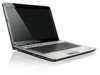
Lenovo IdeaPad U460 Hardware Maintenance Manual V2.0
Page 3
... 23 Passwords 24 Power-on password 24 Supervisor password 24 Power management 25 Screen blank mode 25 Sleep (standby) mode 25 Hibernation mode 26 Lenovo IdeaPad U460 27 Specifications 27 Status indicators 29 Fn key combinations 31 FRU replacement notices 32 Screw notices 32 Removing and replacing an FRU 33 1010 Battery... 1040 Hard disk drive 37 1050 DIMM cover 38 1060 DIMM 39 1070 PCI Express Mini Card for wireless LAN/WAN 40 1080 Keyboard 42 1090 Keyboard bezel 44 1100 LCD unit 49 1110 System board 51 1120 Fan assembly and Heat Sink assembly...54 1130 CPU 57 1140 base ...
Lenovo IdeaPad U460 Hardware Maintenance Manual V2.0
Page 24
... onto the keyboard •• Use of an incorrect AC adapter on which the failing FRU was caused by misuse, accident, modification, unsuitable physical or operating environment, or improper maintenance by nonwarranted activities: •• Missing parts might indicate that the system was subjected to excessive force, or dropped. 20 IdeaPad U460 Hardware...
Lenovo IdeaPad U460 Hardware Maintenance Manual V2.0
Page 29
... circumstances, the computer goes into hibernation mode.) To cause the computer to reenter operation mode. 25 Wait a few seconds before taking any operation with the keyboard, the hard disk, the parallel connector, or the diskette drive within that time. •• If the battery indicator is amber, indicating that the battery...
Lenovo IdeaPad U460 Hardware Maintenance Manual V2.0
Page 30
... disk drive. 26 The hibernation file in suspend mode. IdeaPad U460 Hardware Maintenance Manual Hibernation mode In hibernation mode, the following conditions: •• If a "hibernation time" has been set on the timer, and if the user does not do any operation with the keyboard, the hard disk drive, the parallel connector, or...
Lenovo IdeaPad U460 Hardware Maintenance Manual V2.0
Page 32
...I/O port MODEM slot Audio Video Ethernet (on the system board) PCI Express Mini Card slot WLAN Bluetooth wireless Keyboard Touch pad Fingerprint reader Integrated camera Battery AC adapter Pre-installed operating system Description • External monitor connector •...• Lenovo b/g • Selected Model • 6 row 288mm Lenovo Keyboard • Multi-touch type (no TrackPoint) • Yes, with LED • All Models • Fixed Focus CMOS camera, 1.3 Million pixels • 2.2Ah, 8 cell Li-Polymer Battery • 65W 20V • Windows 7 28 IdeaPad U460 Hardware Maintenance...
Lenovo IdeaPad U460 Hardware Maintenance Manual V2.0
Page 33
... the F11(ScrLk) key. Off: System is enabled. To enable or disable Caps Lock mode, press the CapsLk key. White: The numeric keypad on the keyboard is enabled. White: System is enabled. Note: Do not move the system while the white drive-in use light is enabled. White: Caps Lock mode... physical shock could cause drive errors. To enable or disable Scroll Lock mode, press and hold the Fn key, and press the F8 (NumLk) key. Lenovo IdeaPad U460 Status indicators The system status indicators below show the computer status: 1234 8 9 567 Table 2.
Lenovo IdeaPad U460 Hardware Maintenance Manual V2.0
Page 44
... the jacks by using the removal tool antenna RF connector (P/N: 08K7159), or pick up the connectors with your fingers and gently unplug them in step 1. IdeaPad U460 Hardware Maintenance Manual 1070 PCI Express Mini Card for wireless LAN/WAN 2 1 1 Disconnect the two wireless LAN cables (black, white) 1, and then remove the screw... (HDD) cover" on page 36 •• "1040 Hard disk drive" on page 37 •• "1050 DIMM cover" on page 38 •• "1080 Keyboard" on page 42 •• "1090 Keyboard bezel" on page 44 Figure 7.
Lenovo IdeaPad U460 Hardware Maintenance Manual V2.0
Page 46
Removal steps of keyboard Remove three screws 1. 1 1 1 Step 1 Screw (quantity) M2.5 × 6 mm, flat-head, nylok-coated (3) Color Black Torque 2.5 kgfcm 42 IdeaPad U460 Hardware Maintenance Manual 1080 Keyboard For access, remove this FRU: •• "1010 Battery pack" on page 34 Figure 8.
Lenovo IdeaPad U460 Hardware Maintenance Manual V2.0
Page 47
Lenovo IdeaPad U460 Figure 8. Removal steps of keyboard (continued) Lift the keyboard a little, and then detach the connector in the direction shown by arrows 2 3. Remove the keyboard in the direction shown by arrow 4. 4 3 2 When installing: Make sure that the FPC connector is attached firmly. 43
Lenovo IdeaPad U460 Hardware Maintenance Manual V2.0
Page 48
Removal steps of keyboard bezel Remove thirteen screws 1 on page 42 Figure 9. IdeaPad U460 Hardware Maintenance Manual 1090 Keyboard bezel For access, remove these FRUs in order: •• "1010 Battery pack" on page 34 •• "1030 Hard disk drive (HDD) cover" on page 36 •• "1040 Hard disk drive" on page 37 •• "1050 DIMM cover" on page 38 •• "1080 Keyboard" on the bottom. 1 1 1 1 1 1 1 1 1 1 1 1 1 Step 1 Screw (quantity) Color M2.5 × 6 mm, flat-head, nylok-coated (13) Black Torque 2.5 kgfcm 44
Lenovo IdeaPad U460 Hardware Maintenance Manual V2.0
Page 49
Lenovo IdeaPad U460 Figure 9. Removal steps of keyboard bezel (continued) Remove three screws 2. 2 2 2 Step 2 Screw (quantity) M2.5 × 6 mm, flat-head, nylok-coated (3) Color Black Torque 2.5 kgfcm 45
Lenovo IdeaPad U460 Hardware Maintenance Manual V2.0
Page 50
IdeaPad U460 Hardware Maintenance Manual Figure 9. Unplug the speaker connector in the direction shown by arrow 4. 4 3 4 When installing: Make sure that all the FPC connectors and the speakers connector are attached firmly. 46 Removal steps of keyboard bezel (continued) Detach five FPC connectors in the direction shown by arrows 3 4.
Lenovo IdeaPad U460 Hardware Maintenance Manual V2.0
Page 51
Lenovo IdeaPad U460 Figure 9. Removal steps of keyboard bezel (continued) Remove the keyboard bezel in the direction shown by arrow 5. 5 Remove two screws 6 and then remove the speakers in the direction shown by arrows 7. 6 6 7 7 Step 6 Screw (quantity) Color Torque M2.5 × (5.7+2) mm, flat-head, nylok-coated (2) Black 2.5 kgfcm Note: Touch inductive panel is fixed on the keyboard bezel. 47
Lenovo IdeaPad U460 Hardware Maintenance Manual V2.0
Page 52
IdeaPad U460 Hardware Maintenance Manual Figure 9. Removal steps of keyboard bezel (continued) Remove two screws 8 and then remove the power board and OneKey Rescue System button board 9. 8 8 9 9 Step 8 Screw (quantity) M1.98 × 3 mm, flat-head, nylok-coated (2) Color Torque Silver 1.5 kgfcm 48
Lenovo IdeaPad U460 Hardware Maintenance Manual V2.0
Page 53
...;• "1070 PCI Express Mini Card for wireless LAN/WAN" on page 40 •• "1080 Keyboard" on page 42 •• "1090 Keyboard bezel" on page 44 Figure 10. Route the LCD cable along the cable guides. Lenovo IdeaPad U460 1100 LCD unit For access, remove these FRUs in the direction shown by arrow 2.
Lenovo IdeaPad U460 Hardware Maintenance Manual V2.0
Page 55
..., make sure not to drop or stack the system board. • If you put a system board down, make sure to the system board. 51 Lenovo IdeaPad U460 1110 System board Important notices for handling the system board: When handling the system board, bear the following in order: •• "1010 Battery pack..."1060 DIMM" on page 39 •• "1070 PCI Express Mini Card for wireless LAN/WAN" on page 40 •• "1080 Keyboard" on page 42 •• "1090 Keyboard bezel" on page 44 •• "1100 LCD unit" on page 49 Note: ExpressCard slot assembly is attached to put it only...
Lenovo IdeaPad U460 Hardware Maintenance Manual V2.0
Page 58
...assembly and heat sink assembly Unplug the connector 1. 1 When installing: Make sure that the fan connector is attached firmly to the system board. 54 IdeaPad U460 Hardware Maintenance Manual 1120 Fan assembly and Heat Sink assembly For access, remove these FRUs in order: •• "1010 Battery pack" on page...1060 DIMM" on page 39 •• "1070 PCI Express Mini Card for wireless LAN/WAN" on page 40 •• "1080 Keyboard" on page 42 •• "1090 Keyboard bezel" on page 44 •• "1100 LCD unit" on page 49 •• "1110 System board" on page 51 Figure 12...
Lenovo IdeaPad U460 Hardware Maintenance Manual V2.0
Page 61
Removal steps of CPU Rotate the head of the screw in the direction shown by arrow 1 to secure the CPU. 57 Lenovo IdeaPad U460 1130 CPU For access, remove these FRUs in order: •• "1010 Battery pack" on page 34 •• "1020 Dummy card" on page 35 ...; "1060 DIMM" on page 39 •• "1070 PCI Express Mini Card for wireless LAN/WAN" on page 40 •• "1080 Keyboard" on page 42 •• "1090 Keyboard bezel" on page 44 •• "1100 LCD unit" on page 49 •• "1110 System board" on page 51 ••...
Lenovo IdeaPad U460 Hardware Maintenance Manual V2.0
Page 62
IdeaPad U460 Hardware Maintenance Manual 1140 base cover and bluetooth card For access, remove these FRUs in the direction shown by arrows 2. 1 2 2 Step 1 Screw (quantity) M2.5 × 6 ...; "1060 DIMM" on page 39 •• "1070 PCI Express Mini Card for wireless LAN/WAN" on page 40 •• "1080 Keyboard" on page 42 •• "1090 Keyboard bezel" on page 44 •• "1100 LCD unit" on page 49 •• "1110 System board" on page 51 Figure 14.
Lenovo IdeaPad U460 Hardware Maintenance Manual V2.0
Page 65
Lenovo IdeaPad U460 1150 LCD front bezel For access, remove these FRUs in the direction shown by arrows 2. 2 2 2 2 61 Removal steps of LCD front bezel Remove four screws 1. 1 1 1 1 ... •• "1050 DIMM cover" on page 38 •• "1070 PCI Express Mini Card for wireless LAN/WAN" on page 40 •• "1080 Keyboard" on page 42 •• "1090 Keyboard bezel" on page 44 •• "1100 LCD unit" on page 49 Figure 15.