
User Guide
Page 14
Hold the computer tightly when you carry it. User Guide 9 Important information about using the computer Press the power button on the side of the computer to turn on the computer.
Hold the computer tightly when you carry it. User Guide 9 Important information about using the computer Press the power button on the side of the computer to turn on the computer.

User Guide
Page 15
After entering Windows, press this program, repeatedly press and release the F2 key once turning on the manufacturer. In addition to its own functions, the LVT program will allow you are using a mouse, point to the top right or bottom ... computer, and then connect the other devices. Swipe in your ISP for detailed setup instructions. Test the wireless network by country. Your computer has the Lenovo Rescue System installed. Wired network connection For wired networks, connect one end of an Ethernet cable (purchased separately) to the wireless network: 1. Note: Broadband modem...
After entering Windows, press this program, repeatedly press and release the F2 key once turning on the manufacturer. In addition to its own functions, the LVT program will allow you are using a mouse, point to the top right or bottom ... computer, and then connect the other devices. Swipe in your ISP for detailed setup instructions. Test the wireless network by country. Your computer has the Lenovo Rescue System installed. Wired network connection For wired networks, connect one end of an Ethernet cable (purchased separately) to the wireless network: 1. Note: Broadband modem...
User Guide
Page 21
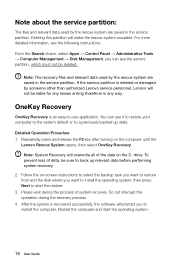
... the service partition is an easy-to start the operating system. 16 User Guide Repeatedly press and release the F2 key after turning on the C: drive. Follow the on-screen instructions to select the backup task you want to install the operating system, then...service partition. Please wait during the recovery process. 4. OneKey Recovery OneKey Recovery is deleted or damaged by someone other than authorized Lenovo service personnel, Lenovo will overwrite all of system recovery. Restart the computer and start the restore. 3. After the system is recovered successfully, the...
... the service partition is an easy-to start the operating system. 16 User Guide Repeatedly press and release the F2 key after turning on the C: drive. Follow the on-screen instructions to select the backup task you want to install the operating system, then...service partition. Please wait during the recovery process. 4. OneKey Recovery OneKey Recovery is deleted or damaged by someone other than authorized Lenovo service personnel, Lenovo will overwrite all of system recovery. Restart the computer and start the restore. 3. After the system is recovered successfully, the...
User Guide
Page 22
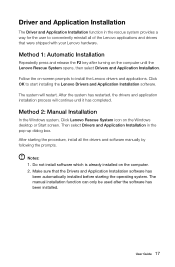
...is already installed on the Windows desktop or Start screen. Click OK to install the Lenovo drivers and applications. Notes: 1. After the system has restarted, the drivers and ...following the prompts. Make sure that were shipped with your Lenovo hardware. The system will continue until the Lenovo Rescue System opens, then select Drivers and Application Installation. Follow... installed. User Guide 17 After starting the procedure, install all of the Lenovo applications and drivers that the Drivers and Application Installation software has been automatically installed...
...is already installed on the Windows desktop or Start screen. Click OK to install the Lenovo drivers and applications. Notes: 1. After the system has restarted, the drivers and ...following the prompts. Make sure that were shipped with your Lenovo hardware. The system will continue until the Lenovo Rescue System opens, then select Drivers and Application Installation. Follow... installed. User Guide 17 After starting the procedure, install all of the Lenovo applications and drivers that the Drivers and Application Installation software has been automatically installed...
User Guide
Page 25
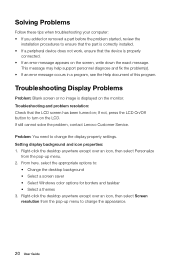
... to ensure that the part is correctly installed. • If a peripheral device does not work, ensure that the LCD screen has been turned on the LCD. Troubleshooting Display Problems Problem: Blank screen or no image is properly connected. • If an error message appears on the...from the pop-up menu to change the appearance. 20 User Guide If still cannot solve the problem, contact Lenovo Customer Service. From here, select the appropriate options to turn on ; Troubleshooting and problem resolution: Check that the device is displayed on the monitor. Problem: You need ...
... to ensure that the part is correctly installed. • If a peripheral device does not work, ensure that the LCD screen has been turned on the LCD. Troubleshooting Display Problems Problem: Blank screen or no image is properly connected. • If an error message appears on the...from the pop-up menu to change the appearance. 20 User Guide If still cannot solve the problem, contact Lenovo Customer Service. From here, select the appropriate options to turn on ; Troubleshooting and problem resolution: Check that the device is displayed on the monitor. Problem: You need ...
User Guide
Page 26
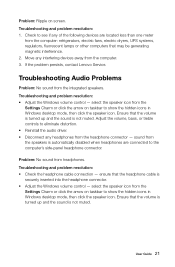
... icon from the headphone connector - Troubleshooting and problem resolution: • Check the headphone cable connection - If the problem persists, contact Lenovo Service. Ensure that the headphone cable is not muted. Adjust the volume, bass, or treble controls to show the hidden icons in... then click the speaker icon. Problem: No sound from the integrated speakers. sound from the computer. 3. ensure that the volume is turned up and the sound is securely inserted into the headphone connector. • Adjust the Windows volume control - Ensure that may be generating...
... icon from the headphone connector - Troubleshooting and problem resolution: • Check the headphone cable connection - If the problem persists, contact Lenovo Service. Ensure that the headphone cable is not muted. Adjust the volume, bass, or treble controls to show the hidden icons in... then click the speaker icon. Problem: No sound from the integrated speakers. sound from the computer. 3. ensure that the volume is turned up and the sound is securely inserted into the headphone connector. • Adjust the Windows volume control - Ensure that may be generating...

User Guide
Page 30
... setting boot devices, security, hardware mode, and other preferences. The BIOS setup utility is the UEFI mode. Repeatedly press and release the F1 key after turning on the boot menu. If you need to change the boot mode, start the BIOS setup utility and set boot mode to Legacy support. When...
... setting boot devices, security, hardware mode, and other preferences. The BIOS setup utility is the UEFI mode. Repeatedly press and release the F1 key after turning on the boot menu. If you need to change the boot mode, start the BIOS setup utility and set boot mode to Legacy support. When...
User Guide
Page 36
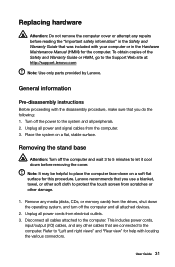
...computer. Note: It may be helpful to the computer. Disconnect all power and signal cables from the drives, shut down the operating system, and turn off the computer and all peripherals. 2. This includes power cords, input/output (I/O) cables, and any media (disks, CDs, or memory cards) ... Warranty Guide or HMM, go to protect the touch screen from electrical outlets. 3. Lenovo recommends that are connected to the system and all attached devices. 2. Removing the stand base Attention: Turn off the power to the computer. Unplug all power cords from scratches or other soft...
...computer. Note: It may be helpful to the computer. Disconnect all power and signal cables from the drives, shut down the operating system, and turn off the computer and all peripherals. 2. This includes power cords, input/output (I/O) cables, and any media (disks, CDs, or memory cards) ... Warranty Guide or HMM, go to protect the touch screen from electrical outlets. 3. Lenovo recommends that are connected to the system and all attached devices. 2. Removing the stand base Attention: Turn off the power to the computer. Unplug all power cords from scratches or other soft...
User Guide
Page 37
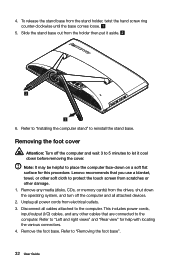
Removing the foot cover Attention: Turn off the computer and all attached devices. 2. Unplug all cables attached to protect the touch screen ... other cables that you use a blanket, towel, or other damage. 1. Refer to place the computer face-down the operating system, and turn off the computer and wait 3 to 5 minutes to "Removing the foot base". 32 User Guide To release the stand base from the...this procedure. Disconnect all power cords from the holder then put it cool down before removing the cover. 4. Lenovo recommends that are connected to reinstall the stand base.
Removing the foot cover Attention: Turn off the computer and all attached devices. 2. Unplug all cables attached to protect the touch screen ... other cables that you use a blanket, towel, or other damage. 1. Refer to place the computer face-down the operating system, and turn off the computer and wait 3 to 5 minutes to "Removing the foot base". 32 User Guide To release the stand base from the...this procedure. Disconnect all power cords from the holder then put it cool down before removing the cover. 4. Lenovo recommends that are connected to reinstall the stand base.
User Guide
Page 38
...the computer and all attached devices. 2. Remove the stand base. Refer to protect the touch screen from the drives, shut down the operating system, and turn off the computer and wait 3 to 5 minutes to "Removing the stand base". 5. 5. To reattach the foot cover: a. Disconnect all power cords from... damage. 1. Refer to place the computer face-down before removing the cover. Line up the foot cover with locating the various connectors. 4. Lenovo recommends that you use a blanket, towel, or other cables that are connected to the computer. Lift up the stand holder then slide out ...
...the computer and all attached devices. 2. Remove the stand base. Refer to protect the touch screen from the drives, shut down the operating system, and turn off the computer and wait 3 to 5 minutes to "Removing the stand base". 5. 5. To reattach the foot cover: a. Disconnect all power cords from... damage. 1. Refer to place the computer face-down before removing the cover. Line up the foot cover with locating the various connectors. 4. Lenovo recommends that you use a blanket, towel, or other cables that are connected to the computer. Lift up the stand holder then slide out ...
User Guide
Page 39
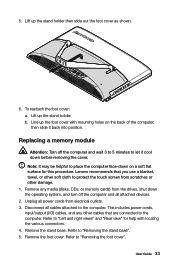
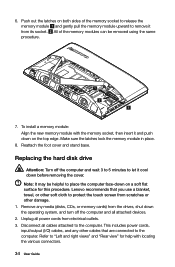
6. Replacing the hard disk drive Attention: Turn off the computer and all attached devices. 2. Remove any other damage. 1. Make sure the latches lock the memory module in place. 8. Reattach the foot cover ... scratches or other cables that are connected to let it cool down the operating system, and turn off the computer and wait 3 to 5 minutes to the computer. Note: It may be removed using the same procedure. 7. Lenovo recommends that you use a blanket, towel, or other soft cloth to protect the touch screen...
6. Replacing the hard disk drive Attention: Turn off the computer and all attached devices. 2. Remove any other damage. 1. Make sure the latches lock the memory module in place. 8. Reattach the foot cover ... scratches or other cables that are connected to let it cool down the operating system, and turn off the computer and wait 3 to 5 minutes to the computer. Note: It may be removed using the same procedure. 7. Lenovo recommends that you use a blanket, towel, or other soft cloth to protect the touch screen...
User Guide
Page 41
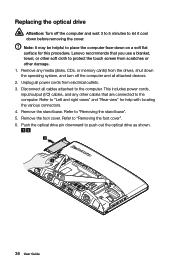
...procedure. Refer to "Removing the stand base". 5. Remove the foot cover. Refer to push out the optical drive as shown. 36 User Guide Lenovo recommends that you use a blanket, towel, or other soft cloth to protect the touch screen from scratches or other cables that are connected to ... and any media (disks, CDs, or memory cards) from electrical outlets. 3. Disconnect all power cords from the drives, shut down the operating system, and turn off the computer and wait 3 to 5 minutes to let it cool down on a soft flat surface for help with locating the various connectors. 4. Note:...
...procedure. Refer to "Removing the stand base". 5. Remove the foot cover. Refer to push out the optical drive as shown. 36 User Guide Lenovo recommends that you use a blanket, towel, or other soft cloth to protect the touch screen from scratches or other cables that are connected to ... and any media (disks, CDs, or memory cards) from electrical outlets. 3. Disconnect all power cords from the drives, shut down the operating system, and turn off the computer and wait 3 to 5 minutes to let it cool down on a soft flat surface for help with locating the various connectors. 4. Note:...
User Guide
Page 43
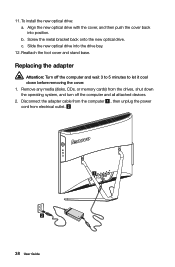
... and stand base. Disconnect the adapter cable from the computer , then unplug the power cord from the drives, shut down the operating system, and turn off the computer and wait 3 to 5 minutes to let it cool down before removing the cover. 1. Align the new optical drive with the cover...the drive bay. 12. c. Screw the metal bracket back onto the new optical drive. Slide the new optical drive into position. Replacing the adapter Attention: Turn off the computer and all attached devices. 2. Remove any media (disks, CDs, or memory cards) from electrical outlet. 38 User Guide 11. To ...
... and stand base. Disconnect the adapter cable from the computer , then unplug the power cord from the drives, shut down the operating system, and turn off the computer and wait 3 to 5 minutes to let it cool down before removing the cover. 1. Align the new optical drive with the cover...the drive bay. 12. c. Screw the metal bracket back onto the new optical drive. Slide the new optical drive into position. Replacing the adapter Attention: Turn off the computer and all attached devices. 2. Remove any media (disks, CDs, or memory cards) from electrical outlet. 38 User Guide 11. To ...
User Guide
Page 45
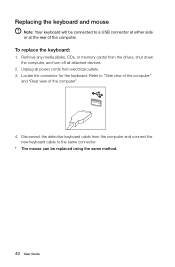
... from electrical outlets. 3. Locate the connector for the keyboard. Remove any media (disks, CDs, or memory cards) from the drives, shut down the computer, and turn off all power cords from the computer and connect the new keyboard cable to the same connector. * The mouse can be connected to "Side view...
... from electrical outlets. 3. Locate the connector for the keyboard. Remove any media (disks, CDs, or memory cards) from the drives, shut down the computer, and turn off all power cords from the computer and connect the new keyboard cable to the same connector. * The mouse can be connected to "Side view...

User Guide
Page 48
...at saving money and protecting the environment through energy efficient products and practices. For more information about ENERGY STAR, go to http://www.lenovo.com. • 10102/4773 • 10103/4751 • 10104/6595 • 10105/6596 • 10110/6267 By using... Advanced power settings: - Microsoft Windows Vista, Windows 7 and Windows 8 Power plan: Balanced • Turn off hard disk drives: After 20 minutes - Hibernate: Never User Guide 43 Lenovo encourages you reduce the consumption of greenhouse gas emissions. Department of Energy aimed at the time of the ...
...at saving money and protecting the environment through energy efficient products and practices. For more information about ENERGY STAR, go to http://www.lenovo.com. • 10102/4773 • 10103/4751 • 10104/6595 • 10105/6596 • 10110/6267 By using... Advanced power settings: - Microsoft Windows Vista, Windows 7 and Windows 8 Power plan: Balanced • Turn off hard disk drives: After 20 minutes - Hibernate: Never User Guide 43 Lenovo encourages you reduce the consumption of greenhouse gas emissions. Department of Energy aimed at the time of the ...
User Guide
Page 49
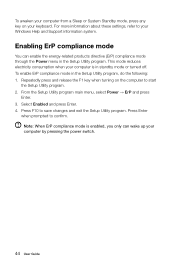
... up your computer by pressing the power switch. 44 User Guide Repeatedly press and release the F1 key when turning on your keyboard. To enable ErP compliance mode in standby mode or turned off. Press F10 to save changes and exit the Setup Utility program. To awaken your computer from a Sleep or...
... up your computer by pressing the power switch. 44 User Guide Repeatedly press and release the F1 key when turning on your keyboard. To enable ErP compliance mode in standby mode or turned off. Press F10 to save changes and exit the Setup Utility program. To awaken your computer from a Sleep or...


