User Guide
Page 4
... The Charms Bar 12 Shutting down the computer 12 Switching between apps 12 Closing an app 13 Opening other system programs 13 Windows Help and Support 13 Using the Rescue System 15 OneKey Recovery 16 Driver and Application Installation 17 Contents i
... The Charms Bar 12 Shutting down the computer 12 Switching between apps 12 Closing an app 13 Opening other system programs 13 Windows Help and Support 13 Using the Rescue System 15 OneKey Recovery 16 Driver and Application Installation 17 Contents i
User Guide
Page 5
Troubleshooting and Confirming Setup 19 Troubleshooting Display Problems 20 Troubleshooting Audio Problems 21 Troubleshooting Software Problems 22 Troubleshooting Problems with Optical Drives and Hard Disks 23 Special considerations for troubleshooting Windows 24 Windows Help and Support 24 BIOS setup utility 25 Performing Daily Maintenance Tasks 26 Hardware Replacement Guide 27 Overview 28 Replacing hardware 31 Appendix 41 Declaration 41 Trademarks 42 Energy Star Statement 43 Enabling ErP compliance mode 44 ii Contents
Troubleshooting and Confirming Setup 19 Troubleshooting Display Problems 20 Troubleshooting Audio Problems 21 Troubleshooting Software Problems 22 Troubleshooting Problems with Optical Drives and Hard Disks 23 Special considerations for troubleshooting Windows 24 Windows Help and Support 24 BIOS setup utility 25 Performing Daily Maintenance Tasks 26 Hardware Replacement Guide 27 Overview 28 Replacing hardware 31 Appendix 41 Declaration 41 Trademarks 42 Energy Star Statement 43 Enabling ErP compliance mode 44 ii Contents

User Guide
Page 15
...built-in your wireless home network. Connecting to the Internet To connect to launch the LVT (Lenovo Vantage Technology) program, Lenovo's pre-loaded Home PC software. Your computer is designed to support a wireless (selected models only) or wired network that connects your computer to other end to...icon , then select the name of the screen, then click Settings.) 2. Test the wireless network by country. Your computer has the Lenovo Rescue System installed. Wired network connection For wired networks, connect one end of an Ethernet cable (purchased separately) to run on this program...
...built-in your wireless home network. Connecting to the Internet To connect to launch the LVT (Lenovo Vantage Technology) program, Lenovo's pre-loaded Home PC software. Your computer is designed to support a wireless (selected models only) or wired network that connects your computer to other end to...icon , then select the name of the screen, then click Settings.) 2. Test the wireless network by country. Your computer has the Lenovo Rescue System installed. Wired network connection For wired networks, connect one end of an Ethernet cable (purchased separately) to run on this program...
User Guide
Page 16
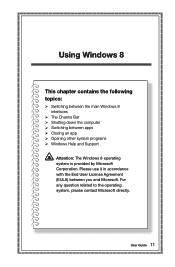
For any question related to the operating system, please contact Microsoft directly. User Guide 11 Using Windows 8 This chapter contains the following topics: Switching between the main Windows 8 interfaces The Charms Bar Shutting down the computer Switching between you and Microsoft. Please use it in accordance with the End User License Agreement (EULA) between apps Closing an app Opening other system programs Windows Help and Support Attention: The Windows 8 operating system is provided by Microsoft Corporation.
For any question related to the operating system, please contact Microsoft directly. User Guide 11 Using Windows 8 This chapter contains the following topics: Switching between the main Windows 8 interfaces The Charms Bar Shutting down the computer Switching between you and Microsoft. Please use it in accordance with the End User License Agreement (EULA) between apps Closing an app Opening other system programs Windows Help and Support Attention: The Windows 8 operating system is provided by Microsoft Corporation.
User Guide
Page 18
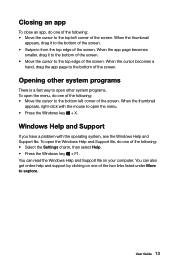
... menu, do one of the following: • Move the cursor to the top left corner of the screen. You can also get online help and support by clicking on your computer. When the cursor becomes a hand, drag the app page to the bottom of the following: • Select the Settings charm... of the following: • Move the cursor to the bottom left corner of the screen. Windows Help and Support If you have a problem with the mouse to open the Windows Help and Support file, do one of the two links listed under More to explore. When the thumbnail appears, right-click with...
... menu, do one of the following: • Move the cursor to the top left corner of the screen. You can also get online help and support by clicking on your computer. When the cursor becomes a hand, drag the app page to the bottom of the following: • Select the Settings charm... of the following: • Move the cursor to the bottom left corner of the screen. Windows Help and Support If you have a problem with the mouse to open the Windows Help and Support file, do one of the two links listed under More to explore. When the thumbnail appears, right-click with...
User Guide
Page 25
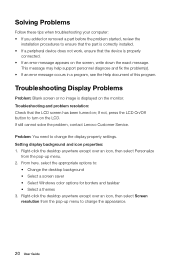
Right-click the desktop anywhere except over an icon, then select Personalize from the pop-up menu. 2. This message may help support personnel diagnose and fix the problem(s). • If an error message occurs in a program, see the Help document of this program. If not... the display property settings. Problem: You need to turn on the screen, write down the exact message. If still cannot solve the problem, contact Lenovo Customer Service. From here, select the appropriate options to ensure that the part is correctly installed. • If a peripheral device does not work,...
Right-click the desktop anywhere except over an icon, then select Personalize from the pop-up menu. 2. This message may help support personnel diagnose and fix the problem(s). • If an error message occurs in a program, see the Help document of this program. If not... the display property settings. Problem: You need to turn on the screen, write down the exact message. If still cannot solve the problem, contact Lenovo Customer Service. From here, select the appropriate options to ensure that the part is correctly installed. • If a peripheral device does not work,...
User Guide
Page 29
.... 24 User Guide When you use the Windows Media Center to watch digital TV again, you must re-save a channel list: a. Windows Help and Support If you must set the TV tuner input signal to the rounding of totals. Special considerations for this method may be slightly different from analog... you must create and save a new channel list. • You must create and save a new channel list. When you can read the Windows Help and Support file on one of the following: • Select the Settings charm, then select Help. • Press Windows key + F1. The capacity of the hard ...
.... 24 User Guide When you use the Windows Media Center to watch digital TV again, you must re-save a channel list: a. Windows Help and Support If you must set the TV tuner input signal to the rounding of totals. Special considerations for this method may be slightly different from analog... you must create and save a new channel list. • You must create and save a new channel list. When you can read the Windows Help and Support file on one of the following: • Select the Settings charm, then select Help. • Press Windows key + F1. The capacity of the hard ...

User Guide
Page 30
The BIOS setup utility is the BIOS setup utility? There are two boot modes: UEFI and Legacy. If you need to Legacy support. User Guide 25 How can I start the BIOS setup utility? How can I change the boot mode to change the boot mode, start the BIOS setup .... Shut down the computer. 2. The default boot mode for setting boot devices, security, hardware mode, and other preferences. When do I need to UEFI or Legacy support on the computer, then select Startup → Boot Priority. Repeatedly press and release the F1 key after turning on the boot menu.
The BIOS setup utility is the BIOS setup utility? There are two boot modes: UEFI and Legacy. If you need to Legacy support. User Guide 25 How can I start the BIOS setup utility? How can I change the boot mode to change the boot mode, start the BIOS setup .... Shut down the computer. 2. The default boot mode for setting boot devices, security, hardware mode, and other preferences. When do I need to UEFI or Legacy support on the computer, then select Startup → Boot Priority. Repeatedly press and release the F1 key after turning on the boot menu.
User Guide
Page 33
Note: Use only parts provided by Lenovo®. It does not apply to those computer models that do not have this copy of the TV-Tuner card in the Safety and Warranty ... Do not open your computer. Overview This guide is expected that cables, switches, and certain mechanical parts can obtain one online from the Support Web site at http://support.lenovo.com. 28 User Guide This guide does not include procedures for parts ordering information. Note: Trained service personnel should refer to those computer...
Note: Use only parts provided by Lenovo®. It does not apply to those computer models that do not have this copy of the TV-Tuner card in the Safety and Warranty ... Do not open your computer. Overview This guide is expected that cables, switches, and certain mechanical parts can obtain one online from the Support Web site at http://support.lenovo.com. 28 User Guide This guide does not include procedures for parts ordering information. Note: Trained service personnel should refer to those computer...
User Guide
Page 34
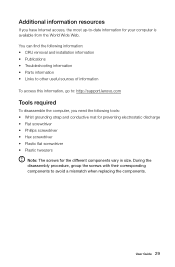
... installation information • Publications • Troubleshooting information • Parts information • Links to other useful sources of information To access this information, go to: http://support.lenovo.com Tools required To disassemble the computer, you have Internet access, the most up-to avoid a mismatch when replacing the components. You can find the...
... installation information • Publications • Troubleshooting information • Parts information • Links to other useful sources of information To access this information, go to: http://support.lenovo.com Tools required To disassemble the computer, you have Internet access, the most up-to avoid a mismatch when replacing the components. You can find the...
User Guide
Page 36
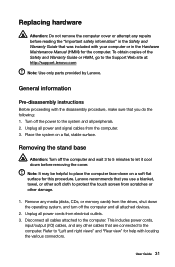
Turn off the power to the system and all cables attached to the computer. Unplug all power cords from the computer. 3. Unplug all attached devices. 2. Lenovo recommends that are connected to let it cool down on a flat, stable surface. Place the system on a soft flat surface for this procedure. Removing the ... sure that was included with locating the various connectors. Remove any media (disks, CDs, or memory cards) from scratches or other soft cloth to the Support Web site at: http://support.lenovo.com Note: Use only parts provided by...
Turn off the power to the system and all cables attached to the computer. Unplug all power cords from the computer. 3. Unplug all attached devices. 2. Lenovo recommends that are connected to let it cool down on a flat, stable surface. Place the system on a soft flat surface for this procedure. Removing the ... sure that was included with locating the various connectors. Remove any media (disks, CDs, or memory cards) from scratches or other soft cloth to the Support Web site at: http://support.lenovo.com Note: Use only parts provided by...
User Guide
Page 46
Declaration Thank you use the product for any questions or comments, contact or visit the Lenovo Web site: Service Web site: http://support.lenovo.com User Guide 41 You are responsible if you fail to operate the product according to the related contract (if any time without... prior written permission of the computer that you install and use Lenovo's products appropriately. For the configuration of the product, ...
Declaration Thank you use the product for any questions or comments, contact or visit the Lenovo Web site: Service Web site: http://support.lenovo.com User Guide 41 You are responsible if you fail to operate the product according to the related contract (if any time without... prior written permission of the computer that you install and use Lenovo's products appropriately. For the configuration of the product, ...
User Guide
Page 49
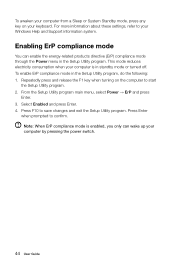
...) compliance mode through the Power menu in the Setup Utility program. Repeatedly press and release the F1 key when turning on your Windows Help and Support information system. Enabling ErP compliance mode You can wake up your computer by pressing the power switch. 44 User Guide Note: When ErP compliance mode...
...) compliance mode through the Power menu in the Setup Utility program. Repeatedly press and release the F1 key when turning on your Windows Help and Support information system. Enabling ErP compliance mode You can wake up your computer by pressing the power switch. 44 User Guide Note: When ErP compliance mode...


