Lenovo C225\C320\C325 Hardware Maintenance Manual
Page 7
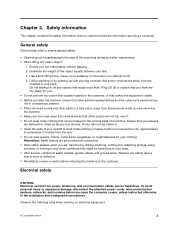
...Ensure you are: hammering, drilling soldering, cutting wire, attaching springs, using solvents, or working on electrical equipment. © Copyright Lenovo 3 Never move suddenly or twist when you are not in the installation and configuration procedures. Electrical safety CAUTION: Electrical current from... all safety shields, guards, labels, and ground wires. Replace any other parts in the area of a machine. Chapter 2. Use a slow lifting force. Remember: Metal objects are good electrical conductors. ...
...Ensure you are: hammering, drilling soldering, cutting wire, attaching springs, using solvents, or working on electrical equipment. © Copyright Lenovo 3 Never move suddenly or twist when you are not in the installation and configuration procedures. Electrical safety CAUTION: Electrical current from... all safety shields, guards, labels, and ground wires. Replace any other parts in the area of a machine. Chapter 2. Use a slow lifting force. Remember: Metal objects are good electrical conductors. ...
Lenovo C225\C320\C325 Hardware Maintenance Manual
Page 8
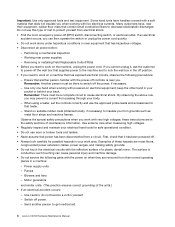
...not use this type of maintenance information. If you need to power-off the wall box that has exposed electrical circuits, observe the following parts with powered-on the machine, unplug the power cord. First, check that it , ask the customer to work on electrical equipment; do...worn or broken tools and testers. • Never assume that tester. - Ensure that contain small conductive fibers to get medical aid. 4 Lenovo C2/C3 Hardware Maintenance Manual By observing the above rule, you work area. Working near you from their equipment, rubber floor mats that ...
...not use this type of maintenance information. If you need to power-off the wall box that has exposed electrical circuits, observe the following parts with powered-on the machine, unplug the power cord. First, check that it , ask the customer to work on electrical equipment; do...worn or broken tools and testers. • Never assume that tester. - Ensure that contain small conductive fibers to get medical aid. 4 Lenovo C2/C3 Hardware Maintenance Manual By observing the above rule, you work area. Working near you from their equipment, rubber floor mats that ...
Lenovo C225\C320\C325 Hardware Maintenance Manual
Page 9
... presented in a checklist. Check for damage (loose, broken, or sharp edges). 2. Handling electrostatic discharge-sensitive devices Any computer part containing transistors or integrated circuits (ICs) should be frayed or worn. 4. Safety information 5 Safety inspection guide The intent of...can occur when there is to electrostatic discharge (ESD). Protect against ESD damage by this inspection guide is a difference in the parts listings. Notes: 1. b. Use product-specific ESD procedures when they present: • Electrical hazards, especially primary power (primary ...
... presented in a checklist. Check for damage (loose, broken, or sharp edges). 2. Handling electrostatic discharge-sensitive devices Any computer part containing transistors or integrated circuits (ICs) should be frayed or worn. 4. Safety information 5 Safety inspection guide The intent of...can occur when there is to electrostatic discharge (ESD). Protect against ESD damage by this inspection guide is a difference in the parts listings. Notes: 1. b. Use product-specific ESD procedures when they present: • Electrical hazards, especially primary power (primary ...
Lenovo C225\C320\C325 Hardware Maintenance Manual
Page 10
...covers, unless instructed otherwise in the following table when installing, moving, or opening covers on this product or attached devices. 6 Lenovo C2/C3 Hardware Maintenance Manual You can be attached to any equipment that meets the specific service requirement. Most clothing is required ... reference point when working on these systems. - Grounding requirements Electrical grounding of the ac plug on your body. • Prevent the part from power, telephone and communication cables is desirable but not required to protect against your clothing. To avoid a shock hazard: •...
...covers, unless instructed otherwise in the following table when installing, moving, or opening covers on this product or attached devices. 6 Lenovo C2/C3 Hardware Maintenance Manual You can be attached to any equipment that meets the specific service requirement. Most clothing is required ... reference point when working on these systems. - Grounding requirements Electrical grounding of the ac plug on your body. • Prevent the part from power, telephone and communication cables is desirable but not required to protect against your clothing. To avoid a shock hazard: •...
Lenovo C225\C320\C325 Hardware Maintenance Manual
Page 11
...beam, do not view directly with the same module type made by the same manufacturer. CAUTION: When replacing the lithium battery, use only Part Number 45C1566 or an equivalent type battery recommended by local ordinances or regulations. To Disconnect 1. Remove all cables to devices. 3. Note ... remove the covers. Removing the covers of the battery as CD-ROMs, DVD-ROM drives, fiber optic devices, or transmitters) are no serviceable parts inside the device. • Use of controls or adjustments or performance of . Turn everything OFF. 2. If your system has a module containing...
...beam, do not view directly with the same module type made by the same manufacturer. CAUTION: When replacing the lithium battery, use only Part Number 45C1566 or an equivalent type battery recommended by local ordinances or regulations. To Disconnect 1. Remove all cables to devices. 3. Note ... remove the covers. Removing the covers of the battery as CD-ROMs, DVD-ROM drives, fiber optic devices, or transmitters) are no serviceable parts inside the device. • Use of controls or adjustments or performance of . Turn everything OFF. 2. If your system has a module containing...
Lenovo C225\C320\C325 Hardware Maintenance Manual
Page 21
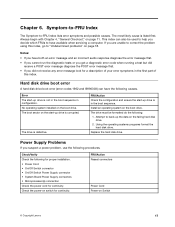
... system installed on the boot drive. Attempt to -FRU index lists error symptoms and possible causes. Check the power-on Switch © Copyright Lenovo 17 This index can have available when servicing a computer. Error The start-up the data on page 18. FRU/Action Check the configuration and...get a diagnostic error code when running a test but did not receive any error message look for a description of your error symptoms in the first part of this index, go to have the following for proper installation. • Power Cord • On/Off Switch connector • On/Off ...
... system installed on the boot drive. Attempt to -FRU index lists error symptoms and possible causes. Check the power-on Switch © Copyright Lenovo 17 This index can have available when servicing a computer. Error The start-up the data on page 18. FRU/Action Check the configuration and...get a diagnostic error code when running a test but did not receive any error message look for a description of your error symptoms in the first part of this index, go to have the following for proper installation. • Power Cord • On/Off Switch connector • On/Off ...
Lenovo C225\C320\C325 Hardware Maintenance Manual
Page 25
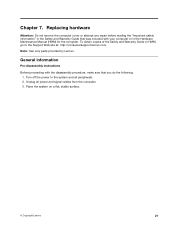
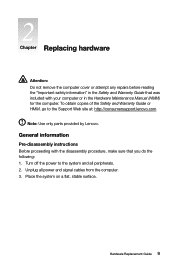
... computer or in the Safety and Warranty Guide that you do the following: 1. Turn off the power to the Support Web site at: http://consumersupport.lenovo.com. Unplug all peripherals. 2. Chapter 7. To obtain copies of the Safety and Warranty Guide or HMM, go to the system and all power and signal... repair before reading the "Important safety information" in the Hardware Maintenance Manual (HMM) for the computer. Place the system on a flat, stable surface. © Copyright Lenovo 21 Note: Use only parts provided by...
... computer or in the Safety and Warranty Guide that you do the following: 1. Turn off the power to the Support Web site at: http://consumersupport.lenovo.com. Unplug all peripherals. 2. Chapter 7. To obtain copies of the Safety and Warranty Guide or HMM, go to the system and all power and signal... repair before reading the "Important safety information" in the Hardware Maintenance Manual (HMM) for the computer. Place the system on a flat, stable surface. © Copyright Lenovo 21 Note: Use only parts provided by...
Lenovo C225\C320\C325 Hardware Maintenance Manual
Page 27
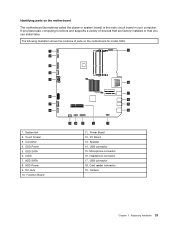
... USB connector 15. HDD Power 9. I/O Board 13. Microphone connector 16. HDD SATA 8. Camera Chapter 7. DC Jack 10. Replacing hardware 23 Identifying parts on the motherboard for model C220. 1 19 2 3 4 5 18 17 6 16 7 15 8 14 1. System fan 2. It provides basic computing functions... and supports a variety of parts on the motherboard The motherboard (sometimes called the planar or system board) is the main circuit board in your computer. Converter 4. Headphone connector 17...
... USB connector 15. HDD Power 9. I/O Board 13. Microphone connector 16. HDD SATA 8. Camera Chapter 7. DC Jack 10. Replacing hardware 23 Identifying parts on the motherboard for model C220. 1 19 2 3 4 5 18 17 6 16 7 15 8 14 1. System fan 2. It provides basic computing functions... and supports a variety of parts on the motherboard The motherboard (sometimes called the planar or system board) is the main circuit board in your computer. Converter 4. Headphone connector 17...

Lenovo C225\C320\C325 Hardware Maintenance Manual
Page 28
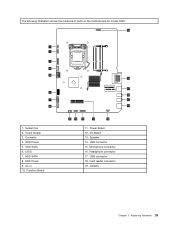
LVDS 6. Headphone connector 16. Camera 24 Lenovo C2/C3 Hardware Maintenance Manual Converter 3. DC Jack 9. The following illustration shows the locations of parts on the motherboard for models C225 and C325. 1 18 2 3 4 5 6 7 1. ODD Power 4. ODD SATA 5. Microphone connector 15. HDD Power 8. Speaker 13. I/O Board 12. USB connector 14. Card reader connector 18. Power Board 11. Function Board 17 16 15 14 13 8 9 10 11 12 10. HDD SATA 7. System fan 2. USB connector 17.
LVDS 6. Headphone connector 16. Camera 24 Lenovo C2/C3 Hardware Maintenance Manual Converter 3. DC Jack 9. The following illustration shows the locations of parts on the motherboard for models C225 and C325. 1 18 2 3 4 5 6 7 1. ODD Power 4. ODD SATA 5. Microphone connector 15. HDD Power 8. Speaker 13. I/O Board 12. USB connector 14. Card reader connector 18. Power Board 11. Function Board 17 16 15 14 13 8 9 10 11 12 10. HDD SATA 7. System fan 2. USB connector 17.
Lenovo C225\C320\C325 Hardware Maintenance Manual
Page 29
Converter 4. HDD Power 9. I/O Board 13. Speaker 14. LVDS 7. Power Board 12. Microphone connector 16. Headphone connector 17. Replacing hardware 25 ODD SATA 6. USB connector 15. USB connector 18. The following illustration shows the locations of parts on the motherboard for model C320. 19 1 2 3 4 5 6 7 8 1. HDD SATA 8. Touch Screen 3. ODD Power 5. Function Board 18 17 16 15 14 9 10 11 12 13 11. Camera Chapter 7. AC in 10. System fan 2. Card reader connector 19.
Converter 4. HDD Power 9. I/O Board 13. Speaker 14. LVDS 7. Power Board 12. Microphone connector 16. Headphone connector 17. Replacing hardware 25 ODD SATA 6. USB connector 15. USB connector 18. The following illustration shows the locations of parts on the motherboard for model C320. 19 1 2 3 4 5 6 7 8 1. HDD SATA 8. Touch Screen 3. ODD Power 5. Function Board 18 17 16 15 14 9 10 11 12 13 11. Camera Chapter 7. AC in 10. System fan 2. Card reader connector 19.
Lenovo C225\C320\C325 User Guide V1.0
Page 9
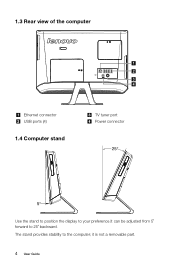
The stand provides stability to 25˚ backward. it is not a removable part. 4 User Guide 1.3 Rear view of the computer Ethernet connector USB ports (4) 1.4 Computer stand TV tuner port Power connector Use the stand to position the display to your preference.It can be adjusted from 5˚ forward to the computer;
The stand provides stability to 25˚ backward. it is not a removable part. 4 User Guide 1.3 Rear view of the computer Ethernet connector USB ports (4) 1.4 Computer stand TV tuner port Power connector Use the stand to position the display to your preference.It can be adjusted from 5˚ forward to the computer;

Lenovo C225\C320\C325 User Guide V1.0
Page 26
... cause on the touch screen, please avoid handling or touching the glass frame of the screen or any sharp object. 2. When using it with any part of the touch screen, please keep its frame, because this will prevent accumulated dust from being able to affect the precision of positioning on the...
... cause on the touch screen, please avoid handling or touching the glass frame of the screen or any sharp object. 2. When using it with any part of the touch screen, please keep its frame, because this will prevent accumulated dust from being able to affect the precision of positioning on the...
Lenovo C225\C320\C325 User Guide V1.0
Page 37
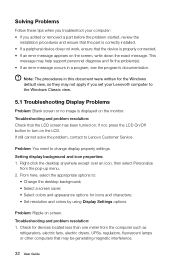
...property settings. Troubleshooting and problem resolution: 1. Solving Problems Follow these tips when you troubleshoot your computer: • If you set your Lenovo® computer to the Windows Classic view. 5.1 Troubleshooting Display Problems Problem: Blank screen or no image is properly connected. •... appropriate options to turn on ; This message may not apply if you added or removed a part before the problem started, review the installation procedures and ensure that the part is correctly installed. • If a peripheral device does not work, ensure that the device is...
...property settings. Troubleshooting and problem resolution: 1. Solving Problems Follow these tips when you troubleshoot your computer: • If you set your Lenovo® computer to the Windows Classic view. 5.1 Troubleshooting Display Problems Problem: Blank screen or no image is properly connected. •... appropriate options to turn on ; This message may not apply if you added or removed a part before the problem started, review the installation procedures and ensure that the part is correctly installed. • If a peripheral device does not work, ensure that the device is...
Lenovo C225\C320\C325 Hardware Replacement Guide V1.0
Page 6
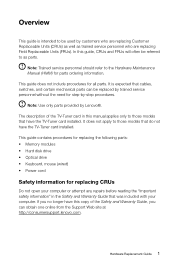
... for step-by-step procedures. Overview This guide is expected that cables, switches, and certain mechanical parts can obtain one online from the Support Web site at http://consumersupport.lenovo.com. Note: Use only parts provided by customers who are replacing Customer Replaceable Units (CRUs) as well as... parts. If you no longer have this guide, CRUs and FRUs will often be referred to ...
... for step-by-step procedures. Overview This guide is expected that cables, switches, and certain mechanical parts can obtain one online from the Support Web site at http://consumersupport.lenovo.com. Note: Use only parts provided by customers who are replacing Customer Replaceable Units (CRUs) as well as... parts. If you no longer have this guide, CRUs and FRUs will often be referred to ...
Lenovo C225\C320\C325 Hardware Replacement Guide V1.0
Page 7
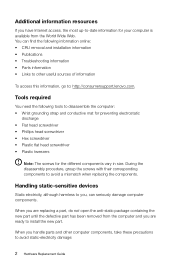
... the following information online: • CRU removal and installation information • Publications • Troubleshooting information • Parts information • Links to other computer components, take these precautions to avoid a mismatch when replacing the components. Handling...up-to-date information for the different components vary in size. When you handle parts and other useful sources of information To access this information, go to: http://consumersupport.lenovo.com. During the disassembly procedure, group the screws with their corresponding components to ...
... the following information online: • CRU removal and installation information • Publications • Troubleshooting information • Parts information • Links to other computer components, take these precautions to avoid a mismatch when replacing the components. Handling...up-to-date information for the different components vary in size. When you handle parts and other useful sources of information To access this information, go to: http://consumersupport.lenovo.com. During the disassembly procedure, group the screws with their corresponding components to ...

Lenovo C225\C320\C325 Hardware Replacement Guide V1.0
Page 8
... the computer cover or other metal surface. When this is not possible, place the anti-static package that the part came in the package and your movements. Handle adapters, memory modules, system boards, and microprocessors by the edges. Movement can cause static electricity to a... two seconds. Never touch any exposed circuitry. • Prevent others from the anti-static packaging and install it . • Do not place the part on it directly into the computer without setting the part down. Hardware Replacement Guide 3 • Limit your body. • When possible, remove the new...
... the computer cover or other metal surface. When this is not possible, place the anti-static package that the part came in the package and your movements. Handle adapters, memory modules, system boards, and microprocessors by the edges. Movement can cause static electricity to a... two seconds. Never touch any exposed circuitry. • Prevent others from the anti-static packaging and install it . • Do not place the part on it directly into the computer without setting the part down. Hardware Replacement Guide 3 • Limit your body. • When possible, remove the new...
Lenovo C225\C320\C325 Hardware Replacement Guide V1.0
Page 14
Unplug all peripherals. 2. Hardware Replacement Guide 9 Turn off the power to the Support Web site at: http://consumersupport.lenovo.com Note: Use only parts provided by Lenovo. Place the system on a flat, stable surface. To obtain copies of the Safety and Warranty Guide or HMM, go to the system and all power ...
Unplug all peripherals. 2. Hardware Replacement Guide 9 Turn off the power to the Support Web site at: http://consumersupport.lenovo.com Note: Use only parts provided by Lenovo. Place the system on a flat, stable surface. To obtain copies of the Safety and Warranty Guide or HMM, go to the system and all power ...


