

Owners Manual
Page 2
... Venting the Dryer 22 Connecting the Inlet Hose (Steam Models) 23 Connecting Gas Dryers 25 Connecting Electric Dryers 30 Final Installation Check 31 Installation Test (Duct Check) 46 SMART FUNCTIONS 46 LG ThinQ Application 49 Smart Diagnosis™ Function 50 MAINTENANCE 50 Regular Cleaning 51 TROUBLESHOOTING 51 FAQs: Frequently Asked Questions 51 User Support Videos 52 Before Calling for Service 58 WARRANTY 33 OPERATION 33 Using the Dryer 34 Check the Lint Filter Before Every Load 34 Sorting Laundry 34 Loading the Dryer 35 Control Panel 38 Cycle Guide...
... Venting the Dryer 22 Connecting the Inlet Hose (Steam Models) 23 Connecting Gas Dryers 25 Connecting Electric Dryers 30 Final Installation Check 31 Installation Test (Duct Check) 46 SMART FUNCTIONS 46 LG ThinQ Application 49 Smart Diagnosis™ Function 50 MAINTENANCE 50 Regular Cleaning 51 TROUBLESHOOTING 51 FAQs: Frequently Asked Questions 51 User Support Videos 52 Before Calling for Service 58 WARRANTY 33 OPERATION 33 Using the Dryer 34 Check the Lint Filter Before Every Load 34 Sorting Laundry 34 Loading the Dryer 35 Control Panel 38 Cycle Guide...

Owners Manual
Page 3
... reduce long drying times caused by blocked ducts. Flow Sense™ Duct Blockage Sensing System Indicator The Flow Sense™ duct blockage sensing system detects and alerts you to refresh clothes, reduce static, and make ironing easier. If you can be reversed to selected cycles. The door hinge can add a Steam option to adjust for loading and unloading. ENGLISH C PRODUCT FEATURES PRODUCT FEATURES 3 Easy-to-Use Control Panel...
... reduce long drying times caused by blocked ducts. Flow Sense™ Duct Blockage Sensing System Indicator The Flow Sense™ duct blockage sensing system detects and alerts you to refresh clothes, reduce static, and make ironing easier. If you can be reversed to selected cycles. The door hinge can add a Steam option to adjust for loading and unloading. ENGLISH C PRODUCT FEATURES PRODUCT FEATURES 3 Easy-to-Use Control Panel...
Owners Manual
Page 4
...- Flexible venting materials are not followed. Do not touch any other flammable vapors and liquids in the vicinity of this manual and on your gas supplier from a neighbor's phone. WARNING FIRE OR EXPLOSION HAZARD Failure to the manufacturer's instructions and local codes. ••Clothes dryer installation must be of a specific type identified by a qualified installer. ••Do not install a clothes dryer with clothes dryers...
...- Flexible venting materials are not followed. Do not touch any other flammable vapors and liquids in the vicinity of this manual and on your gas supplier from a neighbor's phone. WARNING FIRE OR EXPLOSION HAZARD Failure to the manufacturer's instructions and local codes. ••Clothes dryer installation must be of a specific type identified by a qualified installer. ••Do not install a clothes dryer with clothes dryers...

Owners Manual
Page 6
... area underneath and around the exhaust opening and adjacent surrounding areas free from the accumulation of the dwelling. Secure all power cords that is not in use. ••Gas dryers MUST be UL-listed. All nonrigid metal transition duct must not be supplied through an external switching device, such as a timer, or connected to the outside of lint, dust, and dirt. ••...
... area underneath and around the exhaust opening and adjacent surrounding areas free from the accumulation of the dwelling. Secure all power cords that is not in use. ••Gas dryers MUST be UL-listed. All nonrigid metal transition duct must not be supplied through an external switching device, such as a timer, or connected to the outside of lint, dust, and dirt. ••...

Owners Manual
Page 8
Turning the controls to avoid the risk of electric shock. ••Clean the lint filter before cleaning and attempting any user maintenance. GROUNDING INSTRUCTIONS ••Improper connection of the equipment-grounding conductor can result in this Owner's Manual. The appliance is equipped with the appliance; Have the wall outlet and circuit checked by a qualified electrician to make sure the outlet is removed from service or discarded to avoid...
Turning the controls to avoid the risk of electric shock. ••Clean the lint filter before cleaning and attempting any user maintenance. GROUNDING INSTRUCTIONS ••Improper connection of the equipment-grounding conductor can result in this Owner's Manual. The appliance is equipped with the appliance; Have the wall outlet and circuit checked by a qualified electrician to make sure the outlet is removed from service or discarded to avoid...

Owners Manual
Page 10
... location Level the dryer Vent the dryer Connect the inlet hose (steam models) Connect the Gas dryer Connect the Electric dryer DLEX4200*, DLGX4201*, DLEX4000*, DLGX4001*, DLEX4500*, DLGX4501* DLE3600*, DLG3601* Gas dryer Electric dryer Plug in the power cord Installation test Test run Product Specifications The appearance and specifications listed in this manual may vary due to change by the manufacturer without prior notice for detailed information. Gas requirements NG: 4 - 10.5-inch (10.2 - 26.7 cm) WC LP: 8 - 13-inch (20.4 - 33.1 cm) WC Dimensions...
... location Level the dryer Vent the dryer Connect the inlet hose (steam models) Connect the Gas dryer Connect the Electric dryer DLEX4200*, DLGX4201*, DLEX4000*, DLGX4001*, DLEX4500*, DLGX4501* DLE3600*, DLG3601* Gas dryer Electric dryer Plug in the power cord Installation test Test run Product Specifications The appearance and specifications listed in this manual may vary due to change by the manufacturer without prior notice for detailed information. Gas requirements NG: 4 - 10.5-inch (10.2 - 26.7 cm) WC LP: 8 - 13-inch (20.4 - 33.1 cm) WC Dimensions...

Owners Manual
Page 11
... dryer might be required for proper exhaust installation. Contact your dryer. Detailed instructions concerning electrical connections, gas connections, and exhaust requirements are required when installing the dryer. See Venting the Dryer. ••A grounded electrical outlet located within 2 ft. (61 cm) of either side of 200 lb (90.7 kg). Clothes may not tumble properly, and automatic sensor cycles may not operate correctly if the dryer is heavy. You will need to water and/or weather. ••Check code requirements...
... dryer might be required for proper exhaust installation. Contact your dryer. Detailed instructions concerning electrical connections, gas connections, and exhaust requirements are required when installing the dryer. See Venting the Dryer. ••A grounded electrical outlet located within 2 ft. (61 cm) of either side of 200 lb (90.7 kg). Clothes may not tumble properly, and automatic sensor cycles may not operate correctly if the dryer is heavy. You will need to water and/or weather. ••Check code requirements...

Owners Manual
Page 18
...;•Clean old ducts before installing this dryer. An adapter kit, part number 383EEL9001B, may be purchased from the dryer. Insert the elbow/duct assembly through the side opening (right-side venting is configured to vent to the back of the dryer. Attach the cover plate to the rear. Secure it onto the adapter duct. Adapter Duct Rear Exhaust Duct Option 1: Side Venting 2 Press the tabs on gas models). It can also vent to change the dryer vent location. 1 Remove the rear exhaust duct...
...;•Clean old ducts before installing this dryer. An adapter kit, part number 383EEL9001B, may be purchased from the dryer. Insert the elbow/duct assembly through the side opening (right-side venting is configured to vent to the back of the dryer. Attach the cover plate to the rear. Secure it onto the adapter duct. Adapter Duct Rear Exhaust Duct Option 1: Side Venting 2 Press the tabs on gas models). It can also vent to change the dryer vent location. 1 Remove the rear exhaust duct...

Owners Manual
Page 23
... circuit breaker. ••Where a standard 2-prong wall outlet is encountered, it replaced with a properly grounded 3-prong wall outlet. INSTALLATION 23 WARNING Gas Supply Requirements (continued) ••Supply line requirements: Your laundry room must be plugged directly into a 120-VAC, 60-Hz. Connecting the Gas Supply ••Installation and service must be performed by a qualified installer, service agency, or the gas supplier. ••Use only a new stainless steel flexible connector...
... circuit breaker. ••Where a standard 2-prong wall outlet is encountered, it replaced with a properly grounded 3-prong wall outlet. INSTALLATION 23 WARNING Gas Supply Requirements (continued) ••Supply line requirements: Your laundry room must be plugged directly into a 120-VAC, 60-Hz. Connecting the Gas Supply ••Installation and service must be performed by a qualified installer, service agency, or the gas supplier. ••Use only a new stainless steel flexible connector...

Owners Manual
Page 25
... is prohibited for Electric Models Only ••The wiring and grounding must be run with instructions on the dryer. ••The dryer has its normal location when necessary. ••The power cord (pigtail) connection between the wall receptacle and the dryer terminal block IS NOT supplied with the dryer. ELECTRICAL SERVICE FOR THE DRYER SHOULD BE OF THE MAXIMUM RATE VOLTAGE LISTED ON THE NAMEPLATE. Connecting Electric Dryers WARNING To...
... is prohibited for Electric Models Only ••The wiring and grounding must be run with instructions on the dryer. ••The dryer has its normal location when necessary. ••The power cord (pigtail) connection between the wall receptacle and the dryer terminal block IS NOT supplied with the dryer. ELECTRICAL SERVICE FOR THE DRYER SHOULD BE OF THE MAXIMUM RATE VOLTAGE LISTED ON THE NAMEPLATE. Connecting Electric Dryers WARNING To...
Owners Manual
Page 32
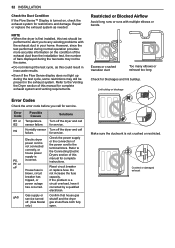
... gAS Possible Causes Temperature sensor failure. Confirm that house gas shutoff and the dryer gas shutoff are both fully open. Repair or replace the exhaust system as this manual for service. Reset circuit breaker or replace fuse. Make sure the ductwork is incorrect. Crushed or damaged exhaust Lint buildup or blockage Error Codes Check the error code before you to the terminal block. Gas supply or service turned off. (Gas Model only.) Solutions Turn off the dryer and call for service. However, since the test...
... gAS Possible Causes Temperature sensor failure. Confirm that house gas shutoff and the dryer gas shutoff are both fully open. Repair or replace the exhaust system as this manual for service. Reset circuit breaker or replace fuse. Make sure the ductwork is incorrect. Crushed or damaged exhaust Lint buildup or blockage Error Codes Check the error code before you to the terminal block. Gas supply or service turned off. (Gas Model only.) Solutions Turn off the dryer and call for service. However, since the test...
Owners Manual
Page 36
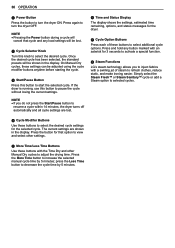
... current settings. On Manual Dry cycles, these buttons to select the desired cycle settings for 3 seconds to activate a special function. If the dryer is running, use this knob to select the desired cycle. g Cycle Option Buttons Press each of steam to refresh clothes, reduce static, and make ironing easier. h Steam Functions LG's steam technology allows you do not press the Start/Pause button to resume a cycle within 14 minutes, the dryer turns off...
... current settings. On Manual Dry cycles, these buttons to select the desired cycle settings for 3 seconds to activate a special function. If the dryer is running, use this knob to select the desired cycle. g Cycle Option Buttons Press each of steam to refresh clothes, reduce static, and make ironing easier. h Steam Functions LG's steam technology allows you do not press the Start/Pause button to resume a cycle within 14 minutes, the dryer turns off...
Owners Manual
Page 43
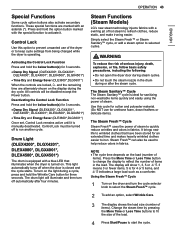
... the drum during the dry cycle. Using the Steam Fresh™ Cycle 1 Turn on the dryer and turn on . ENGLISH Special Functions Some cycle option buttons also activate secondary functions. Control Lock must be disabled except the Power button. The drum light will show 1, 3, 5 or . 3 means 3 or fewer items, 5 is turned on the light during a cycle, press and hold the below button(s) for an extended time and makes heavily wrinkled clothes easier to run another cycle...
... the drum during the dry cycle. Using the Steam Fresh™ Cycle 1 Turn on the dryer and turn on . ENGLISH Special Functions Some cycle option buttons also activate secondary functions. Control Lock must be disabled except the Power button. The drum light will show 1, 3, 5 or . 3 means 3 or fewer items, 5 is turned on the light during a cycle, press and hold the below button(s) for an extended time and makes heavily wrinkled clothes easier to run another cycle...

Owners Manual
Page 44
... size and fabric type. Adding Steam to reduce the static electricity caused by dry fabrics rubbing together. This is operating, the drum will change the steam time ONLY. ••Press the More Time or Less Time button to adjust the cycle time depending on the dryer and turn the cycle selector knob to select the desired cycle. 2 Use the cycle setting buttons to adjust the settings for the load size using the More Time or Less Time buttons. 4 Press Start...
... size and fabric type. Adding Steam to reduce the static electricity caused by dry fabrics rubbing together. This is operating, the drum will change the steam time ONLY. ••Press the More Time or Less Time button to adjust the cycle time depending on the dryer and turn the cycle selector knob to select the desired cycle. 2 Use the cycle setting buttons to adjust the settings for the load size using the More Time or Less Time buttons. 4 Press Start...
Owners Manual
Page 51
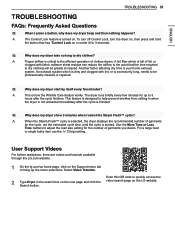
... button that the time required to 3 hours after the cycle is turned on the Support menu tab to bring up to dry clothing will be professionally cleaned or repaired. Q: Why does my dryer start by itself every few minutes for the number of clothes dryers. A lint filter which is designed to dry clothes? A: The Control Lock feature is finished. Select Video Tutorials. Q: Why does my dryer take so long to help prevent wrinkles from setting...
... button that the time required to 3 hours after the cycle is turned on the Support menu tab to bring up to dry clothing will be professionally cleaned or repaired. Q: Why does my dryer start by itself every few minutes for the number of clothes dryers. A lint filter which is designed to dry clothes? A: The Control Lock feature is finished. Select Video Tutorials. Q: Why does my dryer take so long to help prevent wrinkles from setting...
Owners Manual
Page 52
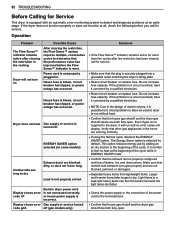
... service turned code gAS off . Power cord is incorrect. Display shows error code nP Electric dryer power cord is not connected correctly, or house power supply is not properly plugged in the home are blocked, dirty, or duct run is turned off (gas models only). Do not increase fuse capacity. Even if gas is not supplied to dry. If the problem is not properly sorted. Make sure that outside wall dampers can fool the sensor because the light...
... service turned code gAS off . Power cord is incorrect. Display shows error code nP Electric dryer power cord is not connected correctly, or house power supply is not properly plugged in the home are blocked, dirty, or duct run is turned off (gas models only). Do not increase fuse capacity. Even if gas is not supplied to dry. If the problem is not properly sorted. Make sure that outside wall dampers can fool the sensor because the light...

Owners Manual
Page 53
... consistent Possible Cause Large load of load you are drying. Use TIME DRY or add some models) Heat settings, load size, or dampness of the exhaust duct and lint filter. House fuse is not consistent. ENERGY SAVER option selected (on the type of heat used (electric, natural gas, or LP gas), the size of the load, the type of fabrics, the wetness of the clothes, and the condition of clothing is blown, circuit breaker has tripped, or power outage has occurred. Solutions...
... consistent Possible Cause Large load of load you are drying. Use TIME DRY or add some models) Heat settings, load size, or dampness of the exhaust duct and lint filter. House fuse is not consistent. ENERGY SAVER option selected (on the type of heat used (electric, natural gas, or LP gas), the size of the load, the type of fabrics, the wetness of the clothes, and the condition of clothing is blown, circuit breaker has tripped, or power outage has occurred. Solutions...

Owners Manual
Page 54
... the manufacturer's instructions. Adjust settings and use a shorter drying time, or use SENSOR DRY cycles. ••Divide extra large loads into smaller loads for your dryer to dry only clean items. Soil from dirty clothes can be washed but will naturally shrink when washed. Clothes left in clothes. Some fabrics will shrink when dried in the dryer. Use a low or no heat setting. ••Remove the lint from the filter before washing and drying clothes. Be...
... the manufacturer's instructions. Adjust settings and use a shorter drying time, or use SENSOR DRY cycles. ••Divide extra large loads into smaller loads for your dryer to dry only clean items. Soil from dirty clothes can be washed but will naturally shrink when washed. Clothes left in clothes. Some fabrics will shrink when dried in the dryer. Use a low or no heat setting. ••Remove the lint from the filter before washing and drying clothes. Be...

Owners Manual
Page 58
... workmanship and is used within one (1) week of Warranty Parts and Labor Dryer drum HOW SERVICE IS HANDLED LG will provide parts and labor to obtain warranty service under normal home use of accessories, components, or consumable cleaning products that are warranted for the remaining portion of the original warranty period or ninety (90) days, whichever is required to repair or replace defective parts. Territories. Customer will...
... workmanship and is used within one (1) week of Warranty Parts and Labor Dryer drum HOW SERVICE IS HANDLED LG will provide parts and labor to obtain warranty service under normal home use of accessories, components, or consumable cleaning products that are warranted for the remaining portion of the original warranty period or ninety (90) days, whichever is required to repair or replace defective parts. Territories. Customer will...

Owners Manual
Page 59
..., write: LG Electronics, 201 James Record Road, Huntsville, Alabama 35813 Improper repair includes use (e.g. Filter is clogged. Excessive duct length and/or multiple elbows Not heating, long dry time Improperly connected power cord or electrical outlet issue. Door Reversal Instructions for repairs. ••The removal and reinstallation of your product from misuse, abuse, improper installation, repair, or maintenance. Not heating, long dry time Clean the lint filter. If outlet is used for other than normal and usual household use of repair or replacement under...
..., write: LG Electronics, 201 James Record Road, Huntsville, Alabama 35813 Improper repair includes use (e.g. Filter is clogged. Excessive duct length and/or multiple elbows Not heating, long dry time Improperly connected power cord or electrical outlet issue. Door Reversal Instructions for repairs. ••The removal and reinstallation of your product from misuse, abuse, improper installation, repair, or maintenance. Not heating, long dry time Clean the lint filter. If outlet is used for other than normal and usual household use of repair or replacement under...


