

Owners Manual
Page 5
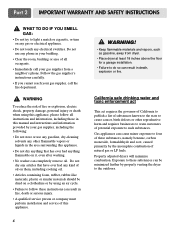
For your safety, the recommendations in this manual. Your dryer's model and serial numbers are defective in this manual, LG will need the complete model and serial numbers when requesting information. The warranty for your nearest LG Service Center and, for only 90 days. WARNING! You will repair or replace ...Serial Number Plate located on the front of this manual must be followed. Warranty service is available by contacting your dryer is printed the end of the dryer behind the door. We recommend that you staple your new LG dryer. Use the space below to record the model...
For your safety, the recommendations in this manual. Your dryer's model and serial numbers are defective in this manual, LG will need the complete model and serial numbers when requesting information. The warranty for your nearest LG Service Center and, for only 90 days. WARNING! You will repair or replace ...Serial Number Plate located on the front of this manual must be followed. Warranty service is available by contacting your dryer is printed the end of the dryer behind the door. We recommend that you staple your new LG dryer. Use the space below to record the model...
Owners Manual
Page 7
... materials should be minimized further by the incomplete combustion of potential exposure to light a match or cigarette, or turn on a clothesline or by using this manual and instructions and information provided by your gas supplier from dryer. • Place dryer at least 18 inches above the floor for a garage installation. •...
... materials should be minimized further by the incomplete combustion of potential exposure to light a match or cigarette, or turn on a clothesline or by using this manual and instructions and information provided by your gas supplier from dryer. • Place dryer at least 18 inches above the floor for a garage installation. •...
Owners Manual
Page 8
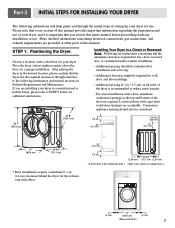
... equivalent ventilation openings are installing your dryer in . (14 cm) clearance behind the dryer for your dryer. Place the dryer at other parts of this manual. Louvered doors with elbow. 24"2 (155 cm2) 3" (7.6 cm) 1" 29.96" 1" (2.54 cm) (76.1 cm) (2.54 cm) 0" (0 cm) 27" (68.6...wall, door, and floor moldings. • Additional spacing of 1 in the desired location, please confirm that you review this manual provides important information regarding the preparation and use . Part 3 INITIAL STEPS FOR INSTALLING YOUR DRYER The following instructions will help guide...
... equivalent ventilation openings are installing your dryer in . (14 cm) clearance behind the dryer for your dryer. Place the dryer at other parts of this manual. Louvered doors with elbow. 24"2 (155 cm2) 3" (7.6 cm) 1" 29.96" 1" (2.54 cm) (76.1 cm) (2.54 cm) 0" (0 cm) 27" (68.6...wall, door, and floor moldings. • Additional spacing of 1 in the desired location, please confirm that you review this manual provides important information regarding the preparation and use . Part 3 INITIAL STEPS FOR INSTALLING YOUR DRYER The following instructions will help guide...
Owners Manual
Page 9
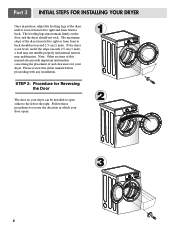
... installed to open either to the left to right or from front to back. Follow these procedures to back should not rock. Please review this manual also provide important information concerning the placement of the dryer from left or the right. STEP 2: Procedure for your dryer. If the dryer is level... dryer should not exceed 2.5 cm (1 inch). Part 3 INITIAL STEPS FOR INSTALLING YOUR DRYER Once in which your door opens: 1 2 3 8 Note: Other sections of this entire manual before proceeding with any installation.
... installed to open either to the left to right or from front to back. Follow these procedures to back should not rock. Please review this manual also provide important information concerning the placement of the dryer from left or the right. STEP 2: Procedure for your dryer. If the dryer is level... dryer should not exceed 2.5 cm (1 inch). Part 3 INITIAL STEPS FOR INSTALLING YOUR DRYER Once in which your door opens: 1 2 3 8 Note: Other sections of this entire manual before proceeding with any installation.
Owners Manual
Page 10
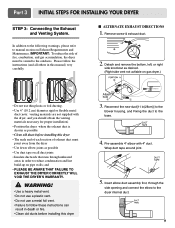
..., and gas accumulation, the dryer must point away from the dryer • Use fewer elbow joints as possible • Clean old ducts before installing this manual) very carefully. Please follow these instructions can result in (28cm)] to the blower housing, and Fixing the duct to... manual section on gas dryer.) • Do not use a metal foil vent. • Failure to follow the instructions (and all duct joints • Insulate ductwork that ...
..., and gas accumulation, the dryer must point away from the dryer • Use fewer elbow joints as possible • Clean old ducts before installing this manual) very carefully. Please follow these instructions can result in (28cm)] to the blower housing, and Fixing the duct to... manual section on gas dryer.) • Do not use a metal foil vent. • Failure to follow the instructions (and all duct joints • Insulate ductwork that ...
Owners Manual
Page 11
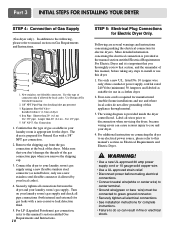
...hood. Use only a new U.L. Longer than 20' (6.1 m) Use 3/8" pipe. Remove the shipping cap from the gas connection at the manual section entitled Electrical Requirements For Electric Dryer and it is appropriate for Natural Gas with a non-corrosive leak detection fluid. 5. Make sure that...the dryer to green ground connector. • Securely tighten all pipe connections (both internal and external) for use this type of this manual, before making the electrical connection for checking inlet gas pressure) 3. Iron Pipe. Part 3 INITIAL STEPS FOR INSTALLING YOUR DRYER STEP 4: Connection of...
...hood. Use only a new U.L. Longer than 20' (6.1 m) Use 3/8" pipe. Remove the shipping cap from the gas connection at the manual section entitled Electrical Requirements For Electric Dryer and it is appropriate for Natural Gas with a non-corrosive leak detection fluid. 5. Make sure that...the dryer to green ground connector. • Securely tighten all pipe connections (both internal and external) for use this type of this manual, before making the electrical connection for checking inlet gas pressure) 3. Iron Pipe. Part 3 INITIAL STEPS FOR INSTALLING YOUR DRYER STEP 4: Connection of...
Owners Manual
Page 12
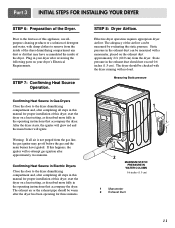
... exhaust duct should be measured by evaluating the static pressure. STEP 8: Dryer Airflow. Static pressure in your dryer after completing all steps in this manual for three minutes. Measuring Static pressure 1 2 MAXIMUM STATIC PRESSURE IN WATER COLUMN 0.6 inches (1.5 cm) 1 Manometer 2 Exhaust Duct 11 The ...dryer drum/drying compartment and, after completing all air is not purged from the dryer. Warning: If all steps in this manual for proper installation of the dryer. Confirming Heat Source in Electric Dryers Close the door to the first use allpurpose cleaning products...
... exhaust duct should be measured by evaluating the static pressure. STEP 8: Dryer Airflow. Static pressure in your dryer after completing all steps in this manual for three minutes. Measuring Static pressure 1 2 MAXIMUM STATIC PRESSURE IN WATER COLUMN 0.6 inches (1.5 cm) 1 Manometer 2 Exhaust Duct 11 The ...dryer drum/drying compartment and, after completing all air is not purged from the dryer. Warning: If all steps in this manual for proper installation of the dryer. Confirming Heat Source in Electric Dryers Close the door to the first use allpurpose cleaning products...
Owners Manual
Page 13
... that venting materials are applicable to the outside using the back, left , right, or bottom panel. 5) Gas dryers may be made of 1 inch at the manual section entitled Electrical Requirements for assistance. Gas dryer may be vented to installations of the dryer in a Manufactured or Mobile Home. WARNING! Any installation in...
... that venting materials are applicable to the outside using the back, left , right, or bottom panel. 5) Gas dryers may be made of 1 inch at the manual section entitled Electrical Requirements for assistance. Gas dryer may be vented to installations of the dryer in a Manufactured or Mobile Home. WARNING! Any installation in...
Owners Manual
Page 20
... are additional instructions regarding electrical connections and requirements for washers and dryers, and DO NOT operate a washer and a dryer on the same circuit when this manual, or if you and your home's wiring and fuses to the same outlet. ! WARNING! c) Use separately fused circuits for gas dryers. ! b) Your dryer is rated...
... are additional instructions regarding electrical connections and requirements for washers and dryers, and DO NOT operate a washer and a dryer on the same circuit when this manual, or if you and your home's wiring and fuses to the same outlet. ! WARNING! c) Use separately fused circuits for gas dryers. ! b) Your dryer is rated...
Owners Manual
Page 21
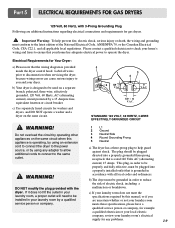
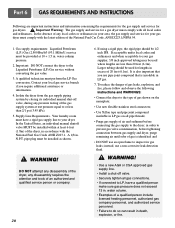
...at 10 + 1.5 in your area, the gas supply and service for gas leaks; Supply Line Requirements. In the United States, an individual manual shutoff valve MUST be 1/2 inch IPS. Part 6 GAS REQUIREMENTS AND INSTRUCTIONS Following are less than 2/1 psi (3.45 kPa). 5. Important: DO...require additional assistance or information. 4. water column pressure. 2. Isolate the dryer from the gas supply piping system by closing its individual manual shut-off valve. • Securely tighten all pipe threads; • Purge gas supply of air and sediment before tightening connection between...
...at 10 + 1.5 in your area, the gas supply and service for gas leaks; Supply Line Requirements. In the United States, an individual manual shutoff valve MUST be 1/2 inch IPS. Part 6 GAS REQUIREMENTS AND INSTRUCTIONS Following are less than 2/1 psi (3.45 kPa). 5. Important: DO...require additional assistance or information. 4. water column pressure. 2. Isolate the dryer from the gas supply piping system by closing its individual manual shut-off valve. • Securely tighten all pipe threads; • Purge gas supply of air and sediment before tightening connection between...
Owners Manual
Page 24
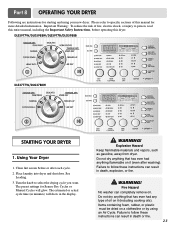
...result in the display. ! Failure to follow these instructions can completely remove oil. Turn the knob to person, read this entire manual, including the Important Safety Instructions, before or after washing). Explosion Hazard Keep flammable materials and vapors, such as gasoline, away from...or plastic must be dried on it (including cooking oils). Failure to follow these instructions can result in minutes) will glow. DLE5977W/DLG5988W/DLE5977B/DLG5988B DLE3777W/DLG3788W STARTING YOUR DRYER 1. Please refer to specific sections of fire, electric shock, or injury to select ...
...result in the display. ! Failure to follow these instructions can completely remove oil. Turn the knob to person, read this entire manual, including the Important Safety Instructions, before or after washing). Explosion Hazard Keep flammable materials and vapors, such as gasoline, away from...or plastic must be dried on it (including cooking oils). Failure to follow these instructions can result in minutes) will glow. DLE5977W/DLG5988W/DLE5977B/DLG5988B DLE3777W/DLG3788W STARTING YOUR DRYER 1. Please refer to specific sections of fire, electric shock, or injury to select ...

Owners Manual
Page 25
To use a Manual Dry Cycle • Select a Manual Dry Cycle. • Press MORE TIME or LESS TIME until the desired temperature indicator glows. • (OPTIONAL STEP) If desired, select OPTIONS. For more than ... time automatically for the selected dryness level. • Select the desired Options. • Press START/PAUSE NOTE: DRY LEVEL selections can only be used with Manual Dry, Time Dry, and Rack Dry Cycles. • Press TEMP. Be sure the door is interrupted for Super Capacity Dryers: Heavy Work Clothes 4 jeans 4 workpants...
To use a Manual Dry Cycle • Select a Manual Dry Cycle. • Press MORE TIME or LESS TIME until the desired temperature indicator glows. • (OPTIONAL STEP) If desired, select OPTIONS. For more than ... time automatically for the selected dryness level. • Select the desired Options. • Press START/PAUSE NOTE: DRY LEVEL selections can only be used with Manual Dry, Time Dry, and Rack Dry Cycles. • Press TEMP. Be sure the door is interrupted for Super Capacity Dryers: Heavy Work Clothes 4 jeans 4 workpants...
Owners Manual
Page 26
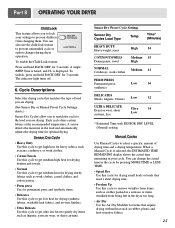
... time. • Freshen Up Use this cycle to get ultra low heat to prevent unintended cycle or option changes during dryer operation. Manual Cycles Use Manual Cycles to remove wrinkles from items, such as rubber, plastic and heat-sensitive fabrics. 25 To unlock, press and hold RACK DRY ... cycle dries certain fabrics at the recommended temperature. To enable the Child Lock feature: Press and hold RACK DRY for 3 seconds. When a Manual Cycle is displayed. Time* (Minutes) HEAVY DUTY Heavyweight, jeans High 54 COTTON/TOWELS Denim pants, towel Medium 55 High NORMAL Medium 41 Corduroys...
... time. • Freshen Up Use this cycle to get ultra low heat to prevent unintended cycle or option changes during dryer operation. Manual Cycles Use Manual Cycles to remove wrinkles from items, such as rubber, plastic and heat-sensitive fabrics. 25 To unlock, press and hold RACK DRY ... cycle dries certain fabrics at the recommended temperature. To enable the Child Lock feature: Press and hold RACK DRY for 3 seconds. When a Manual Cycle is displayed. Time* (Minutes) HEAVY DUTY Heavyweight, jeans High 54 COTTON/TOWELS Denim pants, towel Medium 55 High NORMAL Medium 41 Corduroys...

Owners Manual
Page 27
... that form when you do not select WRINKLE CARE, the dryer stops after an Sensor Dry Cycle. NOTE: Air Dry is also useful for the Manual Cycles. Time dry is not available with the Sensor Dry Cycles. Cycles Load Type Default Time* (Minutes) SPEED DRY SMALL LOADS High 25 FRESHEN UP... get up to 3 hours of heat-free, periodic tumbling at the end of a cycle. • Stop WRINKLE CARE at the end of a cycle. Manual Preset Cycle Settings Manual Dry Temp. NOTE: If you cannot unload the dryer promptly at any time by hand periodically during the cycle. • Dry item completely. CONTROL...
... that form when you do not select WRINKLE CARE, the dryer stops after an Sensor Dry Cycle. NOTE: Air Dry is also useful for the Manual Cycles. Time dry is not available with the Sensor Dry Cycles. Cycles Load Type Default Time* (Minutes) SPEED DRY SMALL LOADS High 25 FRESHEN UP... get up to 3 hours of heat-free, periodic tumbling at the end of a cycle. • Stop WRINKLE CARE at the end of a cycle. Manual Preset Cycle Settings Manual Dry Temp. NOTE: If you cannot unload the dryer promptly at any time by hand periodically during the cycle. • Dry item completely. CONTROL...
Owners Manual
Page 31
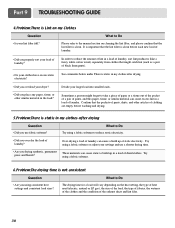
... your dryer? • Did you properly sort your lint filter full? Part 9 TROUBLESHOOTING GUIDE 4.Problem:There is Lint on my Clothes Question What to the manual section on the heat setting, the type of heat used (electric, natural or LP gas), the size of the load, the type of fabrics, the...
... your dryer? • Did you properly sort your lint filter full? Part 9 TROUBLESHOOTING GUIDE 4.Problem:There is Lint on my Clothes Question What to the manual section on the heat setting, the type of heat used (electric, natural or LP gas), the size of the load, the type of fabrics, the...
Owners Manual
Page 32
... drying times for the type of items, add a few extra pieces to each new load of laundry. Confirm that the venting is free of this manual that the dampers are moving freely, that the exhaust venting ductwork is complete? What to wrinkled clothes. Confirm through review of the appropriate sections of...
... drying times for the type of items, add a few extra pieces to each new load of laundry. Confirm that the venting is free of this manual that the dampers are moving freely, that the exhaust venting ductwork is complete? What to wrinkled clothes. Confirm through review of the appropriate sections of...


