
Owners Manual
Page 11
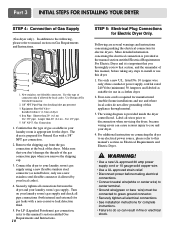
... section on your local codes). 4. Use only a new U.L. Four-wire cord is important that you thoroughly review that you remove the shipping cap. 3. The wiring diagram is prepared for complete instructions. • Failure to this manual's section entitled Gas Requirements and Instructions. 10 STEP 5: Electrical Plug Connections for checking inlet gas...
... section on your local codes). 4. Use only a new U.L. Four-wire cord is important that you thoroughly review that you remove the shipping cap. 3. The wiring diagram is prepared for complete instructions. • Failure to this manual's section entitled Gas Requirements and Instructions. 10 STEP 5: Electrical Plug Connections for checking inlet gas...
Owners Manual
Page 14
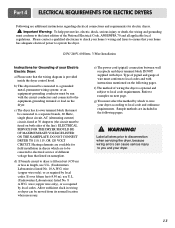
... Hertz, single phase circuit, AC (alternating current) circuit, fused at 30 Amperes (the circuit must be moved from its own terminal block that the wiring diagram is provided inside the dryer control hood. ELECTRICAL SERVICE FOR THE DRYER SHOULD BE OF MAXIMUM RATE VOLTAGE LISTED ON THE NAMEPLATE. DO NOT CONNECT...
... Hertz, single phase circuit, AC (alternating current) circuit, fused at 30 Amperes (the circuit must be moved from its own terminal block that the wiring diagram is provided inside the dryer control hood. ELECTRICAL SERVICE FOR THE DRYER SHOULD BE OF MAXIMUM RATE VOLTAGE LISTED ON THE NAMEPLATE. DO NOT CONNECT...
Owners Manual
Page 20
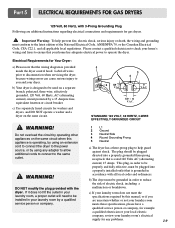
... a properly installed outlet that is provided inside the dryer control hood. The plug should be plugged into a properly grounded three-prong receptacle that the wiring diagram is grounded in your dryer.
... a properly installed outlet that is provided inside the dryer control hood. The plug should be plugged into a properly grounded three-prong receptacle that the wiring diagram is grounded in your dryer.

Owners Manual
Page 23
... need no care. Wipe the exterior of the dryer as required, and always immediately wipe the exterior of the dryer in and that the wiring diagram is clean before starting a new load, because a clogged lint filter may be examined and cleaned if necessary. 2. Always make sure the lint filter is provided...
... need no care. Wipe the exterior of the dryer as required, and always immediately wipe the exterior of the dryer in and that the wiring diagram is clean before starting a new load, because a clogged lint filter may be examined and cleaned if necessary. 2. Always make sure the lint filter is provided...

