User Guide
Page 2
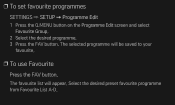
❐❐To set favourite programmes SETTINGS ➾ SETUP ➙ Programme Edit 1 Press the Q.MENU button on the Programme Edit screen and select Favourite Group. 2 Select the desired programme. 3 Press the FAV button. Select the desired preset favourite programme from Favourite List A-D. The favourite list will be saved to your favourite. ❐❐To use Favourite Press the FAV button. The selected programme will appear.
❐❐To set favourite programmes SETTINGS ➾ SETUP ➙ Programme Edit 1 Press the Q.MENU button on the Programme Edit screen and select Favourite Group. 2 Select the desired programme. 3 Press the FAV button. Select the desired preset favourite programme from Favourite List A-D. The favourite list will be saved to your favourite. ❐❐To use Favourite Press the FAV button. The selected programme will appear.

User Guide
Page 3
.... 1 Select Country where the TV is turned on the country you choose. 2 Initiate Auto Tuning. 3 Select Input Source of your choice. 4 Set Auto Tuning following screen instructions. ✎✎ If Input Source is not connected properly, programme registration may not work. ✎✎ Auto Tuning only finds programmes that are currently broadcasting. ✎✎ If Lock System is used. Programme settings change depending on , a pop-up window...
.... 1 Select Country where the TV is turned on the country you choose. 2 Initiate Auto Tuning. 3 Select Input Source of your choice. 4 Set Auto Tuning following screen instructions. ✎✎ If Input Source is not connected properly, programme registration may not work. ✎✎ Auto Tuning only finds programmes that are currently broadcasting. ✎✎ If Lock System is used. Programme settings change depending on , a pop-up window...
User Guide
Page 5
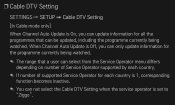
❐❐Cable DTV Setting SETTINGS ➾ SETUP ➙ Cable DTV Setting [In Cable mode only] When Channel Auto Update is set to "Ziggo". When Channel Auto Update is Off, you can only update information for the programme currently being watched. ✎✎ The range that a user can select from the Service Operator menu differs depending on number of Service Operator supported by each country. ✎✎ If number of supported Service Operator for each country is 1, corresponding function...
❐❐Cable DTV Setting SETTINGS ➾ SETUP ➙ Cable DTV Setting [In Cable mode only] When Channel Auto Update is set to "Ziggo". When Channel Auto Update is Off, you can only update information for the programme currently being watched. ✎✎ The range that a user can select from the Service Operator menu differs depending on number of Service Operator supported by each country. ✎✎ If number of supported Service Operator for each country is 1, corresponding function...
User Guide
Page 6
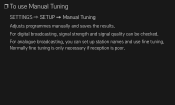
For digital broadcasting, signal strength and signal quality can set up station names and use Manual Tuning SETTINGS ➾ SETUP ➙ Manual Tuning Adjusts programmes manually and saves the results. Normally fine tuning is only necessary if reception is poor. ❐❐To use fine tuning. For analogue broadcasting, you can be checked.
For digital broadcasting, signal strength and signal quality can set up station names and use Manual Tuning SETTINGS ➾ SETUP ➙ Manual Tuning Adjusts programmes manually and saves the results. Normally fine tuning is only necessary if reception is poor. ❐❐To use fine tuning. For analogue broadcasting, you can be checked.
User Guide
Page 7
❐❐To edit programmes SETTINGS ➾ SETUP ➙ Programme Edit Edits the saved programmes. of the selected programme. Set as favourite programme, block/unblock programme, skip programme etc.
❐❐To edit programmes SETTINGS ➾ SETUP ➙ Programme Edit Edits the saved programmes. of the selected programme. Set as favourite programme, block/unblock programme, skip programme etc.
User Guide
Page 15
SETTINGS ➾ SETUP ➙ CI Information • This function enables you to watch some encrypted services (pay services). • If you remove the CI Module, you cannot watch pay services. • CI (Common Interface) functions may not be possible depending upon the country broadcasting circumstances. • When the module is inserted into the CI slot, you can access the module menu. • To purchase a module and smart card, contact your dealer.
SETTINGS ➾ SETUP ➙ CI Information • This function enables you to watch some encrypted services (pay services). • If you remove the CI Module, you cannot watch pay services. • CI (Common Interface) functions may not be possible depending upon the country broadcasting circumstances. • When the module is inserted into the CI slot, you can access the module menu. • To purchase a module and smart card, contact your dealer.
User Guide
Page 19
a video with stationary caption (such as network name) - 4 : 3 aspect ratio mode for an extended period Take caution when using these cases may differ depending on the input signal. ✎✎ The screen aspect ratios on HDMI/RGB-PC input are available in image burn: - • Cinema Zoom: Choose Cinema Zoom when you want to enlarge the picture in correct proportion. ✎✎ While viewing an external device, these functions. ✎✎ Available picture size may result in 4:3 and 16:9 only. (Only for models supporting PC connection)
a video with stationary caption (such as network name) - 4 : 3 aspect ratio mode for an extended period Take caution when using these cases may differ depending on the input signal. ✎✎ The screen aspect ratios on HDMI/RGB-PC input are available in image burn: - • Cinema Zoom: Choose Cinema Zoom when you want to enlarge the picture in correct proportion. ✎✎ While viewing an external device, these functions. ✎✎ Available picture size may result in 4:3 and 16:9 only. (Only for models supporting PC connection)
User Guide
Page 24
❐❐To adjust picture with Picture Wizard SETTINGS ➾ PICTURE ➙ Picture Wizard Ⅱ Calibrates and adjusts for optimum picture quality using the remote control and the Picture Wizard without expensive pattern devices or help from a specialist. Follow the instructions on screen to obtain optimum picture quality.
❐❐To adjust picture with Picture Wizard SETTINGS ➾ PICTURE ➙ Picture Wizard Ⅱ Calibrates and adjusts for optimum picture quality using the remote control and the Picture Wizard without expensive pattern devices or help from a specialist. Follow the instructions on screen to obtain optimum picture quality.
User Guide
Page 27
First select a Picture Mode of your choice. • Backlight: Adjusts the display brightness by varying the brightness of the LCD panel. ✎✎ Depending on the input signal or other picture settings, the range of detailed items for adjustment may differ. ❐❐To fine-tune picture mode SETTINGS ➾ PICTURE ➙ Picture Mode ➙ Backlight / Contrast / Brightness / Sharpness / Colour / Tint / Colour Temp.
First select a Picture Mode of your choice. • Backlight: Adjusts the display brightness by varying the brightness of the LCD panel. ✎✎ Depending on the input signal or other picture settings, the range of detailed items for adjustment may differ. ❐❐To fine-tune picture mode SETTINGS ➾ PICTURE ➙ Picture Mode ➙ Backlight / Contrast / Brightness / Sharpness / Colour / Tint / Colour Temp.
User Guide
Page 28
❐❐To set advanced control SETTINGS ➾ PICTURE ➙ Picture Mode ➙ Advanced Control / Expert Control Calibrates the screen for a special screen. or adjusts picture settings for each picture mode; First select a Picture Mode of your choice. • Dynamic Contrast: Adjusts the contrast to the optimal level according to the brightness of the image. • Dynamic Colour: Adjusts colours to make the image appear in more natural colours. • Clear White: Enhances whites on screen to make the image brighter and sharper.
❐❐To set advanced control SETTINGS ➾ PICTURE ➙ Picture Mode ➙ Advanced Control / Expert Control Calibrates the screen for a special screen. or adjusts picture settings for each picture mode; First select a Picture Mode of your choice. • Dynamic Contrast: Adjusts the contrast to the optimal level according to the brightness of the image. • Dynamic Colour: Adjusts colours to make the image appear in more natural colours. • Clear White: Enhances whites on screen to make the image brighter and sharper.
User Guide
Page 32
Each picture mode is reset. Select the picture mode you wish to reset. ❐❐To reset picture settings SETTINGS ➾ PICTURE ➙ Picture Mode ➙ Picture Reset Resets picture settings that the user customizes.
Each picture mode is reset. Select the picture mode you wish to reset. ❐❐To reset picture settings SETTINGS ➾ PICTURE ➙ Picture Mode ➙ Picture Reset Resets picture settings that the user customizes.
User Guide
Page 34
... bass in Sound. • Reset: Resets voice options that the user has changed. Resets each sound mode. First select a Sound Mode of your choice. • Infinite Surround: LG's proprietary audio processing technology allows 5-channel-like surround sound from two speakers. ✎✎ If Clear Voice II is set minute options for each voice mode. ❐❐To manually adjust Sound Mode SETTINGS ➾ AUDIO ➙ Sound Mode ➙ Infinite Surround / Treble / Bass / Reset You can set to reset.
... bass in Sound. • Reset: Resets voice options that the user has changed. Resets each sound mode. First select a Sound Mode of your choice. • Infinite Surround: LG's proprietary audio processing technology allows 5-channel-like surround sound from two speakers. ✎✎ If Clear Voice II is set minute options for each voice mode. ❐❐To manually adjust Sound Mode SETTINGS ➾ AUDIO ➙ Sound Mode ➙ Infinite Surround / Treble / Bass / Reset You can set to reset.
User Guide
Page 36
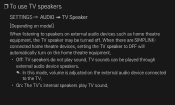
... sounds can be played through external audio device speakers. ✎✎ In this mode, volume is adjusted on external audio devices such as home theatre equipment, the TV speaker may be turned off. ❐❐To use TV speakers SETTINGS ➾ AUDIO ➙ TV Speaker [Depending on model] When listening to speakers on the external audio device connected to OFF will automatically turn on the home theatre equipment. • Off: TV speakers do not play...
... sounds can be played through external audio device speakers. ✎✎ In this mode, volume is adjusted on external audio devices such as home theatre equipment, the TV speaker may be turned off. ❐❐To use TV speakers SETTINGS ➾ AUDIO ➙ TV Speaker [Depending on model] When listening to speakers on the external audio device connected to OFF will automatically turn on the home theatre equipment. • Off: TV speakers do not play...
User Guide
Page 38
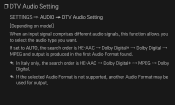
... Audio Setting SETTINGS ➾ AUDIO ➙ DTV Audio Setting [Depending on model] When an input signal comprises different audio signals, this function allows you to AUTO, the search order is HE-AAC → Dolby Digital+ → Dolby Digital → MPEG and output is produced in the first Audio Format found. ✎✎ In Italy only, the search order is HE-AAC → Dolby Digital+ → MPEG → Dolby Digital...
... Audio Setting SETTINGS ➾ AUDIO ➙ DTV Audio Setting [Depending on model] When an input signal comprises different audio signals, this function allows you to AUTO, the search order is HE-AAC → Dolby Digital+ → Dolby Digital → MPEG and output is produced in the first Audio Format found. ✎✎ In Italy only, the search order is HE-AAC → Dolby Digital+ → MPEG → Dolby Digital...

User Guide
Page 41
... not work normally. ✎✎ [Depending on model] If you select or play media from a the device with a home theatre function, the HT Speaker is only compatible with devices with the SIMPLINK logo. ✎✎ To use the SIMPLINK function, you need to use a high-speed HDMIⓇ cable (with an optical cable (sold separately) to use the HT Speaker function. Be sure to connect with...
... not work normally. ✎✎ [Depending on model] If you select or play media from a the device with a home theatre function, the HT Speaker is only compatible with devices with the SIMPLINK logo. ✎✎ To use the SIMPLINK function, you need to use a high-speed HDMIⓇ cable (with an optical cable (sold separately) to use the HT Speaker function. Be sure to connect with...
User Guide
Page 55
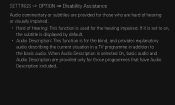
If it is set to on, the subtitle is displayed by default. • Audio Description: This function is used for the blind, and provides explanatory audio describing the current situation in a TV programme in addition to the basic audio. SETTINGS ➾ OPTION ➙ Disability Assistance Audio commentary or subtitles are hard of hearing or visually impaired. • Hard of Hearing: This function is...
If it is set to on, the subtitle is displayed by default. • Audio Description: This function is used for the blind, and provides explanatory audio describing the current situation in a TV programme in addition to the basic audio. SETTINGS ➾ OPTION ➙ Disability Assistance Audio commentary or subtitles are hard of hearing or visually impaired. • Hard of Hearing: This function is...
User Guide
Page 71
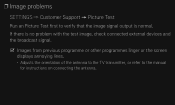
If there is normal. ❐❐Image problems SETTINGS ➾ Customer Support ➙ Picture Test Run an Picture Test first to verify that the image signal output is no problem with the test image, check connected external devices and the broadcast signal. ꕢꕢ Images from previous programme or other programmes linger or the screen displays annoying lines. • Adjusts the orientation of the antenna to the TV transmitter, or refer to the manual for instructions on connecting the antenna.
If there is normal. ❐❐Image problems SETTINGS ➾ Customer Support ➙ Picture Test Run an Picture Test first to verify that the image signal output is no problem with the test image, check connected external devices and the broadcast signal. ꕢꕢ Images from previous programme or other programmes linger or the screen displays annoying lines. • Adjusts the orientation of the antenna to the TV transmitter, or refer to the manual for instructions on connecting the antenna.
User Guide
Page 74
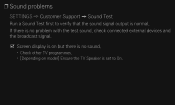
❐❐Sound problems SETTINGS ➾ Customer Support ➙ Sound Test Run a Sound Test first to On. If there is no problem with the test sound, check connected external devices and the broadcast signal. ꕢꕢ Screen display is on but there is no sound. • Check other TV programmes. • [Depending on model] Ensure the TV Speaker is set to verify that the sound signal output is normal.
❐❐Sound problems SETTINGS ➾ Customer Support ➙ Sound Test Run a Sound Test first to On. If there is no problem with the test sound, check connected external devices and the broadcast signal. ꕢꕢ Screen display is on but there is no sound. • Check other TV programmes. • [Depending on model] Ensure the TV Speaker is set to verify that the sound signal output is normal.
User Guide
Page 78
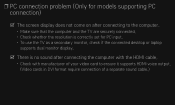
... are securely connected. • Check whether the resolution is correctly set for PC input. • To use the TV as a secondary monitor, check if the connected desktop or laptop supports dual monitor display. ꕢꕢ There is no sound after connecting the computer with the HDMI cable. • Check with manufacturer of your video card to ensure it supports HDMI voice output. (Video cards in DVI format require connection of a separate sound cable.)
... are securely connected. • Check whether the resolution is correctly set for PC input. • To use the TV as a secondary monitor, check if the connected desktop or laptop supports dual monitor display. ꕢꕢ There is no sound after connecting the computer with the HDMI cable. • Check with manufacturer of your video card to ensure it supports HDMI voice output. (Video cards in DVI format require connection of a separate sound cable.)
User Guide
Page 80
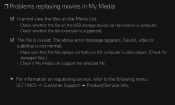
... extension is supported. ꕢꕢ The file is not normal. • Make sure that the file replays normally on the computer's video player. (Check for damaged files.) • Check if My Media can be read on requesting service, refer to the following menu. The above error message appears. Sound, video or subtitles is invalid. SETTINGS ➾ Customer Support ➙ Product/Service Info.
... extension is supported. ꕢꕢ The file is not normal. • Make sure that the file replays normally on the computer's video player. (Check for damaged files.) • Check if My Media can be read on requesting service, refer to the following menu. The above error message appears. Sound, video or subtitles is invalid. SETTINGS ➾ Customer Support ➙ Product/Service Info.


