
User guide
Page 12
...enabled device: 1. Press Home. 4. NOTE: If the printer has been idle, it will default to select Copy Document or Copy Photo. 5. Insert the KODAK Wireless 2.0 USB BLUETOOTH Adapter into the front USB port. 2. For instructions, see the user manual for your device for your device. 3. Select the ...picture you want to print, then select Send to make a copy. 9 www.kodak.com/go/aiosupport To print a picture from wireless devices, such as mobile phones...
...enabled device: 1. Press Home. 4. NOTE: If the printer has been idle, it will default to select Copy Document or Copy Photo. 5. Insert the KODAK Wireless 2.0 USB BLUETOOTH Adapter into the front USB port. 2. For instructions, see the user manual for your device for your device. 3. Select the ...picture you want to print, then select Send to make a copy. 9 www.kodak.com/go/aiosupport To print a picture from wireless devices, such as mobile phones...
Extended user guide
Page 15
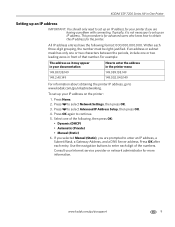
...numbers. Select one or two leading zeros in front of the following format: 000.000.000.000. Consult your printer if you are having a problem with connecting. Use the navigation buttons to select Network Settings, then press OK. 3. KODAK ESP 7200 Series All-in the printer menu 149... IP Address Setup, then press OK. 4. www.kodak.com/go /inkjetnetworking. All IP address entries have the following , then press OK: • Dynamic (DHCP) • Automatic (Private) • Manual (Static) 6. Within each entry. If you selected Manual (Static), you are prompted to obtain the IP ...
...numbers. Select one or two leading zeros in front of the following format: 000.000.000.000. Consult your printer if you are having a problem with connecting. Use the navigation buttons to select Network Settings, then press OK. 3. KODAK ESP 7200 Series All-in the printer menu 149... IP Address Setup, then press OK. 4. www.kodak.com/go /inkjetnetworking. All IP address entries have the following , then press OK: • Dynamic (DHCP) • Automatic (Private) • Manual (Static) 6. Within each entry. If you selected Manual (Static), you are prompted to obtain the IP ...
Extended user guide
Page 32
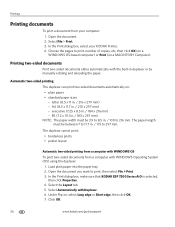
... the duplexer: 1. Select File > Print. 3. In the Print dialog box, make sure that KODAK ESP 7200 Series AiO is selected, then click Properties. 4. letter (8.5 x 11 in duplexer or by manually rotating and reloading the paper. Select Automatically with the built-in . / 216 x 279 mm)... - The duplexer cannot print: • borderless prints • poster layout Automatic two-sided printing from a computer with WINDOWS OS To print two-sided documents from your KODAK Printer. 4. ...
... the duplexer: 1. Select File > Print. 3. In the Print dialog box, make sure that KODAK ESP 7200 Series AiO is selected, then click Properties. 4. letter (8.5 x 11 in duplexer or by manually rotating and reloading the paper. Select Automatically with the built-in . / 216 x 279 mm)... - The duplexer cannot print: • borderless prints • poster layout Automatic two-sided printing from a computer with WINDOWS OS To print two-sided documents from your KODAK Printer. 4. ...
Extended user guide
Page 33
... will continue printing in -One Printer Automatic two-sided printing from a computer with MAC OS To print two-sided documents from the output tray. 8. Select Manual (Instructions provided), then click OK. 6. Press Start on the document. www.kodak.com/go/aiosupport 27 In the Print dialog box, make sure that KODAK ESP 7200 Series AiO is...
... will continue printing in -One Printer Automatic two-sided printing from a computer with MAC OS To print two-sided documents from the output tray. 8. Select Manual (Instructions provided), then click OK. 6. Press Start on the document. www.kodak.com/go/aiosupport 27 In the Print dialog box, make sure that KODAK ESP 7200 Series AiO is...
Extended user guide
Page 34
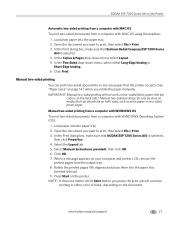
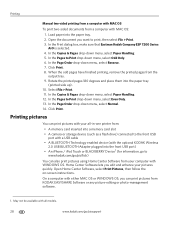
...-down menu, select Even Only. 13. In the Print dialog box, make sure that Eastman Kodak Company ESP 7200 Series AiO is selected. 4. In the Copies & Pages drop-down menu, select Normal.... Center Software from the output tray. 9. Click Print. 8. May not be available with all -in-one printer from: • A memory card inserted into a memory card slot • A camera or storage ... print, then select File > Print. 3. Printing Manual two-sided printing from a computer with MAC OS To print two-sided documents from KODAK EASYSHARE Software or any picture-editing or photo-management software....
...-down menu, select Even Only. 13. In the Print dialog box, make sure that Eastman Kodak Company ESP 7200 Series AiO is selected. 4. In the Copies & Pages drop-down menu, select Normal.... Center Software from the output tray. 9. Click Print. 8. May not be available with all -in-one printer from: • A memory card inserted into a memory card slot • A camera or storage ... print, then select File > Print. 3. Printing Manual two-sided printing from a computer with MAC OS To print two-sided documents from KODAK EASYSHARE Software or any picture-editing or photo-management software....
Extended user guide
Page 41
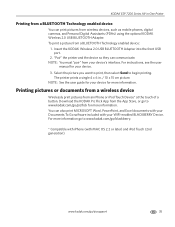
...the front USB port. 2. You can communicate. The printer prints a single 4 x 6 in -One Printer Printing from a BLUETOOTH Technology enabled device You can print pictures from an iPhone or iPod Touch Device* at the touch of a button. www.kodak.com/go /blackberry. * Compatible with iPhone (with ...App Store, or go to www.kodak.com/go/picflick for more information. Download the KODAK Pic Flick App from a BLUETOOTH Technology enabled device: 1. KODAK ESP 7200 Series All-in . / 10 x 15 cm picture. For instructions, see the user manual for more information go to begin ...
...the front USB port. 2. You can communicate. The printer prints a single 4 x 6 in -One Printer Printing from a BLUETOOTH Technology enabled device You can print pictures from an iPhone or iPod Touch Device* at the touch of a button. www.kodak.com/go /blackberry. * Compatible with iPhone (with ...App Store, or go to www.kodak.com/go/picflick for more information. Download the KODAK Pic Flick App from a BLUETOOTH Technology enabled device: 1. KODAK ESP 7200 Series All-in . / 10 x 15 cm picture. For instructions, see the user manual for more information go to begin ...
Extended user guide
Page 69
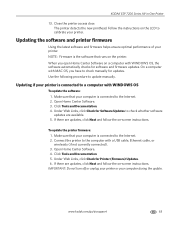
... update the software: 1. If there are available. 5. KODAK ESP 7200 Series All-in-One Printer 13. Open Home Center Software. 3. If there are updates, click Next and follow the on-screen instructions. Close the printer access door. The printer detects the new printhead. NOTE: Firmware is connected to check manually for Software Updates to check whether software...
... update the software: 1. If there are available. 5. KODAK ESP 7200 Series All-in-One Printer 13. Open Home Center Software. 3. If there are updates, click Next and follow the on-screen instructions. Close the printer access door. The printer detects the new printhead. NOTE: Firmware is connected to check manually for Software Updates to check whether software...
Extended user guide
Page 91
KODAK ESP 7200 Series All-in-One Printer plain paper, 16 loading envelopes, 23 legal-size paper, 18 plain paper, 16 location, 1 Paper tray, photo capacity, 21 loading, 21 location, 1 Paper-edge guides ..., 1 performance, monitoring and adjusting, 64 settings, configuring, 4 supplies, maintaining and recycling, 53 Printer access door, location, 1 Printhead removing, 60 replacing, 59 Printhead and ink cartridge access, location, 1 Printing, 25 documents, 26 documents, two-sided automatically, 26 manually, 27 pictures, 28 from a BLUETOOTH Technology enabled device, 35 from a memory card or USB-...
KODAK ESP 7200 Series All-in-One Printer plain paper, 16 loading envelopes, 23 legal-size paper, 18 plain paper, 16 location, 1 Paper tray, photo capacity, 21 loading, 21 location, 1 Paper-edge guides ..., 1 performance, monitoring and adjusting, 64 settings, configuring, 4 supplies, maintaining and recycling, 53 Printer access door, location, 1 Printhead removing, 60 replacing, 59 Printhead and ink cartridge access, location, 1 Printing, 25 documents, 26 documents, two-sided automatically, 26 manually, 27 pictures, 28 from a BLUETOOTH Technology enabled device, 35 from a memory card or USB-...


