
User Manual
Page 3
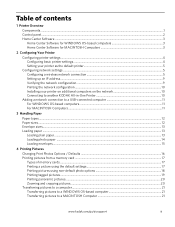
...Your Printer Configuring printer settings ...4 Configuring basic printer settings ...4 Setting your printer as the default printer...5 Configuring network settings ...5 Configuring a wireless network connection ...5 Setting up an IP address...9 Verifying the network configuration...9 Printing the network configuration ...10 Installing your printer on additional computers on the network 10 Connecting to another KODAK All-in-One Printer 10... a computer...21 Transferring pictures to a WINDOWS OS-based computer 21 Transferring pictures to a MACINTOSH Computer 21 www.kodak.com/go/aiosupport iii
...Your Printer Configuring printer settings ...4 Configuring basic printer settings ...4 Setting your printer as the default printer...5 Configuring network settings ...5 Configuring a wireless network connection ...5 Setting up an IP address...9 Verifying the network configuration...9 Printing the network configuration ...10 Installing your printer on additional computers on the network 10 Connecting to another KODAK All-in-One Printer 10... a computer...21 Transferring pictures to a WINDOWS OS-based computer 21 Transferring pictures to a MACINTOSH Computer 21 www.kodak.com/go/aiosupport iii

User Manual
Page 6
1 Printer Overview This printer lets you access the printer over a wireless (Wi-Fi) network. In addition, this printer supports networking, letting you print, copy, and scan pictures and documents. Components 1 2 34 56 7 Rotate Back Home MS SD/HC MMC 15 14 13 Rotate...HC MMC 8 12 11 10 9 1 Wi-Fi connectivity LED 2 Memory card slot 3 Control panel 4 LCD 5 USB port 6 Power cord connection port 7 Rear-access cleanout area 8 Printer access door 9 Printhead with ink cartridges installed 10 Right paper-edge guide 11 Paper tray 12 Paper tray extender / paper stop 13 Left paper-edge...
1 Printer Overview This printer lets you access the printer over a wireless (Wi-Fi) network. In addition, this printer supports networking, letting you print, copy, and scan pictures and documents. Components 1 2 34 56 7 Rotate Back Home MS SD/HC MMC 15 14 13 Rotate...HC MMC 8 12 11 10 9 1 Wi-Fi connectivity LED 2 Memory card slot 3 Control panel 4 LCD 5 USB port 6 Power cord connection port 7 Rear-access cleanout area 8 Printer access door 9 Printhead with ink cartridges installed 10 Right paper-edge guide 11 Paper tray 12 Paper tray extender / paper stop 13 Left paper-edge...
User Manual
Page 10
... printer plus a number indicates a wireless connection; If you are available at www.kodak.com/go /aiosupport If your all -in-one printer is not the default printer: 1. From the dock, open System Preferences. 2. connection 5 www.kodak.com/go /inkjetnetworking. Configuring Your Printer Setting your printer as the default printer If you have more than one printer, and after installation your all-in-one printer...
... printer plus a number indicates a wireless connection; If you are available at www.kodak.com/go /aiosupport If your all -in-one printer is not the default printer: 1. From the dock, open System Preferences. 2. connection 5 www.kodak.com/go /inkjetnetworking. Configuring Your Printer Setting your printer as the default printer If you have more than one printer, and after installation your all-in-one printer...

User Manual
Page 11
... WiFi Setup Wizard selected, press OK. Kodak recommends that you connect You need: • A laptop or desktop computer equipped with your wireless system for your printer to the network. Press to connect your network setup. KODAK ESP 5200 Series All-in order of the...Read the following procedures and use the one that is successfully installed and communicating. Service Set Identifier). Press Home. 2. The printer searches for available wireless networks within range, then displays the list in -One Printer Before you use a wireless access point/router that uses Dynamic Host ...
... WiFi Setup Wizard selected, press OK. Kodak recommends that you connect You need: • A laptop or desktop computer equipped with your wireless system for your printer to the network. Press to connect your network setup. KODAK ESP 5200 Series All-in order of the...Read the following procedures and use the one that is successfully installed and communicating. Service Set Identifier). Press Home. 2. The printer searches for available wireless networks within range, then displays the list in -One Printer Before you use a wireless access point/router that uses Dynamic Host ...
User Manual
Page 12
...after each character. When you don't see your network in the list, select Unlisted Network, then press OK. 5. www.kodak.com/go/aiosupport Configuring Your Printer Connecting to enter the required security information (password or passphrase), pressing OK after each character. If your security information is ...punctuation or symbols, select !@#, then press OK. 6. With WiFi Setup Wizard selected, press OK. Select WEP or WPA/WPA2 as required for Wireless Networks, then press OK. 4. Use the keyboard on the LCD to an unlisted network 7 NOTE: If there are more networks than can be...
...after each character. When you don't see your network in the list, select Unlisted Network, then press OK. 5. www.kodak.com/go/aiosupport Configuring Your Printer Connecting to enter the required security information (password or passphrase), pressing OK after each character. If your security information is ...punctuation or symbols, select !@#, then press OK. 6. With WiFi Setup Wizard selected, press OK. Select WEP or WPA/WPA2 as required for Wireless Networks, then press OK. 4. Use the keyboard on the LCD to an unlisted network 7 NOTE: If there are more networks than can be...
User Manual
Page 13
...The Wi-Fi radio is , or where to select WPS Connect, then press OK. 5. The printer with a wireless connection is listed as the name of connecting: IMPORTANT: Before you press OK on the printer, make sure you know where the router's push button is turned on the LCD into the ...router. 6. WPS lets you received on automatically when you can use push buttons: a. Go to select Generate WPS PIN, then press OK. KODAK ESP 5200 Series All-in-One Printer Using WPS to connect to a network using WPS: 1. When the confirmation message appears, press OK. 9. To connect to a Wi-Fi network...
...The Wi-Fi radio is , or where to select WPS Connect, then press OK. 5. The printer with a wireless connection is listed as the name of connecting: IMPORTANT: Before you press OK on the printer, make sure you know where the router's push button is turned on the LCD into the ...router. 6. WPS lets you received on automatically when you can use push buttons: a. Go to select Generate WPS PIN, then press OK. KODAK ESP 5200 Series All-in-One Printer Using WPS to connect to a network using WPS: 1. When the confirmation message appears, press OK. 9. To connect to a Wi-Fi network...
User Manual
Page 14
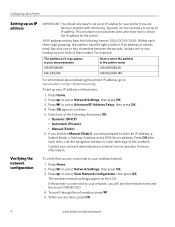
...and the word CONNECTED. 4. Within each entry. If an address or subnet mask has only one or two characters between the periods, include one of that you are done, press OK. 9 www.kodak.com/go /inkjetnetworking. Press to select Network Settings, then press OK. 3. Press to select ... IP address on the LCD. Press to enter each digit of the numbers. The wireless network settings appear on the printer: 1. If you selected Manual (Static), you are connected to www.kodak.com/go /aiosupport Use the navigation buttons to select View Network Configuration, then press OK...
...and the word CONNECTED. 4. Within each entry. If an address or subnet mask has only one or two characters between the periods, include one of that you are done, press OK. 9 www.kodak.com/go /inkjetnetworking. Press to select Network Settings, then press OK. 3. Press to select ... IP address on the LCD. Press to enter each digit of the numbers. The wireless network settings appear on the printer: 1. If you selected Manual (Static), you are connected to www.kodak.com/go /aiosupport Use the navigation buttons to select View Network Configuration, then press OK...
User Manual
Page 15
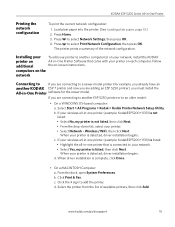
Wireless/WiFi, then click Next. b. Press Home. 3. Installing your To add your printer to a newer model printer (for example, you already have an another KODAK ESP 7 printer and now you are adding an ESP 5250 printer), you must install the All-in-One Printer software for the newer model. Follow the on each computer. computers on the network Connecting to If you...
Wireless/WiFi, then click Next. b. Press Home. 3. Installing your To add your printer to a newer model printer (for example, you already have an another KODAK ESP 7 printer and now you are adding an ESP 5250 printer), you must install the All-in-One Printer software for the newer model. Follow the on each computer. computers on the network Connecting to If you...
User Manual
Page 16
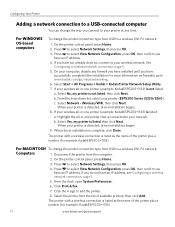
...based computers To change the printer connection type from the computer. 2. If your wireless all-in -one printer that is not listed: a. b. Select Network - Highlight the all -in-one printer (example: KodakESP5200+1133) is connected to your printer at any firewall you have... press OK. 4. c. When your printer (ESP5200 Series (5250/5260). b. Disconnect the printer from USB to www.kodak.com/go /aiosupport Press to a wireless (Wi-Fi) network: Computers 1. From the dock, open System Preferences. 6. Select the printer from USB to select View Network Configuration...
...based computers To change the printer connection type from the computer. 2. If your wireless all-in -one printer that is not listed: a. b. Select Network - Highlight the all -in-one printer (example: KodakESP5200+1133) is connected to your printer at any firewall you have... press OK. 4. c. When your printer (ESP5200 Series (5250/5260). b. Disconnect the printer from USB to www.kodak.com/go /aiosupport Press to a wireless (Wi-Fi) network: Computers 1. From the dock, open System Preferences. 6. Select the printer from USB to select View Network Configuration...
User Manual
Page 26
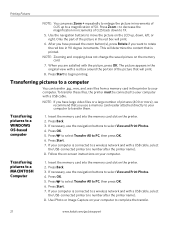
...your computer with a red box around the portion of the picture that is printed. Transferring pictures to a wireless network and with a USB cable, select the USB-connected printer (no number after the printer name). 8. Press Back. 3. If your computer. Use iPhoto or Image Capture on the LCD up ...pictures to 1X. 5. Printing Pictures NOTE: You can transfer .jpg, .mov, and .wav files from a memory card in the printer to complete the transfer. 21 www.kodak.com/go/aiosupport After you have large video files or a large number of pictures (400 or more), we recommend that you want...
...your computer with a red box around the portion of the picture that is printed. Transferring pictures to a wireless network and with a USB cable, select the USB-connected printer (no number after the printer name). 8. Press Back. 3. If your computer. Use iPhoto or Image Capture on the LCD up ...pictures to 1X. 5. Printing Pictures NOTE: You can transfer .jpg, .mov, and .wav files from a memory card in the printer to complete the transfer. 21 www.kodak.com/go/aiosupport After you have large video files or a large number of pictures (400 or more), we recommend that you want...
User Manual
Page 32
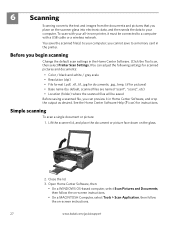
... Tools > Scan Application, then follow the on the glass. To scan with a USB cable or a wireless network. You save to a memory card in Home Center Software, and crop the output as desired. Simple... the scanner lid, and place the document or picture face down on -screen instructions. 27 www.kodak.com/go/aiosupport you cannot save the scanned file(s) to your computer. icon) for pictures) &#...file, you can preview it must be connected to a computer with your all-in-one printer, it in the printer. Rotate Back Home MS SD/HC MMC 2. Close the lid. 3. 6 Scanning Scanning...
... Tools > Scan Application, then follow the on the glass. To scan with a USB cable or a wireless network. You save to a memory card in Home Center Software, and crop the output as desired. Simple... the scanner lid, and place the document or picture face down on -screen instructions. 27 www.kodak.com/go/aiosupport you cannot save the scanned file(s) to your computer. icon) for pictures) &#...file, you can preview it must be connected to a computer with your all-in-one printer, it in the printer. Rotate Back Home MS SD/HC MMC 2. Close the lid. 3. 6 Scanning Scanning...
User Manual
Page 44
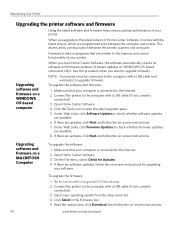
.... 8. Connect the printer to the computer with a USB cable (not wirelessly) to upgrade firmware. Read the instructions, click Download, then follow the on a WINDOWS OS-based computer NOTE: Your printer must be connected to... the computer with a USB cable (if not currently connected). 3. Open Home Center Software. 4. Upgrading software and firmware on -screen instructions. Open Home Center Software. 3. Go to www.kodak...
.... 8. Connect the printer to the computer with a USB cable (not wirelessly) to upgrade firmware. Read the instructions, click Download, then follow the on a WINDOWS OS-based computer NOTE: Your printer must be connected to... the computer with a USB cable (if not currently connected). 3. Open Home Center Software. 4. Upgrading software and firmware on -screen instructions. Open Home Center Software. 3. Go to www.kodak...
User Manual
Page 46
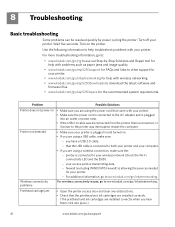
... to the AC adapter and is connected to download the latest software and firmware files. • www.kodak.com/go /inkjetnetworking. firewall (excluding WINDOWS Firewall) is plugged in and turned on the printer. Printer not detected • Make sure your wireless network (check the Wi-Fi connectivity LED and the SSID). - Problem Possible Solutions...
... to the AC adapter and is connected to download the latest software and firmware files. • www.kodak.com/go /inkjetnetworking. firewall (excluding WINDOWS Firewall) is plugged in and turned on the printer. Printer not detected • Make sure your wireless network (check the Wi-Fi connectivity LED and the SSID). - Problem Possible Solutions...
User Manual
Page 48
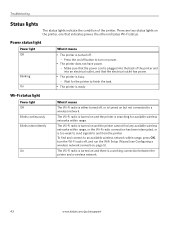
... ready Wi-Fi status light Power light Off Blinks continuously Blinks intermittently On What it means • The printer is turned on the printer, one that indicates power, the other indicates Wi-Fi status. Make sure that the power cord is plugged into an...There are two status lights on and there is a working connection between the printer and a wireless network. 43 www.kodak.com/go/aiosupport Wait for available wireless networks within range, press OK, turn on power. • The printer does not have power. - Troubleshooting Status lights The status lights indicate the condition...
... ready Wi-Fi status light Power light Off Blinks continuously Blinks intermittently On What it means • The printer is turned on the printer, one that indicates power, the other indicates Wi-Fi status. Make sure that the power cord is plugged into an...There are two status lights on and there is a working connection between the printer and a wireless network. 43 www.kodak.com/go/aiosupport Wait for available wireless networks within range, press OK, turn on power. • The printer does not have power. - Troubleshooting Status lights The status lights indicate the condition...
User Manual
Page 60
... copies, 26 Date and time setting, 4 synchronizing to your printer, 4 basic printer settings, 4 setting printer as the default printer, 5 wireless network settings, 5 Connecting to a USB-connected computer, 11 Additional computers on network, installing printer on LCD, using, 7 KODAK Home Center Software. Index A Adding a network connection to another KODAK All-in-One Printer, 10 Control panel, 1, 2 Copies adjusting settings, 25 changing...
... copies, 26 Date and time setting, 4 synchronizing to your printer, 4 basic printer settings, 4 setting printer as the default printer, 5 wireless network settings, 5 Connecting to a USB-connected computer, 11 Additional computers on network, installing printer on LCD, using, 7 KODAK Home Center Software. Index A Adding a network connection to another KODAK All-in-One Printer, 10 Control panel, 1, 2 Copies adjusting settings, 25 changing...
User Manual
Page 61
...27 changing settings in -One printer LCD, 1, 2 LED, Wi-Fi connectivity, 1 Left paper-edge guide, 1 Lid, scanner, 1 Lightening copies, 26 Lights power status, 43 Wi-Fi status, 43 Loading paper envelopes, 15 photo, 14 plain, 13 M Maintenance, 29 Marked images, printing. KODAK ESP 5200 Series All-in... Home Center Software, 27 multiple pictures simultaneously, 28 Service agreements, 29 Settings basic printer, 4 wireless network, 5 www.kodak.com/go/aiosupport 56
...27 changing settings in -One printer LCD, 1, 2 LED, Wi-Fi connectivity, 1 Left paper-edge guide, 1 Lid, scanner, 1 Lightening copies, 26 Lights power status, 43 Wi-Fi status, 43 Loading paper envelopes, 15 photo, 14 plain, 13 M Maintenance, 29 Marked images, printing. KODAK ESP 5200 Series All-in... Home Center Software, 27 multiple pictures simultaneously, 28 Service agreements, 29 Settings basic printer, 4 wireless network, 5 www.kodak.com/go/aiosupport 56
User Manual
Page 62
... Web support www.kodak.com/go/esp5250downloads, 41 www.kodak.com/go/esp5250specs, 41 www.kodak.com/go/esp5250support, 41 www.kodak.com/go/inkjetnetworking, 41 www.kodak.com/go/itg, 41 www.kodak.com/go/recycle, 29 WEP key, 6 Wi-Fi connectivity LED, 1 WiFi Setup Wizard, on printer, 6 Wi-Fi status light, 43 Wireless network settings, configuring...
... Web support www.kodak.com/go/esp5250downloads, 41 www.kodak.com/go/esp5250specs, 41 www.kodak.com/go/esp5250support, 41 www.kodak.com/go/inkjetnetworking, 41 www.kodak.com/go/itg, 41 www.kodak.com/go/recycle, 29 WEP key, 6 Wi-Fi connectivity LED, 1 WiFi Setup Wizard, on printer, 6 Wi-Fi status light, 43 Wireless network settings, configuring...
User Manual
Page 7
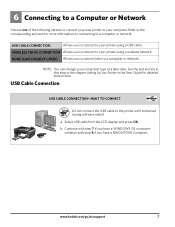
... Network Choose one of the following options to connect your new printer to your connection type at a later date. a. Select USB cable from the LCD display and press OK. Refer to a computer or network. Continue with step 8 if you have a MACINTOSH Computer. www.kodak.com/go/...aiosupport 7 NOTE: You can change your computer. Back Home b. See the last section in this step or the chapter Setting Up Your Printer in the User Guide for more information on connecting to the corresponding sections for detailed instructions. WIRELESS (Wi-Fi...
... Network Choose one of the following options to connect your new printer to your connection type at a later date. a. Select USB cable from the LCD display and press OK. Refer to a computer or network. Continue with step 8 if you have a MACINTOSH Computer. www.kodak.com/go/...aiosupport 7 NOTE: You can change your computer. Back Home b. See the last section in this step or the chapter Setting Up Your Printer in the User Guide for more information on connecting to the corresponding sections for detailed instructions. WIRELESS (Wi-Fi...
User Manual
Page 8
... display. You will have a MACINTOSH Computer. Select WPS on the LCD display into the PIN screen for troubleshooting information. 8 www.kodak.com/go /manuals for your wireless network, go to www.kodak.com/go /inkjetnetworking Rotate Back Home MS SD/HC MMC Determine if you have a WPS router) or Generate WPS Pin. If...
... display. You will have a MACINTOSH Computer. Select WPS on the LCD display into the PIN screen for troubleshooting information. 8 www.kodak.com/go /manuals for your wireless network, go to www.kodak.com/go /inkjetnetworking Rotate Back Home MS SD/HC MMC Determine if you have a WPS router) or Generate WPS Pin. If...

User Manual
Page 9
If the name (the SSID) of your network is not listed, make . When you have a MACINTOSH Computer. c. www.kodak.com/go /manuals for this information. Select your wireless router is turned on and within range. If successfully connected, your security string now. Continue with step 7 if you are...select the letter you have a WINDOWS OS computer; b. continue with whomever set up your network, your wireless network, go to www.kodak.com/go/inkjetnetworking or refer to the User Guide at www.kodak.com/go /aiosupport 9 Check with step 8 if you want and press OK. All Other Routers...
If the name (the SSID) of your network is not listed, make . When you have a MACINTOSH Computer. c. www.kodak.com/go /manuals for this information. Select your wireless router is turned on and within range. If successfully connected, your security string now. Continue with step 7 if you are...select the letter you have a WINDOWS OS computer; b. continue with whomever set up your network, your wireless network, go to www.kodak.com/go/inkjetnetworking or refer to the User Guide at www.kodak.com/go /aiosupport 9 Check with step 8 if you want and press OK. All Other Routers...


