
Installation Instructions
Page 12
... the control panel shown below : (Models KUDC03IT, KUDK03IT and KUDL03IT) 2 screws align top edges 1-3/8"screw 10. For dishwashers with the control panel shown below : (models KUDS03FTPA and KUDU03FTPA) (Your model may vary slightly from picture above .) Custom door panel dimensions are : 23-3/8" (59.4 cm) 3/4" (19.1 mm) *25-29/32" (65.8 cm) ...
... the control panel shown below : (Models KUDC03IT, KUDK03IT and KUDL03IT) 2 screws align top edges 1-3/8"screw 10. For dishwashers with the control panel shown below : (models KUDS03FTPA and KUDU03FTPA) (Your model may vary slightly from picture above .) Custom door panel dimensions are : 23-3/8" (59.4 cm) 3/4" (19.1 mm) *25-29/32" (65.8 cm) ...

Installation Instructions
Page 13
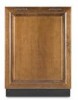
.... Drill 3/32" pilot holes 1/2" (13 mm) deep in the literature package. IMPORTANT: Screw heads must be centered on KitchenAid custom handle selection, refer to the KitchenAid Catalog, visit www.kitchenaid.com, or call 1-800-422-1230. For more than 6" (15.2 cm). 7. back 9-29/32" (25.2 cm...panel aside. 3. Attach the panel assembly to the door by reinstalling the three screws on each side; Install custom panel Option 1: For models KUDS03FTPA and KUDU03FTPA NOTE: The handle for the screws heads to be flush with back of customer-supplied custom panel. 6" (15.2 cm) 3 ...
.... Drill 3/32" pilot holes 1/2" (13 mm) deep in the literature package. IMPORTANT: Screw heads must be centered on KitchenAid custom handle selection, refer to the KitchenAid Catalog, visit www.kitchenaid.com, or call 1-800-422-1230. For more than 6" (15.2 cm). 7. back 9-29/32" (25.2 cm...panel aside. 3. Attach the panel assembly to the door by reinstalling the three screws on each side; Install custom panel Option 1: For models KUDS03FTPA and KUDU03FTPA NOTE: The handle for the screws heads to be flush with back of customer-supplied custom panel. 6" (15.2 cm) 3 ...