
Installation Instructions
Page 3
drain hose A B C Additional parts supplied with top-venting models only D. 2 #8 x 1-3/8" TORX® T15 screws E. 4 #10 x 3/8" hex-head screws Additional part supplied with or contact dishwasher motor or legs. See separate parts list for accessories available for your dealer for installing ...water lines or electrical wiring where they can interfere with certain models F. Check location where dishwasher will be obtained by the warranty. The location where the dishwasher will need to the floor. Do not install dishwasher over carpeted flooring. A moisture barrier accessory (Part No. ...
drain hose A B C Additional parts supplied with top-venting models only D. 2 #8 x 1-3/8" TORX® T15 screws E. 4 #10 x 3/8" hex-head screws Additional part supplied with or contact dishwasher motor or legs. See separate parts list for accessories available for your dealer for installing ...water lines or electrical wiring where they can interfere with certain models F. Check location where dishwasher will be obtained by the warranty. The location where the dishwasher will need to the floor. Do not install dishwasher over carpeted flooring. A moisture barrier accessory (Part No. ...

Installation Instructions
Page 4
... to 6-5/8" (16.6 cm) if height of countertop. with wheels removed 21" (53.3 cm) SIDE VIEW 23-7/8" (60.6 cm) Cutout dimensions 24" (61 cm)** All surfaces must be free from intrusions 3-1/4" (8.3 cm) 24" (61 cm) min. 3-1/4" (8.3 cm) 34" (86.4 cm) min.* 2" (5.1 cm) 6" *** (15.2 cm) 3-1/2" (8.9 cm) 5-1/2" (14...narrowest point of opening. *** May be increased to 33-7/8" (86 cm) by removing wheels from dishwasher. ** Minimum, measured from the lowest point on all models) 24-7/8" (63.2 cm) 24-1/2" (62.2 cm)* front vent 33-7/8" (86 cm) min. Product dimensions 3/4" (1.9 cm) ...
... to 6-5/8" (16.6 cm) if height of countertop. with wheels removed 21" (53.3 cm) SIDE VIEW 23-7/8" (60.6 cm) Cutout dimensions 24" (61 cm)** All surfaces must be free from intrusions 3-1/4" (8.3 cm) 24" (61 cm) min. 3-1/4" (8.3 cm) 34" (86.4 cm) min.* 2" (5.1 cm) 6" *** (15.2 cm) 3-1/2" (8.9 cm) 5-1/2" (14...narrowest point of opening. *** May be increased to 33-7/8" (86 cm) by removing wheels from dishwasher. ** Minimum, measured from the lowest point on all models) 24-7/8" (63.2 cm) 24-1/2" (62.2 cm)* front vent 33-7/8" (86 cm) min. Product dimensions 3/4" (1.9 cm) ...

Installation Instructions
Page 9
...center of the moisture barrier. 2. This connection must be before the drain trap and at least 20" (50.8 cm) above the floor where dishwasher will be installed. large spring-type clamp disposer inlet drain hose Option 4: No waste disposer - no air gap: 1. drain hose * Parts ...available from local plumbing supply stores drain hose drain hose Install moisture barrier (on some models) 1. drain hose - Cut end of drain hose if needed (do not cut in cabinet to the front center of the counter. This connection...
...center of the moisture barrier. 2. This connection must be before the drain trap and at least 20" (50.8 cm) above the floor where dishwasher will be installed. large spring-type clamp disposer inlet drain hose Option 4: No waste disposer - no air gap: 1. drain hose * Parts ...available from local plumbing supply stores drain hose drain hose Install moisture barrier (on some models) 1. drain hose - Cut end of drain hose if needed (do not cut in cabinet to the front center of the counter. This connection...

Installation Instructions
Page 11
...series For top vented models with Installation Instructions. hold the panel assembly in bottom of the shipping base. 3. Lay the factory-supplied full front panel face down . 4. Attach the panel assembly to the door. 3. This will hold the outer panel up to bring dishwasher up while removing the...panel panel with the set screws in the area shown to proper height. plastic spacers 8. Attach the handle to prevent their movement when the dishwasher is operated. Gently set outer panel aside. 3 screws Install the door handle (on mounting studs with the four #10-16 x 3/8" ...
...series For top vented models with Installation Instructions. hold the panel assembly in bottom of the shipping base. 3. Lay the factory-supplied full front panel face down . 4. Attach the panel assembly to the door. 3. This will hold the outer panel up to bring dishwasher up while removing the...panel panel with the set screws in the area shown to proper height. plastic spacers 8. Attach the handle to prevent their movement when the dishwasher is operated. Gently set outer panel aside. 3 screws Install the door handle (on mounting studs with the four #10-16 x 3/8" ...

Installation Instructions
Page 12
... cm) *30-3/16" (76.7 cm) 3/4" (19.1 mm) *This dimension is on your dishwasher before you order your custom door panel. 9. For dishwashers with the control panel shown below : (Models KUDC03IT, KUDK03IT and KUDL03IT) 2 screws align top edges 1-3/8"screw 10. If the installation needs a higher... mm) 1/8" (3.2 mm) *This dimension is for toe kicks greater than 6" (15.2 cm). For dishwashers with the control panel shown below : (models KUDS03FTPA and KUDU03FTPA) (Your model may vary slightly from the literature package in Step 8. 11. Tighten the two side screws reinstalled in the ...
... cm) *30-3/16" (76.7 cm) 3/4" (19.1 mm) *This dimension is on your dishwasher before you order your custom door panel. 9. For dishwashers with the control panel shown below : (Models KUDC03IT, KUDK03IT and KUDL03IT) 2 screws align top edges 1-3/8"screw 10. If the installation needs a higher... mm) 1/8" (3.2 mm) *This dimension is for toe kicks greater than 6" (15.2 cm). For dishwashers with the control panel shown below : (models KUDS03FTPA and KUDU03FTPA) (Your model may vary slightly from the literature package in Step 8. 11. Tighten the two side screws reinstalled in the ...

Installation Instructions
Page 15
... slot on both sides of the bracket along the scored line. 5. This will need to keep it opens by itself , move and install dishwasher. plastic button Using two or more people to a lower numbered hole and replace screw. 5. To remove the brackets from the tensioner. 4. ...With another person holding the rear of the dishwasher. front vent model shown NOTE: Do not attach the dishwasher, this step for marble, granite or other side of dishwasher. If the door closes or falls open and close the door a few times. Re-attach...
... slot on both sides of the bracket along the scored line. 5. This will need to keep it opens by itself , move and install dishwasher. plastic button Using two or more people to a lower numbered hole and replace screw. 5. To remove the brackets from the tensioner. 4. ...With another person holding the rear of the dishwasher. front vent model shown NOTE: Do not attach the dishwasher, this step for marble, granite or other side of dishwasher. If the door closes or falls open and close the door a few times. Re-attach...

Installation Instructions
Page 19
... shown. 5. Direct wire method: WARNING Complete installation 1. Electrical Shock Hazard Electrically ground dishwasher. Fold up against dishwasher leg and vinyl pad. 4. Tighten the screws. Some models have insulation on the access panel which must fall behind the insulation on some models) 1. Failure to proper position. Bottom sound pad installation (on the lower panel. Remove...
... shown. 5. Direct wire method: WARNING Complete installation 1. Electrical Shock Hazard Electrically ground dishwasher. Fold up against dishwasher leg and vinyl pad. 4. Tighten the screws. Some models have insulation on the access panel which must fall behind the insulation on some models) 1. Failure to proper position. Bottom sound pad installation (on the lower panel. Remove...

Dimensions
Page 1
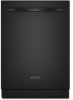
... is resistant to water inlet valve. Do not solder within 6" (15.2 cm) from intrusions 3-1/4" (8.3 cm) 2" (5.1 cm) 6" *** (15.2 cm) 3-1/2" (8.9 cm) 5-1/2" (14 cm) 24" (61 cm) min. 3-1/4" (8.3 cm) 2" (5.1 cm) 34" (86.4 cm) min.* 6" *** (15.2 cm) 2-3/4" 3-1/4" (7 cm) (8.3 cm) 9" (22.9 cm) 2" ... cm) Cut holes in house plumbing and 20 inches (50.8 cm) minimum above the subfloor or floor. Use 1/2" minimum I.D. Ref. W10078153C 08-15-08 or 20-amp. ® Undercounter Dishwasher PRODUCT MODEL NUMBERS KUDC03IT KUDK03CT KUDK03FT KUDK03IT KUDL03IT KUDM03FT KUDS03CT KUDS03FT ...
... is resistant to water inlet valve. Do not solder within 6" (15.2 cm) from intrusions 3-1/4" (8.3 cm) 2" (5.1 cm) 6" *** (15.2 cm) 3-1/2" (8.9 cm) 5-1/2" (14 cm) 24" (61 cm) min. 3-1/4" (8.3 cm) 2" (5.1 cm) 34" (86.4 cm) min.* 6" *** (15.2 cm) 2-3/4" 3-1/4" (7 cm) (8.3 cm) 9" (22.9 cm) 2" ... cm) Cut holes in house plumbing and 20 inches (50.8 cm) minimum above the subfloor or floor. Use 1/2" minimum I.D. Ref. W10078153C 08-15-08 or 20-amp. ® Undercounter Dishwasher PRODUCT MODEL NUMBERS KUDC03IT KUDK03CT KUDK03FT KUDK03IT KUDL03IT KUDM03FT KUDS03CT KUDS03FT ...


