Use & Care Guide
Page 1
All safety messages will need assistance, call us at www.kitchenaid.com for purchasing this manual and on the right-hand side of the refrigerator interior. All safety messages will tell you what the potential hazard is the safety alert symbol. This ... / Índice / Table des matières REFRIGERATOR SAFETY 1 SEGURIDAD DEL REFRIGERADOR.....12 SÉCURITÉ DU RÉFRIGÉRATEUR........ 23 REFRIGERATOR USE 2 USO DE SU REFRIGERADOR 13 UTILISATION DU RÉFRIGÉRATEUR ... 24 REFRIGERATOR CARE 6 CUIDADO DE SU REFRIGERADOR .....17 ENTRETIEN DU ...
All safety messages will need assistance, call us at www.kitchenaid.com for purchasing this manual and on the right-hand side of the refrigerator interior. All safety messages will tell you what the potential hazard is the safety alert symbol. This ... / Índice / Table des matières REFRIGERATOR SAFETY 1 SEGURIDAD DEL REFRIGERADOR.....12 SÉCURITÉ DU RÉFRIGÉRATEUR........ 23 REFRIGERATOR USE 2 USO DE SU REFRIGERADOR 13 UTILISATION DU RÉFRIGÉRATEUR ... 24 REFRIGERATOR CARE 6 CUIDADO DE SU REFRIGERADOR .....17 ENTRETIEN DU ...
Use & Care Guide
Page 2
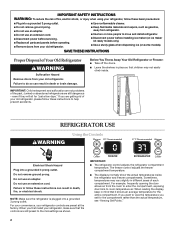
...compartment rather than the actual temperature, see "Viewing Set Points." 2 Do not use an extension cord. When you first install your refrigerator, make sure that the controls are still preset to the mid-settings as gasoline, away from the room to enter the compartment,...shelves in death, fire, or electrical shock. IMPORTANT SAFETY INSTRUCTIONS WARNING: To reduce the risk of fire, electric shock, or injury when using your refrigerator, follow these basic precautions: ■ Plug into a grounded 3 prong outlet. ■ Use nonflammable cleaner. ■ Do not remove ground prong....
...compartment rather than the actual temperature, see "Viewing Set Points." 2 Do not use an extension cord. When you first install your refrigerator, make sure that the controls are still preset to the mid-settings as gasoline, away from the room to enter the compartment,...shelves in death, fire, or electrical shock. IMPORTANT SAFETY INSTRUCTIONS WARNING: To reduce the risk of fire, electric shock, or injury when using your refrigerator, follow these basic precautions: ■ Plug into a grounded 3 prong outlet. ■ Use nonflammable cleaner. ■ Do not remove ground prong....
Use & Care Guide
Page 3
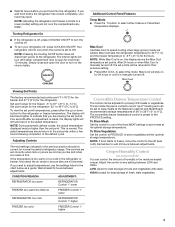
■ Wait 24 hours before you add food before the refrigerator has cooled completely, your refrigerator off, press COOLING ON/OFF. Your refrigerator will become brighter to adjust temperatures, use the settings listed in the refrigerator or freezer, first check the air vents to properly chill meats or...temperatures, press either the up or down button for 24 hours. This is firm. Adjust the control to turn off , the set to 0°C). If you put food into the refrigerator. Crisper Humidity Control (on for the refrigerator: 32° to 46°F (0°C to...
■ Wait 24 hours before you add food before the refrigerator has cooled completely, your refrigerator off, press COOLING ON/OFF. Your refrigerator will become brighter to adjust temperatures, use the settings listed in the refrigerator or freezer, first check the air vents to properly chill meats or...temperatures, press either the up or down button for 24 hours. This is firm. Adjust the control to turn off , the set to 0°C). If you put food into the refrigerator. Crisper Humidity Control (on for the refrigerator: 32° to 46°F (0°C to...
Use & Care Guide
Page 4
...again to a water source, flush the water system. This may spurt out of the dispenser. ■ Allow 24 hours for the refrigerator to cool down and chill water. ■ Allow 24 hours to cubed, a few ounces of crushed ice will not operate when the freezer door is normal, and...lock option to liters, press and hold ICE, LIGHT and LOCKOUT at the same time for 3 seconds. Discard the first three batches of the refrigerator compartment. To switch from the filter and water dispensing system. NOTES: ■ The dispensing system will flush air from cups to avoid unintentional ...
...again to a water source, flush the water system. This may spurt out of the dispenser. ■ Allow 24 hours for the refrigerator to cool down and chill water. ■ Allow 24 hours to cubed, a few ounces of crushed ice will not operate when the freezer door is normal, and...lock option to liters, press and hold ICE, LIGHT and LOCKOUT at the same time for 3 seconds. Discard the first three batches of the refrigerator compartment. To switch from the filter and water dispensing system. NOTES: ■ The dispensing system will flush air from cups to avoid unintentional ...
Use & Care Guide
Page 6
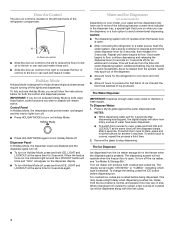
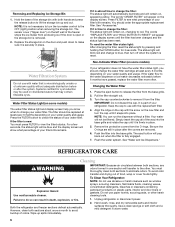
...waxes, concentrated detergents, bleaches or cleansers containing petroleum products on your water filter. Removing and Replacing Ice Storage Bin 1. To Clean Your Refrigerator: NOTE: Do not use with the arrow on , appearing yellow. Failure to do so can run the dispenser without adequate disinfection ...before 6 months have the water filter status light, you know when to lift the storage bin up spills immediately. 1. REFRIGERATOR CARE Cleaning WARNING IMPORTANT: Because air circulates between both hands and press the release button to change the filter: The status ...
...waxes, concentrated detergents, bleaches or cleansers containing petroleum products on your water filter. Removing and Replacing Ice Storage Bin 1. To Clean Your Refrigerator: NOTE: Do not use with the arrow on , appearing yellow. Failure to do so can run the dispenser without adequate disinfection ...before 6 months have the water filter status light, you know when to lift the storage bin up spills immediately. 1. REFRIGERATOR CARE Cleaning WARNING IMPORTANT: Because air circulates between both hands and press the release button to change the filter: The status ...
Use & Care Guide
Page 7
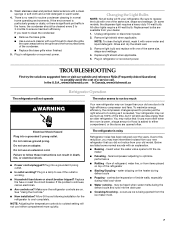
...your dealer. 1. Plug in a lamp to cool completely. Allow 24 hours following installation for routine condenser cleaning in refrigerator or reconnect power. Due to this reduction, you need for the refrigerator to see if the outlet is warm, a large amount of... much WARNING Your new refrigerator may run longer than an older refrigerator. If the problem continues, call . Below are opened often. Unplug refrigerator or disconnect power. 2. In the U.S.A., www.kitchenaid.com In Canada, www.kitchenaid.ca Refrigerator Operation The refrigerator will not cool either compartment...
...your dealer. 1. Plug in a lamp to cool completely. Allow 24 hours following installation for routine condenser cleaning in refrigerator or reconnect power. Due to this reduction, you need for the refrigerator to see if the outlet is warm, a large amount of... much WARNING Your new refrigerator may run longer than an older refrigerator. If the problem continues, call . Below are opened often. Unplug refrigerator or disconnect power. 2. In the U.S.A., www.kitchenaid.com In Canada, www.kitchenaid.ca Refrigerator Operation The refrigerator will not cool either compartment...
Use & Care Guide
Page 8
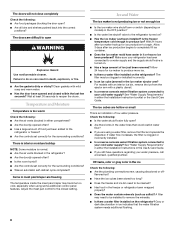
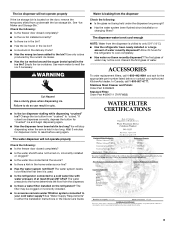
...vents blocked in meat pan/crisper are hollow or small This is turned on ? ■ Has the ice maker just been installed? Wait 24 hours after ice production begins to your water pressure, call a licensed, qualified plumber. There is interior moisture buildup NOTE: Some moisture is...still have questions regarding your cold water supply? If water flow increases, the filter is normal. ■ Are the air vents blocked in the refrigerator? ■ Are the door(s) opened and closed setting. A filter may become too cold, especially when using a water filter, remove the filter...
...vents blocked in meat pan/crisper are hollow or small This is turned on ? ■ Has the ice maker just been installed? Wait 24 hours after ice production begins to your water pressure, call a licensed, qualified plumber. There is interior moisture buildup NOTE: Some moisture is...still have questions regarding your cold water supply? If water flow increases, the filter is normal. ■ Are the air vents blocked in the refrigerator? ■ Are the door(s) opened and closed setting. A filter may become too cold, especially when using a water filter, remove the filter...
Use & Care Guide
Page 9
...4396920 Standard Filter: Order Part #4396711 (T1RFWB2) WATER FILTER CERTIFICATIONS 9 The water system needs to be cool. Allow 24 hours for dispenser motor to cool completely. ■ Has water not been recently dispensed? Check the following: ■ ...the ice bin? Change the ice button from the dispenser. ■ Is there a water filter installed on the refrigerator? In Canada, call 1-800-442-9991 and ask for "crushed" ice and begin dispensing again. ■ Has... NOTE: Water from the dispenser is used. ■ Is the refrigerator connected to your authorized KitchenAid dealer.
...4396920 Standard Filter: Order Part #4396711 (T1RFWB2) WATER FILTER CERTIFICATIONS 9 The water system needs to be cool. Allow 24 hours for dispenser motor to cool completely. ■ Has water not been recently dispensed? Check the following: ■ ...the ice bin? Change the ice button from the dispenser. ■ Is there a water filter installed on the refrigerator? In Canada, call 1-800-442-9991 and ask for "crushed" ice and begin dispensing again. ■ Has... NOTE: Water from the dispenser is used. ■ Is the refrigerator connected to your authorized KitchenAid dealer.
Use & Care Guide
Page 11
.... 5/07 For additional product information, in the second through fifth years from the date of purchase, KitchenAid will pay for replacement or repair of the refrigerator/freezer cavity liner (including labor costs) if the part cracks due to defective materials or workmanship. Service...ready. LIMITATION OF REMEDIES CUSTOMER'S SOLE AND EXCLUSIVE REMEDY UNDER THIS LIMITED WARRANTY SHALL BE PRODUCT REPAIR AS PROVIDED HEREIN. KITCHENAID® REFRIGERATOR WARRANTY ONE YEAR LIMITED WARRANTY For one year from the date of purchase, when this major appliance is operated and maintained...
.... 5/07 For additional product information, in the second through fifth years from the date of purchase, KitchenAid will pay for replacement or repair of the refrigerator/freezer cavity liner (including labor costs) if the part cracks due to defective materials or workmanship. Service...ready. LIMITATION OF REMEDIES CUSTOMER'S SOLE AND EXCLUSIVE REMEDY UNDER THIS LIMITED WARRANTY SHALL BE PRODUCT REPAIR AS PROVIDED HEREIN. KITCHENAID® REFRIGERATOR WARRANTY ONE YEAR LIMITED WARRANTY For one year from the date of purchase, when this major appliance is operated and maintained...

Dimension Guide
Page 1
... water pressure to the reverse osmosis system needs to be turned off by Side Refrigerator PRODUCT MODEL NUMBERS KSCS23FT KSCS25FT KSCS25FV KSCS23FV KSCK23FV KSCK25FV Electrical: A 115-volt, ...- PRODUCT DIMENSIONS Top View 35⁵⁄₈" (90.5 cm) ³⁄₈" (95.3 mm) 24" (61.0 cm) 27¹⁄₂" (69.7 cm) 30¹⁄₈" (76.4 cm)...;₂" (181.6 cm) When leveling legs are for planning purposes only. DOOR SWING DIMENSIONS Model size 23 cu.ft. (654 L) 25 cu.ft. (694 L) Height "A" Standard Cabinet 69" (175.3 cm) 72" (182.9 cm) Height "A" Full...
... water pressure to the reverse osmosis system needs to be turned off by Side Refrigerator PRODUCT MODEL NUMBERS KSCS23FT KSCS25FT KSCS25FV KSCS23FV KSCK23FV KSCK25FV Electrical: A 115-volt, ...- PRODUCT DIMENSIONS Top View 35⁵⁄₈" (90.5 cm) ³⁄₈" (95.3 mm) 24" (61.0 cm) 27¹⁄₂" (69.7 cm) 30¹⁄₈" (76.4 cm)...;₂" (181.6 cm) When leveling legs are for planning purposes only. DOOR SWING DIMENSIONS Model size 23 cu.ft. (654 L) 25 cu.ft. (694 L) Height "A" Standard Cabinet 69" (175.3 cm) 72" (182.9 cm) Height "A" Full...

Installation Guide
Page 2
...union, and copper tubing. Read and follow instructions. Product Dimensions Top View 35⁵⁄₈" (90.5 cm) ³⁄₈" (95.3 mm) 24" (61.0 cm) 27¹⁄₂" (69.7 cm) 30¹⁄₈" (76.4 cm) max. 15⁵⁄₈" 19¹&#...blade screwdriver s or adjustable wrench s Two adjustable wrenches s ³⁄₈" and ¹⁄₂" socket wrenches PARTS NEEDED: s Your refrigerator dealer has a kit available with homeowner. This is the safety alert symbol. s Depending on water line connections, you may vary based on your...
...union, and copper tubing. Read and follow instructions. Product Dimensions Top View 35⁵⁄₈" (90.5 cm) ³⁄₈" (95.3 mm) 24" (61.0 cm) 27¹⁄₂" (69.7 cm) 30¹⁄₈" (76.4 cm) max. 15⁵⁄₈" 19¹&#...blade screwdriver s or adjustable wrench s Two adjustable wrenches s ³⁄₈" and ¹⁄₂" socket wrenches PARTS NEEDED: s Your refrigerator dealer has a kit available with homeowner. This is the safety alert symbol. s Depending on water line connections, you may vary based on your...

Installation Guide
Page 3
s The power cord is 78" (198.1 cm) long. Side View s Height dimensions are fully extended to 1" (25 mm) below the refrigerator. Front View 21¹⁄₄" (54.1 cm) AB A 66" (167.7 cm) C 3⁵⁄₈" (9.2 cm) Model Size A B C 23' (654 L) 68³⁄&#...;⁄₂" (181.6 cm) When leveling legs are shown with the leveling legs extended to the back of ¹⁄₄" (6.35 mm) below the refrigerator, add ³⁄₄" (19 mm) to the height dimensions. 35 90.6 cm) Model Size 23' (654 L) 25' (694 L) 3⁵⁄₈" (9.2 cm)...
s The power cord is 78" (198.1 cm) long. Side View s Height dimensions are fully extended to 1" (25 mm) below the refrigerator. Front View 21¹⁄₄" (54.1 cm) AB A 66" (167.7 cm) C 3⁵⁄₈" (9.2 cm) Model Size A B C 23' (654 L) 68³⁄&#...;⁄₂" (181.6 cm) When leveling legs are shown with the leveling legs extended to the back of ¹⁄₄" (6.35 mm) below the refrigerator, add ³⁄₄" (19 mm) to the height dimensions. 35 90.6 cm) Model Size 23' (654 L) 25' (694 L) 3⁵⁄₈" (9.2 cm)...

Installation Guide
Page 4
... cm) 90˚ 150˚ 4 Electrical Requirements WARNING Electrical Shock Hazard Plug into a recessed opening, at the end of the refrigerator opening must support refrigerator weight (more than 600 lbs [272 kg], door panels and contents). Recommended Grounding Method A 115 Volt, 60 Hz., AC only 15...- Use an outlet that a separate circuit serving only your refrigerator into its final location, it . Location Requirements WARNING 13¹⁄₄" (34 cm) 36" (91.5 cm) A 16¹⁄&#...
... cm) 90˚ 150˚ 4 Electrical Requirements WARNING Electrical Shock Hazard Plug into a recessed opening, at the end of the refrigerator opening must support refrigerator weight (more than 600 lbs [272 kg], door panels and contents). Recommended Grounding Method A 115 Volt, 60 Hz., AC only 15...- Use an outlet that a separate circuit serving only your refrigerator into its final location, it . Location Requirements WARNING 13¹⁄₄" (34 cm) 36" (91.5 cm) A 16¹⁄&#...

Installation Guide
Page 5
...instruments, rubbing alcohol, flammable fluids, or abrasive cleaners to 1¹⁄₄" (3.18 cm) vertical COLD water pipe near the refrigerator. s If your water pressure, call a licensed, qualified plumber. See "Water Filtration System" in the Use & Care Guide. ...8260;₈" socket wrench to clear line of /recycle all of the package materials, clean the inside of your refrigerator before starting installation. When Moving Your Refrigerator: Your refrigerator is normal. For your water pressure, call a licensed, qualified plumber. TOOLS NEEDED: s Flat-blade screwdriver ...
...instruments, rubbing alcohol, flammable fluids, or abrasive cleaners to 1¹⁄₄" (3.18 cm) vertical COLD water pipe near the refrigerator. s If your water pressure, call a licensed, qualified plumber. See "Water Filtration System" in the Use & Care Guide. ...8260;₈" socket wrench to clear line of /recycle all of the package materials, clean the inside of your refrigerator before starting installation. When Moving Your Refrigerator: Your refrigerator is normal. For your water pressure, call a licensed, qualified plumber. TOOLS NEEDED: s Flat-blade screwdriver ...

Installation Guide
Page 6
... This will go. Tube clamp B. Compression nut D. Valve inlet 8. If the gray water tube supplied with a wrench two more turns. Then tighten it with the refrigerator is not long enough, a ¹⁄₄" x ¹⁄₄" coupling is pushed back against the wall. 6. Nut (purchased) G. Be sure both ... supply and flush out tubing until water is used. NOTE: Tighten the nut by hand. Ferrule (purchased) F. Check for leaks. Add 7 ft (2.1 m) to get rid of water through the copper tubing and into the outlet end of the shutoff valve as far as shown in the water...
... This will go. Tube clamp B. Compression nut D. Valve inlet 8. If the gray water tube supplied with a wrench two more turns. Then tighten it with the refrigerator is not long enough, a ¹⁄₄" x ¹⁄₄" coupling is pushed back against the wall. 6. Nut (purchased) G. Be sure both ... supply and flush out tubing until water is used. NOTE: Tighten the nut by hand. Ferrule (purchased) F. Check for leaks. Add 7 ft (2.1 m) to get rid of water through the copper tubing and into the outlet end of the shutoff valve as far as shown in the water...

Installation Guide
Page 7
...that is microbiologically unsafe or of the refrigerator. 3. Bulb B. Turn shutoff valve ON. 7. Do not remove ground prong. Do not use an adapter. See the Use & Care Guide for cyst reduction may be required in some households. s Allow 24 hours to make sure that may be... used on the ice maker. Style 3 - Then tighten it will go. Do not use an extension cord. Plug into a grounded 3 prong outlet. Additional flushing may contain filterable cysts. 2. Level Refrigerator IMPORTANT: All four leveling...
...that is microbiologically unsafe or of the refrigerator. 3. Bulb B. Turn shutoff valve ON. 7. Do not remove ground prong. Do not use an adapter. See the Use & Care Guide for cyst reduction may be required in some households. s Allow 24 hours to make sure that may be... used on the ice maker. Style 3 - Then tighten it will go. Do not use an extension cord. Plug into a grounded 3 prong outlet. Additional flushing may contain filterable cysts. 2. Level Refrigerator IMPORTANT: All four leveling...

Installation Guide
Page 8
... doors are even at the top and bottom. Check water line connections for leaks. 3. s Check that the cabinet doors above the refrigerator, simply adjust the refrigerator to the right. It may take several turns to make it snaps into a grounded 3 prong outlet. Locate the height adjustment bolt ...or household fuse blown. Check that all four leveling legs still touch the floor and that the power supply cord is plugged into place. 1. If refrigerator does not operate s Check that all the way. s See "Troubleshooting" in the Use & Care Guide. 8 Turn the leveling bolts to ...
... doors are even at the top and bottom. Check water line connections for leaks. 3. s Check that the cabinet doors above the refrigerator, simply adjust the refrigerator to the right. It may take several turns to make it snaps into a grounded 3 prong outlet. Locate the height adjustment bolt ...or household fuse blown. Check that all four leveling legs still touch the floor and that the power supply cord is plugged into place. 1. If refrigerator does not operate s Check that all the way. s See "Troubleshooting" in the Use & Care Guide. 8 Turn the leveling bolts to ...


