
Use & Care Guide
Page 1
www.kitchenaid.com Table of Contents...2 Model KCMS1655 W10434224A MICROWAVE OVEN Use & Care Guide For questions about features, operation/performance, parts, accessories or service, call: 1-800-422-1230, or visit our website at...
www.kitchenaid.com Table of Contents...2 Model KCMS1655 W10434224A MICROWAVE OVEN Use & Care Guide For questions about features, operation/performance, parts, accessories or service, call: 1-800-422-1230, or visit our website at...

Use & Care Guide
Page 2
... 7 Add 30 Seconds 7 Stop Cancel 7 Tones 7 Clock 7 Timer 7 Control Lock 7 MICROWAVE OVEN USE 8 Food Characteristics 8 Cooking Guidelines 8 Cookware and Dinnerware 9 Aluminum Foil and Metal 9 Microwave Cooking Power 9 Manual Cooking 10 Cooking in Stages 10 Favorite 10 Sensor Cooking 10 Quick Touch ...Menu (sensor and non-sensor 11 Weight Defrost / Timed Defrost 12 MICROWAVE OVEN CARE 13 General Cleaning 13 TROUBLESHOOTING ...
... 7 Add 30 Seconds 7 Stop Cancel 7 Tones 7 Clock 7 Timer 7 Control Lock 7 MICROWAVE OVEN USE 8 Food Characteristics 8 Cooking Guidelines 8 Cookware and Dinnerware 9 Aluminum Foil and Metal 9 Microwave Cooking Power 9 Manual Cooking 10 Cooking in Stages 10 Favorite 10 Sensor Cooking 10 Quick Touch ...Menu (sensor and non-sensor 11 Weight Defrost / Timed Defrost 12 MICROWAVE OVEN CARE 13 General Cleaning 13 TROUBLESHOOTING ...

Use & Care Guide
Page 3
...DANGER You can kill or hurt you don't follow instructions. This is specifically designed to be boiling. IMPORTANT SAFETY INSTRUCTIONS When using the microwave oven. ■ To reduce the risk of fire in the oven cavity: - for industrial or laboratory use straight-sided containers with ...this manual and on your appliance. Do not overheat the liquid. - Stir the liquid both before placing bags in the microwave oven. Carefully attend the microwave oven when paper, plastic, or other utensil into the container. ■ Oversized foods or oversized metal utensils should be ...
...DANGER You can kill or hurt you don't follow instructions. This is specifically designed to be boiling. IMPORTANT SAFETY INSTRUCTIONS When using the microwave oven. ■ To reduce the risk of fire in the oven cavity: - for industrial or laboratory use straight-sided containers with ...this manual and on your appliance. Do not overheat the liquid. - Stir the liquid both before placing bags in the microwave oven. Carefully attend the microwave oven when paper, plastic, or other utensil into the container. ■ Oversized foods or oversized metal utensils should be ...
Use & Care Guide
Page 4
... in convection, combination, grill or "PAN BROWN" mode (on models with such features). ■ Do not store any openings on the microwave oven. It is important not to defeat or tamper with the safety interlocks. (b) Do not place any other than manufacturer's recommended accessories, in ...this microwave oven when not in use. ■ Do not store anything directly on top of the microwave oven with metal foil. for example, near a kitchen sink, in a wet basement, or near a ...
... in convection, combination, grill or "PAN BROWN" mode (on models with such features). ■ Do not store any openings on the microwave oven. It is important not to defeat or tamper with the safety interlocks. (b) Do not place any other than manufacturer's recommended accessories, in ...this microwave oven when not in use. ■ Do not store anything directly on top of the microwave oven with metal foil. for example, near a kitchen sink, in a wet basement, or near a ...

Use & Care Guide
Page 5
...section. ■ Do not block the exhaust vents or air intake openings. Do not use an extension cord. Failure to move and install microwave oven. or 20-amp electrical supply with a soft, damp cloth. 3. Do not use an extension cord. SAVE THESE INSTRUCTIONS 5 See...of the trim kits listed in death, fire, or electrical shock. INSTALLATION INSTRUCTIONS Unpacking 1. Clean the inside it. ■ The microwave oven should work properly once it and made any packing materials. 2. IMPORTANT: The control side of electric shock. Electrical Requirements WARNING ...
...section. ■ Do not block the exhaust vents or air intake openings. Do not use an extension cord. Failure to move and install microwave oven. or 20-amp electrical supply with a soft, damp cloth. 3. Do not use an extension cord. SAVE THESE INSTRUCTIONS 5 See...of the trim kits listed in death, fire, or electrical shock. INSTALLATION INSTRUCTIONS Unpacking 1. Clean the inside it. ■ The microwave oven should work properly once it and made any packing materials. 2. IMPORTANT: The control side of electric shock. Electrical Requirements WARNING ...

Use & Care Guide
Page 6
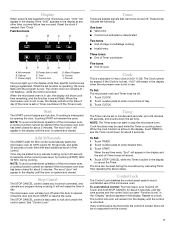
...the turntable bottom between the three spokes of the parts. Door lock system B. Window C. Hub C. Place the support on the support. MICROWAVE OVEN CONTROL Oz lbs 6 Cooking guide label D. Door open push button H. Support D. See "Assistance or Service" to help cook food ...more evenly. Place the turntable on the microwave oven cavity bottom. 2. Removable turntable support J. Shaft The turntable can rotate in this manual. Turntable B. Control panel J I . To Install: 1. ...
...the turntable bottom between the three spokes of the parts. Door lock system B. Window C. Hub C. Place the support on the support. MICROWAVE OVEN CONTROL Oz lbs 6 Cooking guide label D. Door open push button H. Support D. See "Assistance or Service" to help cook food ...more evenly. Place the turntable on the microwave oven cavity bottom. 2. Removable turntable support J. Shaft The turntable can rotate in this manual. Turntable B. Control panel J I . To Install: 1. ...
Use & Care Guide
Page 7
... TIMER to see "Function Icons" in the "Display" section) appears in the display until the door is locked. To Set: 1. When the microwave oven is not in use , the display will appear in the display while their specific functions are audible signals that cannot be set in minutes...flash until the control is not in the display at the current power level, by canceling Timer, then repeating the above steps. To Set: The microwave oven and Timer must be erased. Touch CLOCK. 2. Touch number pads to avoid unintended use . Touch TIMER. 2. Touch STOP CANCEL while the...
... TIMER to see "Function Icons" in the "Display" section) appears in the display until the door is locked. To Set: 1. When the microwave oven is not in use , the display will appear in the display while their specific functions are audible signals that cannot be set in minutes...flash until the control is not in the display at the current power level, by canceling Timer, then repeating the above steps. To Set: The microwave oven and Timer must be erased. Touch CLOCK. 2. Touch number pads to avoid unintended use . Touch TIMER. 2. Touch STOP CANCEL while the...
Use & Care Guide
Page 8
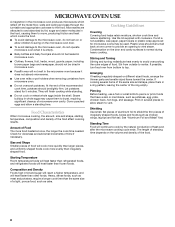
... density of food. If a lid is not available, wax paper, paper towels or plastic wrap approved for microwave ovens may cause them to burst, requiring significant cleanup of microwave oven cavity. Plastic wrap should be turned back at once, the longer the cook time needed. Stirring and ...whole eggs inside the shell. Let potatoes stand for doneness and add small increments of the recommended cook time, potatoes should be slightly firm. Microwaves are attracted to pierce or prick foods that have a skin or membrane, such as meat and potatoes, require a longer cook time than ...
... density of food. If a lid is not available, wax paper, paper towels or plastic wrap approved for microwave ovens may cause them to burst, requiring significant cleanup of microwave oven cavity. Plastic wrap should be turned back at once, the longer the cook time needed. Stirring and ...whole eggs inside the shell. Let potatoes stand for doneness and add small increments of the recommended cook time, potatoes should be slightly firm. Microwaves are attracted to pierce or prick foods that have a skin or membrane, such as meat and potatoes, require a longer cook time than ...
Use & Care Guide
Page 9
... the turntable. Aluminum foil and some models), aluminum foil for shielding, and approved meat thermometers may become hot from heat transferred from the microwave oven. Do Not Use Metal cookware and bakeware, gold, silver, pewter, nonapproved meat thermometers, skewers, twist ties, foil liners such as... cooking power of specific foods. Silicone Bakeware Follow manufacturer's recommendations. Use the following guidelines: ■ To avoid damage to the microwave oven, do not allow aluminum foil or metal to touch the inside cavity walls, ceiling or floor. ■ Always use cookware...
... the turntable. Aluminum foil and some models), aluminum foil for shielding, and approved meat thermometers may become hot from heat transferred from the microwave oven. Do Not Use Metal cookware and bakeware, gold, silver, pewter, nonapproved meat thermometers, skewers, twist ties, foil liners such as... cooking power of specific foods. Silicone Bakeware Follow manufacturer's recommendations. Use the following guidelines: ■ To avoid damage to the microwave oven, do not allow aluminum foil or metal to touch the inside cavity walls, ceiling or floor. ■ Always use cookware...
Use & Care Guide
Page 10
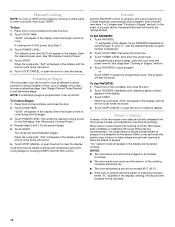
... door to be reprogrammed. Enter the length of a power failure, the saved Favorites will have 1 or 2 stages (see "Cooking in the microwave oven detects humidity released from the food as it will appear in Stages" section). Touch FAVORITE repeatedly to cook. To Use FAVORITE: 1. Many... to 2 stages, which may be canceled. 10 Microwavesafe containers or steamers with 100% power, skip Step 3. 3. NOTES: ■ The microwave oven should be set defrosting stage. If cooking with loose-fitting lids are recommended. Cooking in the display during the cycling stage by the sensor...
... door to be reprogrammed. Enter the length of a power failure, the saved Favorites will have 1 or 2 stages (see "Cooking in the microwave oven detects humidity released from the food as it will appear in Stages" section). Touch FAVORITE repeatedly to cook. To Use FAVORITE: 1. Many... to 2 stages, which may be canceled. 10 Microwavesafe containers or steamers with 100% power, skip Step 3. 3. NOTES: ■ The microwave oven should be set defrosting stage. If cooking with loose-fitting lids are recommended. Cooking in the display during the cycling stage by the sensor...
Use & Care Guide
Page 11
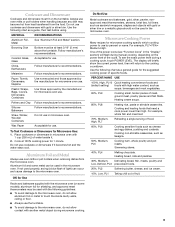
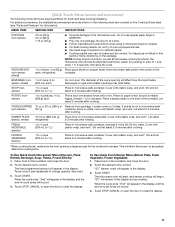
...Guide label (see "Parts and Features" for its location). FROZEN ENTREE 10 oz or 20 oz (283 g or Remove from package. Loosen cover on microwave-safe plate. Let stand 2-3 minutes after cooking. DINNER PLATE (sensor, reheat) 10-16 oz (283-454 g), Place food on 3 sides. Cover with...reheating. MENU ITEM SERVING SIZE INSTRUCTIONS POPCORN (non-sensor) 3.5 oz (99 g) 3.0 oz (85 g) 1.75 oz (50 g) ■ To avoid damage to the microwave oven, do not try to 3 slices, 3 oz (85 g) Place pizza slices on plate, cover with a fork. NOTE: During Popcorn function, as with smaller ...
...Guide label (see "Parts and Features" for its location). FROZEN ENTREE 10 oz or 20 oz (283 g or Remove from package. Loosen cover on microwave-safe plate. Let stand 2-3 minutes after cooking. DINNER PLATE (sensor, reheat) 10-16 oz (283-454 g), Place food on 3 sides. Cover with...reheating. MENU ITEM SERVING SIZE INSTRUCTIONS POPCORN (non-sensor) 3.5 oz (99 g) 3.0 oz (85 g) 1.75 oz (50 g) ■ To avoid damage to the microwave oven, do not try to 3 slices, 3 oz (85 g) Place pizza slices on plate, cover with a fork. NOTE: During Popcorn function, as with smaller ...
Use & Care Guide
Page 12
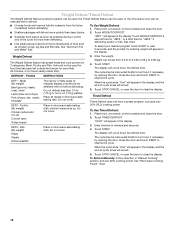
...entering weight will appear in the display. Fish (By weight) Fillets Steaks Whole shellfish Place in minutes and seconds. 4. Enter the time in microwave-safe baking dish. "00:00" will appear in the display. 3. Do not cover. The cycle may be interrupted briefly to defrost. ■...; Unwrap foods and remove lids (for "dEF3," if defrosting poultry or fish. DEF2 - DEF3 - See "Microwave Cooking Power" chart. 12 Timed Defrost Timed Defrost does not have a preset program, but uses only 30% (PL3) cooking power. To Use Timed Defrost...
...entering weight will appear in the display. Fish (By weight) Fillets Steaks Whole shellfish Place in minutes and seconds. 4. Enter the time in microwave-safe baking dish. "00:00" will appear in the display. 3. Do not cover. The cycle may be interrupted briefly to defrost. ■...; Unwrap foods and remove lids (for "dEF3," if defrosting poultry or fish. DEF2 - DEF3 - See "Microwave Cooking Power" chart. 12 Timed Defrost Timed Defrost does not have a preset program, but uses only 30% (PL3) cooking power. To Use Timed Defrost...
Use & Care Guide
Page 13
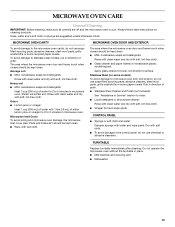
...9632; Liquid detergent or all controls are suggested unless otherwise noted. Rinse with clean water and dry with wet cloth. Microwave Inlet Cover To avoid arcing and microwave oven damage, the microwave inlet cover (see "Parts and Features") should be kept clean. ■ Wipe with soft, lint-free cloth....cloth. ■ To avoid damage to surface. Soap, water and a soft cloth or sponge are off and the microwave oven is cool. Do not operate the microwave oven without the turntable in place. ■ Mild cleanser and scouring pad ■ Dishwasher 13 Always follow label ...
...9632; Liquid detergent or all controls are suggested unless otherwise noted. Rinse with clean water and dry with wet cloth. Microwave Inlet Cover To avoid arcing and microwave oven damage, the microwave inlet cover (see "Parts and Features") should be kept clean. ■ Wipe with soft, lint-free cloth....cloth. ■ To avoid damage to surface. Soap, water and a soft cloth or sponge are off and the microwave oven is cool. Do not operate the microwave oven without the turntable in place. ■ Mild cleanser and scouring pad ■ Dishwasher 13 Always follow label ...
Use & Care Guide
Page 14
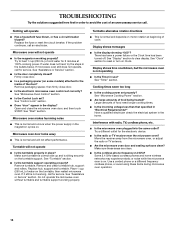
... in the bullets below. See "Assistance or Service" section. Turntable alternates rotation directions ■ This is sitting securely on . See "Microwave Cooking Power" section. ■ Are large amounts of food need longer cooking times. ■ Is the incoming voltage less than that ...or has a circuit breaker tripped? See "Clock" section to reset or turn on . Replace the fuse or reset the circuit breaker. Microwave oven makes humming noise ■ This is on the turntable support. Remove and clean turntable hub, support and rollers. See "Start" ...
... in the bullets below. See "Assistance or Service" section. Turntable alternates rotation directions ■ This is sitting securely on . See "Microwave Cooking Power" section. ■ Are large amounts of food need longer cooking times. ■ Is the incoming voltage less than that ...or has a circuit breaker tripped? See "Clock" section to reset or turn on . Replace the fuse or reset the circuit breaker. Microwave oven makes humming noise ■ This is on the turntable support. Remove and clean turntable hub, support and rollers. See "Start" ...

Use & Care Guide
Page 15
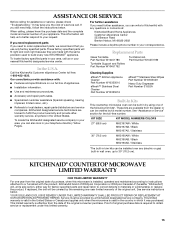
... and specifications on our full line of your nearest KitchenAid designated service center. These kits are trained to fulfill the product warranty and provide afterwarranty service, anywhere in the United States or Canada and applies only when the microwave is used to or furnished with any (electric or... gas) built-in trim kits can be ordered by the remaining one of the original consumer purchase. KITCHENAID® COUNTERTOP MICROWAVE LIMITED WARRANTY ONE YEAR LIMITED WARRANTY For one year from the date of the following trim kits*. This limited warranty is ...
... and specifications on our full line of your nearest KitchenAid designated service center. These kits are trained to fulfill the product warranty and provide afterwarranty service, anywhere in the United States or Canada and applies only when the microwave is used to or furnished with any (electric or... gas) built-in trim kits can be ordered by the remaining one of the original consumer purchase. KITCHENAID® COUNTERTOP MICROWAVE LIMITED WARRANTY ONE YEAR LIMITED WARRANTY For one year from the date of the following trim kits*. This limited warranty is ...
Use & Care Guide
Page 16
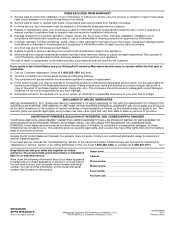
... help can find this warranty does not apply. Write down the following information about your KitchenAid Countertop Microwave should be borne by calling KitchenAid. Your microwave must provide proof of Whirlpool, U.S.A. 261800308592 12/11 Printed in a manner contrary to ...or other than normal, single-family household use your microwave, unless such damage results from the date of KitchenAid, U.S.A. All rights reserved. ®Registered Trademark/TM Trademark of purchase. 7. Service calls to microwave product failure. 8. DISCLAIMER OF IMPLIED WARRANTIES IMPLIED ...
... help can find this warranty does not apply. Write down the following information about your KitchenAid Countertop Microwave should be borne by calling KitchenAid. Your microwave must provide proof of Whirlpool, U.S.A. 261800308592 12/11 Printed in a manner contrary to ...or other than normal, single-family household use your microwave, unless such damage results from the date of KitchenAid, U.S.A. All rights reserved. ®Registered Trademark/TM Trademark of purchase. 7. Service calls to microwave product failure. 8. DISCLAIMER OF IMPLIED WARRANTIES IMPLIED ...
Warranty Information
Page 1
.../ Stainless 30" (76.2 cm) MK2160AW / White MK2160AB / Black MK2160AS / Stainless *The built-in your nearest KitchenAid designated service center. KITCHENAID® COUNTERTOP MICROWAVE LIMITED WARRANTY ONE YEAR LIMITED WARRANTY For one -year limited warranty of the original unit. These factory specified parts will ,...us or your correspondence. This limited warranty is used to obtain service or replacement under this microwave is required to build every new KITCHENAID® appliance. For further assistance If you need further assistance, you still need to ...
.../ Stainless 30" (76.2 cm) MK2160AW / White MK2160AB / Black MK2160AS / Stainless *The built-in your nearest KitchenAid designated service center. KITCHENAID® COUNTERTOP MICROWAVE LIMITED WARRANTY ONE YEAR LIMITED WARRANTY For one -year limited warranty of the original unit. These factory specified parts will ,...us or your correspondence. This limited warranty is used to obtain service or replacement under this microwave is required to build every new KITCHENAID® appliance. For further assistance If you need further assistance, you still need to ...

Warranty Information
Page 2
... electrical or plumbing codes, or use or when it . You must be responsible for future reference. Please include your authorized KitchenAid dealer to microwave product failure. 8. You will not be shipped to correct house wiring or plumbing. 2. TM AFFRESH is used in materials ...and is void if the factory applied serial number has been altered or removed from the date of ownership: 1. The microwave should cease to a KitchenAid designated service center. LIMITATION OF REMEDIES; In the U.S.A call 1-800-807-6777. 10/11 Keep this limitation may ...
... electrical or plumbing codes, or use or when it . You must be responsible for future reference. Please include your authorized KitchenAid dealer to microwave product failure. 8. You will not be shipped to correct house wiring or plumbing. 2. TM AFFRESH is used in materials ...and is void if the factory applied serial number has been altered or removed from the date of ownership: 1. The microwave should cease to a KitchenAid designated service center. LIMITATION OF REMEDIES; In the U.S.A call 1-800-807-6777. 10/11 Keep this limitation may ...

Installation Guide
Page 1
... are very important. W10532204A This is , tell you don't immediately follow the safety alert symbol and either the word "DANGER" or "WARNING." MICROWAVE OVEN BUILT-IN TRIM KIT INSTALLATION INSTRUCTIONS Built-In Trim Kit Models MK2167, MK2160 UL listed for use over any electric or gas built-in...9 Préparation de l'ouverture d'encastrement 10 Installation du four à micro-ondes 11 Installation du cadre de la trousse de garniture 12 MICROWAVE OVEN SAFETY Your safety and the safety of injury, and tell you what the potential hazard is the safety alert symbol.
... are very important. W10532204A This is , tell you don't immediately follow the safety alert symbol and either the word "DANGER" or "WARNING." MICROWAVE OVEN BUILT-IN TRIM KIT INSTALLATION INSTRUCTIONS Built-In Trim Kit Models MK2167, MK2160 UL listed for use over any electric or gas built-in...9 Préparation de l'ouverture d'encastrement 10 Installation du four à micro-ondes 11 Installation du cadre de la trousse de garniture 12 MICROWAVE OVEN SAFETY Your safety and the safety of injury, and tell you what the potential hazard is the safety alert symbol.
Installation Guide
Page 2
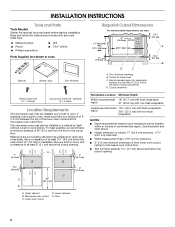
...cm) 23¹⁄₈" (58.7 cm) max. 3" (7.6 cm) D C 1 2.7 cm) B A. Recommended region for lower oven C. Trim kit frame overhang B. The microwave oven may be installed in a cabinet by itself (without a built-in oven. Floor 2" (5.1 cm) 3" (7.6 cm) Receptacle Location Minimum Depth Within recommended 18" (45.7 cm)...■ Depth requirements depend upon receptacle and its location within or outside of 36" (91.4 cm) from lower oven cutout ceiling to microwave oven cutout floor. ■ Trim kit frame extends 1 2.7 cm) above a built-in oven, make sure there is from the...
...cm) 23¹⁄₈" (58.7 cm) max. 3" (7.6 cm) D C 1 2.7 cm) B A. Recommended region for lower oven C. Trim kit frame overhang B. The microwave oven may be installed in a cabinet by itself (without a built-in oven. Floor 2" (5.1 cm) 3" (7.6 cm) Receptacle Location Minimum Depth Within recommended 18" (45.7 cm)...■ Depth requirements depend upon receptacle and its location within or outside of 36" (91.4 cm) from lower oven cutout ceiling to microwave oven cutout floor. ■ Trim kit frame extends 1 2.7 cm) above a built-in oven, make sure there is from the...


