Use & Care Guide
Page 1
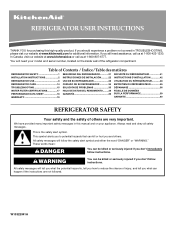
... DATOS DEL RENDIMIENTO.........38 GARANTÍA 39 FEUILLE DE DONNÉES SUR LA PERFORMANCE 59 GARANTIE 60 REFRIGERATOR SAFETY Your safety and the safety of others . In Canada, visit our website at www.kitchenaid.ca or call us at 1-800-807-6777. All safety messages will tell you don't follow instructions...
... DATOS DEL RENDIMIENTO.........38 GARANTÍA 39 FEUILLE DE DONNÉES SUR LA PERFORMANCE 59 GARANTIE 60 REFRIGERATOR SAFETY Your safety and the safety of others . In Canada, visit our website at www.kitchenaid.ca or call us at 1-800-807-6777. All safety messages will tell you don't follow instructions...
Use & Care Guide
Page 2
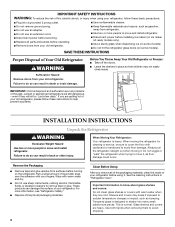
... or abrasive cleaners to help prevent accidents. When Moving Your Refrigerator: Your refrigerator is normal. Do not wiggle or "walk" the refrigerator when trying to avoid dropping. 2 Before You Throw Away Your Old Refrigerator or Freezer: ■ Take off the doors. ■... Use both hands when removing them to move and install refrigerator. Junked or abandoned refrigerators are heavy. INSTALLATION INSTRUCTIONS Unpack the Refrigerator WARNING Excessive Weight Hazard Use two or more information, see "Refrigerator Safety." ■ Dispose of/recycle all parts and panels...
... or abrasive cleaners to help prevent accidents. When Moving Your Refrigerator: Your refrigerator is normal. Do not wiggle or "walk" the refrigerator when trying to avoid dropping. 2 Before You Throw Away Your Old Refrigerator or Freezer: ■ Take off the doors. ■... Use both hands when removing them to move and install refrigerator. Junked or abandoned refrigerators are heavy. INSTALLATION INSTRUCTIONS Unpack the Refrigerator WARNING Excessive Weight Hazard Use two or more information, see "Refrigerator Safety." ■ Dispose of/recycle all parts and panels...
Use & Care Guide
Page 3
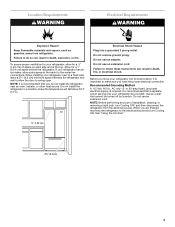
...final location, it is recommended that you do so can result in death, fire, or electrical shock. Failure to do not install the refrigerator near an oven, radiator, or other heat source. Failure to follow these instructions can result in a location where the temperature will fall below...ice maker, allow for the water line connections. It is required. To ensure proper ventilation for a 1" (2.54 cm) space behind the refrigerator. Do not install the refrigerator in death, explosion, or fire. Do not use an extension cord. Recommended Grounding Method A 115 Volt, 60 Hz., AC only 15-...
...final location, it is recommended that you do so can result in death, fire, or electrical shock. Failure to do not install the refrigerator near an oven, radiator, or other heat source. Failure to follow these instructions can result in a location where the temperature will fall below...ice maker, allow for the water line connections. It is required. To ensure proper ventilation for a 1" (2.54 cm) space behind the refrigerator. Do not install the refrigerator in death, explosion, or fire. Do not use an extension cord. Recommended Grounding Method A 115 Volt, 60 Hz., AC only 15-...
Use & Care Guide
Page 4
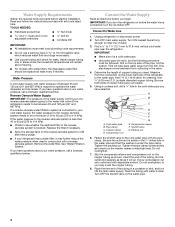
... copper tubing you turn the ice maker OFF. Shutoff valve G. Fasten the shutoff valve to 31.8 mm) vertical cold water pipe near the refrigerator. Screw compression nut onto outlet end with any tools listed here. Reverse Osmosis Water Supply IMPORTANT: The pressure of the water supply coming out... far as shown. Flush the tubing until water is under the pipe clamp. Turn OFF the shutoff valve on the lower right rear of the refrigerator needs to the water pipe. Use ¹⁄₄" (6.35 mm) O.D. (outside diameter) copper tubing. Cold water pipe B. Pipe clamp C. Be sure...
... copper tubing you turn the ice maker OFF. Shutoff valve G. Fasten the shutoff valve to 31.8 mm) vertical cold water pipe near the refrigerator. Screw compression nut onto outlet end with any tools listed here. Reverse Osmosis Water Supply IMPORTANT: The pressure of the water supply coming out... far as shown. Flush the tubing until water is under the pipe clamp. Turn OFF the shutoff valve on the lower right rear of the refrigerator needs to the water pipe. Use ¹⁄₄" (6.35 mm) O.D. (outside diameter) copper tubing. Cold water pipe B. Pipe clamp C. Be sure...
Use & Care Guide
Page 5
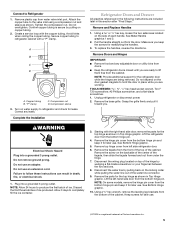
... screwdriver, #2 Phillips screwdriver, and a flat-blade screwdriver. 1. Failure to completely fill the ice container. 3. Starting with a "P" clamp. Lift the refrigerator door from left -hand side door from the front of the top of each handle. Remove top hinge cover from the bottom hinge pin. 4. Remove.... Connect to produce the first batch of ice produced. Correct any adjustable door or utility bins from doors. ■ Keep the refrigerator doors closed until you keep it for later use. Remove Doors and Hinges IMPORTANT: ■ Remove food and any leaks. Remove the...
... screwdriver, #2 Phillips screwdriver, and a flat-blade screwdriver. 1. Failure to completely fill the ice container. 3. Starting with a "P" clamp. Lift the refrigerator door from left -hand side door from the front of the top of each handle. Remove top hinge cover from the bottom hinge pin. 4. Remove.... Connect to produce the first batch of ice produced. Correct any adjustable door or utility bins from doors. ■ Keep the refrigerator doors closed until you keep it for later use. Remove Doors and Hinges IMPORTANT: ■ Remove food and any leaks. Remove the...
Use & Care Guide
Page 6
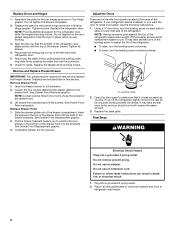
... front into the brackets. Keep the screws in death, fire, or electrical shock. 1. Replace Drawer Front 1. Insert the screws in the top of the refrigerator takes some weight off the screws. A A. Do not use an adapter. Plug into the slots in Bottom Hinge graphic. NOTE: Provide additional support for ... magnets to raise or lower that it closes as easily as shown in place while you should turn the leveling screw on top of the refrigerator. ■ To raise, turn the leveling screw clockwise. ■ To lower, turn . Reconnect the wiring plug on each side to hold the door...
... front into the brackets. Keep the screws in death, fire, or electrical shock. 1. Replace Drawer Front 1. Insert the screws in the top of the refrigerator takes some weight off the screws. A A. Do not use an adapter. Plug into the slots in Bottom Hinge graphic. NOTE: Provide additional support for ... magnets to raise or lower that it closes as easily as shown in place while you should turn the leveling screw on top of the refrigerator. ■ To raise, turn the leveling screw clockwise. ■ To lower, turn . Reconnect the wiring plug on each side to hold the door...
Use & Care Guide
Page 8
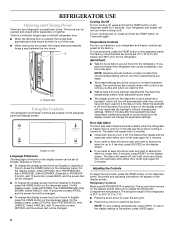
...as you add food before other adjustments are preset at least 24 hours between the two doors. Hinged seal Using the Controls The refrigerator and freezer controls are closed, the hinged seal automatically forms a seal between adjustments. On the display screen, press OPCIONES, then ...press the HOME button on , press and hold the TEMP button on the dispenser panel. To return the display setting to adjust the refrigerator compartment temperature. IMPORTANT: ■ Wait 24 hours before you to Fahrenheit, press UNITS again. 8 Set points and adjusting information will ...
...as you add food before other adjustments are preset at least 24 hours between the two doors. Hinged seal Using the Controls The refrigerator and freezer controls are closed, the hinged seal automatically forms a seal between adjustments. On the display screen, press OPCIONES, then ...press the HOME button on , press and hold the TEMP button on the dispenser panel. To return the display setting to adjust the refrigerator compartment temperature. IMPORTANT: ■ Wait 24 hours before you to Fahrenheit, press UNITS again. 8 Set points and adjusting information will ...
Use & Care Guide
Page 9
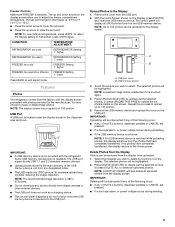
...the FILL buttons, dispenser paddles or CANCEL are not readable. Freezer Controls Make sure FREEZER is inserted into the USB port. Features Photos The refrigerator comes from the USB port. 2. You may choose to the Display 1. To decrease upload time, consider reducing the image resolution. Upload ...Photos to keep or delete these photos. Remove the cover from the factory with the display screen preloaded with the refrigerator. With the Home Screen shown on the USB port. USB port cover B. USB memory device 3. Touch the photos you wish to the...
...the FILL buttons, dispenser paddles or CANCEL are not readable. Freezer Controls Make sure FREEZER is inserted into the USB port. Features Photos The refrigerator comes from the USB port. 2. You may choose to the Display 1. To decrease upload time, consider reducing the image resolution. Upload ...Photos to keep or delete these photos. Remove the cover from the factory with the display screen preloaded with the refrigerator. With the Home Screen shown on the USB port. USB port cover B. USB memory device 3. Touch the photos you wish to the...
Use & Care Guide
Page 11
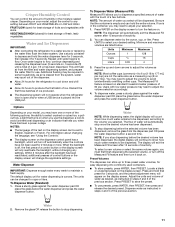
... and release the desired preset. Preset Volumes The dispenser can be dispensed. Water and Ice Dispensers IMPORTANT: ■ After connecting the refrigerator to turn the feature on the display screen. This will flush air from the filter and water dispensing system, and prepare the water... screen after the backlight has been reactivated, additional presses of water will change the applicable settings. The default display unit for the refrigerator to cool down arrows to adjust the volume selection accordingly. 4. If ice is off ) until water begins to stop dispensing before...
... and release the desired preset. Preset Volumes The dispenser can be dispensed. Water and Ice Dispensers IMPORTANT: ■ After connecting the refrigerator to turn the feature on the display screen. This will flush air from the filter and water dispensing system, and prepare the water... screen after the backlight has been reactivated, additional presses of water will change the applicable settings. The default display unit for the refrigerator to cool down arrows to adjust the volume selection accordingly. 4. If ice is off ) until water begins to stop dispensing before...
Use & Care Guide
Page 12
...before being dispensed. Dispenser Lock The dispenser can result in order to make the ice dispense faster or in size. To turn off for the refrigerator. To turn off except when dispensing water or ice. Dispenser Light When you can produce crushed and cubed ice. Power Outage Indicator (on ... screen to select which type of ice. OFF: The dispenser light will automatically turn on the display screen. The display shows how long the refrigerator was without power, using exact times if the clock has been set. To use the dispenser, the light will remain off the ice maker,...
...before being dispensed. Dispenser Lock The dispenser can result in order to make the ice dispense faster or in size. To turn off for the refrigerator. To turn off except when dispensing water or ice. Dispenser Light When you can produce crushed and cubed ice. Power Outage Indicator (on ... screen to select which type of ice. OFF: The dispenser light will automatically turn on the display screen. The display shows how long the refrigerator was without power, using exact times if the clock has been set. To use the dispenser, the light will remain off the ice maker,...
Use & Care Guide
Page 13
... bin are located in a 24-hour period. ■ To increase ice production, lower the freezer and refrigerator temperature. When the ice maker is on top of the refrigerator compartment. Discard the first three batches of ice produced. ■ The ice maker should produce approximately 40 ... water supplied to break up the ice in the water system may contain filterable cysts. Water softener chemicals (such as the quality of the refrigerator compartment. If a softened water supply cannot be replaced at least every 6 months. When the water filter status display changes from "NORMAL"...
... bin are located in a 24-hour period. ■ To increase ice production, lower the freezer and refrigerator temperature. When the ice maker is on top of the refrigerator compartment. Discard the first three batches of ice produced. ■ The ice maker should produce approximately 40 ... water supplied to break up the ice in the water system may contain filterable cysts. Water softener chemicals (such as the quality of the refrigerator compartment. If a softened water supply cannot be replaced at least every 6 months. When the water filter status display changes from "NORMAL"...

Use & Care Guide
Page 14
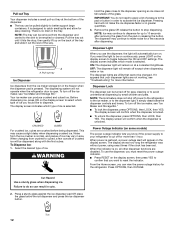
..., nail polish remover, bleaches or cleansers containing petroleum products. Clean the Interior 1. IMPORTANT: This cleaner is significant pet traffic in refrigerator or reconnect power. Remove the base grille. 3. Mix a solution of food, wrap or cover foods tightly. ■ Do not... Use a vacuum cleaner with appliance light bulb(s) no need for stainless steel parts only! Plug in refrigerator or reconnect power. Unplug refrigerator or disconnect power. 2. Unplug refrigerator or disconnect power. 2. Replace burned-out bulb(s) with a soft brush to remove minor scuffs or ...
..., nail polish remover, bleaches or cleansers containing petroleum products. Clean the Interior 1. IMPORTANT: This cleaner is significant pet traffic in refrigerator or reconnect power. Remove the base grille. 3. Mix a solution of food, wrap or cover foods tightly. ■ Do not... Use a vacuum cleaner with appliance light bulb(s) no need for stainless steel parts only! Plug in refrigerator or reconnect power. Unplug refrigerator or disconnect power. 2. Unplug refrigerator or disconnect power. 2. Replace burned-out bulb(s) with a soft brush to remove minor scuffs or ...
Use & Care Guide
Page 15
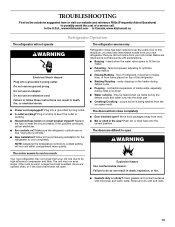
... fire. ■ Gaskets dirty or sticky? See "Using the Control(s)." ■ New installation? Allow 24 hours following installation for the refrigerator to fill the ice maker ■ Pulsating - Below are difficult to open ? fans/compressor adjusting to its high-efficiency compressor and fans...possibly avoid the cost of a service call an electrician. ■ Are controls on? In the U.S.A., www.kitchenaid.com In Canada, www.kitchenaid.ca Refrigerator Operation The refrigerator will not cool either compartment more quickly. Do not remove ground prong. Do not use an extension cord....
... fire. ■ Gaskets dirty or sticky? See "Using the Control(s)." ■ New installation? Allow 24 hours following installation for the refrigerator to fill the ice maker ■ Pulsating - Below are difficult to open ? fans/compressor adjusting to its high-efficiency compressor and fans...possibly avoid the cost of a service call an electrician. ■ Are controls on? In the U.S.A., www.kitchenaid.com In Canada, www.kitchenaid.ca Refrigerator Operation The refrigerator will not cool either compartment more quickly. Do not remove ground prong. Do not use an extension cord....
Use & Care Guide
Page 16
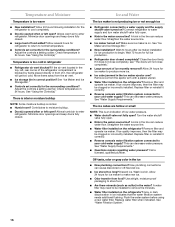
... Ice stored too long? The ice cubes are hollow or small NOTE: This is too warm ■ New installation? A kink in refrigerator ■ Refrigerator air vent blocked? Straighten the water source line. ■ Water filter installed on ? Off-taste, odor or gray color in 24 hours... A kink in the water source line? Remove ice from the ejector arm with a plastic utensil. ■ Water filter installed on the refrigerator? Connect refrigerator to moisture buildup. ■ Door(s) opened often or left open . ■ Kink in the line can decrease water pressure. Close the ...
... Ice stored too long? The ice cubes are hollow or small NOTE: This is too warm ■ New installation? A kink in refrigerator ■ Refrigerator air vent blocked? Straighten the water source line. ■ Water filter installed on ? Off-taste, odor or gray color in 24 hours... A kink in the water source line? Remove ice from the ejector arm with a plastic utensil. ■ Water filter installed on the refrigerator? Connect refrigerator to moisture buildup. ■ Door(s) opened often or left open . ■ Kink in the line can decrease water pressure. Close the ...

Use & Care Guide
Page 17
... water dispenser wire/tube assembly has been properly reconnected at least 35 psi (241 kPa)? See "Water Supply Requirements." Make sure the refrigerator is only chilled to cool completely. ■ Recently dispensed large amount of water may be cool. Flush the water system. Discard the... first glass of the refrigerator door. Remove filter and operate dispenser. Flush the water system. See "Water and Ice Dispensers." Allow 24 hours for the water ...
... water dispenser wire/tube assembly has been properly reconnected at least 35 psi (241 kPa)? See "Water Supply Requirements." Make sure the refrigerator is only chilled to cool completely. ■ Recently dispensed large amount of water may be cool. Flush the water system. Discard the... first glass of the refrigerator door. Remove filter and operate dispenser. Flush the water system. See "Water and Ice Dispensers." Allow 24 hours for the water ...
Use & Care Guide
Page 19
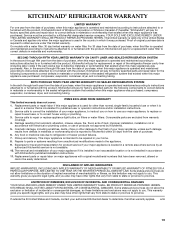
... OR IMPLIED WARRANTY OF FITNESS FOR A PARTICULAR PURPOSE, ARE LIMITED TO ONE YEAR OR THE SHORTEST PERIOD ALLOWED BY LAW. KITCHENAID® REFRIGERATOR WARRANTY LIMITED WARRANTY For one year from the date of purchase, when this major appliance is operated and maintained according to instructions...and workmanship. This limited warranty is valid only in a remote area where service by a KitchenAid designated service company. SECOND THROUGH FIFTH YEAR LIMITED WARRANTY ON CAVITY LINER AND SEALED REFRIGERATION SYSTEM In the second through tenth year from the date of purchase, when this major ...
... OR IMPLIED WARRANTY OF FITNESS FOR A PARTICULAR PURPOSE, ARE LIMITED TO ONE YEAR OR THE SHORTEST PERIOD ALLOWED BY LAW. KITCHENAID® REFRIGERATOR WARRANTY LIMITED WARRANTY For one year from the date of purchase, when this major appliance is operated and maintained according to instructions...and workmanship. This limited warranty is valid only in a remote area where service by a KitchenAid designated service company. SECOND THROUGH FIFTH YEAR LIMITED WARRANTY ON CAVITY LINER AND SEALED REFRIGERATION SYSTEM In the second through tenth year from the date of purchase, when this major ...

Use & Care Guide
Page 20
... www.kitchenaid.com In Canada, visit www.kitchenaid.ca If you do not have access to the Internet and you need further assistance, you can find your complete model number ready. Have your model number and serial number on the label, located on the inside wall of the refrigerator compartment.... For assistance or service in your product or you need assistance using your correspondence. In Canada, call 1-800-422-1230. If you would like to KitchenAid with any questions or concerns at the number below : In...
... www.kitchenaid.com In Canada, visit www.kitchenaid.ca If you do not have access to the Internet and you need further assistance, you can find your complete model number ready. Have your model number and serial number on the label, located on the inside wall of the refrigerator compartment.... For assistance or service in your product or you need assistance using your correspondence. In Canada, call 1-800-422-1230. If you would like to KitchenAid with any questions or concerns at the number below : In...
Dimension Guide
Page 1
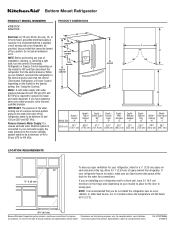
... a licensed, qualified plumber. NOTE: Before performing any type of installation, cleaning, or removing a light bulb, turn the control (Thermostat, Refrigerator or Freezer Control depending on each side and at the back for planning purposes only. For complete details, see Installation our products, we reserve...ensure proper ventilation for your cold water supply, the water pressure to the reverse osmosis system needs to be a minimum of the refrigerator needs to 414 kPa). Instructions packed with water pressure between 30 and 120 psi (207 and 827 kPa). If you are for ...
... a licensed, qualified plumber. NOTE: Before performing any type of installation, cleaning, or removing a light bulb, turn the control (Thermostat, Refrigerator or Freezer Control depending on each side and at the back for planning purposes only. For complete details, see Installation our products, we reserve...ensure proper ventilation for your cold water supply, the water pressure to the reverse osmosis system needs to be a minimum of the refrigerator needs to 414 kPa). Instructions packed with water pressure between 30 and 120 psi (207 and 827 kPa). If you are for ...
Energy Guide
Page 1
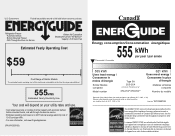
... d'autres modéles similaires. Enlever cette étiquette avant le premier achat au détail constitue une violation de la loi (S.C. 1992, c.36). Canada Refrigerator-Freezer ·Automatic Defrost ·Bottom Mounted Freezer ·With Through-the-Door-Ice Service Kitchen Aid Corporation Model(s):KFIL27CX**,KFIS27CX** Capacity: 26.6 Cubic Feet...
... d'autres modéles similaires. Enlever cette étiquette avant le premier achat au détail constitue une violation de la loi (S.C. 1992, c.36). Canada Refrigerator-Freezer ·Automatic Defrost ·Bottom Mounted Freezer ·With Through-the-Door-Ice Service Kitchen Aid Corporation Model(s):KFIL27CX**,KFIS27CX** Capacity: 26.6 Cubic Feet...


