KitchenAid KCG0799SX Support and Manuals
Get Help and Manuals for this KitchenAid item

View All Support Options Below
Free KitchenAid KCG0799SX manuals!
Problems with KitchenAid KCG0799SX?
Ask a Question
Free KitchenAid KCG0799SX manuals!
Problems with KitchenAid KCG0799SX?
Ask a Question
Popular KitchenAid KCG0799SX Manual Pages
Use & Care Guide - Page 3
...Service ...parts.
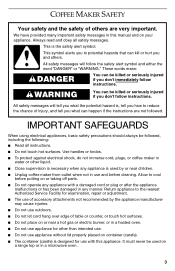
■ Do not operate any manner. IMPORTANT SAFEGUARDS
When using electrical appliances, basic safety precautions should always be killed or seriously injured if you don't follow instructions.... COFFEE MAKER SAFETY
Your safety and the safety of injury, and tell you what the potential hazard is used on a range top or in any appliance with this manual... repair ...
Use & Care Guide - Page 4
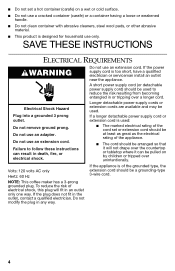
...9632; The marked electrical rating of the cord set a hot container (carafe) on by children or tripped over a longer cord. If the plug does not fit in any way.
4
Failure to follow these instructions can be used to reduce the risk resulting from..., or other abrasive material.
■ This product is too short, have a qualified electrician or serviceman install an outlet near the appliance.
Use & Care Guide - Page 5
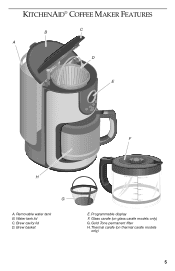
Removable water tank B. Programmable display F. Thermal carafe (on glass carafe models only) G. Brew cavity lid D. Glass carafe (on thermal carafe models
only)
5 Water tank lid C. Brew basket
E. Gold Tone permanent filter H. KITCHENAID® COFFEE MAKER FEATURES
B
C
A
D
E
F
H
G
A.
Use & Care Guide - Page 6
... be hand washed.
6
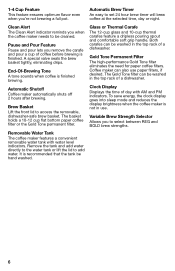
Coffee maker can be washed in the top rack of a dishwasher.
1-4 Cup Feature
This feature ensures optimum flavor even when you to set 24 hour brew timer will brew coffee at the selected time, day or night. Automatic Brew Timer
An easy to select between REG and BOLD...
Use & Care Guide - Page 7
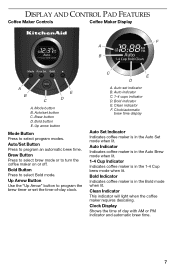
...Indicator This indicator will light when the coffee maker requires descaling. Mode button B. Auto/Set Button Press to select Bold mode. Bold Button Press to program an automatic brew time...maker is in the Auto Brew mode when lit. 1-4 Cup Indicator Indicates coffee maker is in the Auto Set mode when lit. DISPLAY AND CONTROL PAD FEATURES
Coffee Maker Controls
Coffee Maker Display
F A
B
A B...
Use & Care Guide - Page 9
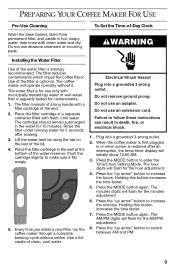
...to increase the minutes. Holding this button increases the time faster. 5. To Set the Time-of-Day Clock
WARNING
Installing the Water Filter
Use of the water reservoir. The filter consists of the filter...the tab on the rear of clean, cool water. Push the cartridge slightly to follow these instructions can result in death, fire, or electrical shock.
1. Press the MODE button to increase ...
Use & Care Guide - Page 10
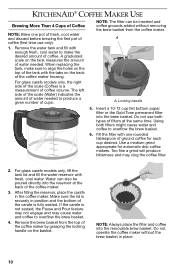
...10 NOTE: Always place the filter and coffee into the brew basket. A
1.
Locking handle
5.
When replacing the tank, make the desired amount of filters at the back of cups. The left side of the... coffee maker.
3. Use a medium grind appropriate for each cup desired. A. For glass carafe models only, lift the tank lid and fill the water reservoir with the tabs on the back of...
Use & Care Guide - Page 11
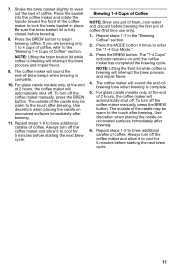
...models only, at the end of 2 hours, the coffee maker will automatically shut off the coffee maker and allow it to cool for 5 minutes before brewing.
8. Always turn off the coffee maker manually...maker has completed the brewing cycle. To turn off .
Always turn off the coffee maker manually, press the BREW button. The outside of the coffee maker to brew additional carafes of...
Use & Care Guide - Page 12

... feature enables you to remove the carafe from the brew basket.
Press the AUTO SET button.
Once the set brew time is complete to turn off . If desired, press the BREW button after... "up arrow" button to increase the hours. Press the AUTO SET button. Press the AUTO SET button to enter the Auto Brew setting mode. NOTE: The warming plate is complete to increase the minutes...
Use & Care Guide - Page 13
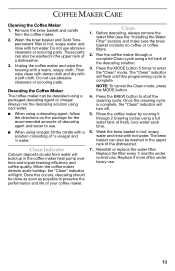
...the coffee maker heat pump over time and impair brewing efficiency and coffee quality.
These parts can also be washed in the upper rack of your coffee maker. Unplug the coffee ..., always remove the water filter (see the "Installing the Water Filter" section) and make sure the brew basket contains no coffee or coffee filters.
2. Replace it through a complete Clean cycle using a packaged...
Use & Care Guide - Page 14
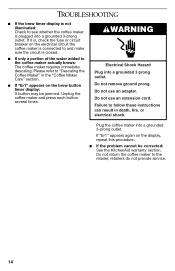
...Plug into a grounded 3-prong outlet. Failure to follow these instructions can result in the "Coffee Maker Care" section.
■... may be corrected: See the KitchenAid warranty section. TROUBLESHOOTING
■ If the brew timer display is not ... repeat this procedure.
■ If the problem cannot be jammed. If "Er1" appears again...do not provide service.
14 If it is plugged into a grounded...
Use & Care Guide - Page 15
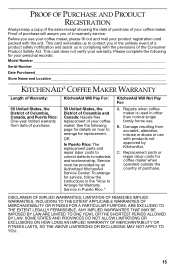
... complete the following page for service, follow the instructions in the "How to contact you of the Consumer Product Safety Act. B.
Damage resulting from date of your coffee maker. DISCLAIMER OF IMPLIED WARRANTIES; OR
In Puerto Rico: The replacement parts and repair labor costs to arrange for your personal records:
Model Number
Serial Number
Date Purchased...
Use & Care Guide - Page 16
... to receive this highquality service.
instructions to
KitchenAid Service Center. Mississauga, ON L5N 0B7
How to obtain satisfactory service in this high-quality
...Service Centre. In the
ownership, KitchenAid Canada will also be
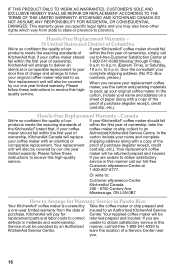
replacement parts and labor costs to 5 p.m. IF THIS PRODUCT FAILS TO WORK AS WARRANTED, CUSTOMER'S SOLE AND EXCLUSIVE REMEDY SHALL BE REPAIR OR REPLACEMENT...
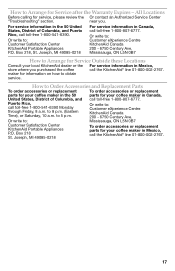
Use & Care Guide - Page 17
...
To order accessories or replacement parts for Service Outside these Locations
Consult your local KitchenAid dealer or the For service information in the 50 United States, District of Columbia, and call toll-free 1-800-541-6390.
Or write to 5 p.m.
to Arrange for service, please review the Or contact an Authorized Service Center
"Troubleshooting" section. How to 8 p.m. (Eastern...
KitchenAid KCG0799SX Reviews
We have not received any reviews for KitchenAid yet.