Instruction Manual
Page 2
... Scroll HD Radio control features 17 About HD Radio Tuning Menu system 18 Menu System Activating Security Code Deactivating Security Code Touch Sensor Tone Manual Clock Adjustment DSI (Disabled System Indicator) Display Illumination Control Dimmer Switching preout Supreme Setting CRSC (Clean Reception System Circuit) Receive mode Setting SIRIUS ID (ESN) display...
... Scroll HD Radio control features 17 About HD Radio Tuning Menu system 18 Menu System Activating Security Code Deactivating Security Code Touch Sensor Tone Manual Clock Adjustment DSI (Disabled System Indicator) Display Illumination Control Dimmer Switching preout Supreme Setting CRSC (Clean Reception System Circuit) Receive mode Setting SIRIUS ID (ESN) display...
Instruction Manual
Page 7
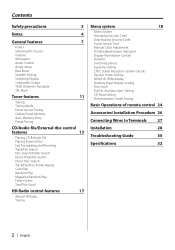
Press the [ATT] button. Each time you press the button, the Attenuator turns ON and OFF. General features ATT VOL Release button B.BOOST Clock display FM AM SRC Control knob BOOST indicator ATT indicator Power Turning ON the Power Press the [SRC] button. Volume Increasing Volume Turn the [VOL] ...
Press the [ATT] button. Each time you press the button, the Attenuator turns ON and OFF. General features ATT VOL Release button B.BOOST Clock display FM AM SRC Control knob BOOST indicator ATT indicator Power Turning ON the Power Press the [SRC] button. Volume Increasing Volume Turn the [VOL] ...
Instruction Manual
Page 9
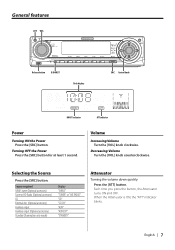
...name Composer name Category name Label name Comment Band & Channel number Clock Display "CH NAME" "SONG" "ARTIST" "COMPOSER" "CATEGORY" "LABEL" "COMMENT" "CH NUM" "CLOCK" In Standby/ Auxiliary input source Information Source name Clock Display "SRC NAME" "CLOCK" 3 Exit Switching Display mode Press the Control knob. ⁄...6x9 in . English | 9 Speaker type OFF For 5 & 4 in . Each time you select the clock display, the display setting of each source will be changed to the clock display. • Album name cannot be displayed in the table below. speaker For the OEM speaker Display "SP...
...name Composer name Category name Label name Comment Band & Channel number Clock Display "CH NAME" "SONG" "ARTIST" "COMPOSER" "CATEGORY" "LABEL" "COMMENT" "CH NUM" "CLOCK" In Standby/ Auxiliary input source Information Source name Clock Display "SRC NAME" "CLOCK" 3 Exit Switching Display mode Press the Control knob. ⁄...6x9 in . English | 9 Speaker type OFF For 5 & 4 in . Each time you select the clock display, the display setting of each source will be changed to the clock display. • Album name cannot be displayed in the table below. speaker For the OEM speaker Display "SP...
Instruction Manual
Page 18
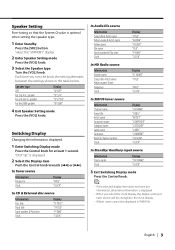
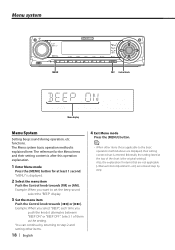
Select 1 of the chart is entered. (Normally the setting listed at least 1 second. functions. The reference for the Menu items and their setting content chart is the original setting.) Also, the explanation for at the top of them as the setting. Example: When you push the knob it alternates between "BEEP ON" or "BEEP OFF". "MENU" is explained here. You can continue by returning to step 2 and setting other items. 18 | English 4 Exit Menu mode Press the [MENU] button. ⁄ • When other items those applicable to set the beep sound select the "BEEP" display. 3 Set the ...
Select 1 of the chart is entered. (Normally the setting listed at least 1 second. functions. The reference for the Menu items and their setting content chart is the original setting.) Also, the explanation for at the top of them as the setting. Example: When you push the knob it alternates between "BEEP ON" or "BEEP OFF". "MENU" is explained here. You can continue by returning to step 2 and setting other items. 18 | English 4 Exit Menu mode Press the [MENU] button. ⁄ • When other items those applicable to set the beep sound select the "BEEP" display. 3 Set the ...
Instruction Manual
Page 20
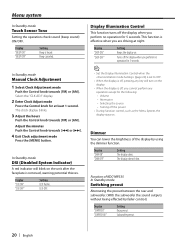
...any key will blink on the unit after the faceplate is effective when you perform no operation for at night. In Standby mode Manual Clock Adjustment 1 Select Clock Adjustment mode Push the Control knob towards [FM] or [AM]. LED OFF. Display "DISP ON" "DISP OFF" Setting Keeps ..."CLK ADJ" display. 2 Enter Clock Adjust mode Press the Control knob for 5 seconds. In Standby mode DSI (Disabled System Indicator) A red indicator will turn on the display. • When the display is heard. Dimmer You can lower the brightness of KDC-MP335 In Standby mode Switching preout Alternating ...
...any key will blink on the unit after the faceplate is effective when you perform no operation for at night. In Standby mode Manual Clock Adjustment 1 Select Clock Adjustment mode Push the Control knob towards [FM] or [AM]. LED OFF. Display "DISP ON" "DISP OFF" Setting Keeps ..."CLK ADJ" display. 2 Enter Clock Adjust mode Press the Control knob for 5 seconds. In Standby mode DSI (Disabled System Indicator) A red indicator will turn on the display. • When the display is heard. Dimmer You can lower the brightness of KDC-MP335 In Standby mode Switching preout Alternating ...


