Instruction Manual
Page 1
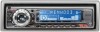
Familiarity with installation and operation procedures will help you call upon your KENWOOD dealer for information or service on the warranty card, and in the space provided below. Refer to read through this instruction manual. For your new CD-receiver. Model KDC-3025/KDC-325 Serial number © B64-2694-00/00 (KW/KN) KDC-3025 KDC-325 CD-RECEIVER INSTRUCTION MANUAL AMPLI-TUNER LECTEUR DE CD MODE D'EMPLOI REPRODUCTOR DE DISCOS COMPACTOS RECEPTOR DE...
Familiarity with installation and operation procedures will help you call upon your KENWOOD dealer for information or service on the warranty card, and in the space provided below. Refer to read through this instruction manual. For your new CD-receiver. Model KDC-3025/KDC-325 Serial number © B64-2694-00/00 (KW/KN) KDC-3025 KDC-325 CD-RECEIVER INSTRUCTION MANUAL AMPLI-TUNER LECTEUR DE CD MODE D'EMPLOI REPRODUCTOR DE DISCOS COMPACTOS RECEPTOR DE...
Instruction Manual
Page 2
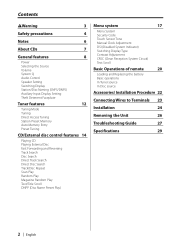
... 8 Power Selecting the Source Volume System Q Audio Control Speaker Setting Switching Display Station/Disc Naming (SNPS/DNPS) Auxiliary Input Display Setting Theft Deterrent Faceplate Tuner features 12 Tuning Mode Tuning Direct Access Tuning Station Preset Memory Auto Memory Entry Preset Tuning CD/External disc control features 14 Playing CD Playing External Disc Fast Forwarding and Reversing Track Search Disc Search Direct Track Search Direct Disc Search Track/Disc Repeat Scan Play Random Play Magazine Random Play Text/Title Scroll DNPP (Disc Name Preset Play) Menu system 17 Menu...
... 8 Power Selecting the Source Volume System Q Audio Control Speaker Setting Switching Display Station/Disc Naming (SNPS/DNPS) Auxiliary Input Display Setting Theft Deterrent Faceplate Tuner features 12 Tuning Mode Tuning Direct Access Tuning Station Preset Memory Auto Memory Entry Preset Tuning CD/External disc control features 14 Playing CD Playing External Disc Fast Forwarding and Reversing Track Search Disc Search Direct Track Search Direct Disc Search Track/Disc Repeat Scan Play Random Play Magazine Random Play Text/Title Scroll DNPP (Disc Name Preset Play) Menu system 17 Menu...
Instruction Manual
Page 3
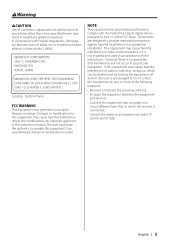
... radio or television reception, which the receiver is no guarantee that to which can be determined by turning the equipment off and on, the user is encouraged to try to correct the interference by one or more of the following are expressly approved in the instruction manual. This equipment may result in hazardous radiation exposure. Location : Bottom Panel...
... radio or television reception, which the receiver is no guarantee that to which can be determined by turning the equipment off and on, the user is encouraged to try to correct the interference by one or more of the following are expressly approved in the instruction manual. This equipment may result in hazardous radiation exposure. Location : Bottom Panel...
Instruction Manual
Page 4
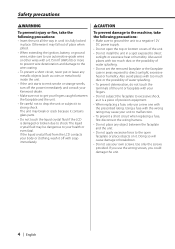
...the power immediately and consult your Kenwood dealer. • Make sure not to get your fingers caught between the faceplate and the unit. • Do not apply excessive force to excessive shock, as it is a piece of precision equipment. • When replacing a fuse, only use automotive-grade wires or other wires with ... possibility of water splashing. • To prevent deterioration, do not touch the terminals of the unit. • Do not install the unit in a spot exposed to direct sunlight or excessive heat or humidity. Safety precautions 2WARNING To prevent injury or fire, take the ...
...the power immediately and consult your Kenwood dealer. • Make sure not to get your fingers caught between the faceplate and the unit. • Do not apply excessive force to excessive shock, as it is a piece of precision equipment. • When replacing a fuse, only use automotive-grade wires or other wires with ... possibility of water splashing. • To prevent deterioration, do not touch the terminals of the unit. • Do not install the unit in a spot exposed to direct sunlight or excessive heat or humidity. Safety precautions 2WARNING To prevent injury or fire, take the ...
Instruction Manual
Page 5
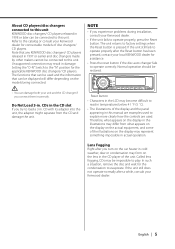
... problems during installation, consult your unit and the CD changer if you connect them incorrectly. Note that can be connected to this unit. Refer to the catalog or consult your local KENWOOD dealer for connectable models of the unit. If the unit still does not operate normally after the Reset button has been pressed, contact your Kenwood dealer for assistance. • Press the reset button if the disc auto changer fails to factory settings...
... problems during installation, consult your unit and the CD changer if you connect them incorrectly. Note that can be connected to this unit. Refer to the catalog or consult your local KENWOOD dealer for connectable models of the unit. If the unit still does not operate normally after the Reset button has been pressed, contact your Kenwood dealer for assistance. • Press the reset button if the disc auto changer fails to factory settings...
Instruction Manual
Page 6
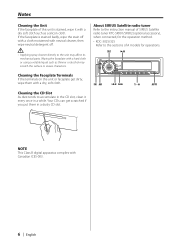
... the CD Slot As dust tends to the unit may scratch the surface or erases characters. About SIRIUS Satellite radio tuner Refer to the instruction manual of SIRIUS Satellite radio tuner KTC-SR901/SR902 (optional accessory), when connected, for the operation method. • KDC-3025/325 Refer to the sections of this unit is ... or alcohol may affect its mechanical parts. Notes Cleaning the Unit If the faceplate of A models for operations. Your CDs can get dirty, wipe them in a while. SRC 38 FM AM SCAN RDM REP M.RDM FM AM 4¢ 1-6 AUTO NOTE This Class B digital apparatus ...
... the CD Slot As dust tends to the unit may scratch the surface or erases characters. About SIRIUS Satellite radio tuner Refer to the instruction manual of SIRIUS Satellite radio tuner KTC-SR901/SR902 (optional accessory), when connected, for the operation method. • KDC-3025/325 Refer to the sections of this unit is ... or alcohol may affect its mechanical parts. Notes Cleaning the Unit If the faceplate of A models for operations. Your CDs can get dirty, wipe them in a while. SRC 38 FM AM SCAN RDM REP M.RDM FM AM 4¢ 1-6 AUTO NOTE This Class B digital apparatus ...

Instruction Manual
Page 8
... time the button is pressed the sound setting switches. 8 | English Volume Increasing Volume Turn the [VOL] knob clockwise. Turning OFF the Power Press the [SRC] button for different types of music. 1 Select the source to set Press the [SRC] button. 2 Select the Sound type Press the [Q] button. Source required SIRIUS tuner (Optional accessory) Tuner CD External disc (Optional accessory) Auxiliary input (Optional accessory) Standby (Illumination only mode) Display "SIRIUS" "TUNER" "CD" "DISC CH"/ "CD2" "AUX1" "ALL OFF" System Q You can recall the best sound setting preset...
... time the button is pressed the sound setting switches. 8 | English Volume Increasing Volume Turn the [VOL] knob clockwise. Turning OFF the Power Press the [SRC] button for different types of music. 1 Select the source to set Press the [SRC] button. 2 Select the Sound type Press the [Q] button. Source required SIRIUS tuner (Optional accessory) Tuner CD External disc (Optional accessory) Auxiliary input (Optional accessory) Standby (Illumination only mode) Display "SIRIUS" "TUNER" "CD" "DISC CH"/ "CD2" "AUX1" "ALL OFF" System Q You can recall the best sound setting preset...

Instruction Manual
Page 9
.../OFF Speaker Setting Fine-tuning so that can be adjusted switch as shown below . 4 Adjust the Audio item Press the [4] or [¢] button. English | 9 Sound setting Flat User memory Rock Pops Easy Top 40 Jazz Display "FLAT" "USER" "ROCK" "POPS" "EASY" "TOP 40" "JAZZ" • User memory: The values set as a difference from the basic volume. • Loudness: Compensating for adjustment Press the [FM] or [AM] button. Audio Control 1 Select the source for adjustment Press...
.../OFF Speaker Setting Fine-tuning so that can be adjusted switch as shown below . 4 Adjust the Audio item Press the [4] or [¢] button. English | 9 Sound setting Flat User memory Rock Pops Easy Top 40 Jazz Display "FLAT" "USER" "ROCK" "POPS" "EASY" "TOP 40" "JAZZ" • User memory: The values set as a difference from the basic volume. • Loudness: Compensating for adjustment Press the [FM] or [AM] button. Audio Control 1 Select the source for adjustment Press...
Instruction Manual
Page 10
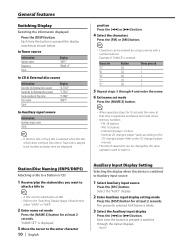
... CD. 1 Receive/play time are displayed. Each time the button is pressed the display switches as shown below displays. • "AUX1" General features Switching Display Switching the information displayed. position Press the [4] or [¢] button. 4 Select the characters Press the [FM] or [AM] button. • Characters can be changed by using a remote with a number buttons. The presently selected AUX Name is entered. Example: If "DANCE" is blinks. 3 Select the Auxiliary input display Press the [4] or [¢] button. In Tuner source Information Station...
... CD. 1 Receive/play time are displayed. Each time the button is pressed the display switches as shown below displays. • "AUX1" General features Switching Display Switching the information displayed. position Press the [4] or [¢] button. 4 Select the characters Press the [FM] or [AM] button. • Characters can be changed by using a remote with a number buttons. The presently selected AUX Name is entered. Example: If "DANCE" is blinks. 3 Select the Auxiliary input display Press the [4] or [¢] button. In Tuner source Information Station...
Instruction Manual
Page 12
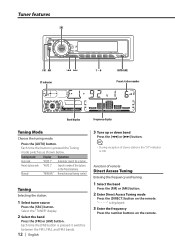
..."- - - -" is displayed. 3 Enter the frequency Press the number buttons on the remote. Each time the button is ON. Manual "MANUAL" Normal manual tuning control. Preset station seek "AUTO 2" Search in the Preset memory. Function of the stations in order of remote Direct Access Tuning Entering the frequency and tuning. 1 Select the band Press the [FM] or [AM] button. 2 Enter Direct Access Tuning mode Press the [DIRECT] button on the remote. Tuning Selecting the station. 1 Select tuner source Press the [SRC] button. Each time the [FM] button is pressed it switches between the...
..."- - - -" is displayed. 3 Enter the frequency Press the number buttons on the remote. Each time the button is ON. Manual "MANUAL" Normal manual tuning control. Preset station seek "AUTO 2" Search in the Preset memory. Function of the stations in order of remote Direct Access Tuning Entering the frequency and tuning. 1 Select the band Press the [FM] or [AM] button. 2 Enter Direct Access Tuning mode Press the [DIRECT] button on the remote. Tuning Selecting the station. 1 Select tuner source Press the [SRC] button. Each time the [FM] button is pressed it switches between the...

Instruction Manual
Page 15
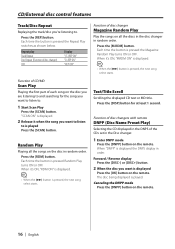
... the number buttons on the remote. 2 Do Disc Search Press the [DISC+] or [DISC-] button. Reversing Hold down on the external disc players being connected. Press the [4] or [¢] button. Canceling Direct Disc Search Press the [38] button. • Input "0" to play Press the [38] button. Playing External Disc Playing discs set in the optional accessory disc player connected to hear. Display examples: Display "CD2" "DISC CH" Disc player CD player CD changer/ MD changer Pause and play the disc at that point. Function of disc changer Disc Search Selecting the disc you...
... the number buttons on the remote. 2 Do Disc Search Press the [DISC+] or [DISC-] button. Reversing Hold down on the external disc players being connected. Press the [4] or [¢] button. Canceling Direct Disc Search Press the [38] button. • Input "0" to play Press the [38] button. Playing External Disc Playing discs set in the optional accessory disc player connected to hear. Display examples: Display "CD2" "DISC CH" Disc player CD player CD changer/ MD changer Pause and play the disc at that point. Function of disc changer Disc Search Selecting the disc you...
Instruction Manual
Page 16
.... CD/External disc control features Track/Disc Repeat Replaying the track/disc you want is displayed Press the [OK] button on the remote. Each time the button is played. Press the [M.RDM] button. Canceling the DNPP mode Press the [DNPP] button on the disc in order. Repeat play Track Repeat Disc Repeat (Function of disc changer) OFF Display "(T-)REP ON" "D-REP ON" "REP OFF" Function of CD/MD Scan Play Playing the first part of the CDs set...
.... CD/External disc control features Track/Disc Repeat Replaying the track/disc you want is displayed Press the [OK] button on the remote. Each time the button is played. Press the [M.RDM] button. Canceling the DNPP mode Press the [DNPP] button on the disc in order. Repeat play Track Repeat Disc Repeat (Function of disc changer) OFF Display "(T-)REP ON" "D-REP ON" "REP OFF" Function of CD/MD Scan Play Playing the first part of the CDs set...
Instruction Manual
Page 18
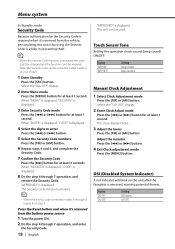
... [¢] button for at least 1 second. The Security Code function activates. • When the wrong Code is removed, warning potential thieves. Display "DSI ON" "DSI OFF" Setting LED flashes. The unit can be released. Touch Sensor Tone Setting the operation check sound (beep sound) ON/OFF. Menu system In Standby mode Security Code Because authorization by using the Security Code is a help in steps 4 through 6, repeat from the battery power source 1 Turn the power ON...
... [¢] button for at least 1 second. The Security Code function activates. • When the wrong Code is removed, warning potential thieves. Display "DSI ON" "DSI OFF" Setting LED flashes. The unit can be released. Touch Sensor Tone Setting the operation check sound (beep sound) ON/OFF. Menu system In Standby mode Security Code Because authorization by using the Security Code is a help in steps 4 through 6, repeat from the battery power source 1 Turn the power ON...

Instruction Manual
Page 19
... reception switched from power lines) may cause unstable sound quality when CRSC is OFF. • Strong electrical fields (such as from stereo to mono to reduce multi-path noise when listening to the FM station. Display and Setting "CONT 0" "CONT 7" (Original setting) ... Display "SCL AUTO" "SCL MANU" Setting Repeats scroll. MD title - Text for the SIRIUS tuner source, including Channel name, etc. Switching Display Type Setting the Display type. Display...
... reception switched from power lines) may cause unstable sound quality when CRSC is OFF. • Strong electrical fields (such as from stereo to mono to reduce multi-path noise when listening to the FM station. Display and Setting "CONT 0" "CONT 7" (Original setting) ... Display "SCL AUTO" "SCL MANU" Setting Repeats scroll. MD title - Text for the SIRIUS tuner source, including Channel name, etc. Switching Display Type Setting the Display type. Display...

Instruction Manual
Page 20
... operations [VOL.] buttons Adjusting the volume. [SRC] button Each time the button is pressed again it is pressed the source switches. Basic Operations of children. For the source switching order refer to the previous level. 2WARNING • Store unused batteries out of the reach of remote VOL. When it returns to 'Selecting the Source' (page 8). [ATT] button Turning the volume down quickly. DNPP Not Used [0] - [9] SRC ATT VOL. 38 FM+ DISC 4 AM- ¢ DNPP DIRECT...
... operations [VOL.] buttons Adjusting the volume. [SRC] button Each time the button is pressed again it is pressed the source switches. Basic Operations of children. For the source switching order refer to the previous level. 2WARNING • Store unused batteries out of the reach of remote VOL. When it returns to 'Selecting the Source' (page 8). [ATT] button Turning the volume down quickly. DNPP Not Used [0] - [9] SRC ATT VOL. 38 FM+ DISC 4 AM- ¢ DNPP DIRECT...

Instruction Manual
Page 21
... band. [0] - [9] buttons Press buttons [1] - [6] to recall preset stations. [DIRECT]/ [OK] button Enters and cancels the 'Direct Access Tuning' (page 12) mode. English | 21 In Tuner source [FM]/ [AM] buttons Select the band. Each time the [FM] button is pressed the song pauses and plays. [DNPP] button Enters and cancels the 'DNPP (Disc Name Preset Play)' (page 16) mode. [0] - [9] buttons When in 'Direct Track Search' (page 15) and 'Direct Disc Search' (page 15), enter the track/disc number.
... band. [0] - [9] buttons Press buttons [1] - [6] to recall preset stations. [DIRECT]/ [OK] button Enters and cancels the 'Direct Access Tuning' (page 12) mode. English | 21 In Tuner source [FM]/ [AM] buttons Select the band. Each time the [FM] button is pressed the song pauses and plays. [DNPP] button Enters and cancels the 'DNPP (Disc Name Preset Play)' (page 16) mode. [0] - [9] buttons When in 'Direct Track Search' (page 15) and 'Direct Disc Search' (page 15), enter the track/disc number.

Instruction Manual
Page 22
... metal part in your car's ignition does not have an ACC position, connect the ignition wires to both the front output terminals or to a power source that the mounting angle is installed, check whether the brake lamps, blinkers, wipers, etc. Connect the speaker wires of the left speaker to work if you connect the + connector of the wiring harness. 4. Connect the wiring harness connector to cause a short circuit, then replace the old fuse with...
... metal part in your car's ignition does not have an ACC position, connect the ignition wires to both the front output terminals or to a power source that the mounting angle is installed, check whether the brake lamps, blinkers, wipers, etc. Connect the speaker wires of the left speaker to work if you connect the + connector of the wiring harness. 4. Connect the wiring harness connector to cause a short circuit, then replace the old fuse with...
Instruction Manual
Page 23
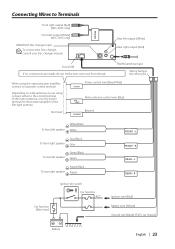
... antenna control wire (Blue) (Brown) TEL MUTE To front left speaker White/Black White To front right speaker Gray/Black Gray To rear left output (White) (KDC-3025 only) KENWOOD disc changer input To connect the Disc changer, consult your Disc changer manual. Connecting Wires to Terminals Front right output (Red) (KDC-3025 only) Front left speaker Green/Black Green To rear right speaker Purple/Black Purple FRONT • L FRONT • R REAR • L REAR • R Car fuse box (Main fuse) Ignition key switch Car fuse box ACC - + Battery...
... antenna control wire (Blue) (Brown) TEL MUTE To front left speaker White/Black White To front right speaker Gray/Black Gray To rear left output (White) (KDC-3025 only) KENWOOD disc changer input To connect the Disc changer, consult your Disc changer manual. Connecting Wires to Terminals Front right output (Red) (KDC-3025 only) Front left speaker Green/Black Green To rear right speaker Purple/Black Purple FRONT • L FRONT • R REAR • L REAR • R Car fuse box (Main fuse) Ignition key switch Car fuse box ACC - + Battery...
Instruction Manual
Page 27
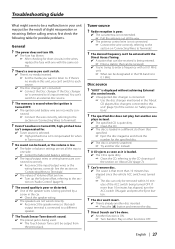
... problems. General ? Even if Loudness is turned ON, high-pitched tone isn't compensated for. ✔ Tuner source is turned OFF. ✔ The ignition and battery wire are low. ☞ Turn up the Volume offset, referring to . Radio reception is poor. ✔ The car antenna is severely scratched. ☞ Try another disc inserted. ☞ Press the [0] button and remove the disc. ? A CD ejects as soon as it 's input terminal, You can 't switch...
... problems. General ? Even if Loudness is turned ON, high-pitched tone isn't compensated for. ✔ Tuner source is turned OFF. ✔ The ignition and battery wire are low. ☞ Turn up the Volume offset, referring to . Radio reception is poor. ✔ The car antenna is severely scratched. ☞ Try another disc inserted. ☞ Press the [0] button and remove the disc. ? A CD ejects as soon as it 's input terminal, You can 't switch...

Instruction Manual
Page 28
... PANEL: The faceplate of the slave unit being exchanged in the changer. Or the unit is malfunctioning for some reason. ➪ Press the reset button on the unit. As the temperature falls below display your nearest service center. After setting it in the disc magazine. ➪ Load a disc into the disc magazine. Troubleshooting Guide ? The messages shown below 60°C (140°F), the disc will start playing again...
... PANEL: The faceplate of the slave unit being exchanged in the changer. Or the unit is malfunctioning for some reason. ➪ Press the reset button on the unit. As the temperature falls below display your nearest service center. After setting it in the disc magazine. ➪ Load a disc into the disc magazine. Troubleshooting Guide ? The messages shown below 60°C (140°F), the disc will start playing again...


