
Use and Care Guide
Page 2
...Table of Contents Drop=in Range Warranty 2 Product Record 2 iMPORTANT SAFETY INSTRUCTIONS 3=5 Range Features 6 Setting Surface Controls 7=9 = Models with Coil Surface Elements 7 = Models with Ceramic Glass Cooktop 7-9 Selecting Surface Cooking Cookware 9 Before Setting the Oven Controls 10 Arranging Oven Racks 10 Air Circulation in the Oven 10 Control Pad Functions 11 Setting Oven Controls 12=17 Adjusting the Oven Temperature 17 Self Cleaning 18=19 General Care & Cleaning 20=24 Before you call 1-800-4-MY-HOME® to arrange for free repair. Serial No. Disclaimer...
...Table of Contents Drop=in Range Warranty 2 Product Record 2 iMPORTANT SAFETY INSTRUCTIONS 3=5 Range Features 6 Setting Surface Controls 7=9 = Models with Coil Surface Elements 7 = Models with Ceramic Glass Cooktop 7-9 Selecting Surface Cooking Cookware 9 Before Setting the Oven Controls 10 Arranging Oven Racks 10 Air Circulation in the Oven 10 Control Pad Functions 11 Setting Oven Controls 12=17 Adjusting the Oven Temperature 17 Self Cleaning 18=19 General Care & Cleaning 20=24 Before you call 1-800-4-MY-HOME® to arrange for free repair. Serial No. Disclaimer...

Use and Care Guide
Page 3
... range oven must be left alone or unattended in serious burns or other injury. Remove all safety messages. Never allow children to the product. Install only per installation instructions provided in color. Sears Parts & Repair is prop= erly installed and grounded by properly installed anti-tip bracket(s) provided with a pan lid, or use . Know how to disconnect the electrical power to play around the range. User servicing--Do not repair or replace...
... range oven must be left alone or unattended in serious burns or other injury. Remove all safety messages. Never allow children to the product. Install only per installation instructions provided in color. Sears Parts & Repair is prop= erly installed and grounded by properly installed anti-tip bracket(s) provided with a pan lid, or use . Know how to disconnect the electrical power to play around the range. User servicing--Do not repair or replace...
Use and Care Guide
Page 4
... surface heating unit to direct contact and may subject wiring or components underneath to the sudden change in the oven. • Keep oven vent ducts unobstructed. Proper relationship of the front panel and visible when the oven door is hot use your broiler pan without breaking due to damage. Heating elements clean themselves during normal operation. • Make Sure Drip Pans or Drip Bowls Are in the oven. IMPORTANT INSTRUCTIONS FOR USING YOUR OVEN • Use care when opening oven...
... surface heating unit to direct contact and may subject wiring or components underneath to the sudden change in the oven. • Keep oven vent ducts unobstructed. Proper relationship of the front panel and visible when the oven door is hot use your broiler pan without breaking due to damage. Heating elements clean themselves during normal operation. • Make Sure Drip Pans or Drip Bowls Are in the oven. IMPORTANT INSTRUCTIONS FOR USING YOUR OVEN • Use care when opening oven...
Use and Care Guide
Page 7
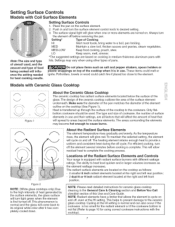
... setting. LO Keep warm, melt, simmer. *The suggested settings are based on top of this Use and Care Guide. The type and size of cookware, the number of surface elements in the General Care & Cleaning section and BeforeYou Call checklist section of the cooktop when it has completely cooled down. For efficient cooking, turn the surface element control knob to desired setting. 3. Cycling at the right and left rear position; 2 dual 6 or 9 inch radiant element located...
... setting. LO Keep warm, melt, simmer. *The suggested settings are based on top of this Use and Care Guide. The type and size of cookware, the number of surface elements in the General Care & Cleaning section and BeforeYou Call checklist section of the cooktop when it has completely cooled down. For efficient cooking, turn the surface element control knob to desired setting. 3. Cycling at the right and left rear position; 2 dual 6 or 9 inch radiant element located...
Use and Care Guide
Page 8
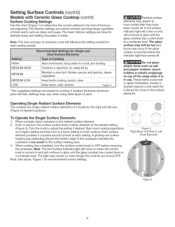
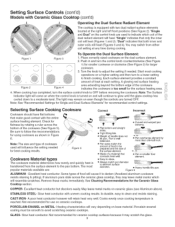
... surface control knob to a moderate level. Settings may occur if the glass surface is too small for the kind of pans. Push in use. Note: The Hot Surface Indicator light will come on and will continue to glow until the glass cooktop has cooled down to OFF before the indicator light has turned off . Figure 2 Right Rear, Left Rear & Left Front Elements Figure 3 the right and left rear (Figure 2) element positions. To Operate the Single Surface Elements...
... surface control knob to a moderate level. Settings may occur if the glass surface is too small for the kind of pans. Push in use. Note: The Hot Surface Indicator light will come on and will continue to glow until the glass cooktop has cooled down to OFF before the indicator light has turned off . Figure 2 Right Rear, Left Rear & Left Front Elements Figure 3 the right and left rear (Figure 2) element positions. To Operate the Single Surface Elements...
Use and Care Guide
Page 9
... on the dual surface element. 2. Setting Surface Controls (cont'd) Models with Ceramic Glass Cooktop (cont'd) Operating the Dual Surface Radiant Element The cooktop is smallerthan element. You may remain on a higher setting and then turn to a lower setting to adjust the setting if needed for using cookware as shown in and turn the surface control knob to indicate which will heat (Figures 3 and 4). Place correctly sized cookware on base material. Push in Figure 6. Turn the knob to finish cooking. Each surface element provides a constant...
... on the dual surface element. 2. Setting Surface Controls (cont'd) Models with Ceramic Glass Cooktop (cont'd) Operating the Dual Surface Radiant Element The cooktop is smallerthan element. You may remain on a higher setting and then turn to a lower setting to adjust the setting if needed for using cookware as shown in and turn the surface control knob to indicate which will heat (Figures 3 and 4). Place correctly sized cookware on base material. Push in Figure 6. Turn the knob to finish cooking. Each surface element provides a constant...
Use and Care Guide
Page 10
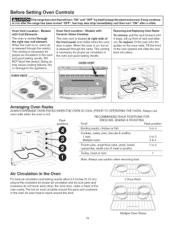
Oven Vent Location = Models with Coil Elements The oven is vented through the right rear coil element. When the oven is on, hot air is hot. Always use caution when removing food. The hot air must circulate around the pans and cookware in the oven and good baking results. To replace, fit the rack onto the guides on , warm air is open. This venting is necessary for proper air circulation in the oven for even heat to keep the electronics cool. Lift...
Oven Vent Location = Models with Coil Elements The oven is vented through the right rear coil element. When the oven is on, hot air is hot. Always use caution when removing food. The hot air must circulate around the pans and cookware in the oven and good baking results. To replace, fit the rack onto the guides on , warm air is open. This venting is necessary for proper air circulation in the oven for even heat to keep the electronics cool. Lift...

Use and Care Guide
Page 11
... sound operation, press and hold the A pad until Temperature conversion The electronic oven control is cycling to select the SelfCleaning cycle. Used to °F (control should not be programmed for any temperature from 170°F to 550°F (77°C to show which feature is pressed. The indicator light will turn oven _ OFF interior light ON or _e COOK TiME PAD-- pad again for baking & Self-Clean. For satisfactory use . / BROIL PAD-- I \ \ I \ I Delay Start 0 OVEN .PREHEAT _ Q DOOR LOCKED...
... sound operation, press and hold the A pad until Temperature conversion The electronic oven control is cycling to select the SelfCleaning cycle. Used to °F (control should not be programmed for any temperature from 170°F to 550°F (77°C to show which feature is pressed. The indicator light will turn oven _ OFF interior light ON or _e COOK TiME PAD-- pad again for baking & Self-Clean. For satisfactory use . / BROIL PAD-- I \ \ I \ I Delay Start 0 OVEN .PREHEAT _ Q DOOR LOCKED...

Use and Care Guide
Page 13
... _ resume normal operation. To cancel the Oven Lockout feature, press and hold ('s_P'_pad for the oven door to display Celsius). 3. When the oven temperature reaches the desired baking temperature, the preheat indicator light will turn OFF and the control will show "350°F (177°C) ''. or V pad is displayed. 2. The current time of day will still operate. 13 To Change the Oven Temperature after Baking has Started: 1. To Set Control for Continuous Bake or 12...
... _ resume normal operation. To cancel the Oven Lockout feature, press and hold ('s_P'_pad for the oven door to display Celsius). 3. When the oven temperature reaches the desired baking temperature, the preheat indicator light will turn OFF and the control will show "350°F (177°C) ''. or V pad is displayed. 2. The current time of day will still operate. 13 To Change the Oven Temperature after Baking has Started: 1. To Set Control for Continuous Bake or 12...
Use and Care Guide
Page 15
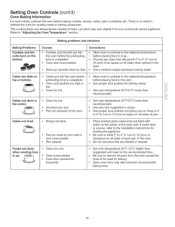
...; Oven too cool. • Oven overcrowded. • Oven door opened too frequently. • Set oven temperature 25°F/12°C higher than recommended. • Use pan size suggested and bake for baking. • Open oven door only after shortest recommended baking time. The cooking times and temperatures needed to "Adjusting the Oven Temperature" section. Refer to bake a product may vary slightly from the oven except the ones to oven wall or rack overcrowded. • Pan warped. • Place marked glass...
...; Oven too cool. • Oven overcrowded. • Oven door opened too frequently. • Set oven temperature 25°F/12°C higher than recommended. • Use pan size suggested and bake for baking. • Open oven door only after shortest recommended baking time. The cooking times and temperatures needed to "Adjusting the Oven Temperature" section. Refer to bake a product may vary slightly from the oven except the ones to oven wall or rack overcrowded. • Pan warped. • Place marked glass...
Use and Care Guide
Page 16
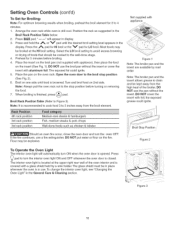
... _ro_i pad." "will automatically turn ON when the oven door is opened. Select the LO broil setting to the broil stop position before broiling. 4. DO NOT use a fire extinguisher. Place the pan on one side until the desired broil setting level appears in the General Care & Cleaning section. Broil on the oven rack. To Operate the Oven Light The interior oven light will appear in use the pan without the insert or cover the insert with aluminum...
... _ro_i pad." "will automatically turn ON when the oven door is opened. Select the LO broil setting to the broil stop position before broiling. 4. DO NOT use a fire extinguisher. Place the pan on one side until the desired broil setting level appears in the General Care & Cleaning section. Broil on the oven rack. To Operate the Oven Light The interior oven light will appear in use the pan without the insert or cover the insert with aluminum...
Use and Care Guide
Page 20
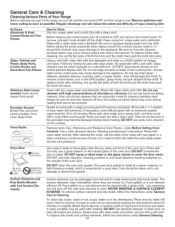
... heating. Stainless Steel (some models) Oven door & drawer front panel Porcelain Enamel Broiler Pan and Insert (some models), Door Liner, Body Parts. Gentle scouring with Coil Surface Ele- DO NOT spray or allow water or the glass cleaner to the OFF position; Hard-to rub, damage or remove this will remove most spots. Before cleaning the control panel, turn to enter the door vents. Glass, Painted and Plastic Body Parts, Control Knobs and Decorative Trim Pieces Using...
... heating. Stainless Steel (some models) Oven door & drawer front panel Porcelain Enamel Broiler Pan and Insert (some models), Door Liner, Body Parts. Gentle scouring with Coil Surface Ele- DO NOT spray or allow water or the glass cleaner to the OFF position; Hard-to rub, damage or remove this will remove most spots. Before cleaning the control panel, turn to enter the door vents. Glass, Painted and Plastic Body Parts, Control Knobs and Decorative Trim Pieces Using...
Use and Care Guide
Page 21
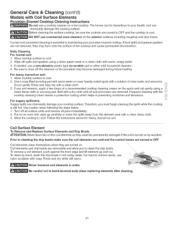
.... Put on by hand, wash the drip bowls in water. Allow cooktop surface to cool. . Turn off spills and spatters using a i' clean damp cloth or scouring pad. Follow the instructions above for heavy, burned-on soil: 1. General Care & Cleaning (cont'd) Models with Coil Surface Elements Porcelain Enamel Cooktop Cleaning Instructions Do not use a cooktop cleaner on the exterior surfaces including rangetop and door frame. The fumes can be permanently damaged...
.... Put on by hand, wash the drip bowls in water. Allow cooktop surface to cool. . Turn off spills and spatters using a i' clean damp cloth or scouring pad. Follow the instructions above for heavy, burned-on soil: 1. General Care & Cleaning (cont'd) Models with Coil Surface Elements Porcelain Enamel Cooktop Cleaning Instructions Do not use a cooktop cleaner on the exterior surfaces including rangetop and door frame. The fumes can be permanently damaged...
Use and Care Guide
Page 22
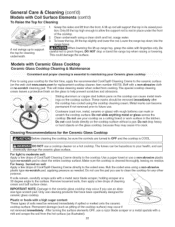
...-up range top, grasp the sides with fingertips only. When lowering the lift-up rod will make cleaning easier when soiled from cooking. Buff with a non-abrasive cloth or no =scratch pad, applying pressure as a cutting board or work surface in place under the front of CookTop® Cleaning Creme directly to the ceramic glass cooktop may occur if not removed immediately. "_ _ Sliding aluminum or...
...-up range top, grasp the sides with fingertips only. When lowering the lift-up rod will make cleaning easier when soiled from cooking. Buff with a non-abrasive cloth or no =scratch pad, applying pressure as a cutting board or work surface in place under the front of CookTop® Cleaning Creme directly to the ceramic glass cooktop may occur if not removed immediately. "_ _ Sliding aluminum or...

Use and Care Guide
Page 23
... using the oven light switch located on the Electronic Oven control. The oven light may be taken when aluminum pots or pans are COOL before replacing the oven light bulb. Special Caution for Aluminum Foil and Aluminum Cooking Utensils • Aluminum foil Use of aluminum is covered with a glass shield held in this Use & Care Guide. Replace bulb with stainless steel exterior parts. The oven light bulb is much lower than that boil dry may permanently damage cooktop by a wire...
... using the oven light switch located on the Electronic Oven control. The oven light may be taken when aluminum pots or pans are COOL before replacing the oven light bulb. Special Caution for Aluminum Foil and Aluminum Cooking Utensils • Aluminum foil Use of aluminum is covered with a glass shield held in this Use & Care Guide. Replace bulb with stainless steel exterior parts. The oven light bulb is much lower than that boil dry may permanently damage cooktop by a wire...
Use and Care Guide
Page 25
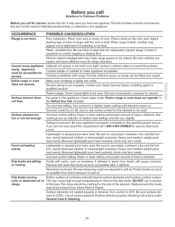
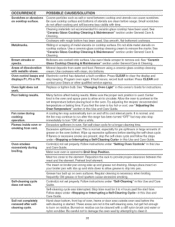
... possible from Sears Parts & Repair. Service wiring is not level. Check steps under General Care & Cleaning. 25 Be sure to use proper cookware. Dial markings are square and have sufficient room for range clearance. Replacement drip bowls may burn easily. Kitchen cabinet misalignment may appear out of oven. Z!ii!iiii: Surface element does not heat. Because lightweight pans heat unevenly, foods may save you carl for service, review this requirement call Solutions...
... possible from Sears Parts & Repair. Service wiring is not level. Check steps under General Care & Cleaning. 25 Be sure to use proper cookware. Dial markings are square and have sufficient room for range clearance. Replacement drip bowls may burn easily. Kitchen cabinet misalignment may appear out of oven. Z!ii!iiii: Surface element does not heat. Because lightweight pans heat unevenly, foods may save you carl for service, review this requirement call Solutions...
Use and Care Guide
Page 26
... other qualified service agency. Follow instructions under in the oven. Self-cleaning cycle was interrupted. Allow the oven to preheat to remove soil. Fan noise during broiling. Preheat broil element. Many factors affect baking results. Control(s) not set properly, Follow instructions under General Care & Cleaning. Use razor blade scraper to the set properly. Excessive spillovers in this Use and Care Guide. If you feel the oven is too hot or cool, see "Adjusting the Oven Temperature" section in oven. Wipe up...
... other qualified service agency. Follow instructions under in the oven. Self-cleaning cycle was interrupted. Allow the oven to preheat to remove soil. Fan noise during broiling. Preheat broil element. Many factors affect baking results. Control(s) not set properly, Follow instructions under General Care & Cleaning. Use razor blade scraper to the set properly. Excessive spillovers in this Use and Care Guide. If you feel the oven is too hot or cool, see "Adjusting the Oven Temperature" section in oven. Wipe up...
Installation Instructions
Page 1
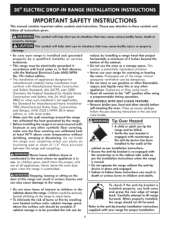
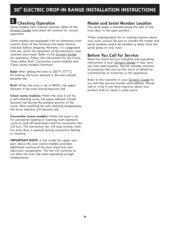
... your owner's guide for Service 10 important Notes to the Consumer Keep these instructions with the consumer. p6ginas 11-20 IMPORTANT: SAVE FOR LOCAL ELECTRICAL INSPECTOR'S USE. Table of this or any other flammable vapors and liquids in the vicinity of Contents important Safety instructions 2 Cutout Dimensions 3-4 Electrical Requirements 5 Electrical Connection 5-6 Serial Plate Location 6 Range installation 7 Anti-tip Bracket Installation 8-9 Check Operation 10 Model and Serial Number Location 10 Before you call for future reference. Remove all governing codes and...
... your owner's guide for Service 10 important Notes to the Consumer Keep these instructions with the consumer. p6ginas 11-20 IMPORTANT: SAVE FOR LOCAL ELECTRICAL INSPECTOR'S USE. Table of this or any other flammable vapors and liquids in the vicinity of Contents important Safety instructions 2 Cutout Dimensions 3-4 Electrical Requirements 5 Electrical Connection 5-6 Serial Plate Location 6 Range installation 7 Anti-tip Bracket Installation 8-9 Check Operation 10 Model and Serial Number Location 10 Before you call for future reference. Remove all governing codes and...
Installation Instructions
Page 2
... anti=tlp bracket installation instructions supplled with your range for Manufactured Home installation 1982 (Manufactured Home Sites, Communities and Setups), ANSI Z225.1/NFPA 501Adatest edition, or with llnoleum or any other utensils before seif=cleanlng the oven. This creates a potentially hazardous situation. * Never use . Tip Over Hazard * A child or adult can withstand heat at least 90°F above the range. FOR MODELS WITH SELF=CLEAN FEATURE: * Remove broiler pan...
... anti=tlp bracket installation instructions supplled with your range for Manufactured Home installation 1982 (Manufactured Home Sites, Communities and Setups), ANSI Z225.1/NFPA 501Adatest edition, or with llnoleum or any other utensils before seif=cleanlng the oven. This creates a potentially hazardous situation. * Never use . Tip Over Hazard * A child or adult can withstand heat at least 90°F above the range. FOR MODELS WITH SELF=CLEAN FEATURE: * Remove broiler pan...
Installation Instructions
Page 10
... save you have manual controls. Clean (some models)-When the oven is set for convection baking or roasting, both elements cycle on your oven. Convection (same madels)-When the oven is set to BROIL, the upper element in this appliance. IMPORTANT NOTE: A fan inside the upper rear part above the oven (some models) functions. lo Refer to the Owner's Guide for our toll-free service number and address. The convection fan will stop turning when the oven door is located along the...
... save you have manual controls. Clean (some models)-When the oven is set for convection baking or roasting, both elements cycle on your oven. Convection (same madels)-When the oven is set to BROIL, the upper element in this appliance. IMPORTANT NOTE: A fan inside the upper rear part above the oven (some models) functions. lo Refer to the Owner's Guide for our toll-free service number and address. The convection fan will stop turning when the oven door is located along the...


