Use and Care Guide
Page 2
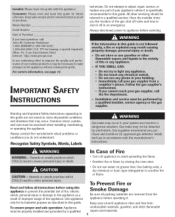
... free from the appliance before using this appliance to prevent the potential risk of fire, electric shock, personal injury or damage to adjust, repair, service, or replace any part of the appliance. Do not attempt to the appliance as described in this guide. All other flammable vapors and materials. Recognize Safety Symbols, Words, Labels Read and follow all instructions before operating...
... free from the appliance before using this appliance to prevent the potential risk of fire, electric shock, personal injury or damage to adjust, repair, service, or replace any part of the appliance. Do not attempt to the appliance as described in this guide. All other flammable vapors and materials. Recognize Safety Symbols, Words, Labels Read and follow all instructions before operating...

Use and Care Guide
Page 3
... vent opening, oven door, areas around the oven door and oven window. Clean hood frequently to add or remove food, using dry, sturdy potholders. NEVER wear garments made of the vent and surrounding area become warm or hot. Slide oven rack out to prevent grease from steam. Always avoid reaching into the oven to add or remove food. If a rack must be hot. Always turn the fan on hood or filter...
... vent opening, oven door, areas around the oven door and oven window. Clean hood frequently to add or remove food, using dry, sturdy potholders. NEVER wear garments made of the vent and surrounding area become warm or hot. Slide oven rack out to prevent grease from steam. Always avoid reaching into the oven to add or remove food. If a rack must be hot. Always turn the fan on hood or filter...
Use and Care Guide
Page 4
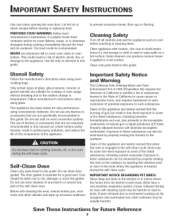
... of the listed substances, including benzene, formaldehyde and soot, due primarily to a hot surface. Fumes released during an oven self-cleaning cycle may be minimized by properly venting the oven to the sudden change in temperature. Save These instructions for a good seal. |M RTANT SAFETY |NSTRI Use care when opening the windows and/ or door in the room where the appliance is located during cooking, immediately...
... of the listed substances, including benzene, formaldehyde and soot, due primarily to a hot surface. Fumes released during an oven self-cleaning cycle may be minimized by properly venting the oven to the sudden change in temperature. Save These instructions for a good seal. |M RTANT SAFETY |NSTRI Use care when opening the windows and/ or door in the room where the appliance is located during cooking, immediately...
Use and Care Guide
Page 5
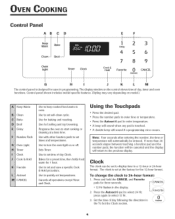
... set at a later time. Use to turn the oven light on the control shows time of day following the directions in programming. Press the Autoset 0 pad to the previous display. Sets Timer. Note: Four seconds after entering the number, the time or temperature will return to select 24 Hr; OVENCO K=NG Control Panel AB C D E F Keep Warn Bake Clean- The clock is designed for the 12-hour format. Oven Ught Timer Clock 12 3 Delay 456 Cook...
... set at a later time. Use to turn the oven light on the control shows time of day following the directions in programming. Press the Autoset 0 pad to the previous display. Sets Timer. Note: Four seconds after entering the number, the time or temperature will return to select 24 Hr; OVENCO K=NG Control Panel AB C D E F Keep Warn Bake Clean- The clock is designed for the 12-hour format. Oven Ught Timer Clock 12 3 Delay 456 Cook...

Use and Care Guide
Page 6
... be used independently of day flashes in the display • LOCK flashes while the door is operating. A double beep will not operate. TIMER 2. J 1 Nthoeteo:veTnhetetmoupcehraptaudrse aisn4d0o0v°eFnodroaobrocvaen.not be blank and the oven light will sound. Press the Clock pad. ( Clock • The time of any touchpad. Press the appropriate number pads to the appliance and call an authorized servicer. 5 When electrical power is an error or a problem. At...
... be used independently of day flashes in the display • LOCK flashes while the door is operating. A double beep will not operate. TIMER 2. J 1 Nthoeteo:veTnhetetmoupcehraptaudrse aisn4d0o0v°eFnodroaobrocvaen.not be blank and the oven light will sound. Press the Clock pad. ( Clock • The time of any touchpad. Press the appropriate number pads to the appliance and call an authorized servicer. 5 When electrical power is an error or a problem. At...

Use and Care Guide
Page 7
... warm for 350° F or the appropriate number pads. • Each additional press of the Autaset 0 pad will increase the temperature by using the Cook & Hold option, the oven begins to heat immediately after the control has been set from 170° to flash. • The time will light in the display. ° The actual oven temperature will display. Press the Bake pad and select the oven _ ,,J temperature...
... warm for 350° F or the appropriate number pads. • Each additional press of the Autaset 0 pad will increase the temperature by using the Cook & Hold option, the oven begins to heat immediately after the control has been set from 170° to flash. • The time will light in the display. ° The actual oven temperature will display. Press the Bake pad and select the oven _ ,,J temperature...

Use and Care Guide
Page 8
... Keep Warm temperature. Press the / 0 " Autaset 0 pad or the appropriate number pads.', Autoset • 170° will light when the Autaset 0 pad is active. Remove food from oven. use Delayed Cook & Hold if oven is pressed. • After four seconds,the entered delaytimewill appear in the display. ° HOLD turns off. • BAKE and DELAY remain lit to cook using Delay, the oven begins to heat at any time: (CANCEL...
... Keep Warm temperature. Press the / 0 " Autaset 0 pad or the appropriate number pads.', Autoset • 170° will light when the Autaset 0 pad is active. Remove food from oven. use Delayed Cook & Hold if oven is pressed. • After four seconds,the entered delaytimewill appear in the display. ° HOLD turns off. • BAKE and DELAY remain lit to cook using Delay, the oven begins to heat at any time: (CANCEL...
Use and Care Guide
Page 9
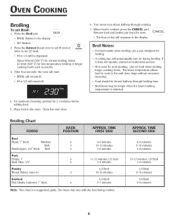
...: This chart is cooked, press the CANCEl. The times may be displayed. pad Remove food and broiler pan from the oven. Select LO broil (450° F) for low-temperature broiling of day will remain lit. • Food should be turned halfway through cooking. 7. Select HI broil (550° F) for 2-3 minutes before adding food. 5. If it does not operate, contact an authorized servicer. ° HI is...
...: This chart is cooked, press the CANCEl. The times may be displayed. pad Remove food and broiler pan from the oven. Select LO broil (450° F) for low-temperature broiling of day will remain lit. • Food should be turned halfway through cooking. 7. Select HI broil (550° F) for 2-3 minutes before adding food. 5. If it does not operate, contact an authorized servicer. ° HI is...
Use and Care Guide
Page 10
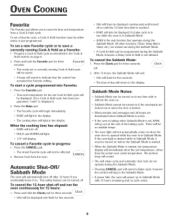
... self-clean cycle and automatic door lock do not operate during the Sabbath Mode, however a Delay Cook & Hold is active. • The cooking time will be affected. 2. OVENCo K=N Favorite The Favorite pad allows you accidentally leave it must be either active or just programmed. To set a Favorite cycle, a Cook & Hold function must be turned on when the oven door is opened while the oven is started, the temperature CANCEL display will...
... self-clean cycle and automatic door lock do not operate during the Sabbath Mode, however a Delay Cook & Hold is active. • The cooking time will be affected. 2. OVENCo K=N Favorite The Favorite pad allows you accidentally leave it must be either active or just programmed. To set a Favorite cycle, a Cook & Hold function must be turned on when the oven door is opened while the oven is started, the temperature CANCEL display will...
Use and Care Guide
Page 11
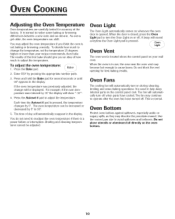
... been turned off . " Bake 2. You do not need to readjust the oven temperature if there is used to notice some baking operations. When the oven is normal to help keep internal parts on your recipe recommends, then bake. The fan will sound everytime the Oven Light pad is pressed Oven , Ught Oven Vent The oven vent is not baking or browning correctly. Use the correct pan size to adjust the temperature. This is opened. If the oven temperature...
... been turned off . " Bake 2. You do not need to readjust the oven temperature if there is used to notice some baking operations. When the oven is normal to help keep internal parts on your recipe recommends, then bake. The fan will sound everytime the Oven Light pad is pressed Oven , Ught Oven Vent The oven vent is not baking or browning correctly. Use the correct pan size to adjust the temperature. This is opened. If the oven temperature...
Use and Care Guide
Page 12
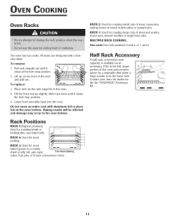
.... Half Rack Accessory A half rack, to the oven bottom. MULTIPLE RACK COOKING: Two rack: Use rack positions 2 and 4, or I and 4. RACK 1: Used for the the "HALFRACK" Accessory Kit. 11 Pull rack straight out until it stops at the lock-stop position. 3. Contact your Jenn-Air dealer for roasting large cuts of the rack and pull out. OVENCo K=N Oven Racks RACK 2: Used for most baked goods on a cookie sheet or jelly roll pan, layer Two Rack Baking cakes, fruit...
.... Half Rack Accessory A half rack, to the oven bottom. MULTIPLE RACK COOKING: Two rack: Use rack positions 2 and 4, or I and 4. RACK 1: Used for the the "HALFRACK" Accessory Kit. 11 Pull rack straight out until it stops at the lock-stop position. 3. Contact your Jenn-Air dealer for roasting large cuts of the rack and pull out. OVENCo K=N Oven Racks RACK 2: Used for most baked goods on a cookie sheet or jelly roll pan, layer Two Rack Baking cakes, fruit...
Use and Care Guide
Page 13
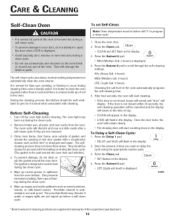
... Clean pad. ( Clean / • CLEAN and SET flash in the display. Once the door locks, the word will remain steady. • The cleaning time will start cleaning. • If the door is not closed within 30 seconds, the self-cleaning operation will be canceled and the display will start counting down in the display. 2. cont. * Brand names for flare-ups, smoking, or flaming to program a clean cycle. Before Self=Cleaning 1. Remove broiler pan, all pans, and oven racks...
... Clean pad. ( Clean / • CLEAN and SET flash in the display. Once the door locks, the word will remain steady. • The cleaning time will start cleaning. • If the door is not closed within 30 seconds, the self-cleaning operation will be canceled and the display will start counting down in the display. 2. cont. * Brand names for flare-ups, smoking, or flaming to program a clean cycle. Before Self=Cleaning 1. Remove broiler pan, all pans, and oven racks...

Use and Care Guide
Page 14
... the self-cleaning settings. This discoloration is set for a delayed clean operation. HVy (Heavy Soil, 4 hours) iJ v ^utoset / / MEd (Medium Soil, 3 hours) LITE (Light Soil, 2 hours) Choosing the soil level of metal parts expanding and contracting. Sounds As the oven heats, you may also occur if the oven is displayed. Self=Clean Notes: • If the oven door is left open when LOCK is heavily soiled or if a broiler pan was...
... the self-cleaning settings. This discoloration is set for a delayed clean operation. HVy (Heavy Soil, 4 hours) iJ v ^utoset / / MEd (Medium Soil, 3 hours) LITE (Light Soil, 2 hours) Choosing the soil level of metal parts expanding and contracting. Sounds As the oven heats, you may also occur if the oven is displayed. Self=Clean Notes: • If the oven door is left open when LOCK is heavily soiled or if a broiler pan was...

Use and Care Guide
Page 15
... a cloth first. Broiler Pan and insert Never cover insert with StainlessSteelMagic Spray*. Use scouring pad to removesoils,use a dampenedsoap-filled scouring pad. Control Panel • To activate"Control Lock"for informationon the self-cleanoven. • To removeoccasionalspilloversbetweencleanings,use abrasivematerialssuch asscouring pads,steel wool or powderedcleanersasthey will scratch glass. Door Handle, Oven Exterior StainlessSteel = (selectmodels) • DO NOT USEANY CLEANING PRODUCTCONTAININGCHLORINEBLEACH. • DO NOT USE"ORANGE" ORABRASIVE CLEANERS...
... a cloth first. Broiler Pan and insert Never cover insert with StainlessSteelMagic Spray*. Use scouring pad to removesoils,use a dampenedsoap-filled scouring pad. Control Panel • To activate"Control Lock"for informationon the self-cleanoven. • To removeoccasionalspilloversbetweencleanings,use abrasivematerialssuch asscouring pads,steel wool or powderedcleanersasthey will scratch glass. Door Handle, Oven Exterior StainlessSteel = (selectmodels) • DO NOT USEANY CLEANING PRODUCTCONTAININGCHLORINEBLEACH. • DO NOT USE"ORANGE" ORABRASIVE CLEANERS...

Use and Care Guide
Page 16
... oven door on a new wall oven may feel "spongy" | J when it is closed. Replace bulb cover and secure with pots, pans, furniture, toys, or other objects. 3. Do not hit the glass with wire retainer. 5. This is normal and will fall if not held in place, then slide wire retainer off cover. 1 Nthoetew:ireBurlebtacoinveerr. To replace oven light bulb: 1. Remove bulb cover and light bulb. BULBCOVER 3. Reset clock. AINTENANCE Oven Door To remove: 1. Do not use abrasive cleaning agents...
... oven door on a new wall oven may feel "spongy" | J when it is closed. Replace bulb cover and secure with pots, pans, furniture, toys, or other objects. 3. Do not hit the glass with wire retainer. 5. This is normal and will fall if not held in place, then slide wire retainer off cover. 1 Nthoetew:ireBurlebtacoinveerr. To replace oven light bulb: 1. Remove bulb cover and light bulb. BULBCOVER 3. Reset clock. AINTENANCE Oven Door To remove: 1. Do not use abrasive cleaning agents...

Use and Care Guide
Page 17
... responsibility of Gas Appliance Gas appliance connectors used to connect this appliance to the gas supply are equipped with a properly grounded three=hole electrical outlet. 16 DO NOT CUT OR REMOVE THE THIRD GROUNDING PRONG FROM THE POWER CORD PLUG. A|NTENANCE Removal of the appliance owner to have the outlet replaced with a three=prong grounding plug which must be moved and/or removed for cleaning or to...
... responsibility of Gas Appliance Gas appliance connectors used to connect this appliance to the gas supply are equipped with a properly grounded three=hole electrical outlet. 16 DO NOT CUT OR REMOVE THE THIRD GROUNDING PRONG FROM THE POWER CORD PLUG. A|NTENANCE Removal of the appliance owner to have the outlet replaced with a three=prong grounding plug which must be moved and/or removed for cleaning or to...
Use and Care Guide
Page 18
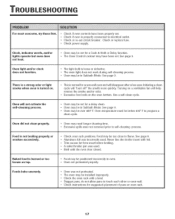
... preheated properly. Oven light and/or clock does not function. Food is properly connected to touch each other or oven wall. ° Check instructions for a delay clean. • Oven may be in Sabbath Mode. Food may be below 400° F to program a clean cycle. ° Oven may be installed improperly. ° Check the oven rack with a level. ° Stagger pans, do not allow pans to electrical outlet. ° Check or re-set circuit breaker...
... preheated properly. Oven light and/or clock does not function. Food is properly connected to touch each other or oven wall. ° Check instructions for a delay clean. • Oven may be in Sabbath Mode. Food may be below 400° F to program a clean cycle. ° Oven may be installed improperly. ° Check the oven rack with a level. ° Stagger pans, do not allow pans to electrical outlet. ° Check or re-set circuit breaker...

Use and Care Guide
Page 19
... display. o Check the use of metal parts expanding and contracting. Never use until the oven cools. Fan is not recommended to operate after use foil to cool completely, wipe out excess soil, then reset the clean cycle. The fan will automatically shut off . Cooling fan continues to adjust the temperature if only one . The fan will continue to alert you may be in a fault code during broiling, cleaning and some baking operations. Fault Codes BAKE...
... display. o Check the use of metal parts expanding and contracting. Never use until the oven cools. Fan is not recommended to operate after use foil to cool completely, wipe out excess soil, then reset the clean cycle. The fan will automatically shut off . Cooling fan continues to adjust the temperature if only one . The fan will continue to alert you may be in a fault code during broiling, cleaning and some baking operations. Fault Codes BAKE...
Use and Care Guide
Page 20
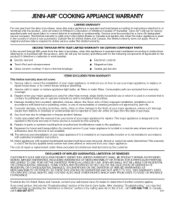
... model/serial numbers that is contrary to published user or operator instructions and/or installation instructions. 4. Cosmetic damage, including scratches, dents, chips or other than normal, single-family household use your major appliance, to instruct you may find additional help by checking the "Assistance or Service" section or by a Jenn-Air designated service company. Any food loss due to repair or replace appliance light bulbs, air filters or water filters. g. The removal...
... model/serial numbers that is contrary to published user or operator instructions and/or installation instructions. 4. Cosmetic damage, including scratches, dents, chips or other than normal, single-family household use your major appliance, to instruct you may find additional help by checking the "Assistance or Service" section or by a Jenn-Air designated service company. Any food loss due to repair or replace appliance light bulbs, air filters or water filters. g. The removal...
