

Instruction Manual
Page 10
... Time Code and User's Bit 68 Setting Time Code Generator 69 Setting the User's Bit 71 Setting Zebra Pattern 72 Viewing Recorded Videos Immediately (Clip Review 73 Recording Simultaneously at Two Different Definitions 74 Series Rec 74 Dual Rec 74 Backup Rec 76 Special Recording 78 Pre Rec 78 Clip Continuous...
... Time Code and User's Bit 68 Setting Time Code Generator 69 Setting the User's Bit 71 Setting Zebra Pattern 72 Viewing Recorded Videos Immediately (Clip Review 73 Recording Simultaneously at Two Different Definitions 74 Series Rec 74 Dual Rec 74 Backup Rec 76 Special Recording 78 Pre Rec 78 Clip Continuous...

Instruction Manual
Page 19
...] trigger button to Remote Edit Mode?" Operation Modes 19 However, you can check the most recently recorded video clip. (A P73 [Viewing Recorded Videos Immediately (Clip Review)] ) Media Mode USB Mode 0 This mode allows you access via a Web Browser K] ) Memo : 0 If you to "Remote Edit Mode". Selecting [Change] on the camera recorder...
...] trigger button to Remote Edit Mode?" Operation Modes 19 However, you can check the most recently recorded video clip. (A P73 [Viewing Recorded Videos Immediately (Clip Review)] ) Media Mode USB Mode 0 This mode allows you access via a Web Browser K] ) Memo : 0 If you to "Remote Edit Mode". Selecting [Change] on the camera recorder...

Instruction Manual
Page 23
... assigning a specific feature in the menu setting to this button. (A P39 [Assignment of Functions to User Buttons] ) F [C.REVIEW/4] Clip Review/User 4 Button 0 For checking the most recently captured images. (A P73 [Viewing Recorded Videos Immediately (Clip Review)] ) 0 You can also use it as a user button by assigning a specific feature in the menu setting to...
... assigning a specific feature in the menu setting to this button. (A P39 [Assignment of Functions to User Buttons] ) F [C.REVIEW/4] Clip Review/User 4 Button 0 For checking the most recently captured images. (A P73 [Viewing Recorded Videos Immediately (Clip Review)] ) 0 You can also use it as a user button by assigning a specific feature in the menu setting to...

Instruction Manual
Page 36
The contents displayed are screen examples of GY-HM200U/GYHM200E. Preparations Status Screen 0 This screen allows you to check the current settings. 0 To display the status screen, press the [STATUS] button in the ... Zoom Speed M Handle Zoom Speed H None Planning Metadata Title1 Title2 Description Creator USER Switch Set USER1 Focus Assist USER2 TC Preset USER3 USER4 Lolux Clip Review USER5 Zebra USER6 OIS USER7 Rec Audio -62dB Video HDMI/SDI Out Resolution HDMI Color HDMI Enhance SDI Rec Trigger SD Aspect SD Set Up...
The contents displayed are screen examples of GY-HM200U/GYHM200E. Preparations Status Screen 0 This screen allows you to check the current settings. 0 To display the status screen, press the [STATUS] button in the ... Zoom Speed M Handle Zoom Speed H None Planning Metadata Title1 Title2 Description Creator USER Switch Set USER1 Focus Assist USER2 TC Preset USER3 USER4 Lolux Clip Review USER5 Zebra USER6 OIS USER7 Rec Audio -62dB Video HDMI/SDI Out Resolution HDMI Color HDMI Enhance SDI Rec Trigger SD Aspect SD Set Up...

Instruction Manual
Page 39
... takes priority over lighting up. The operation changes according to User Buttons 39 Button [F.ASSIST/1] Button Menu Item [USER1] [TC/2] Button [USER2] [LOLUX/3] Button [USER3] [C.REVIEW/4] Button [USER4] [ZEBRA/5] Button [USER5] [OIS/6] Button [USER6] [REC/7] Button [USER7] [EXPANDED FOCUS/8] Button [USER8] [AWB/9] Button LCD Cross-Shaped Button (J) LCD Cross-Shaped Button...
... takes priority over lighting up. The operation changes according to User Buttons 39 Button [F.ASSIST/1] Button Menu Item [USER1] [TC/2] Button [USER2] [LOLUX/3] Button [USER3] [C.REVIEW/4] Button [USER4] [ZEBRA/5] Button [USER5] [OIS/6] Button [USER6] [REC/7] Button [USER7] [EXPANDED FOCUS/8] Button [USER8] [AWB/9] Button LCD Cross-Shaped Button (J) LCD Cross-Shaped Button...

Instruction Manual
Page 47
... resolution (1440x1080, 960x480, 720x480, 720x576, or 480x270) suitable for web distribution You can also be used to start recording to activate the Clip Review function. The tally lamp lights up in red during recording. 0 Zoom Operation (A P49 [Zoom Operation] ) 0 Adjusting the Focus (A P50 ... 0 After playback, the camera recorder returns to standby mode (STBY). (A P73 [Viewing Recorded Videos Immediately (Clip Review)] ) Memo : 0 [Clip Review] is complete for recording/playback, and the video recording format on the screen during switching. The most recently captured images....
... resolution (1440x1080, 960x480, 720x480, 720x576, or 480x270) suitable for web distribution You can also be used to start recording to activate the Clip Review function. The tally lamp lights up in red during recording. 0 Zoom Operation (A P49 [Zoom Operation] ) 0 Adjusting the Focus (A P50 ... 0 After playback, the camera recorder returns to standby mode (STBY). (A P73 [Viewing Recorded Videos Immediately (Clip Review)] ) Memo : 0 [Clip Review] is complete for recording/playback, and the video recording format on the screen during switching. The most recently captured images....

Instruction Manual
Page 70
...selected. (A P103 [ TC Generator ] ) 2 Set the time code (hour, minute, second, frame). The [TC Preset] setting screen appears. Memo : 0 Press the [C.REVIEW/4] button to reset each digit to "0". Use the cross-shaped button (HI) to place the cursor at the item to set, then use the crossshaped...press the [CANCEL] button. 4 Press the [MENU] button. Memo : 0 When [TC/UB] B [TC Generator] is set to "0". Memo : 0 Press the [C.REVIEW/4] button to reset each digit to "Regen". 0 Menu screen is displayed. 0 The camera recorder is displayed as "Regen" and cannot be made in the following...
...selected. (A P103 [ TC Generator ] ) 2 Set the time code (hour, minute, second, frame). The [TC Preset] setting screen appears. Memo : 0 Press the [C.REVIEW/4] button to reset each digit to "0". Use the cross-shaped button (HI) to place the cursor at the item to set, then use the crossshaped...press the [CANCEL] button. 4 Press the [MENU] button. Memo : 0 When [TC/UB] B [TC Generator] is set to "0". Memo : 0 Press the [C.REVIEW/4] button to reset each digit to "Regen". 0 Menu screen is displayed. 0 The camera recorder is displayed as "Regen" and cannot be made in the following...
Instruction Manual
Page 71
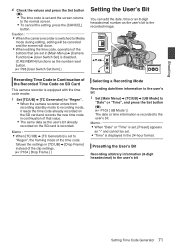
... framing mode of the time code follows the settings in continuation of that are set in [Main Menu] B [Camera Function] B [User Switch Set] is disabled. [C.REVIEW/4] functions as the number reset button. (A P98 [User Switch Set Item] ) Recording Time Code in Continuation of the clip settings. (A P104 [ Drop Frame ] ) Setting the...
... framing mode of the time code follows the settings in continuation of that are set in [Main Menu] B [Camera Function] B [User Switch Set] is disabled. [C.REVIEW/4] functions as the number reset button. (A P98 [User Switch Set Item] ) Recording Time Code in Continuation of the clip settings. (A P104 [ Drop Frame ] ) Setting the...

Instruction Manual
Page 72
... brightness (luminance) level range for displaying (in 5 % increments) [Zebra] Bottom Lower luminance 0% - 100% (in [LCD/VF] B [Shooting Assist] B [Zebra] B [Top] and [Bottom]. Memo : 0 Press the [C.REVIEW/4] button to reset each digit to change the values. The [Preset] setting screen appears. 3 Use the cross-shaped button (HI) to place the cursor at...
... brightness (luminance) level range for displaying (in 5 % increments) [Zebra] Bottom Lower luminance 0% - 100% (in [LCD/VF] B [Shooting Assist] B [Zebra] B [Top] and [Bottom]. Memo : 0 Press the [C.REVIEW/4] button to reset each digit to change the values. The [Preset] setting screen appears. 3 Use the cross-shaped button (HI) to place the cursor at...

Instruction Manual
Page 73
..."STBYC" (white text) first. (A P79 [Clip Continuous Rec] ) 0 Clip Review is unavailable when the camera recorder is connected to the [C.REVIEW/4] button in the selected slot, Clip Review function is disabled. 0 Clip Review is unavailable when Clip Continuous Rec is paused ("STBYC", yellow text). K . 1... Playback of the clip is played back. (A P98 [ Clip Review ] ) 0 When playback is played back according to cancel clip review and enter recording mode. Viewing Recorded Videos Immediately (Clip Review) 73 "Clip Review" is assigned to an external equipment and the equipment is displayed...
..."STBYC" (white text) first. (A P79 [Clip Continuous Rec] ) 0 Clip Review is unavailable when the camera recorder is connected to the [C.REVIEW/4] button in the selected slot, Clip Review function is disabled. 0 Clip Review is unavailable when Clip Continuous Rec is paused ("STBYC", yellow text). K . 1... Playback of the clip is played back. (A P98 [ Clip Review ] ) 0 When playback is played back according to cancel clip review and enter recording mode. Viewing Recorded Videos Immediately (Clip Review) 73 "Clip Review" is assigned to an external equipment and the equipment is displayed...

Instruction Manual
Page 74
... will only be recorded to that slot. 0 The [Rec Mode] is fixed at "Normal". 0 Clip Cutter Trig is disabled. 0 [Slot Mode] cannot be selected. 0 Clip Review can only be performed for the HD file. Shooting Recording Simultaneously at Two Different Definitions By setting [System] to "HD+Web", you can record simultaneously...
... will only be recorded to that slot. 0 The [Rec Mode] is fixed at "Normal". 0 Clip Cutter Trig is disabled. 0 [Slot Mode] cannot be selected. 0 Clip Review can only be performed for the HD file. Shooting Recording Simultaneously at Two Different Definitions By setting [System] to "HD+Web", you can record simultaneously...

Instruction Manual
Page 78
... on the [Pre Rec Time] setting. 0 Using Pre Rec allows you to Camera mode 0 Immediately after setting [Rec Mode] 0 Immediately after the end of Clip Review 0 Immediately after changing file format 0 Immediately after power on the setting of [Main Menu] B [System] B [Record Set] B [Record Format] B [System]. 0 When [System] is set in...
... on the [Pre Rec Time] setting. 0 Using Pre Rec allows you to Camera mode 0 Immediately after setting [Rec Mode] 0 Immediately after the end of Clip Review 0 Immediately after changing file format 0 Immediately after power on the setting of [Main Menu] B [System] B [Record Set] B [Record Format] B [System]. 0 When [System] is set in...

Instruction Manual
Page 80
... Memo : 0 Clip Continuous Rec cannot be used in the following operations cannot be performed while recording is paused (STBYC, yellow text). 0 Clip Review operation (A P73 [Viewing Recorded Videos Immediately (Clip Review)] ) 0 Switching SD card slots 0 Switching operation mode (A P18 [Operation Modes] ) 0 Files are recorded as a single clip until the same number is...
... Memo : 0 Clip Continuous Rec cannot be used in the following operations cannot be performed while recording is paused (STBYC, yellow text). 0 Clip Review operation (A P73 [Viewing Recorded Videos Immediately (Clip Review)] ) 0 Switching SD card slots 0 Switching operation mode (A P18 [Operation Modes] ) 0 Files are recorded as a single clip until the same number is...

Instruction Manual
Page 83
..." are displayed in slot B needs to most recent. A E B D C . A E B F C G D HI . Otherwise, an OK mark will be appended. H [DISPLAY] Button Switches between the screens. 0 Thumbnails are available. F [C.REVIEW/4] Button 0 Switches the selection status of recording from the oldest to be displayed at the same time. B Clip Mark Displays the clip information (properties). A [MENU...
..." are displayed in slot B needs to most recent. A E B D C . A E B F C G D HI . Otherwise, an OK mark will be appended. H [DISPLAY] Button Switches between the screens. 0 Thumbnails are available. F [C.REVIEW/4] Button 0 Switches the selection status of recording from the oldest to be displayed at the same time. B Clip Mark Displays the clip information (properties). A [MENU...

Instruction Manual
Page 89
...: [Add OK Mark] B [Selected Clips] 0 Deletes OK mark together: [Delete OK Mark] B [Selected Clips] 0 Uploading selected clips to a clip without a check mark, and press the [C.REVIEW/4] button. A green check mark appears on the clip. 16.4V 2/4 3840x2160 30p 150M x5 x5 USER3 USER4 USER6 00:00:00.00 Jan 24,2015... the clip does not have an OK mark, an OK mark will be appended. 0 If the clip is appended with check mark and pressing the [C.REVIEW/4] button will cancel the selection. 0 If the operation is performed on multiple clips at the same time, a progress bar appears.
...: [Add OK Mark] B [Selected Clips] 0 Deletes OK mark together: [Delete OK Mark] B [Selected Clips] 0 Uploading selected clips to a clip without a check mark, and press the [C.REVIEW/4] button. A green check mark appears on the clip. 16.4V 2/4 3840x2160 30p 150M x5 x5 USER3 USER4 USER6 00:00:00.00 Jan 24,2015... the clip does not have an OK mark, an OK mark will be appended. 0 If the clip is appended with check mark and pressing the [C.REVIEW/4] button will cancel the selection. 0 If the operation is performed on multiple clips at the same time, a progress bar appears.

Instruction Manual
Page 90
... FTP server together: [FTP Upload] B [Selected Clips] 0 Deletes selected clips together: [Delete Clips] B [Selected Clips] Memo : 0 Selecting clips appended with check mark and pressing the [C.REVIEW/4] button will cancel the selection. 0 If the operation is not possible to green. 0 Pressing the [ZEBRA/5] button while the multiple clips are outside the range...
... FTP server together: [FTP Upload] B [Selected Clips] 0 Deletes selected clips together: [Delete Clips] B [Selected Clips] Memo : 0 Selecting clips appended with check mark and pressing the [C.REVIEW/4] button will cancel the selection. 0 If the operation is not possible to green. 0 Pressing the [ZEBRA/5] button while the multiple clips are outside the range...

Instruction Manual
Page 91
... using the cross-shaped button (JKH I or J/K to move the video to the out point. (A P86 [Playing back] ) 0 Specify the out point by pressing the [C.REVIEW/4] button at all times. 0 When trimming the in and out point, the in point trimmed may be up to one second behind the specified out...
... using the cross-shaped button (JKH I or J/K to move the video to the out point. (A P86 [Playing back] ) 0 Specify the out point by pressing the [C.REVIEW/4] button at all times. 0 When trimming the in and out point, the in point trimmed may be up to one second behind the specified out...

Instruction Manual
Page 92
... panel of the camera recorder or the buttons on the LCD monitor to the [Favorites Menu]. (A P123 [Adding/Editing Frequently Used Menu Items (Favorites Menu)] ) F [C.REVIEW/4] Button Resets settings in Menu Screen Menu Display and Detailed Settings Basic Operations in other screens. A [MENU/THUMB] Button 0 Displays the menu screen. This button...
... panel of the camera recorder or the buttons on the LCD monitor to the [Favorites Menu]. (A P123 [Adding/Editing Frequently Used Menu Items (Favorites Menu)] ) F [C.REVIEW/4] Button Resets settings in Menu Screen Menu Display and Detailed Settings Basic Operations in other screens. A [MENU/THUMB] Button 0 Displays the menu screen. This button...

Instruction Manual
Page 98
... mode is enabled using the [AF/MF] selection button, and when one of the following functions to each of the [F.ASSIST/1], [TC/2], [LOLUX/3], [C.REVIEW/4], [ZEBRA/5], [OIS/6], [REC/7], [EXPANDED FOCUS/8], [AWB/9] buttons or the cross-shaped buttons on the screen is lost . Menu Display and Detailed Settings..., Middle, RHigh] 9 Hysteresis For setting the margin to the shooting conditions. Usable only in the Lolux mode. [Setting Values: 36dB, R30dB] Clip Review For specifying the operation when any of the [USER1]-[USER9], [LCD KEY▲], [LCD KEY▶], [LCD KEY▼], or [LCD KEY◀]...
... mode is enabled using the [AF/MF] selection button, and when one of the following functions to each of the [F.ASSIST/1], [TC/2], [LOLUX/3], [C.REVIEW/4], [ZEBRA/5], [OIS/6], [REC/7], [EXPANDED FOCUS/8], [AWB/9] buttons or the cross-shaped buttons on the screen is lost . Menu Display and Detailed Settings..., Middle, RHigh] 9 Hysteresis For setting the margin to the shooting conditions. Usable only in the Lolux mode. [Setting Values: 36dB, R30dB] Clip Review For specifying the operation when any of the [USER1]-[USER9], [LCD KEY▲], [LCD KEY▶], [LCD KEY▼], or [LCD KEY◀]...

Instruction Manual
Page 106
... determine the angle of view for the image according to the shooting purpose. (A P135 [Marker and Safety Zone Displays (Camera Mode Only)] ) Memo : 0 During Clip Review or when in the Media mode, the markers do not function. 9 Aspect Ratio For selecting the final image aspect ratio to be used from the...
... determine the angle of view for the image according to the shooting purpose. (A P135 [Marker and Safety Zone Displays (Camera Mode Only)] ) Memo : 0 During Clip Review or when in the Media mode, the markers do not function. 9 Aspect Ratio For selecting the final image aspect ratio to be used from the...